canDisableEquipment (Medium)
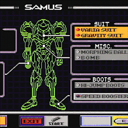

Collecting equipment can make movement more difficult in certain situations. Speedbooster without HiJump will reduce Samus' jump height when running and turning Speedbooster off will enable her to jump normally while running. Disabling HiJump will give more time to perform a mid-air morph. Disabling Gravity will allow Samus to float farther in water, or jump slower for a mid-air morph. Beams may need to be disabled to control how enemies are killed (i.e. Remove plasma for canUseFrozenEnemies, or remove ice to effeciently use heat room farm points).
Strats ()
|
Stand on the farthest pixel into the door possible using moonwalk, X-Ray, or morphball turn around. Run towards the water and jump on the last possible frame. Perform the CWJ off of the item pedestal to cross to the other side. Requires: "canCWJ"
"canDisableEquipment"
{
"doorUnlockedAtNode": 1
}
{
"or": [
"canMoonwalk",
"Morph",
"canXRayTurnaround"
]
}
{
"obstaclesNotCleared": [
"A"
]
}
|
|
Aligning against the closed door shell on the other side of the transition. Run towards the water and jump on the last possible frame. Perform the CWJ off of the item pedestal to cross to the other side. Entrance condition: {
"comeInRunning": {
"speedBooster": "any",
"minTiles": 1.4
}
}
Requires: "canCWJ"
"canDisableEquipment"
{
"obstaclesNotCleared": [
"A"
]
}
|
|
Notable: true 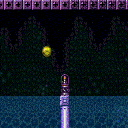
Open the door and step as close to the transition as possible. Run, jump, lateral midair morph on the way down, then bounce off the pedestal to get to the other side. Requires: "canSpringBallBounce"
"canDisableEquipment"
{
"doorUnlockedAtNode": 1
}
{
"or": [
"canTrickyJump",
"h_canUseMorphBombs"
]
}
{
"obstaclesNotCleared": [
"A"
]
}
|
|
Notable: true
Run, jump, lateral midair morph on the way down, then bounce off the pedestal to get to the other side. Entrance condition: {
"comeInRunning": {
"speedBooster": "any",
"minTiles": 1
}
}
Requires: "canSpringBallBounce"
"canDisableEquipment"
{
"or": [
"canTrickyJump",
"h_canUseMorphBombs"
]
}
{
"obstaclesNotCleared": [
"A"
]
}
|
|
This jump is much easier without HiJump or Speedbooster equipped. Requires: "canDisableEquipment" |
|
Execution of this strat is non-trivial, and failing will lead to falling into the pit. Depending on item loadout, that could be a softlock. Requires: "canDisableEquipment"
"canCarefulJump"
{
"or": [
{
"doorUnlockedAtNode": 2
},
"canTrickyJump",
"canLateralMidAirMorph",
"SpeedBooster"
]
}
|
|
Execution of this strat is non-trivial, and failing will lead to falling into the pit. Depending on item loadout, that could be a softlock. Entrance condition: {
"comeInRunning": {
"speedBooster": "any",
"minTiles": 2
}
}
Requires: "canDisableEquipment" "canCarefulJump" |
|
From: 12
Above Power Bomb Blocks - Main Junction
To: 13
Below Power Bomb Blocks - Main Junction
Freeze two Zeelas to perform an 'Enemy Stuck Moonfall' in order to clip through the Power Bomb blocks. Position one Zeela upside down on a ceiling, and another below it on the ground. The global Zeela paired with either the lowest Zeela, or the other perimeter Zeela can be used, but freezing them together is the hardest part. Freezing one and then unequipping Ice Beam to dispel the ice effect or manipulating the camera can be used to synchronize them. If the moonfall is initiated immediately after freezing both enemies, it is possible to gain enough speed to automatically clip through the enemy and the floor; in this case, hold an angle button to buffer a pose change. Alternatively, and more easily, when one of the enemies is about to thaw, hold backward in order to move forward and fall off the enemy with a buffered turnaround, which will clip through the floor without needing as much fall speed. From directly on top of the Power Bomb blocks, no pose change is needed. Two Super Missiles can speed up the Zeela setup greatly by knocking them off of the wall. Requires: "canEnemyStuckMoonfall"
"canTrickyUseFrozenEnemies"
{
"or": [
"canDisableEquipment",
"canCameraManip"
]
}
{
"or": [
"canBePatient",
{
"ammo": {
"type": "Super",
"count": 2
}
}
]
}
|
|
Notable: true 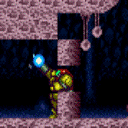
Break exactly the lower-middle-right and top-right Bomb Blocks, leaving the upper-middle-right and bottommost Blocks intact. Clear all enemies before starting. Unmorph while on the top block to begin the Moondance. Exactly 145 moonfalls after clipping into the bottom block (321 total), wiggle out to the left. The next moonfall will clip Samus down two tiles. Re-enable Screw Attack and moonfall to break the right side blocks, then use Grapple again to become unstuck. Finally, moonfall through the Speed Blocks to clip down to the Dachora. Requires: {
"obstaclesNotCleared": [
"A"
]
}
"h_canUseMorphBombs"
"ScrewAttack"
"canExtendedMoondance"
"canDisableEquipment"
|
|
Notable: true
Break exactly the lower-middle-right and top-right Bomb Blocks, leaving the upper-middle-right and bottommost Blocks intact. Clear all enemies before starting. Unmorph while on the top block to begin the Moondance. Exactly 145 moonfalls after clipping into the bottom block (321 total), wiggle out to the left. The next moonfall will clip Samus down two tiles. Finally use Screw Attack or SpeedBooster to break the Bomb blocks and reach the right side door. Requires: {
"obstaclesNotCleared": [
"A"
]
}
"h_canUseMorphBombs"
{
"or": [
"SpeedBooster",
{
"and": [
"ScrewAttack",
"canDisableEquipment"
]
}
]
}
"canExtendedMoondance"
Exit condition: {
"leaveWithStoredFallSpeed": {
"fallSpeedInTiles": 2
}
}
Unlocks doors: {"types":["ammo"],"requires":[]}
|
|
Jump into the room and onto the Grapple block. Entrance condition: {
"comeInJumping": {
"speedBooster": true,
"minTiles": 6.4375
}
}
Requires: "canPrepareForNextRoom" "HiJump" "canDisableEquipment" "canCarefulJump" |
|
Jump into the room and onto the Grapple block. Requires a runway of only 2 tiles in the adjacent room. Entrance condition: {
"comeInJumping": {
"speedBooster": true,
"minTiles": 1.4375
}
}
Requires: "canPrepareForNextRoom" "HiJump" "canTrickyDashJump" "canDisableEquipment" |
|
It's much easier without Speedbooster equipped. Requires: "canPreciseWalljump" "canDisableEquipment" |
|
Samus will be slowed by lava if SpeedBooster is equipped, even with Gravity. Requires: {
"or": [
"h_lavaProof",
"canSuitlessLavaDive"
]
}
"Gravity"
"SpaceJump"
{
"heatFrames": 340
}
{
"lavaFrames": 280
}
{
"or": [
"canDisableEquipment",
{
"and": [
{
"heatFrames": 120
},
{
"lavaFrames": 120
}
]
}
]
}
|
|
Requires: {
"or": [
"h_lavaProof",
"canSuitlessLavaDive"
]
}
"Gravity"
{
"heatFrames": 250
}
{
"lavaFrames": 190
}
{
"or": [
"canDisableEquipment",
{
"and": [
{
"heatFrames": 50
},
{
"lavaFrames": 50
}
]
}
]
}
|
|
Requires: {
"or": [
{
"and": [
"Gravity",
{
"heatFrames": 180
},
{
"lavaFrames": 180
}
]
},
{
"and": [
"Gravity",
"canDisableEquipment",
{
"heatFrames": 140
},
{
"lavaFrames": 140
}
]
},
{
"and": [
{
"heatFrames": 210
},
{
"lavaFrames": 210
}
]
}
]
}
|
|
Samus will be slowed by lava if SpeedBooster is equipped, even with Gravity. Requires: "Gravity"
{
"or": [
"h_lavaProof",
"canSuitlessLavaDive"
]
}
{
"or": [
{
"and": [
"canDisableEquipment",
{
"heatFrames": 270
},
{
"lavaFrames": 230
}
]
},
{
"and": [
"canDisableEquipment",
"SpaceJump",
"canCarefulJump",
{
"heatFrames": 225
},
{
"lavaFrames": 180
}
]
},
{
"and": [
{
"heatFrames": 330
},
{
"lavaFrames": 300
}
]
}
]
}
|
|
Requires: {
"or": [
{
"and": [
"Gravity",
{
"heatFrames": 195
},
{
"lavaFrames": 195
}
]
},
{
"and": [
"Gravity",
"canDisableEquipment",
{
"heatFrames": 150
},
{
"lavaFrames": 150
}
]
},
{
"and": [
{
"heatFrames": 200
},
{
"lavaFrames": 200
}
]
}
]
}
|
|
From: 1
Left Door
To: 2
Right Door
Entrance condition: {
"comeInRunning": {
"minTiles": 4,
"speedBooster": false
}
}
Requires: "Gravity"
"canCarefulJump"
"canDisableEquipment"
"canSpringBallBounce"
{
"spikeHits": 2
}
{
"heatFrames": 350
}
{
"lavaFrames": 20
}
|
|
From: 1
Left Door
To: 2
Right Door
Uses a runway of at least 14 tiles in the adjacent room. Disable SpeedBooster after jumping so that the lava will not take away all of Samus' momentum. Entrance condition: {
"comeInRunning": {
"minTiles": 14,
"speedBooster": true
}
}
Requires: "Gravity"
"canDisableEquipment"
"canSpringBallBounce"
"canTrickyJump"
{
"spikeHits": 1
}
{
"heatFrames": 240
}
{
"lavaFrames": 10
}
|
|
From: 1
Left Door
To: 2
Right Door
Uses a runway of at least 21 tiles in the adjacent room. It will help to perform the first jump with HiJump disabled. Disable SpeedBooster before Samus reaches the lava. Entrance condition: {
"comeInRunning": {
"minTiles": 21,
"speedBooster": true
}
}
Requires: "HiJump"
"canDisableEquipment"
"canSpringBallBounce"
"canTrickyJump"
{
"spikeHits": 1
}
{
"heatFrames": 200
}
{
"lavaFrames": 11
}
|
|
From: 1
Left Door
To: 2
Right Door
It may help to perform the first jump with HiJump disabled. Entrance condition: {
"comeInRunning": {
"minTiles": 4,
"speedBooster": false
}
}
Requires: "canCarefulJump"
"HiJump"
"canDisableEquipment"
"canSpringBallBounce"
{
"spikeHits": 3
}
{
"heatFrames": 350
}
{
"lavaFrames": 32
}
|
|
From: 1
Left Door
To: 2
Right Door
Uses a runway of at least 8 tiles in the adjacent room. It will help to perform the first jump with HiJump disabled. Disable SpeedBooster before Samus reaches the lava. Entrance condition: {
"comeInRunning": {
"minTiles": 8,
"speedBooster": true
}
}
Requires: "canTrickyJump"
"HiJump"
"canDisableEquipment"
"canSpringBallBounce"
{
"spikeHits": 2
}
{
"heatFrames": 311
}
{
"lavaFrames": 22
}
|
|
Speedbooster significantly reduces your jump speed in lava and should be turned off. Requires: "Gravity"
"canDisableEquipment"
{
"heatFrames": 350
}
{
"lavaFrames": 100
}
{
"spikeHits": 2
}
{
"or": [
"canIframeSpikeJump",
{
"and": [
{
"spikeHits": 2
},
{
"heatFrames": 50
}
]
},
"canHorizontalDamageBoost"
]
}
|
|
From: 2
Right Door
To: 1
Left Door
Entrance condition: {
"comeInRunning": {
"minTiles": 4,
"speedBooster": false
}
}
Requires: "Gravity"
"canDisableEquipment"
"canSpringBallBounce"
{
"spikeHits": 2
}
{
"heatFrames": 350
}
{
"lavaFrames": 20
}
|
|
From: 2
Right Door
To: 1
Left Door
Uses a runway of at least 14 tiles in the adjacent room. Disable SpeedBooster after jumping so that the lava will not take away all of Samus' momentum. Entrance condition: {
"comeInRunning": {
"minTiles": 14,
"speedBooster": true
}
}
Requires: "Gravity"
"canDisableEquipment"
"canSpringBallBounce"
"canTrickyJump"
{
"spikeHits": 1
}
{
"heatFrames": 240
}
{
"lavaFrames": 10
}
|
|
From: 2
Right Door
To: 1
Left Door
Uses a runway of at least 21 tiles in the adjacent room. It will help to perform the first jump with HiJump disabled. Disable SpeedBooster before Samus reaches the lava. Entrance condition: {
"comeInRunning": {
"minTiles": 21,
"speedBooster": true
}
}
Requires: "HiJump"
"canDisableEquipment"
"canSpringBallBounce"
"canTrickyJump"
{
"spikeHits": 1
}
{
"heatFrames": 200
}
{
"lavaFrames": 11
}
|
|
From: 2
Right Door
To: 1
Left Door
It may help to perform the first jump with HiJump disabled. Entrance condition: {
"comeInRunning": {
"minTiles": 4,
"speedBooster": false
}
}
Requires: "canCarefulJump"
"HiJump"
"canDisableEquipment"
"canSpringBallBounce"
{
"spikeHits": 3
}
{
"heatFrames": 350
}
{
"lavaFrames": 32
}
|
|
From: 2
Right Door
To: 1
Left Door
Uses a runway of at least 8 tiles in the adjacent room. It will help to perform the first jump with HiJump disabled. Disable SpeedBooster before Samus reaches the lava. Entrance condition: {
"comeInRunning": {
"minTiles": 8,
"speedBooster": true
}
}
Requires: "canTrickyJump"
"HiJump"
"canDisableEquipment"
"canSpringBallBounce"
{
"spikeHits": 2
}
{
"heatFrames": 311
}
{
"lavaFrames": 22
}
|
|
Speedbooster significantly reduces your jump speed in lava and should be turned off. Requires: "Gravity"
"canDisableEquipment"
{
"heatFrames": 350
}
{
"lavaFrames": 100
}
{
"spikeHits": 2
}
{
"or": [
"canIframeSpikeJump",
{
"and": [
{
"spikeHits": 2
},
{
"heatFrames": 50
}
]
},
"canHorizontalDamageBoost"
]
}
|
|
Begin with SpeedBooster unequipped, and run&jump over the acid into an airball. Once Samus begins falling, equip SpringBall and SpeedBooster to safely land on the other side near the statue. Requires: "canSpringFling"
"canDisableEquipment"
"SpeedBooster"
"canTrickyJump"
"canLateralMidAirMorph"
{
"heatFrames": 210
}
|
|
Requires: {
"or": [
{
"ammo": {
"type": "Super",
"count": 2
}
},
{
"and": [
{
"ammo": {
"type": "Super",
"count": 1
}
},
{
"enemyDamage": {
"enemy": "Boulder",
"type": "contact",
"hits": 1
}
}
]
},
{
"and": [
"canDisableEquipment",
"canPseudoScrew"
]
}
]
}
{
"or": [
"Ice",
"canCarefulJump"
]
}
|
|
Requires: "ScrewAttack"
{
"or": [
"canCarefulJump",
"h_canUsePowerBombs",
{
"ammo": {
"type": "Super",
"count": 1
}
},
{
"and": [
"canDisableEquipment",
"canPseudoScrew"
]
},
{
"enemyDamage": {
"enemy": "Fune",
"type": "fireball",
"hits": 1
}
}
]
}
|
|
Use Space Jump to reset Samus' fall speed, by jumping, to avoid the topmost boulder. Requires: "SpaceJump"
"canCarefulJump"
{
"or": [
{
"ammo": {
"type": "Super",
"count": 1
}
},
{
"and": [
"canDisableEquipment",
"canPseudoScrew"
]
},
"Ice",
"canTrickyJump",
{
"enemyDamage": {
"enemy": "Boulder",
"type": "contact",
"hits": 1
}
}
]
}
|
|
From: 1
Top Left Door
To: 4
Top Right Door
Entrance condition: {
"comeInWithStoredFallSpeed": {
"fallSpeedInTiles": 1
}
}
Requires: "canDisableEquipment"
{
"heatFrames": 90
}
Exit condition: {
"leaveWithStoredFallSpeed": {
"fallSpeedInTiles": 1
}
}
Unlocks doors: {"types":["missiles","super"],"requires":[]}
{"types":["powerbomb"],"requires":["never"]}
|
|
From: 1
Top Left Door
To: 4
Top Right Door
Entrance condition: {
"comeInWithStoredFallSpeed": {
"fallSpeedInTiles": 2
}
}
Requires: "canDisableEquipment"
{
"heatFrames": 90
}
Exit condition: {
"leaveWithStoredFallSpeed": {
"fallSpeedInTiles": 2
}
}
Unlocks doors: {"types":["missiles","super"],"requires":[]}
{"types":["powerbomb"],"requires":["never"]}
|
|
From: 4
Top Right Door
To: 1
Top Left Door
Entrance condition: {
"comeInWithStoredFallSpeed": {
"fallSpeedInTiles": 1
}
}
Requires: "canDisableEquipment"
{
"heatFrames": 90
}
Exit condition: {
"leaveWithStoredFallSpeed": {
"fallSpeedInTiles": 1
}
}
Unlocks doors: {"types":["missiles","super"],"requires":[]}
{"types":["powerbomb"],"requires":["never"]}
|
|
From: 4
Top Right Door
To: 1
Top Left Door
Entrance condition: {
"comeInWithStoredFallSpeed": {
"fallSpeedInTiles": 2
}
}
Requires: "canDisableEquipment"
{
"heatFrames": 90
}
Exit condition: {
"leaveWithStoredFallSpeed": {
"fallSpeedInTiles": 2
}
}
Unlocks doors: {"types":["missiles","super"],"requires":[]}
{"types":["powerbomb"],"requires":["never"]}
|
|
If Spring Ball is unavailable, then either crouch jump and morph from the stairs, or run and jump into morph from the right of the stairs. If you have HiJump, it must be disabled. Requires: {
"obstaclesCleared": [
"B"
]
}
{
"or": [
{
"and": [
"canCarefulJump",
"canMidAirMorph",
"canDisableEquipment"
]
},
"h_canUseSpringBall"
]
}
|
|
From: 7
Bottom Door
To: 3
Bottom Left Door
In R-Mode, kill the Coverns until there is Energy in Samus's Reserves. Get into the Morph tunnel and go to the far left. Wait for Coverns to damage Samus down until Reserves trigger, forcing a stand up and enabling her to shoot the shot blocks and escape. Entrance condition: {
"comeInWithRMode": {},
"comesThroughToilet": "any"
}
Requires: {
"not": "f_DefeatedPhantoon"
}
"canRiskPermanentLossOfAccess"
{
"or": [
"canBePatient",
"Plasma"
]
}
{
"or": [
{
"and": [
"canCarefulJump",
"canMidAirMorph",
"canDisableEquipment"
]
},
"h_canUseSpringBall"
]
}
Clears obstacles: B |
|
If Spring Ball is unavailable, then either crouch jump and morph from the stairs, or run and jump into morph from the right of the stairs. If you have HiJump, it must be disabled. Requires: {
"or": [
"Wave",
"Spazer"
]
}
{
"or": [
{
"and": [
"canCarefulJump",
"canMidAirMorph",
"canDisableEquipment"
]
},
"h_canUseSpringBall"
]
}
Clears obstacles: B |
|
From: 7
Bottom Door
To: 3
Bottom Left Door
Use the Covern to partial ceiling clip so your beam can reach the shot block of the ceiling at the end of the Morph tunnel to the left. It is possible to mid-air morph to get into the morph tunnel with nothing, from the Covern, the ground, or the stairs below. Requires: "canTrickyUseFrozenEnemies"
"canCeilingClip"
{
"not": "f_DefeatedPhantoon"
}
"canRiskPermanentLossOfAccess"
{
"or": [
{
"and": [
"canCarefulJump",
"canMidAirMorph",
"canDisableEquipment"
]
},
"h_canUseSpringBall"
]
}
Clears obstacles: B |
|
From: 1
Bottom Left Door
To: 5
Platform Junction Near Top Left Door
Notable: true 
This underwater walljump is very long. Some jump assistance, cross room jump, or a flatley jump from the door frame is needed to get to the first overhang. The cross room jump requires an adjacent runway of 3 tiles (with no open end) with HiJump disabled. Perform a turnaround just before hitting the ceiling. Entrance condition: {
"comeInJumping": {
"speedBooster": "any",
"minTiles": 2.4375
}
}
Requires: "canUnderwaterWalljump" "canTrickyJump" "canDisableEquipment" "canMomentumConservingTurnaround" |
|
From: 5
Morph Passage Doorway
To: 7
Morph Tunnel Item
Turn HiJump and Gravity suit off before jumping and morphing into the tunnel. The crab will not come through the whole tunnel. Retreat to the right to avoid taking a hit. Requires: "canSuitlessMaridia" "canDisableEquipment" "canMidAirMorph" |
|
From: 7
Morph Tunnel Item
To: 5
Morph Passage Doorway
Turn HiJump and Gravity suit off before jumping and morphing into the tunnel. Requires: "canSuitlessMaridia" "canDisableEquipment" "canMidAirMorph" |
|
Requires: "h_canNavigateUnderwater"
{
"or": [
"h_canUseSpringBall",
"canMidAirMorph",
{
"and": [
"Gravity",
{
"or": [
"canIBJ",
"canBombHorizontally"
]
}
]
},
{
"and": [
"Gravity",
"canTrivialMidAirMorph",
{
"or": [
"SpaceJump",
"canUseFrozenEnemies"
]
}
]
},
{
"and": [
"canTrivialMidAirMorph",
"canDisableEquipment"
]
}
]
}
|
|
From: 9
Spawn At Junction Below Top Door
To: 11
Upper Left Ledge Junction
Turn off Gravity and HiJump to jump directly here. Requires: "canSuitlessMaridia" "canDisableEquipment" |
|
From: 1
Left Door
To: 5
Item
Needs a runway of 7 tiles with no open end in the adjacent room, to get enough height. This is a peak of height with speed booster, no hjb, while underwater. Jump before the transition with SpeedBooster off and then SpeedBooster back on after reaching the ceiling and Morphing. Entrance condition: {
"comeInJumping": {
"speedBooster": true,
"minTiles": 6.4375
}
}
Requires: "canLateralMidAirMorph"
"canDisableEquipment"
"canCrossRoomJumpIntoWater"
"canSpringBallBounce"
{
"or": [
{
"enemyDamage": {
"enemy": "Puyo",
"type": "contact",
"hits": 1
}
},
"canInsaneJump",
{
"and": [
"Plasma",
"canTrickyJump"
]
}
]
}
|
|
From: 4
Right Door
To: 6
Junction Right of Morph Passage
Requires running 7 tiles with no open end in the adjacent room, as this is a peak in jump speed. Run with Speedbooster off, and turn it on after entering the room. Entrance condition: {
"comeInJumping": {
"speedBooster": true,
"minTiles": 6.4375
}
}
Requires: "canDisableEquipment" "canCrossRoomJumpIntoWater" |
|
From: 5
Item
To: 6
Junction Right of Morph Passage
Jump and mid-air morph. This is much easier with Gravity and HiJump turned off. Requires: "canSuitlessMaridia" "canMidAirMorph" "canDisableEquipment" |
|
From: 6
Junction Right of Morph Passage
To: 5
Item
Jump and mid-air morph. This is much easier with Gravity and HiJump turned off. Requires: "canSuitlessMaridia" "canMidAirMorph" "canDisableEquipment" |
|
From: 3
Junction Left of Morph Tunnel
To: 6
East Cactus Alley Junction (Right of Morph Tunnel)
This can be done by turning off Gravity and HiJump to do a mid-air morph through the morph tunnel. Requires: "canSuitlessMaridia" "canMidAirMorph" "canDisableEquipment" |
|
From: 5
Bottom Middle Junction
To: 6
East Cactus Alley Junction (Right of Morph Tunnel)
This can be done by turning off Gravity and HiJump to jump over both spike pits. Requires: "canSuitlessMaridia"
"canDisableEquipment"
"canCarefulJump"
{
"or": [
"Gravity",
"HiJump",
"canSpringBallJumpMidAir"
]
}
|
|
From: 6
East Cactus Alley Junction (Right of Morph Tunnel)
To: 5
Bottom Middle Junction
This can be done by turning off Gravity and HiJump to jump over both spike pits. Requires: "canSuitlessMaridia" "canDisableEquipment" "canCarefulJump" |
|
From: 1
Bottom Left Door
To: 2
Top Right Door
The lenient version requires a runway of at least 5 tiles (with no open end) in the adjacent room. This is easier without Speed Booster and requires disabling HiJump. Entrance condition: {
"comeInJumping": {
"speedBooster": false,
"minTiles": 4.4375
}
}
Requires: "canCrossRoomJumpIntoWater" "canDisableEquipment" |
|
From: 1
Bottom Left Door
To: 2
Top Right Door
Requires a runway of at least 2 tiles (with no open end) in the adjacent room. This is typically easier without Speed Booster depending on the exact runway length and requires disabling HiJump. Entrance condition: {
"comeInJumping": {
"speedBooster": false,
"minTiles": 1.4375
}
}
Requires: "canCrossRoomJumpIntoWater" "canMomentumConservingTurnaround" "canTrickyJump" "canDisableEquipment" |
|
From: 1
Bottom Left Door
To: 2
Top Right Door
It is possible to jump to the top door using a runway of just one tile with Speed Booster and no HiJump. Requires a last-frame jump and down press that is late but not immediately before the turnaround. With a second-to-last-frame jump it is still possible but more precise. Entrance condition: {
"comeInJumping": {
"speedBooster": true,
"minTiles": 1
}
}
Requires: "canCrossRoomJumpIntoWater" "canMomentumConservingTurnaround" "canTrickyDashJump" "canDisableEquipment" |
|
Requires: "h_canNavigateUnderwater"
{
"or": [
"h_canUsePowerBombs",
{
"and": [
"Gravity",
"ScrewAttack"
]
},
{
"and": [
"Gravity",
"canIBJ"
]
},
{
"and": [
"h_canUseMorphBombs",
"h_canUseSpringBall"
]
},
{
"and": [
"h_canUseMorphBombs",
"canTrivialMidAirMorph",
"canDisableEquipment"
]
}
]
}
|