canUseEnemies (Basic)
Using an enemy in a room to accomplish something that couldn't be done if it weren't there, e.g. when standing on or grappling from an enemy.
Strats ()
|
From: 5
Lower Section - Bottom Right Door
To: 4
Lower Section - Top Right Door
Notable: true 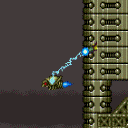
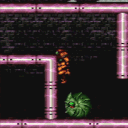
Grapple on the Ripper to get inside the wall under the door. Do a Crystal Flash to force a standup. X-Ray climb up to the door transition. Requires: "canUseEnemies" "canGrappleClip" "h_canCrystalFlash" "canXRayClimb" Bypasses door shell: true |
|
From: 12
Top Junction
To: 9
Top Hidden Item (Above Trippers)
Jump on the left platforms to get the middle Tripper on screen, luring it to the right. Get on the middle Tripper and use it to jump to the item. This requires a somewhat precise shot and jump, particularly if the top Tripper is in the way. The jump and shot can be easier and done at the apex of a single jump starting with a crouch. Freezing the Trippers can make this much easier. Requires: "canUseEnemies"
{
"or": [
"canCarefulJump",
"canUseFrozenEnemies",
"canPreciseWalljump"
]
}
|
|
From: 12
Top Junction
To: 9
Top Hidden Item (Above Trippers)
Requires: "canUseEnemies" "HiJump" |
|
Requires: "canUseEnemies" "canBeVeryPatient" |
|
Wall jump up the left wall, perform a delayed wall jump on the Fune to reach the door. Requires: "canDelayedWalljump"
"canConsecutiveWalljump"
"canTrickyJump"
"canUseEnemies"
{
"or": [
{
"heatFrames": 190
},
{
"and": [
"canPrepareForNextRoom",
{
"heatFrames": 120
}
]
}
]
}
|
|
From: 2
Bottom Left Door
To: 1
Top Left Door
Notable: true 
Wall jump up the left wall and then on the moving platform (Kamer) while avoiding the Fune's fireball. The Kamers will temporarily move down if Samus is below them, so it is best to walk under the first Kamer before climbing the wall. It is possible to freeze or kill the Fune with a Super or Power Bomb to make things easier. Requires: "canPreciseWalljump"
"canConsecutiveWalljump"
"canUseEnemies"
{
"or": [
{
"heatFrames": 560
},
{
"and": [
"canCarefulJump",
{
"heatFrames": 360
}
]
},
{
"and": [
"canTrickyJump",
{
"heatFrames": 240
}
]
},
{
"and": [
{
"or": [
"canUseFrozenEnemies",
{
"ammo": {
"type": "Super",
"count": 1
}
}
]
},
{
"heatFrames": 432
}
]
},
{
"and": [
{
"ammo": {
"type": "PowerBomb",
"count": 1
}
},
{
"heatFrames": 456
}
]
}
]
}
|
|
From: 2
Bottom Left Door
To: 1
Top Left Door
Notable: true
Wall jump up the left wall and then on the moving platform (Kamer) while avoiding the Fune's fireball. The Kamers will temporarily move down if Samus is below them, so it is best to walk under the first Kamer before climbing the wall. Requires: "HiJump"
"canUseEnemies"
"canWalljump"
{
"or": [
{
"heatFrames": 360
},
{
"and": [
"canCarefulJump",
{
"heatFrames": 250
}
]
}
]
}
|
|
From: 2
Right Door
To: 3
Above Lava Junction
Notable: true 
BounceBall into the Lava, Unmorphing with good timing to sink faster and drift effeciently towards the bottom right Namihe. Walljump at about eye height (4 pixel window) to gain enough height to reach the center portion of ceiling. While rising, wiggle to shrink Samus' hitbox. Some walljump positions will not need to wiggle, when walljumping far away from the Namihe. Jumping, from the wall, around the next lowest overhang is very precise and taking any extra time to position will increase the amount of lava damage being taken. It may help to disable HiJump for this part. Then Walljump again to exit the Lava and reach the left ledge. Requires: "canSuitlessLavaDive"
"canUseEnemies"
"HiJump"
"canBounceBall"
"canMidairWiggle"
"canInsaneWalljump"
{
"lavaFrames": 392
}
{
"heatFrames": 515
}
|
|
From: 4
Lava, Left Wall
To: 3
Above Lava Junction
Notable: true 
Enter the Bottom-Left Namihe by Kagoing inside of it. Wait for a second hit to gain I-Frames and then very quickly walljump up the spikes and across to the right side wall. Requires: "canSuitlessLavaDive"
"canInsaneWalljump"
"canInsaneJump"
"canIframeSpikeJump"
"canStaggeredWalljump"
"canFastWalljumpClimb"
"canUseEnemies"
"canKago"
{
"heatFrames": 510
}
{
"lavaFrames": 480
}
{
"enemyDamage": {
"enemy": "Namihe",
"type": "kago",
"hits": 2
}
}
|
|
From: 4
Lava, Left Wall
To: 3
Above Lava Junction
Notable: true 
Double springball jump out of a walljump starting from the top of the left wall Namihe. Requires: "canSuitlessLavaDive"
"canUseEnemies"
"canDoubleSpringBallJumpMidAir"
"canSpringwall"
"canPreciseWalljump"
{
"heatFrames": 270
}
{
"lavaFrames": 240
}
|
|
Walljump off of the lower half of the Upper-Left Namihe to cross to the right side wall. Continue Walljumping up from there, waiting for the above flame to pass if it is in the way. Requires: "HiJump"
"canSuitlessLavaDive"
"canUseEnemies"
"canTrickyJump"
"canStaggeredWalljump"
{
"heatFrames": 270
}
{
"lavaFrames": 240
}
|
|
Lava physics will reduce Samus' horizontal momentum. Requires: {
"or": [
"h_lavaProof",
"canSuitlessLavaDive"
]
}
"canSpringwall"
"canTrickySpringBallJump"
"HiJump"
"canUseEnemies"
{
"heatFrames": 195
}
{
"lavaFrames": 180
}
|
|
Notable: true 
Use the bottommost right side namihe to generate a flame and walk with it to the bottommost left namihe head Use a turnaround animation as Samus is hit by the flame to cancel out knockback frames. While invulnerability frames are active, walljump up the spikes either 2 or 3 times and jump accross to catch the middle wall and climb from there. Requires: "canSuitlessLavaDive"
"canIframeSpikeJump"
"canStaggeredWalljump"
"canFastWalljumpClimb"
"canUseEnemies"
"canCameraManip"
{
"heatFrames": 600
}
{
"lavaFrames": 500
}
{
"enemyDamage": {
"enemy": "Namihe",
"type": "fireball",
"hits": 1
}
}
|
|
Involves grappling off a Ripper 2. Requires: "canUseEnemies" "Grapple" |
|
Involves grappling off a Ripper 2. Requires: "canUseEnemies" "Grapple" |
|
Notable: true 
Grapple off several Ripper 2. Requires: "canUseEnemies" "canPreciseGrapple" |
|
Notable: true
Involves grappling off several Ripper 2. Requires: "canUseEnemies" "canPreciseGrapple" |
|
From: 4
Firefleas Item
To: 5
Firefleas Bottom Left Platform Junction
Requires: {
"enemyDamage": {
"enemy": "Fireflea",
"type": "contact",
"hits": 1
}
}
"canUseEnemies"
"canIframeSpikeJump"
|
|
From: 5
Firefleas Bottom Left Platform Junction
To: 4
Firefleas Item
Requires: {
"enemyDamage": {
"enemy": "Fireflea",
"type": "contact",
"hits": 1
}
}
"canUseEnemies"
"canIframeSpikeJump"
|
|
Ride the Spike Platform up and back down again to more easily position for using it as a runway. Requires: "canUseEnemies"
{
"heatFrames": 480
}
Exit condition: {
"leaveWithRunway": {
"length": 8,
"openEnd": 0
}
}
|
|
From: 1
Bottom Left Door
To: 1
Bottom Left Door
Requires: "canUseEnemies"
"canTrickyJump"
{
"heatFrames": 120
}
Exit condition: {
"leaveWithRunway": {
"length": 8,
"openEnd": 0
}
}
|
|
Requires: "canUseEnemies"
{
"or": [
{
"and": [
"canWalljump",
{
"heatFrames": 390
}
]
},
{
"and": [
"canConsecutiveWalljump",
"canCarefulJump",
{
"heatFrames": 330
}
]
},
{
"and": [
"HiJump",
{
"heatFrames": 490
}
]
},
{
"and": [
"h_canCrouchJumpDownGrab",
{
"heatFrames": 610
}
]
}
]
}
|
|
Requires: "canUseEnemies"
{
"heatFrames": 430
}
Exit condition: {
"leaveWithRunway": {
"length": 8,
"openEnd": 0
}
}
|
|
From: 5
Junction Below Shot Block
To: 1
Bottom Left Door
Walk into a Spike and then Morph-Kago through the top Spike-Platform. Requires: "canKago"
"Morph"
"canUseEnemies"
{
"spikeHits": 1
}
{
"heatFrames": 250
}
Exit condition: {
"leaveWithRunway": {
"length": 8,
"openEnd": 0
}
}
|
|
Notable: true 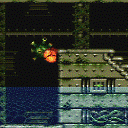
Position the Bull with beam shots before jumping into it. Requires: "canSuitlessMaridia"
"HiJump"
"canUseEnemies"
"canNeutralDamageBoost"
"canCrouchJump"
"Morph"
{
"enemyDamage": {
"enemy": "Bull",
"hits": 1,
"type": "contact"
}
}
|
|
Ride Mama Turtle. To avoid getting hit, shoot one of her babies to wake her up, then quickly get on her back. Requires: "h_canNavigateUnderwater"
"canUseEnemies"
{
"or": [
"canCarefulJump",
{
"enemyDamage": {
"enemy": "Kame (Tatori)",
"type": "contact",
"hits": 1
}
}
]
}
Clears obstacles: A |
|
Requires: "h_canNavigateUnderwater"
{
"or": [
"Gravity",
{
"obstaclesNotCleared": [
"A"
]
},
{
"enemyDamage": {
"enemy": "Kame (Tatori)",
"type": "contact",
"hits": 1
}
}
]
}
{
"or": [
"Gravity",
"HiJump",
"canSpringBallJumpMidAir",
"h_canCrouchJumpDownGrab",
"canUseEnemies"
]
}
|
|
Jump over or on to Mama Turtle. The easiest method is to jump over her by jumping on her babies, spin jumping off of them and over her, then breaking spin before landing. Requires: "canSuitlessMaridia" "canTrickyJump" "canUseEnemies" |
|
Requires: "canSuitlessMaridia"
"canCarefulJump"
{
"or": [
"HiJump",
"Morph"
]
}
{
"or": [
"HiJump",
"canSpringBallJumpMidAir",
"h_canCrouchJumpDownGrab",
"canUseEnemies"
]
}
|
|
There is a grappleable Powamp directly above each of the 3 peaks. Requires: "canSuitlessMaridia" "canUseEnemies" "Grapple" |
|
From: 7
Lower Hills Junction
To: 9
Spawn At Junction Below Top Door
There is a grappleable Powamp directly above each of the 3 peaks. Requires: "h_canNavigateUnderwater" "canUseEnemies" "Grapple" |
|
There is a grappleable Powamp directly above each of the 3 peaks. Requires: "h_canNavigateUnderwater" "canUseEnemies" "Grapple" Clears obstacles: B |
|
There is a grappleable Powamp directly above each of the 3 peaks. Requires: "h_canNavigateUnderwater" "canUseEnemies" "Grapple" |
|
From: 10
Upper Right Ledge Junction
To: 4
Top Right Door
There is a grappleable Powamp directly above each of the 3 peaks. Requires: "canSuitlessMaridia" "canUseEnemies" "Grapple" |
|
Requires: "Gravity"
{
"or": [
"canWalljump",
"h_canFly",
"SpeedBooster",
"canSpringBallJumpMidAir",
"canUseEnemies"
]
}
{
"or": [
{
"obstaclesCleared": [
"A"
]
},
"h_canUsePowerBombs"
]
}
Clears obstacles: A |
|
Requires: "canUseEnemies"
{
"or": [
"Gravity",
{
"and": [
"canSuitlessMaridia",
"HiJump"
]
}
]
}
{
"or": [
{
"obstaclesCleared": [
"A"
]
},
"h_canUsePowerBombs"
]
}
Clears obstacles: A |
|
Requires: "Gravity"
{
"or": [
"canWalljump",
"h_canFly",
"SpeedBooster",
"Grapple",
{
"and": [
"HiJump",
"canSpringBallJumpMidAir"
]
},
{
"and": [
"HiJump",
"canUseEnemies"
]
}
]
}
|
|
Involves waiting around for a snail to come along, in order to reach the door by jumping while standing on it. Requires: "canUseEnemies" |
|
From: 3
Bottom Right Door
To: 2
Bottom Left Door
Notable: true 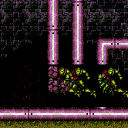
Quickly shoot out the 3 shot blocks then horizontal spark breaking the speed blocks. Wait for the Oums to roll on their own to a place where they can be climbed. Do not stand on the Oums when they begin to attack. Entrance condition: {
"comeInShinecharged": {
"framesRequired": 100
}
}
Requires: "Morph"
"canSuitlessMaridia"
"canUseEnemies"
"canHorizontalShinespark"
{
"shinespark": {
"frames": 91,
"excessFrames": 4
}
}
|
|
Halfie Climb Enter with Shinespark from the Bottom Right (Conserve Health) (Very Hard)
Halfie Climb Room
From: 3
Bottom Right Door
To: 2
Bottom Left Door
Notable: true
Quickly shoot out the 3 shot blocks then horizontal spark breaking the speed blocks. Jump forward to save some health before Shinesparking Wait for the Oums to roll on their own to a place where they can be climbed. Do not stand on the Oums when they begin to attack. Entrance condition: {
"comeInShinecharged": {
"framesRequired": 125
}
}
Requires: "Morph"
"canSuitlessMaridia"
"canUseEnemies"
"canHorizontalShinespark"
"canShinechargeMovementComplex"
{
"shinespark": {
"frames": 70,
"excessFrames": 4
}
}
|
|
From: 3
Bottom Right Door
To: 2
Bottom Left Door
Notable: true
Jump into the room and shoot out at least the bottom shotblock. Jumping into the top of the door frame at low speeds lines up the shot well. Speedball through and unmorph on top of the first set of speedblocks. Reposition with a Chain Temporary Blue closer to the remaining speed blocks. Jump into the rest of the Speed Blocks clearing a path for the Oums. Wait for the Oums to roll on their own to a place where they can be climbed. Do not stand on the Oums when they begin to attack. Entrance condition: {
"comeInSpeedballing": {
"runway": {
"length": 0,
"openEnd": 0
}
}
}
Requires: "canSpeedball" "canCrossRoomJumpIntoWater" "canUseEnemies" "canChainTemporaryBlue" "canSlowShortCharge" |