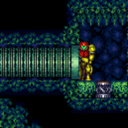
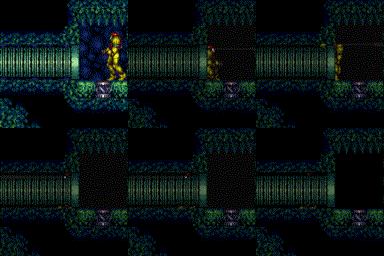
canTwoTileSqueeze (Hard)
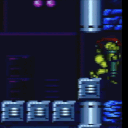
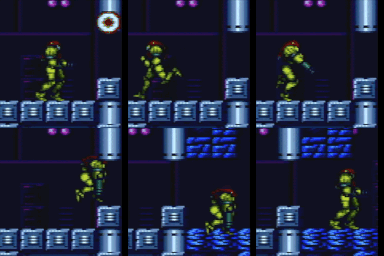
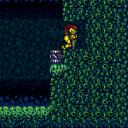
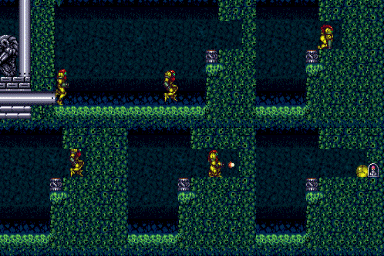
Taking advantage of the smaller hitbox of spinjump and down-aim to squeeze through two-tile gaps. Aiming down while jumping into a two-tile gap will allow Samus to stand up.
Strats ()
|
Requires: "HiJump"
{
"or": [
{
"obstaclesCleared": [
"A"
]
},
"h_canBombThings",
{
"and": [
"ScrewAttack",
{
"or": [
"canTwoTileSqueeze",
"SpeedBooster",
{
"and": [
"canXRayStandUp",
"Morph"
]
}
]
}
]
}
]
}
Clears obstacles: A |
|
Shinespark from the end of the entry runway, just past the down slope. Samus will crash into the last set of blocks preventing access to the opposite door. Entrance condition: {
"comeInShinecharged": {
"framesRequired": 37
}
}
Requires: "canShinechargeMovement"
"canHorizontalShinespark"
{
"shinespark": {
"frames": 70
}
}
{
"or": [
"Morph",
"canTunnelCrawl",
"canTurnaroundAimCancel",
{
"and": [
"canTwoTileSqueeze",
"canXRayTurnaround"
]
}
]
}
|
|
From: 3
Middle Visible Item
To: 4
Right Hidden Item
Notable: true A single very precise jump into the bomb blocks can break both sets of blocks with screw attack. Obtaining the item requires morph, so this strat has no soft lock risk. Alternatively, tunnel crawl through to break both blocks with multiple, less precise jumps. Requires: "Morph"
"ScrewAttack"
{
"or": [
"canTunnelCrawl",
{
"and": [
"canTwoTileSqueeze",
"canTrickyJump"
]
}
]
}
|
|
Use a Frozen Zeb to extend the runway. The bug's height when standing next to the pipe is optimal. Requires: "h_canFrozenEnemyRunway"
{
"or": [
"Morph",
"canTwoTileSqueeze",
{
"enemyDamage": {
"enemy": "Zeb",
"hits": 1,
"type": "contact"
}
}
]
}
Exit condition: {
"leaveWithRunway": {
"length": 3,
"openEnd": 0
}
}
|
|
From: 5
Junction The Left End of Morph Tube
To: 4
Item (Through the Pipe)
Notable: true It's a long Wiggle, but you can see the item before going in too far. Spin jumping directly into the tube will disable X-Ray, so enter aiming down to standup first. Requires: "canTwoTileSqueeze" "canXRayTurnaround" |
|
From: 9
Left Side - Bottom Door
To: 11
Middle Item
Go into the morph tunnel below the Charge Beam location and Crystal Flash to force a standup and jump through. Samus is now unable to use X-Ray. Without Morph, be careful not to overload PLMs using the camera scroll blocks on the path upward. Then partially floor clip into the left side of the bomb block, and jump to clip through and escape. To exit G-Mode, damage down until the reserves trigger, which can be done most quickly using the Sidehoppers. Entrance condition: {
"comeInWithGMode": {
"mode": "any",
"morphed": true
}
}
Requires: {
"or": [
"h_canArtificialMorphIBJ",
"Morph",
{
"and": [
"h_canArtificialMorphSpringBall",
{
"or": [
"HiJump",
{
"and": [
"h_canArtificialMorphSpringBallBombJump",
"h_additionalBomb",
"h_additionalBomb",
"h_additionalBomb"
]
}
]
}
]
}
]
}
"h_canArtificialMorphCrystalFlash"
{
"or": [
"Morph",
{
"and": [
"canTwoTileSqueeze",
"canPartialFloorClip",
"canCeilingClip"
]
}
]
}
"canBePatient"
|
|
Partially floor clip into the left side of the bomb block above the charge beam location. Then jump to clip through the above tile. Requires: {
"or": [
"canTwoTileSqueeze",
{
"and": [
"Morph",
"canXRayStandUp"
]
}
]
}
"canPartialFloorClip"
"canCeilingClip"
|
|
Use the Solid Blocks next to the Samus Eater to clip up through the Power Bomb Blocks. Carefully jump around the thorns, use HiJump to jump over them, or walk through them using IFrames. Requires: "canCeilingClip"
"canPartialFloorClip"
{
"or": [
{
"and": [
"canCarefulJump",
"HiJump",
"canTwoTileSqueeze",
{
"or": [
"canTrickyJump",
{
"thornHits": 1
}
]
}
]
},
{
"and": [
"canNeutralDamageBoost",
"canIframeSpikeJump",
{
"thornHits": 1
}
]
},
{
"and": [
"canPreciseWalljump",
"canTwoTileSqueeze"
]
}
]
}
|
|
Use 2 supers, then squeeze through with a spin jump or down-aim jump. Requires: {
"ammo": {
"type": "Super",
"count": 2
}
}
"canTwoTileSqueeze"
|
|
Use 2 supers, then squeeze through with a spin jump or down-aim jump. Requires: {
"ammo": {
"type": "Super",
"count": 2
}
}
"canTwoTileSqueeze"
|
|
Stand on one frozen Atomic to bring a second Atomic to the correct height to use as a crouch platform. Requires: "canUpwardGModeSetup" "canTwoTileSqueeze" "canTrickyUseFrozenEnemies" "f_DefeatedPhantoon" Exit condition: {
"leaveWithGModeSetup": {}
}
|
|
Bring two atomics to the top of the room. Stand on one frozen Atomic to bring a second Atomic to the correct height to use as a crouch platform. Requires: "canUpwardGModeSetup"
"canTwoTileSqueeze"
"canTrickyUseFrozenEnemies"
"f_DefeatedPhantoon"
{
"enemyDamage": {
"enemy": "Atomic",
"type": "contact",
"hits": 1
}
}
Exit condition: {
"leaveWithGModeSetup": {}
}
|
|
Requires: {
"or": [
{
"and": [
"Gravity",
"SpaceJump"
]
},
{
"and": [
"HiJump",
"canPreciseGrapple",
{
"or": [
"Gravity",
"canSpringBallJumpMidAir"
]
}
]
},
{
"and": [
"HiJump",
"canGravityJump",
"canBeVeryPatient"
]
}
]
}
"canUpwardGModeSetup"
"canTrickyUseFrozenEnemies"
{
"or": [
"Morph",
"canTwoTileSqueeze"
]
}
Exit condition: {
"leaveWithGModeSetup": {}
}
|
|
The two snails together can setup G-Mode on either side of the door. Requires: "canUpwardGModeSetup" "h_canNavigateUnderwater" "canTwoTileSqueeze" Exit condition: {
"leaveWithGModeSetup": {}
}
|
|
Involves breaking the top left Puyo free and then freezing it while it falls. Walk to the end of the door platform and wait for the above puyo to land on the shot block. It will float there until its next jump, where it will slowly descend. Requires: "canSuitlessMaridia"
"canTrickyUseFrozenEnemies"
{
"or": [
"h_canCrouchJumpDownGrab",
"canTwoTileSqueeze",
"Morph"
]
}
|
|
From: 2
Left Door
To: 1
Top Right Door
Notable: true Use at least 4 tiles of runway to gain speed, running through the transition. Hold down during and after the transition in order to aim down and squeeze under the Hopper. Then immediately run to the right to make it to the door without taking damage. Entrance condition: {
"comeInRunning": {
"minTiles": 4,
"speedBooster": "any"
}
}
Requires: "canPrepareForNextRoom" "canTwoTileSqueeze" |
