canPreciseGrapple (Hard)
The ability to precisely aim at grapple points while moving quickly, and precise control of Samus' speed and trajectory when releasing from a grapplable object.
Dependencies: canUseGrapple
Strats ()
|
From: 4
Lower Section - Top Right Door
To: 8
Bridge Right Door (Same Connection as Lower Section - Bottom Right Door)
Notable: true 
Climb up 1 screen. Entrance condition: {
"comeInWithGMode": {
"mode": "direct",
"morphed": false
}
}
Requires: "canSkipDoorLock"
{
  "or": [
    "canArtificialMorph",
    "canWalljump",
    "SpaceJump",
    {
      "and": [
        "canIBJ",
        {
          "or": [
            "Gravity",
            "canJumpIntoIBJ",
            "canBombHorizontally"
          ]
        }
      ]
    },
    {
      "and": [
        "HiJump",
        "canSpringBallJumpMidAir"
      ]
    },
    "canPreciseGrapple"
  ]
}
"canXRayClimb"
|
|
From: 4
Lower Section - Top Right Door
To: 8
Bridge Right Door (Same Connection as Lower Section - Bottom Right Door)
Notable: true
Enter with G-mode direct, back up to between 1 and 6 pixels from the door transition, and activate X-ray to get very deep stuck in the door. Climb up 1 screen, and perform a turnaround buffered spin-jump away from the door to trigger the transition, bypassing any lock on the door. Entrance condition: {
"comeInWithGMode": {
"mode": "direct",
"morphed": false
}
}
Requires: {
"or": [
"canArtificialMorph",
"canWalljump",
"SpaceJump",
{
"and": [
"canIBJ",
{
"or": [
"Gravity",
"canJumpIntoIBJ",
"canBombHorizontally"
]
}
]
},
{
"and": [
"HiJump",
"canSpringBallJumpMidAir"
]
},
"canPreciseGrapple"
]
}
"canXRayClimb"
Bypasses door shell: true |
|
From: 4
Lower Section - Top Right Door
To: 12
Top Junction
Climb up 2 screens. Entrance condition: {
"comeInWithGMode": {
"mode": "direct",
"morphed": false
}
}
Requires: {
"or": [
"canArtificialMorph",
"canWalljump",
"SpaceJump",
{
"and": [
"canIBJ",
{
"or": [
"Gravity",
"canJumpIntoIBJ",
"canBombHorizontally"
]
}
]
},
{
"and": [
"HiJump",
"canSpringBallJumpMidAir"
]
},
"canPreciseGrapple"
]
}
"canXRayClimb"
|
|
From: 5
Lower Section - Bottom Right Door
To: 4
Lower Section - Top Right Door
Attach to the ripper when it is all the way left. Build momentum and launch Heavensward. Requires: "canTrickyJump" "canPreciseGrapple" |
|
From: 9
Main Junction
To: 1
Left Side - Top Door
Notable: true 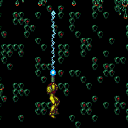
Perform a very tight Spring Ball jump from the Save room door runway, starting from either a crouch or spin jump, then use Grapple to barely reach the ceiling blocks. Requires: "canTrickySpringBallJump" "canPreciseGrapple" |
|
Jump from the Save room door runway and use Grapple to grab onto the Grapple Blocks. Requires: "HiJump" "SpeedBooster" "canPreciseGrapple" "h_canMidAirShootUp" |
|
From: 1
Left Door
To: 2
Right Door
Carefully and quickly lure the Gamets to the right door without letting them go off camera. It may help to kill any extra Gamets once they spread apart. Requires: "h_canNavigateUnderwater"
{
"or": [
{
"resourceCapacity": [
{
"type": "Super",
"count": 1
}
]
},
{
"obstaclesCleared": [
"A"
]
}
]
}
"canTrickyJump"
{
"or": [
{
"and": [
"Gravity",
"SpaceJump"
]
},
{
"and": [
"HiJump",
"canSpaceJumpWaterBounce"
]
},
{
"and": [
"Gravity",
"canPreciseGrapple"
]
},
{
"and": [
"Gravity",
"canStaggeredWalljump",
"canInsaneJump"
]
},
{
"and": [
"HiJump",
"canPreciseGrapple",
"canInsaneJump"
]
},
"canTrickyUseFrozenEnemies"
]
}
Exit condition: {
"leaveWithGModeSetup": {}
}
Unlocks doors: {"types":["ammo"],"requires":[]}
|
|
From: 4
Center Platform Junction
To: 3
Junction Left of Green Gate
Requires: {
"or": [
"SpaceJump",
{
"and": [
"Grapple",
{
"obstaclesNotCleared": [
"B"
]
}
]
},
"canPreciseGrapple"
]
}
|
|
From: 4
Top Right Door
To: 4
Top Right Door
Lure the Gamets while using the Kamer, then get up to the doorway with a quick crouch jump + down grab or by other means. Requires: {
"or": [
"HiJump",
"SpaceJump",
"canWalljump",
"canSpringBallJumpMidAir",
"canTrickyUseFrozenEnemies",
{
"and": [
"canTrickyJump",
"h_canCrouchJumpDownGrab"
]
},
{
"and": [
"canInsaneJump",
"canPreciseGrapple"
]
},
{
"and": [
"canJumpIntoIBJ",
"canDoubleBombJump"
]
}
]
}
Exit condition: {
"leaveWithGModeSetup": {}
}
|
|
Notable: true 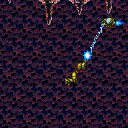
Grapple off several Ripper 2. Requires: "canUseEnemies" "canPreciseGrapple" |
|
Notable: true
Involves grappling off several Ripper 2. Requires: "canUseEnemies" "canPreciseGrapple" |
|
From: 5
Golden Torizo
To: 5
Golden Torizo
Notable: true 
This strat requires some farming. It assumes starting with 15 supers for one session of farming. A safe farming method is to face left while standing in the safe spot. Then fire straight up to shoot the orbs as they appear. Jump up while GT's beak is not open to collect the drops. Plasma allows all of the orbs to be broken at once. Grapple allows for more drops to be collected by shooting diagonally, and collecting the items using Grapple. Keep the number of current Missiles below 31 so that GT will be guaranteed to use the attack which creates drops. Firing Supers requires a very steady fire rate so that for every Super Missile caught by GT, the next 4 Supers do damage. Requires: "h_canNavigateHeatRooms"
"canTrickyJump"
{
"ammo": {
"type": "Super",
"count": 15
}
}
{
"or": [
{
"and": [
"Plasma",
{
"heatFrames": 2700
}
]
},
{
"and": [
"canPreciseGrapple",
{
"heatFrames": 2700
}
]
},
{
"heatFrames": 3200
}
]
}
Clears obstacles: f_DefeatedGoldenTorizo |
|
From: 5
Golden Torizo
To: 5
Golden Torizo
Notable: true
This strat requires much farming. It assumes a capacity of and starting with only 5 supers for five sessions of farming. A safe farming method is to face left while standing in the safe spot. Then fire straight up to shoot the orbs as they appear. Jump up while GT's beak is not open to collect the drops. Plasma allows all of the orbs to be broken at once. Grapple allows for more drops to be collected by shooting diagonally, and collecting the items using Grapple. Keep the number of current Missiles below 31 so that GT will be guaranteed to use the attack which creates drops. Firing Supers requires a very steady fire rate so that for every Super Missile caught by GT, the next 4 Supers do damage. Requires: "h_canNavigateHeatRooms"
"canTrickyJump"
"canBePatient"
{
"ammo": {
"type": "Super",
"count": 5
}
}
{
"or": [
{
"and": [
"Plasma",
{
"heatFrames": 3100
}
]
},
{
"and": [
"canPreciseGrapple",
{
"heatFrames": 3200
}
]
},
{
"heatFrames": 4500
}
]
}
Clears obstacles: f_DefeatedGoldenTorizo |
|
From: 1
Top Left Door
To: 1
Top Left Door
Enter the room aiming diagonally down and quickly use two grapple shots to break the shot blocks. Requires: "canPrepareForNextRoom" "canPreciseGrapple" Exit condition: {
"leaveWithRunway": {
"length": 13,
"openEnd": 0
}
}
|
|
From: 4
Top Right Door
To: 4
Top Right Door
Enter the room aiming diagonally down and quickly use two grapple shots to break the shot blocks. Requires: "canPrepareForNextRoom" "canPreciseGrapple" Exit condition: {
"leaveWithRunway": {
"length": 13,
"openEnd": 0
}
}
|
|
Fling Samus from the first set of grapple blocks to the second set without falling. Requires precise timing. It can help to perform a lateral mid-air morph and unmorph. Requires: "canPreciseGrapple"
"canTrickyJump"
{
"or": [
"canInsaneJump",
{
"and": [
"canLateralMidAirMorph",
{
"thornHits": 5
}
]
}
]
}
|
|
Fling Samus from the first set of grapple blocks to the second set without falling. Requires precise timing. Requires: "canPreciseGrapple" "canTrickyJump" |
|
If Mama Turtle is in her starting location, stand on the rightmost side of her to be aligned below the grapple block. With a miss, if you havent moved horizontally, simply fall straight down to land safely back on to her. Requires: "Grapple"
{
"or": [
"HiJump",
"canPreciseGrapple"
]
}
Clears obstacles: B |
|
From: 1
Top Left Door
To: 1
Top Left Door
Follow the crab from the bottom right door to the top left door with Gravity or Grapple. It is also possible to knock the crab off of the middle peak with a super and follow it to the left with Ice or HiJump and Spring Ball. Requires: "canBeVeryPatient"
{
"or": [
"canGravityJump",
{
"and": [
"canPreciseGrapple",
{
"or": [
"HiJump",
"Gravity"
]
}
]
},
{
"and": [
{
"ammo": {
"type": "Super",
"count": 1
}
},
{
"or": [
"canTrickyUseFrozenEnemies",
{
"and": [
"HiJump",
"canSpringBallJumpMidAir"
]
}
]
}
]
}
]
}
Exit condition: {
"leaveWithGModeSetup": {}
}
|
|
From: 1
Top Left Door
To: 1
Top Left Door
Follow the crab from the bottom right door to the top left door. It is also possible to knock the crab off of the middle peak with a super and follow it. Requires: "h_canFrozenEnemyRunway"
"Gravity"
"canBeVeryPatient"
{
"or": [
"canGravityJump",
"canPreciseGrapple",
{
"ammo": {
"type": "Super",
"count": 1
}
}
]
}
Exit condition: {
"leaveWithRunway": {
"length": 4,
"openEnd": 0
}
}
|
|
Note that it is possible to get up with Grapple alone by using the Powamps. Fling from the Powamp into the side of the top platform to align horizontally. Entrance condition: {
"comeInWithGMode": {
"mode": "direct",
"morphed": false
},
"comesThroughToilet": "any"
}
Requires: "h_canNavigateUnderwater"
{
"or": [
{
"and": [
"Gravity",
{
"or": [
"HiJump",
"canSpringBallJumpMidAir",
"h_canFly",
"canGravityJump"
]
}
]
},
{
"and": [
"canUseEnemies",
"canPreciseGrapple"
]
},
{
"and": [
"HiJump",
"canSpringBallJumpMidAir"
]
}
]
}
Exit condition: {
"leaveWithGMode": {
"morphed": false
}
}
Bypasses door shell: true |
|
Requires: {
"or": [
{
"and": [
"Gravity",
"SpaceJump"
]
},
{
"and": [
"HiJump",
"canPreciseGrapple",
{
"or": [
"Gravity",
"canSpringBallJumpMidAir"
]
}
]
},
{
"and": [
"HiJump",
"canGravityJump",
"canBeVeryPatient"
]
}
]
}
"canUpwardGModeSetup"
"canTrickyUseFrozenEnemies"
{
"or": [
"Morph",
"canTwoTileSqueeze"
]
}
Exit condition: {
"leaveWithGModeSetup": {}
}
|
|
From: 10
Upper Right Ledge Junction
To: 4
Top Right Door
Crouch at the edge of the overhang. Jump and just after the peak of the jump, grapple to the grapple blocks. This strat is finicky, and failure doesn't usually allow a second try (assuming the Powamp is not there). This is possible to do without a crouch jump, but it is much harder. Requires: "canSuitlessMaridia"
"canPreciseGrapple"
{
"or": [
"canCrouchJump",
"canTrickyJump"
]
}
|
|
Use Grapple Beam to cross the Colosseum. The first two room segments can be safely grappled across from in the water. The third room segment grapple is tricky. It is possible to use the spikes as platforms instead. Requires: "canSuitlessMaridia"
"canDodgeWhileShooting"
"canPreciseGrapple"
{
"or": [
"canInsaneJump",
"canPlayInSand"
]
}
{
"or": [
"HiJump",
"canTrickyJump"
]
}
|
|
Requires: "canSuitlessMaridia"
"canDodgeWhileShooting"
"canPreciseGrapple"
{
"or": [
"canInsaneJump",
"canPlayInSand"
]
}
{
"or": [
"HiJump",
"canTrickyJump"
]
}
|
|
Notable: true 
Kill Draygon by grappling to a bottom turret as you get grabbed. Avoids taking all the hits from Draygon. Requires: "h_canNavigateUnderwater"
"canPreciseGrapple"
"h_canBreakOneDraygonTurret"
{
"draygonElectricityFrames": 240
}
Clears obstacles: f_DefeatedDraygon |