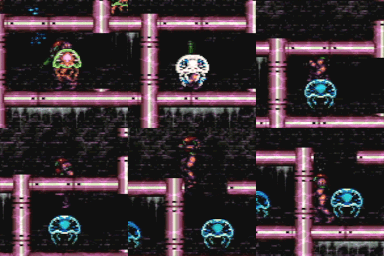
canCeilingClip (Hard)
Basic variant of jumping into a two block high space and performing the actions needed to clip up through a one-tile-thick ceiling.
Strats ()
|
From: 9
Left Side - Bottom Door
To: 11
Middle Item
Go into the morph tunnel below the Charge Beam location and Crystal Flash to force a standup and jump through. Samus is now unable to use X-Ray. Without Morph, be careful not to overload PLMs using the camera scroll blocks on the path upward. Then partially floor clip into the left side of the bomb block, and jump to clip through and escape. To exit G-Mode, damage down until the reserves trigger, which can be done most quickly using the Sidehoppers. Entrance condition: {
"comeInWithGMode": {
"mode": "any",
"morphed": true
}
}
Requires: {
"or": [
"h_canArtificialMorphIBJ",
"Morph",
{
"and": [
"h_canArtificialMorphSpringBall",
{
"or": [
"HiJump",
{
"and": [
"h_canArtificialMorphSpringBallBombJump",
"h_additionalBomb",
"h_additionalBomb",
"h_additionalBomb"
]
}
]
}
]
}
]
}
"h_canArtificialMorphCrystalFlash"
{
"or": [
"Morph",
{
"and": [
"canTwoTileSqueeze",
"canPartialFloorClip",
"canCeilingClip"
]
}
]
}
"canBePatient"
|
|
Partially floor clip into the left side of the bomb block above the charge beam location. Then jump to clip through the above tile. Requires: {
"or": [
"canTwoTileSqueeze",
{
"and": [
"Morph",
"canXRayStandUp"
]
}
]
}
"canPartialFloorClip"
"canCeilingClip"
|
|
From: 2
Bottom Right Door
To: 3
Item
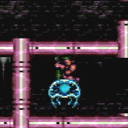
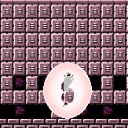
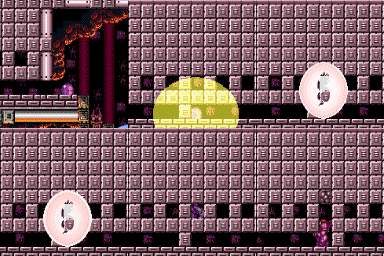
Notable: true Perform the crystal flash all the way to the left, against the crumble blocks to prevent the elevator on the right from blocking you in. Simply jump after performing the crystal flash to jump through the floor. Requires: "h_canCrystalFlash" "canCeilingClip" |
|
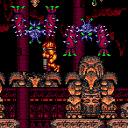
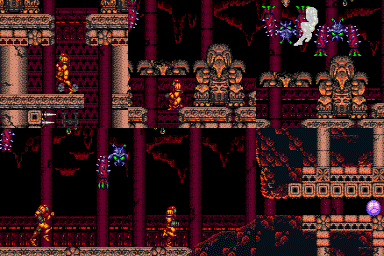
Use the Solid Blocks next to the Samus Eater to clip up through the Power Bomb Blocks. Carefully jump around the thorns, use HiJump to jump over them, or walk through them using IFrames. Requires: "canCeilingClip"
"canPartialFloorClip"
{
"or": [
{
"and": [
"canCarefulJump",
"HiJump",
"canTwoTileSqueeze",
{
"or": [
"canTrickyJump",
{
"thornHits": 1
}
]
}
]
},
{
"and": [
"canNeutralDamageBoost",
"canIframeSpikeJump",
{
"thornHits": 1
}
]
},
{
"and": [
"canPreciseWalljump",
"canTwoTileSqueeze"
]
}
]
}
|
|
Use the Solid Blocks next to the Samus Eater to clip up through the Power Bomb Blocks. The thorns do not cover the entire blocks above. Jump barely only onto the corner to avoid the damage. Carefully jump around the thorns, tunnel crawl slightly to avoid touching the thorns when partial floor clipping. Morph and x-ray can be used instead to setup the clip much easier. Requires: "canTrickyJump"
{
"or": [
"h_canXRayCeilingClip",
{
"and": [
"canTunnelCrawl",
"canPartialFloorClip"
]
}
]
}
"canCeilingClip"
|
|
From: 5
Junction Below Right Item
To: 3
Top Right Item
Requires: "Morph" "canXRayStandUp" "canPartialFloorClip" "canCeilingClip" |
|
From: 2
Right Vertical Door
To: 5
Spring Ball Maze Junction (Past the Bomb Blocks)
Notable: true Perform the crystal flash all the way against the left wall of the accessible tunnel, then jump through the ceiling. Requires: {
"heatFrames": 300
}
"h_canCrystalFlash"
"canCeilingClip"
{
"heatFrames": 270
}
Clears obstacles: B |
|
From: 6
Inside Morph Tunnel (Right of Left Bomb Blocks)
To: 7
Junction At Middle Right Door With Bottom KiHunter Cleared
Wait for the bomb blocks to reappear. Two crouches worth of height are needed before jumping through the rest of the blocks. Watch for the KiHunter to move right before jumping up to get a safe predicatable swoop. Requires: "h_canNavigateHeatRooms"
"h_canUsePowerBombs"
"canXRayClimb"
"canCeilingClip"
{
"or": [
"ScrewAttack",
{
"and": [
"canCarefulJump",
{
"heatFrames": 90
}
]
},
{
"enemyDamage": {
"enemy": "Kihunter (red)",
"type": "contact",
"hits": 1
}
}
]
}
{
"heatFrames": 810
}
|
|
From: 6
Inside Morph Tunnel (Right of Left Bomb Blocks)
To: 7
Junction At Middle Right Door With Bottom KiHunter Cleared
Use Xray to stand up. Jump to clip into the floor. Then another jump to clip through the ceiling block. Watch for the KiHunter to move right before jumping up to get a safe predicatable swoop. Requires: "h_canNavigateHeatRooms"
"h_canUsePowerBombs"
"canXRayStandUp"
"canPartialFloorClip"
"canCeilingClip"
{
"or": [
"ScrewAttack",
{
"and": [
"canCarefulJump",
{
"heatFrames": 90
}
]
},
{
"enemyDamage": {
"enemy": "Kihunter (red)",
"type": "contact",
"hits": 1
}
}
]
}
{
"heatFrames": 520
}
|
|
From: 5
Junction Below Shot Block
To: 7
Junction Left of Morph Tunnel
Notable: true Break the Power Bomb statue leaving 1 row of blocks. Partially clip beneath the Power Bomb blocks and the sold tiles beneath. Wait for a Dessgeega to jump over head and jump into it. The left ceiling Dessgeega works better. Aim down after jumping in order to fully boost over the solid statue. Damage boost to the right and use I-Frames to run through all of the enemies. Requires: {
"obstaclesNotCleared": [
"A"
]
}
"h_canUsePowerBombs"
"canTrickyJump"
"canPartialFloorClip"
"canCeilingClip"
"canHorizontalDamageBoost"
"canHitbox"
{
"enemyDamage": {
"enemy": "Dessgeega",
"type": "contact",
"hits": 1
}
}
{
"heatFrames": 225
}
|
|
From: 5
Junction Below Shot Block
To: 7
Junction Left of Morph Tunnel
Notable: true Break the Power Bomb statue leaving 1 row of blocks. Partially clip beneath the Power Bomb blocks and the sold tiles beneath. Wait for a Dessgeega to jump over head and jump into it. The left ceiling Dessgeega works better. Damage boost to the right and use I-Frames to run through all of the enemies. Requires: {
"obstaclesNotCleared": [
"A"
]
}
"h_canUsePowerBombs"
"HiJump"
"canPartialFloorClip"
"canCeilingClip"
"canHorizontalDamageBoost"
"canHitbox"
{
"enemyDamage": {
"enemy": "Dessgeega",
"type": "contact",
"hits": 1
}
}
{
"heatFrames": 225
}
|
|
From: 5
Junction Below Shot Block
To: 8
Junction Below Top Right Door
Notable: true Break the Power Bomb statue leaving 1 row of blocks. Partially clip beneath the Power Bomb blocks and the sold tiles beneath. Wait for a Dessgeega to jump over head and jump into it. The left ceiling Dessgeega works better. Aim down after jumping in order to fully boost over the solid statue. Damage boost to the right and use I-Frames to run through all of the enemies. Begin shortcharging while running through the Dessgeegas for a speedball. It may help to end the damage boost early, but then it becomes more difficult to stutter for the shortcharge. Requires: {
"obstaclesNotCleared": [
"A"
]
}
"h_canUsePowerBombs"
"canPartialFloorClip"
"canCeilingClip"
"canTrickyJump"
"canHorizontalDamageBoost"
"canHitbox"
"canSpeedball"
{
"canShineCharge": {
"usedTiles": 16,
"openEnd": 1
}
}
{
"enemyDamage": {
"enemy": "Dessgeega",
"type": "contact",
"hits": 1
}
}
{
"heatFrames": 390
}
{
"or": [
"h_canUseSpringBall",
{
"hibashiHits": 1
}
]
}
|
|
From: 5
Junction Below Shot Block
To: 8
Junction Below Top Right Door
Notable: true Break the Power Bomb statue leaving 1 row of blocks. Partially clip beneath the Power Bomb blocks and the sold tiles beneath. Wait for a Dessgeega to jump over head and jump into it. The left ceiling Dessgeega works better. Damage boost to the right and use I-Frames to run through all of the enemies. Begin shortcharging while running through the Dessgeegas for a speedball. It may help to end the damage boost early, but then it becomes more difficult to stutter for the shortcharge. Requires: {
"obstaclesNotCleared": [
"A"
]
}
"h_canUsePowerBombs"
"HiJump"
"canPartialFloorClip"
"canCeilingClip"
"canHorizontalDamageBoost"
"canHitbox"
"canSpeedball"
{
"canShineCharge": {
"usedTiles": 16,
"openEnd": 1
}
}
{
"enemyDamage": {
"enemy": "Dessgeega",
"type": "contact",
"hits": 1
}
}
{
"heatFrames": 390
}
{
"or": [
"h_canUseSpringBall",
{
"hibashiHits": 1
}
]
}
|
|
From: 2
Item (Behind the Bomb Wall) (locked)
To: 1
Left Door
Notable: true Crystal flash to force a standup then spin jump up then morph to bypass the dead robot. Use Coverns to damage down if necessary. Note that if the Covern spawns on Samus while crystal flashing, it will deal large amounts of damage. To avoid this, it is recommended to kill the Covern and leave its drop, then quickly get in the morph tunnel and CF. Requires: "h_canCrystalFlash" "canCeilingClip" |
|
From: 2
Item (Behind the Bomb Wall) (locked)
To: 1
Left Door
Notable: true In R-Mode, kill the Coverns until there is Energy in Samus's Reserves. Get into the Morph tunnel and go to the far left. Wait for Coverns to damage Samus down until Reserves trigger, forcing a stand up and enabling her to escape. Note that it is required to break the bomb block above the Morph tunnel as well, in order to clip out. Requires: {
"obstaclesCleared": [
"A"
]
}
"canCeilingClip"
"canBePatient"
"Morph"
{
"or": [
"Ice",
"Wave",
"Spazer",
"Plasma",
"ScrewAttack"
]
}
|
|
From: 7
Bottom Door
To: 3
Bottom Left Door
Use the Covern to partial ceiling clip so your beam can reach the shot block of the ceiling at the end of the Morph tunnel to the left. It is possible to mid-air morph to get into the morph tunnel with nothing, from the Covern, the ground, or the stairs below. Requires: "Morph"
"canUseFrozenEnemies"
"canCeilingClip"
{
"not": "f_DefeatedPhantoon"
}
"canRiskPermanentLossOfAccess"
Clears obstacles: B |
|
From: 1
Bottom Left Door
To: 2
Right Door
Notable: true Crouch under the crumble blocks while aiming upward, using both angle buttons then freeze the Mochtroid while it is on Samus. Jump onto the Mochtroid by quickly pressing down after jumping, when on it, press up to stand then jump through the ceiling. With no jump assists, use a frozen Mochtroid as a platform to get to the ledge above the door. Requires: "h_canNavigateUnderwater" "canCeilingClip" "canUseFrozenEnemies" |
|
From: 2
Right Door
To: 1
Bottom Left Door
Notable: true Crouch under the crumble blocks while aiming upward, using both angle buttons then freeze the Mochtroid while it is on Samus. Jump onto the Mochtroid by quickly pressing down after jumping, when on it, press up to stand then jump through the ceiling. With no jump assists, use a frozen Mochtroid as a platform to get to the ledge above the door. Requires: "h_canNavigateUnderwater"
"canCeilingClip"
"canUseFrozenEnemies"
{
"or": [
{
"and": [
"h_canCrouchJumpDownGrab",
"canTrickyJump"
]
},
"HiJump",
"Gravity",
"canSpringBallJumpMidAir"
]
}
|
|
From: 2
Bottom Right Door
To: 2
Bottom Right Door
Notable: true Crouch and freeze a Mochtroid to clip into the space behind the grapple blocks. Jump and tap grapple while aiming diagonally to be pushed into the wall just the right amount. Samus should be one tile below the grapple blocks and fully in the wall. Too short a tap and the next grapple will not work, too long and Samus will be stuck in the wall. Grapple diagonally again to be pushed into the transition. Requires: {
"or": [
{
"and": [
"Gravity",
"canUseFrozenEnemies",
"canCeilingClip"
]
},
{
"and": [
"canTrickyUseFrozenEnemies",
"h_canNonTrivialCeilingClip"
]
}
]
}
"canGrappleClip"
Bypasses door shell: true |

.png)
.gif)
.png)
.gif)

