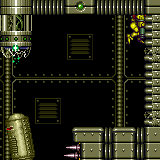
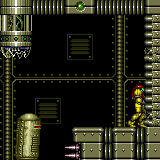
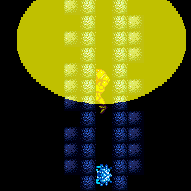
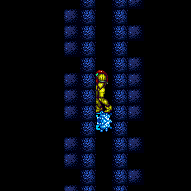
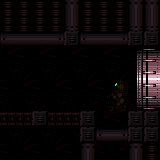
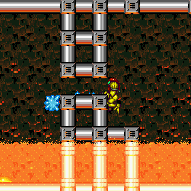
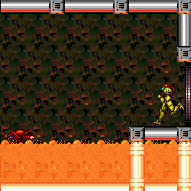
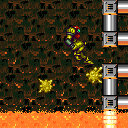
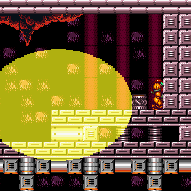
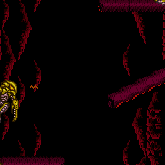
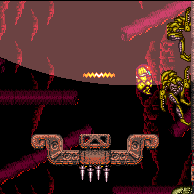
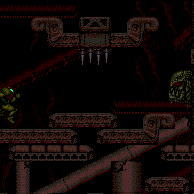
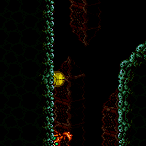
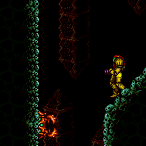
canTrivialMidAirMorph (Implicit)
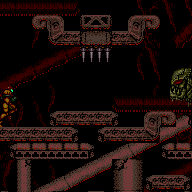
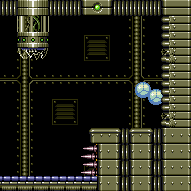
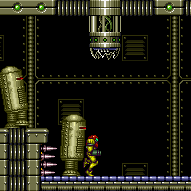
The ability to enter Morph Ball while in the air. This is only for simple variants where the vertical space and time in which Samus needs to morph is relatively unconstrained.
Strats ()
From: 10
Left Morph Maze Item
To: 14
Morph Maze Junction (Below Super Block)
Requires: {
"or": [
"canTrivialMidAirMorph",
"h_useSpringBall",
"canIBJ"
]
}
{
"or": [
{
"obstaclesNotCleared": [
"B"
]
},
"canRiskPermanentLossOfAccess"
]
} |
|
Requires: {
"or": [
"canTrivialMidAirMorph",
"h_useSpringBall",
{
"and": [
"Gravity",
"h_bombThings"
]
}
]
}Dev note: Turning off Gravity and HiJump can make this mid-air morph easier. |
|
Requires: {
"or": [
"h_usePowerBomb",
{
"obstaclesCleared": [
"C"
]
}
]
}
{
"or": [
"canConsecutiveWallJump",
"SpaceJump",
"canLongIBJ"
]
}
{
"or": [
{
"and": [
"h_usePowerBomb",
"canTrivialMidAirMorph"
]
},
"ScrewAttack"
]
}Clears obstacles: A, B, C Dev note: canWallJumpInstantMorph is not needed here, as the precision is very low. |
From: 4
Right Item
To: 2
Top Left Door
Use both Geemers to climb the tall shaft by repeatedly freezing them. Note that one moves locally when on camera and the other moves globally. Once Samus is close to the top Bomb Block, freeze one Geemer low and jump as high as possible before placing a power bomb. Continue climbing with the Geemer that survives. Requires: "h_ZebesIsAwake"
{
"or": [
"h_usePowerBomb",
{
"and": [
{
"obstaclesCleared": [
"B"
]
},
"Morph"
]
},
{
"obstaclesCleared": [
"C"
]
}
]
}
"h_usePowerBomb"
"canTrivialMidAirMorph"
"canTrickyUseFrozenEnemies"
"canTrickyJump"
"canBePatient"
"canCameraManip"Clears obstacles: A, B |
From: 9
Right Etecoon Shaft - Top Left Door
To: 15
Right Etecoon Shaft - Upper Tunnel Entrance
Requires: {
"or": [
"canMidAirMorph",
"h_useSpringBall",
{
"and": [
"canTrivialMidAirMorph",
{
"or": [
"SpaceJump",
"canConsecutiveWallJump"
]
}
]
},
{
"and": [
"canIBJ",
"canBombHorizontally"
]
}
]
}Dev note: Doable with just a very long IBJ, but if bombing horizontally is too hard, that will be too. |
From: 13
Central Junction
To: 7
Right Side - Door Behind Super Block
Requires: {
"or": [
"canTrivialMidAirMorph",
"h_useSpringBall",
"canIBJ",
{
"and": [
"Morph",
"canCarefulJump"
]
}
]
}
{
"obstaclesCleared": [
"F"
]
}Dev note: This base strat represents only backtracking after entering from 7. It is possible to avoid a mid-air morph by rolling off the platform above With HiJump, a full jump won't work, so the midair morph may not be very trivial. |
|
Requires: {
"or": [
"canTrivialMidAirMorph",
"h_useSpringBall",
{
"and": [
"h_usePowerBomb",
{
"heatFrames": 260
}
]
},
{
"and": [
"Morph",
"Wave",
{
"heatFrames": 180
}
]
}
]
}
{
"heatFrames": 175
}
{
"or": [
"canDash",
{
"heatFrames": 10
}
]
}Collects items: 3 Dev note: The Wave and Power Bomb options ride the rising tower, to avoid a mid-air morph. |
|
Requires: {
"resetRoom": {
"nodes": [
2
]
}
}
{
"or": [
"canQuickDrop",
{
"cycleFrames": 30
}
]
}
{
"or": [
{
"and": [
"Wave",
{
"cycleFrames": 120
}
]
},
{
"and": [
"Grapple",
"canDodgeWhileShooting",
{
"cycleFrames": 240
}
]
},
{
"and": [
"Morph",
"canTrickyJump",
{
"cycleFrames": 300
}
]
},
{
"and": [
"canTrivialMidAirMorph",
"Bombs",
{
"cycleFrames": 1100
}
]
},
{
"and": [
"Morph",
{
"or": [
{
"notable": "Return Through Crumble Blocks"
},
"Bombs"
]
},
{
"or": [
"canWallJump",
{
"and": [
"HiJump",
"canSpringBallJumpMidAir",
"h_doubleEquipmentScreenCycleFrames"
]
},
"SpaceJump"
]
},
{
"cycleFrames": 510
}
]
},
{
"cycleFrames": 2160
}
]
}
{
"or": [
"canDash",
{
"cycleFrames": 90
}
]
}Resets obstacles: A, B, C, D Farm cycle drops: 1 Sova |
From: 1
Top Right Door
To: 2
Middle Right Door
Entrance condition: {
"comeInShinecharging": {
"length": 0,
"openEnd": 1
}
}Requires: "canShinechargeMovementTricky"
"canTrivialMidAirMorph"
{
"or": [
"canUsePowerBombLag",
{
"and": [
"canInsaneJump",
"canOffScreenMovement"
]
}
]
}
{
"heatFrames": 200
}
{
"shinespark": {
"frames": 17,
"excessFrames": 0
}
}Exit condition: {
"leaveWithSpark": {}
}Unlocks doors: {"types":["super"],"requires":[]}
{"types":["missiles","powerbomb"],"requires":["never"]}Dev note: Technically Samus isn't moving off-camera but is close to the edge; 'canOffScreenMovement' is for the difficulty of timing the unmorph, given limited visibility of the end of the passage and the Sova. If a Power Bomb is available, then lag from the explosion can make the movement much easier. |
|
Requires: {
"or": [
"canTrivialMidAirMorph",
{
"and": [
"h_useSpringBall",
"HiJump"
]
}
]
}
{
"heatFrames": 80
} |
|
Either use a Power Bomb or Wave + Plasma to kill all the Sovas off-camera, or if heat protection is available, wait for all the Sovas to come out of the tunnel. Requires: {
"or": [
{
"and": [
"HiJump",
{
"or": [
"canTrivialMidAirMorph",
"h_useSpringBall"
]
}
]
},
{
"and": [
"SpaceJump",
"canTrivialMidAirMorph",
{
"heatFrames": 40
}
]
},
{
"and": [
"canWallJump",
"canTrivialMidAirMorph"
]
},
"canSpringBallJumpMidAir",
{
"and": [
"canIBJ",
{
"heatFrames": 900
}
]
},
{
"and": [
"canJumpIntoIBJ",
{
"heatFrames": 520
}
]
},
{
"and": [
"canJumpIntoIBJ",
"canDoubleBombJump",
{
"heatFrames": 400
}
]
}
]
}
{
"or": [
"h_heatProof",
{
"and": [
"canDash",
{
"or": [
"h_usePowerBomb",
{
"and": [
"Wave",
"Plasma",
"canTrickyJump",
{
"heatFrames": 80
}
]
}
]
}
]
},
{
"and": [
{
"haveBlueSuit": {}
},
{
"heatFrames": 40
}
]
}
]
}
{
"or": [
{
"heatFrames": 180
},
{
"and": [
"canFarmWhileShooting",
{
"heatFramesWithEnergyDrops": {
"frames": 115,
"drops": [
{
"enemy": "Sova",
"count": 3
}
]
}
},
{
"heatFrames": 65
}
]
}
]
} |
|
Requires: "canDash"
{
"or": [
{
"and": [
"HiJump",
{
"or": [
"canTrivialMidAirMorph",
"h_useSpringBall"
]
}
]
},
{
"and": [
"SpaceJump",
"canTrivialMidAirMorph",
{
"heatFrames": 40
}
]
},
{
"and": [
"canWallJump",
"canTrivialMidAirMorph"
]
},
"canSpringBallJumpMidAir",
{
"and": [
"canJumpIntoIBJ",
{
"heatFrames": 240
}
]
},
{
"and": [
"canJumpIntoIBJ",
"canDoubleBombJump",
{
"heatFrames": 120
}
]
},
{
"and": [
"canDoubleBombJump",
{
"heatFrames": 300
}
]
}
]
}
{
"heatFrames": 180
}
{
"enemyDamage": {
"enemy": "Sova",
"type": "contact",
"hits": 1
}
}Dev note: Base IBJ should kill the Sovas or go around. |
|
Requires: "Gravity"
{
"or": [
"canTrivialMidAirMorph",
"h_useSpringBall"
]
}
{
"or": [
{
"and": [
"canDash",
{
"heatFrames": 290
},
{
"lavaFrames": 25
}
]
},
{
"and": [
{
"haveBlueSuit": {}
},
{
"heatFrames": 335
},
{
"lavaFrames": 40
}
]
}
]
}Dev note: FIXME: Add a lava dip + spring ball midair strat, and a HiJump + damage boost strat. |
|
Requires: {
"or": [
"canTrivialMidAirMorph",
"h_useSpringBall",
{
"and": [
"h_bombThings",
{
"heatFrames": 80
}
]
}
]
}
{
"heatFrames": 270
}
{
"or": [
{
"lavaFrames": 70
},
{
"and": [
"Gravity",
"canDash",
{
"disableEquipment": "SpeedBooster"
},
{
"lavaFrames": 25
}
]
}
]
}
{
"or": [
{
"haveBlueSuit": {}
},
{
"enemyDamage": {
"enemy": "Boyon",
"type": "contact",
"hits": 1
}
},
{
"heatFrames": 30
}
]
}
{
"or": [
"canDash",
{
"heatFrames": 70
}
]
} |
|
An ice shot can shoot through the wall below the Morph tunnel and can freeze the Boyon even without Wave. Requires: {
"or": [
"canTrivialMidAirMorph",
"h_useSpringBall",
{
"and": [
"h_bombThings",
{
"heatFrames": 80
}
]
}
]
}
{
"or": [
"canTrickyUseFrozenEnemies",
{
"and": [
"canUseFrozenEnemies",
"Wave"
]
}
]
}
{
"heatFrames": 280
}
{
"or": [
"canDash",
{
"heatFrames": 100
}
]
} |
|
Unmorph with the right timing to damage boost using the Boyon who is closest to the Morph tunnel in order to avoid taking any lava damage. Requires: {
"notable": "Impressive Damage Boost"
}
"canHorizontalDamageBoost"
"canTrivialMidAirMorph"
"canTrickyJump"
{
"enemyDamage": {
"enemy": "Boyon",
"type": "contact",
"hits": 1
}
}
{
"heatFrames": 220
} |
|
Requires: "h_usePowerBomb"
{
"or": [
"canTrivialMidAirMorph",
"h_useSpringBall"
]
}
{
"or": [
{
"and": [
"canPreciseWallJump",
{
"heatFrames": 230
}
]
},
{
"and": [
"SpaceJump",
{
"heatFrames": 310
}
]
},
{
"and": [
"HiJump",
"canSpeedyJump",
{
"heatFrames": 320
}
]
},
{
"and": [
"HiJump",
"SpaceJump",
{
"heatFrames": 200
}
]
},
{
"and": [
"HiJump",
"canWallJump",
{
"heatFrames": 200
}
]
},
{
"and": [
"HiJump",
"canSpringBallJumpMidAir",
{
"heatFrames": 340
}
]
}
]
} |
|
Requires: {
"or": [
"canTrivialMidAirMorph",
"h_useSpringBall"
]
}
"h_useMorphBombs"
{
"heatFrames": 200
}Clears obstacles: B |
From: 5
Junction Above Bottom Blocks
To: 5
Junction Above Bottom Blocks
Requires: "h_usePowerBomb"
"canTrivialMidAirMorph"
{
"heatFrames": 150
}Clears obstacles: A Dev note: FIXME: This doesn't quite break the blocks above, but going up after has more requirements. The canTrivialMidAirMorph could be avoided by using Spring Ball on entry or from the doorsill. |
From: 2
Right Vertical Door
To: 5
Spring Ball Maze Junction (Past the Bomb Blocks)
Perform the Crystal Flash all the way against the left wall of the accessible tunnel, then jump through the ceiling. Requires: {
"notable": "Crystal Flash Clip"
}
{
"heatFrames": 100
}
"h_heatedCrystalFlash"
"canCeilingClip"
{
"or": [
"canTrivialMidAirMorph",
"h_useSpringBall"
]
}
{
"heatFrames": 175
}Clears obstacles: B Dev note: After the CF, a midair morph can be avoided with a single bomb, but midair morph is expected for this level. The heat frames are based on reaching the entrance of the last morph tunnel. FIXME: in the room diagram, draw node 5 using a smaller box to more precisely indicate this location. |
From: 2
Right Vertical Door
To: 7
Junction By Lower Alcoons (Left of Spike Pits)
Crystal Flash against the left edge of the tunnel, then jump through the ceiling. You cannot use Power Bombs or X-Ray after the Crystal Flash clip. Kill the Alcoon to clear the runway then drop into the lower left Alcoon to interrupt. Entrance condition: {
"comeInWithRMode": {},
"comesThroughToilet": "no"
}Requires: {
"notable": "Crystal Flash Clip"
}
{
"heatFrames": 100
}
"h_heatedCrystalFlashForReserveEnergy"
"canCeilingClip"
"canTrivialMidAirMorph"
{
"heatFrames": 240
}
{
"or": [
{
"enemyKill": {
"enemies": [
[
"Alcoon"
]
],
"explicitWeapons": [
"Missile",
"Super",
"Charge+Plasma",
"Wave+Plasma"
]
}
},
{
"heatFrames": 200
}
]
}
{
"canShineCharge": {
"usedTiles": 27,
"gentleUpTiles": 2,
"openEnd": 0
}
}
{
"or": [
"canDownBack",
"canTrickyJump"
]
}
{
"heatFrames": 120
}
{
"autoReserveTrigger": {
"maxReserveEnergy": 95
}
}
"canRModeSparkInterrupt"Clears obstacles: A, B |
From: 4
Item
To: 5
Spring Ball Maze Junction (Past the Bomb Blocks)
Requires: {
"or": [
{
"and": [
"canTrivialMidAirMorph",
{
"heatFrames": 190
}
]
},
{
"and": [
"h_useSpringBall",
"HiJump",
{
"heatFrames": 190
}
]
},
{
"and": [
"h_useSpringBall",
"canInsaneJump",
{
"heatFrames": 100
}
]
},
{
"and": [
"h_useMorphBombs",
"canInsaneJump",
{
"heatFrames": 160
}
]
}
]
}
{
"or": [
{
"obstaclesCleared": [
"B"
]
},
{
"haveBlueSuit": {}
}
]
} |
From: 4
Item
To: 5
Spring Ball Maze Junction (Past the Bomb Blocks)
Requires: {
"or": [
"canTrivialMidAirMorph",
"h_useSpringBall"
]
}
{
"obstaclesNotCleared": [
"B"
]
}
"h_useMorphBombs"
{
"or": [
{
"and": [
"canInsaneJump",
{
"heatFrames": 245
}
]
},
{
"heatFrames": 330
}
]
}Clears obstacles: B |
From: 4
Item
To: 5
Spring Ball Maze Junction (Past the Bomb Blocks)
Requires: "h_usePowerBomb"
{
"or": [
{
"and": [
"canTrivialMidAirMorph",
{
"heatFrames": 250
}
]
},
{
"and": [
"h_useSpringBall",
"HiJump",
{
"heatFrames": 250
}
]
},
{
"and": [
"h_useSpringBall",
"canInsaneJump",
{
"heatFrames": 170
}
]
}
]
}Clears obstacles: B |
From: 5
Spring Ball Maze Junction (Past the Bomb Blocks)
To: 2
Right Vertical Door
Requires: {
"or": [
{
"and": [
"h_useSpringBall",
{
"heatFrames": 475
}
]
},
{
"and": [
"canTrivialMidAirMorph",
{
"heatFrames": 530
}
]
}
]
}Unlocks doors: {"types":["powerbomb"],"requires":[]} |
From: 5
Spring Ball Maze Junction (Past the Bomb Blocks)
To: 4
Item
Requires: {
"or": [
"canTrivialMidAirMorph",
{
"and": [
"HiJump",
"h_useSpringBall"
]
}
]
}
{
"heatFrames": 70
} |
From: 2
Bottom Left Door
To: 4
Junction Above Bomb Blocks
Use Screw Attack to remove the left wall Pirate and wall jump high enough to place a Power Bomb to destroy the bomb blocks Then wall jump up again to reach the upper region. Requires: "h_usePowerBomb"
"canPreciseWallJump"
"canConsecutiveWallJump"
"canTrivialMidAirMorph"
"HiJump"
"ScrewAttack"
{
"heatFrames": 330
}
{
"or": [
"h_heatResistant",
"canPauseAbuse",
{
"resourceCapacity": [
{
"type": "RegularEnergy",
"count": 149
}
]
}
]
}Clears obstacles: A Dev note: With Reserves only, canPauseAbuse is used as a proxy for pause abuse or optimal reserve management and character movement. |
From: 2
Bottom Left Door
To: 4
Junction Above Bomb Blocks
Deal an exact amount of damage to a wall pirate to freeze it while breaking the bomb blocks with a power bomb without taking damage. Quickly move to the right side and walljump up to the right height to power bomb out the bomb blocks, double hitting the top wall pirate. Wait for the full power bomb effect to end and wall jump once on the right wall and hit top pirate with 1 missile and 1 super. Jump and shoot the top pirate with a charge+ice shot. Hold a charge and walljump up the left wall and freeze the top pirate when it jumps across. Use the pirate to jump to the higher area. Requires: {
"notable": "Low Ice Pirate Freeze"
}
"canTrickyUseFrozenEnemies"
"Charge"
"canPreciseWallJump"
"canWallJumpWithCharge"
"canTrivialMidAirMorph"
"canTrickyDodgeEnemies"
{
"ammo": {
"type": "Missile",
"count": 1
}
}
{
"ammo": {
"type": "Super",
"count": 1
}
}
{
"ammo": {
"type": "PowerBomb",
"count": 1
}
}
{
"heatFrames": 870
}
{
"or": [
"h_heatResistant",
{
"and": [
"canInsaneJump",
"canPauseAbuse"
]
},
{
"resourceCapacity": [
{
"type": "RegularEnergy",
"count": 149
}
]
}
]
}Clears obstacles: A Dev note: With Reserves only, this strat requires much more precise movement and either pause abuse or optimal reserve management. |
From: 2
Bottom Left Door
To: 4
Junction Above Bomb Blocks
Jump with some run speed to place the power bomb high enough to break the bomb blocks. During the explosion, jump through the left wall pirate and precisely walljump to reach the upper area. Requires: {
"notable": "New Route with HiJump, Speed, and PowerBombs"
}
"HiJump"
"canSpeedyJump"
"canPreciseWallJump"
"canTrickyDodgeEnemies"
"h_usePowerBomb"
"canTrivialMidAirMorph"
"canHitbox"
{
"heatFrames": 360
}
{
"or": [
"h_heatResistant",
"canPauseAbuse",
{
"resourceCapacity": [
{
"type": "RegularEnergy",
"count": 149
}
]
}
]
}Clears obstacles: A Dev note: With Reserves only, canPauseAbuse is used as a proxy for pause abuse or optimal reserve management and character movement. |
From: 2
Bottom Left Door
To: 4
Junction Above Bomb Blocks
Avoid the bottom Pirates and jump high enough to break the bomb blocks with a power bomb. During the explosion, climb the right wall passing through any Pirates and use a movement item to reach the top. Requires: {
"notable": "Power Bombs and a Jump Assist"
}
"canDash"
"canHitbox"
"h_usePowerBomb"
"canTrivialMidAirMorph"
{
"or": [
{
"and": [
"SpaceJump",
"canPreciseWallJump",
{
"heatFrames": 490
}
]
},
{
"and": [
"HiJump",
"canSpeedyJump",
"SpaceJump",
{
"heatFrames": 420
}
]
},
{
"and": [
"canSpringwall",
{
"heatFrames": 490
}
]
},
{
"and": [
"HiJump",
"canPreciseWallJump",
"canInsaneJump",
{
"heatFrames": 470
}
]
},
{
"and": [
"HiJump",
"canSpeedyJump",
"canTrickySpringBallJump",
"canInsaneJump",
{
"heatFrames": 410
}
]
},
{
"and": [
"HiJump",
"SpaceJump",
"canInsaneJump",
{
"heatFrames": 600
}
]
}
]
}
{
"or": [
"h_heatResistant",
"canPauseAbuse",
{
"resourceCapacity": [
{
"type": "RegularEnergy",
"count": 149
}
]
}
]
}Clears obstacles: A Dev note: With Reserves only, canPauseAbuse is used as a proxy for pause abuse or optimal reserve management and character movement. |
From: 2
Bottom Left Door
To: 6
Bottom Platform Junction With Pirates Killed
Jump to the center platform, morph, and kill the bottom two Pirates by laying Power Bombs on the platform. Then jump morph to lay additional Power Bombs to kill the top Pirate. The amount of Power Bombs needed can be reduced by jump morphing over the bottom Pirate to lay one or more of the Power Bombs mid-air. Note that it is possible to freeze the Namihe on entry with Plasma and Ice. Requires: {
"or": [
"canDodgeWhileShooting",
{
"enemyDamage": {
"enemy": "Yellow Space Pirate (wall)",
"type": "contact",
"hits": 1
}
},
{
"and": [
"Ice",
"Plasma"
]
}
]
}
"canTrivialMidAirMorph"
{
"ammo": {
"type": "PowerBomb",
"count": 3
}
}
{
"heatFrames": 470
}
{
"or": [
"canTrickyDodgeEnemies",
{
"and": [
"canTrickyJump",
{
"ammo": {
"type": "PowerBomb",
"count": 1
}
},
{
"heatFrames": 200
}
]
},
{
"and": [
{
"ammo": {
"type": "PowerBomb",
"count": 2
}
},
{
"heatFrames": 400
},
{
"or": [
{
"and": [
{
"ammo": {
"type": "PowerBomb",
"count": 1
}
},
{
"heatFrames": 200
}
]
},
{
"ammo": {
"type": "Super",
"count": 1
}
},
{
"ammo": {
"type": "Missile",
"count": 1
}
}
]
}
]
}
]
}
{
"or": [
"h_heatResistant",
"canPauseAbuse",
{
"resourceCapacity": [
{
"type": "RegularEnergy",
"count": 149
}
]
}
]
} |
From: 6
Bottom Platform Junction With Pirates Killed
To: 6
Bottom Platform Junction With Pirates Killed
Requires: {
"or": [
{
"and": [
"canWallJump",
{
"heatFrames": 150
}
]
},
{
"and": [
"SpaceJump",
{
"heatFrames": 200
}
]
},
{
"and": [
"HiJump",
"SpaceJump",
{
"heatFrames": 155
}
]
},
{
"and": [
"HiJump",
"canSpeedyJump",
{
"heatFrames": 140
}
]
},
{
"and": [
"canSpringBallJumpMidAir",
{
"heatFrames": 155
}
]
}
]
}
"canTrivialMidAirMorph"
"h_usePowerBomb"Clears obstacles: A |
|
Requires: "h_destroyBombWalls"
"f_DefeatedPhantoon"
{
"or": [
"canTrivialMidAirMorph",
"h_useSpringBall",
"h_bombThings",
{
"and": [
"Morph",
"canUseEnemies"
]
}
]
} |
From: 1
Left Door
To: 2
Item (Behind the Bomb Wall)
Run on the conveyor to build Speed for breaking the bomb block. Push the right side Worker Robot onto the conveyor Jump low into the wall so Samus' head touches the block. Speed can be used to clear the Bulls. Requires: "f_DefeatedPhantoon"
"canCarefulJump"
{
"or": [
"canDodgeWhileShooting",
{
"enemyKill": {
"enemies": [
[
"Bull",
"Bull"
]
]
}
},
{
"enemyDamage": {
"enemy": "Bull",
"type": "contact",
"hits": 1
}
}
]
}
{
"getBlueSpeed": {
"usedTiles": 18,
"openEnd": 1
}
}
"h_blueJump"
{
"or": [
"canTrivialMidAirMorph",
"h_useSpringBall",
"h_bombThings"
]
}Dev note: Space Jumping from left conveyor feels a little harder. |
|
By normal means, the path can't be passed unless the Workrobot is activated (so Phantoon dead) Requires: "f_DefeatedPhantoon"
{
"or": [
"canTrivialMidAirMorph",
"h_useSpringBall",
"h_bombThings"
]
}Dev note: This doesn't require breaking the bomb blocks on the premise that you can't get here without breaking them. |
From: 2
Item (Behind the Bomb Wall)
To: 1
Left Door
Crystal flash to force a standup then spin jump up then morph to bypass the dead robot. Use Coverns to damage down if necessary. Note that if the Covern spawns on Samus while crystal flashing, it will deal large amounts of damage. To avoid this, it is recommended to kill the Covern and leave its drop, then quickly get in the morph tunnel and CF. Requires: {
"obstaclesNotCleared": [
"R-Mode"
]
}
{
"notable": "Crystal Flash Clip"
}
{
"or": [
"canTrivialMidAirMorph",
"h_useSpringBall",
"h_bombThings"
]
}
"h_CrystalFlash"
"canCeilingClip"Dev note: If Phantoon is alive, 'Base' can be used instead. Note that this strat is useless in vanilla, as the item only spawns if Phantoon has been killed. |
From: 2
Item (Behind the Bomb Wall)
To: 1
Left Door
In R-Mode, kill the Coverns until there is Energy in Samus's Reserves. Get into the Morph tunnel and go to the far left. Wait for Coverns to damage Samus down until Reserves trigger, forcing a stand up and enabling her to escape. Note that it is required to break the bomb block above the Morph tunnel as well, in order to clip out. Requires: {
"notable": "R-Mode Standup Clip"
}
{
"obstaclesCleared": [
"R-Mode"
]
}
"canRModeStandupClip"
"canCeilingClip"
{
"or": [
{
"and": [
{
"disableEquipment": "ETank"
},
{
"or": [
"canBePatient",
{
"resourceAvailable": [
{
"type": "Energy",
"count": 80
}
]
}
]
}
]
},
"canBeExtremelyPatient"
]
}
{
"partialRefill": {
"type": "ReserveEnergy",
"limit": 20
}
}
{
"or": [
"canTrivialMidAirMorph",
"h_useSpringBall",
"h_bombThings"
]
}
{
"autoReserveTrigger": {}
}Resets obstacles: R-Mode Dev note: If Phantoon is alive, 'Base' can be used instead. Note that this strat is useless in vanilla, as the item only spawns if Phantoon has been killed. |
|
Requires: "h_navigateUnderwater"
{
"or": [
"h_useSpringBall",
"canMidAirMorph",
{
"and": [
"Gravity",
"canBombHorizontally"
]
},
{
"and": [
"Gravity",
"canLongIBJ",
"canJumpIntoIBJ"
]
},
{
"and": [
"Gravity",
"canTrivialMidAirMorph",
{
"or": [
"SpaceJump",
"canUseFrozenEnemies"
]
}
]
},
{
"and": [
"canTrivialMidAirMorph",
"canDisableEquipment"
]
}
]
}Dev note: It's possible to get in without a mid-air morph by rolling off from above, but that requires disabling Gravity and/or crab hits and the crab not killed. That's a lot of work to avoid something simple and barely reasonable at that level anyways. |
|
Requires: {
"or": [
"h_usePowerBomb",
{
"and": [
"Gravity",
"ScrewAttack"
]
},
{
"and": [
"Gravity",
"canIBJ"
]
},
{
"and": [
"h_useMorphBombs",
"h_useSpringBall"
]
},
{
"and": [
"h_useMorphBombs",
"canTrivialMidAirMorph",
"canDisableEquipment"
]
}
]
}Clears obstacles: A |
|
Requires: "Morph"
{
"or": [
"f_KilledZebetites4",
{
"obstaclesCleared": [
"f_KilledZebetites4"
]
}
]
}
{
"or": [
{
"and": [
"canTrickyJump",
"canMidAirMorph"
]
},
{
"and": [
"canCarefulJump",
"h_useSpringBall"
]
},
{
"and": [
{
"enemyDamage": {
"enemy": "Rinka",
"type": "contact",
"hits": 1
}
},
{
"or": [
"canTrivialMidAirMorph",
"canNeutralDamageBoost",
"h_useSpringBall",
"h_bombThings"
]
}
]
}
]
} |
From: 5
Between First and Second Zebetite
To: 6
Between Second and Third Zebetite
Requires: "Morph"
{
"or": [
"f_KilledZebetites2",
{
"obstaclesCleared": [
"f_KilledZebetites2"
]
}
]
}
{
"or": [
{
"and": [
"canTrickyJump",
"canMidAirMorph"
]
},
{
"and": [
"canDodgeWhileShooting",
"h_useSpringBall"
]
},
{
"and": [
{
"enemyDamage": {
"enemy": "Rinka",
"type": "contact",
"hits": 1
}
},
{
"or": [
"canTrivialMidAirMorph",
"canNeutralDamageBoost",
"h_useSpringBall",
"h_bombThings"
]
}
]
}
]
}
{
"enemyDamage": {
"enemy": "Mother Brain 1",
"type": "turret",
"hits": 1
}
} |
From: 6
Between Second and Third Zebetite
To: 5
Between First and Second Zebetite
Requires: "Morph"
{
"or": [
"f_KilledZebetites2",
{
"obstaclesCleared": [
"f_KilledZebetites2"
]
}
]
}
{
"or": [
{
"and": [
"canTrickyJump",
"canMidAirMorph"
]
},
{
"and": [
"canCarefulJump",
"h_useSpringBall"
]
},
{
"and": [
{
"enemyDamage": {
"enemy": "Rinka",
"type": "contact",
"hits": 1
}
},
{
"or": [
"canTrivialMidAirMorph",
"canNeutralDamageBoost",
"h_useSpringBall",
"h_bombThings"
]
}
]
}
]
}
{
"enemyDamage": {
"enemy": "Mother Brain 1",
"type": "turret",
"hits": 1
}
} |
|
Requires: "Morph"
{
"or": [
"f_KilledZebetites4",
{
"obstaclesCleared": [
"f_KilledZebetites4"
]
}
]
}
{
"or": [
{
"and": [
"canTrickyJump",
"canMidAirMorph"
]
},
{
"and": [
"canDodgeWhileShooting",
"h_useSpringBall"
]
},
{
"and": [
{
"enemyDamage": {
"enemy": "Rinka",
"type": "contact",
"hits": 1
}
},
{
"or": [
"canTrivialMidAirMorph",
"canNeutralDamageBoost",
"h_useSpringBall",
"h_bombThings"
]
}
]
}
]
} |
