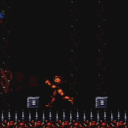
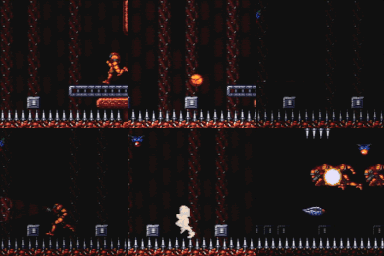
canXMode (Extreme)
Ability to enter XMode using spikes by unmorphing frame perfectly before knockback ends with X-Ray ready to activate. This can be used to charge a shinespark or to slowly move forward by armpumping. Walking into a solid tile while in XMode will crash the game.
Strats ()
|
Requires: "h_canXMode"
"h_XModeSpikeHit"
"h_XModeSpikeHit"
"canShinechargeMovement"
"canIframeSpikeJump"
{
"canShineCharge": {
"usedTiles": 33,
"openEnd": 2
}
}
Exit condition: {
"leaveShinecharged": {
"framesRemaining": 70
}
}
|
|
From: 1
Left Door
To: 1
Left Door
Jump into the large patch of thorns from below. Requires: "h_canXMode"
"h_XModeThornHit"
"h_XModeThornHit"
"h_XModeThornHit"
{
"canShineCharge": {
"usedTiles": 33,
"openEnd": 2
}
}
"canShinechargeMovement"
Exit condition: {
"leaveShinecharged": {
"framesRemaining": 50
}
}
|
|
From: 1
Top Right Door
To: 1
Top Right Door
Requires: {
"obstaclesCleared": [
"A"
]
}
"SpeedBooster"
"h_canXMode"
"h_XModeSpikeHit"
"h_XModeSpikeHit"
"canShinechargeMovement"
Exit condition: {
"leaveShinecharged": {
"framesRemaining": 100
}
}
|
|
Use the Spikes in the center of the room to build a Shinespark with X-Mode. There are sections of the room where using more complex movement can be used to save a Spike hit when X-Moding. Requires: "h_canXMode"
"h_XModeSpikeHit"
"h_XModeSpikeHit"
"canIframeSpikeJump"
{
"or": [
"SpaceJump",
"h_XModeSpikeHit"
]
}
{
"canShineCharge": {
"usedTiles": 33,
"openEnd": 2
}
}
{
"shinespark": {
"frames": 50
}
}
Exit condition: {
"leaveWithSpark": {}
}
|
|
Jump from the runway near the right door to bounce onto spikes for X-Mode. Store a spark in X-Mode and use that to shinepark across the room. Bumping a solid tile before activating X-Mode will remove dash state, preventing shinecharging. The left door must have been opened previously, in order to shinespark through it. Requires: {
"obstaclesCleared": [
"A"
]
}
"canMidairShinespark"
"h_canXMode"
{
"spikeHits": 1
}
{
"canShineCharge": {
"usedTiles": 33,
"openEnd": 2
}
}
{
"or": [
{
"shinespark": {
"frames": 146
}
},
{
"and": [
"SpaceJump",
{
"shinespark": {
"frames": 50
}
}
]
}
]
}
Exit condition: {
"leaveWithSpark": {}
}
|
|
Jump from the runway near the right door to bounce onto spikes for X-Mode. Store a spark in X-Mode and use that to shinepark across the room. Bumping a solid tile before activating X-Mode will remove dash state, preventing shinecharging. Requires: "canMidairShinespark"
"h_canXMode"
{
"spikeHits": 2
}
{
"canShineCharge": {
"usedTiles": 33,
"openEnd": 2
}
}
{
"shinespark": {
"frames": 146,
"excessFrames": 6
}
}
|
|
From: 2
Right Door
To: 2
Right Door
Store a spark in X-Mode and use that to leave with a shinecharge. Requires: "h_canXMode"
"h_XModeSpikeHit"
"h_XModeSpikeHit"
{
"canShineCharge": {
"usedTiles": 33,
"openEnd": 2
}
}
"canShinechargeMovement"
Exit condition: {
"leaveShinecharged": {
"framesRemaining": 40
}
}
|
|
Requires: "canXMode"
"canBounceBall"
"canLateralMidAirMorph"
"canShinechargeMovement"
{
"canShineCharge": {
"usedTiles": 33,
"openEnd": 2
}
}
"h_XModeSpikeHitLeniency"
"h_XModeSpikeHitLeniency"
{
"shinespark": {
"frames": 6
}
}
|
|
Jump into the spikes and try to bounce on the crumble blocks moving towards the door. Requires: "h_canXMode"
"h_XModeSpikeHit"
"h_XModeSpikeHit"
"h_XModeSpikeHit"
"SpeedBooster"
"HiJump"
{
"heatFrames": 480
}
Exit condition: {
"leaveShinecharged": {
"framesRemaining": 40
}
}
|
|
Jump into the spikes and try to bounce on the crumble blocks moving towards the door. Requires: "h_canXMode"
"h_XModeSpikeHit"
"h_XModeSpikeHit"
"h_XModeSpikeHit"
"canWalljump"
"SpeedBooster"
{
"heatFrames": 540
}
{
"shinespark": {
"frames": 5
}
}
Exit condition: {
"leaveWithSpark": {}
}
|
|
A short hop from the door can bounce on the crumbles. Just be careful of being pushed back onto the crumble blocks by the spikes. Requires: "h_canXMode"
"h_XModeSpikeHit"
"h_XModeSpikeHit"
"canTrickyJump"
"canMidairShinespark"
{
"canShineCharge": {
"usedTiles": 33,
"openEnd": 2
}
}
{
"heatFrames": 400
}
{
"shinespark": {
"frames": 12,
"excessFrames": 4
}
}
|
|
A short hop from the ledge can bounce on the crumbles and into the spikes. Just be careful of being pushed back onto the crumble blocks by the spikes. Requires: "h_canXMode"
"h_XModeSpikeHit"
"h_XModeSpikeHit"
"canTrickyJump"
"canIframeSpikeJump"
"canMidairShinespark"
{
"canShineCharge": {
"usedTiles": 33,
"openEnd": 2
}
}
{
"heatFrames": 480
}
{
"shinespark": {
"frames": 11,
"excessFrames": 4
}
}
|
|
From: 3
Bottom Horizontal Door
To: 3
Bottom Horizontal Door
Clear the Alcoon then bounce into the spike patch. Requires: "SpeedBooster"
"h_canXMode"
"h_XModeSpikeHit"
"h_XModeSpikeHit"
{
"or": [
{
"and": [
{
"enemyKill": {
"enemies": [
[
"Alcoon"
]
],
"explicitWeapons": [
"Plasma",
"Wave+Spazer",
"ScrewAttack",
"Missile",
"Super"
]
}
},
{
"heatFrames": 420
}
]
},
{
"and": [
{
"enemyKill": {
"enemies": [
[
"Alcoon"
]
],
"explicitWeapons": [
"Spazer",
"Wave",
"PseudoScrew",
"PowerBomb"
]
}
},
{
"heatFrames": 530
}
]
},
{
"and": [
{
"enemyKill": {
"enemies": [
[
"Alcoon"
]
],
"explicitWeapons": [
"PowerBeam"
]
}
},
{
"heatFrames": 620
}
]
}
]
}
Exit condition: {
"leaveShinecharged": {
"framesRemaining": 90
}
}
|
|
From: 2
Middle Left Door
To: 2
Middle Left Door
Requires: "h_canXMode"
"h_XModeSpikeHit"
"h_XModeSpikeHit"
"h_XModeSpikeHit"
"canIframeSpikeJump"
{
"canShineCharge": {
"usedTiles": 33,
"openEnd": 2
}
}
"canShinechargeMovement"
Exit condition: {
"leaveShinecharged": {
"framesRemaining": 100
}
}
|
|
Move in X-Mode until the Chozo Statue becomes visible and then jump before releasing XRay. Requires: "h_canXMode" "h_XModeSpikeHit" |
|
Jumping from the door and bouncing on the platform enemy works pretty well. Requires: "f_DefeatedPhantoon"
"h_canXMode"
"h_XModeSpikeHit"
"h_XModeSpikeHit"
"Gravity"
{
"canShineCharge": {
"usedTiles": 33,
"openEnd": 2
}
}
"canShinechargeMovement"
Exit condition: {
"leaveShinecharged": {
"framesRemaining": 80
}
}
|
|
From: 1
Right Door
To: 1
Right Door
Requires: "h_canXMode"
"h_XModeThornHit"
"h_XModeThornHit"
"SpaceJump"
"HiJump"
"canShinechargeMovementComplex"
{
"canShineCharge": {
"usedTiles": 33,
"openEnd": 2
}
}
{
"shinespark": {
"frames": 21
}
}
{
"or": [
{
"and": [
"f_DefeatedPhantoon",
"Gravity"
]
},
{
"and": [
{
"not": "f_DefeatedPhantoon"
},
"canRiskPermanentLossOfAccess"
]
}
]
}
Exit condition: {
"leaveWithSpark": {}
}
|
|
Requires: "h_canXMode"
"h_XModeSpikeHit"
"h_XModeSpikeHit"
{
"or": [
"h_XModeSpikeHit",
"canStationarySpinJump"
]
}
"Gravity"
"HiJump"
"SpaceJump"
"canShinechargeMovementComplex"
"canMidairShinespark"
{
"canShineCharge": {
"usedTiles": 33,
"openEnd": 2
}
}
{
"shinespark": {
"frames": 10
}
}
Exit condition: {
"leaveWithSpark": {}
}
|
|
Requires: "h_canXMode"
"h_XModeSpikeHit"
"h_XModeSpikeHit"
{
"or": [
"h_XModeSpikeHit",
"canStationarySpinJump"
]
}
"Gravity"
"canShinechargeMovementComplex"
{
"canShineCharge": {
"usedTiles": 33,
"openEnd": 2
}
}
Exit condition: {
"leaveShinecharged": {
"framesRemaining": 100
}
}
|
|
From: 2
Right Door
To: 4
Top Right Ledge Junction
Requires: "Gravity"
"h_canXMode"
"h_XModeSpikeHit"
"h_XModeSpikeHit"
{
"or": [
"h_XModeSpikeHit",
"canStationarySpinJump"
]
}
{
"canShineCharge": {
"usedTiles": 33,
"openEnd": 2
}
}
{
"shinespark": {
"frames": 25,
"excessFrames": 5
}
}
|

