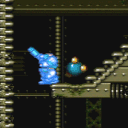
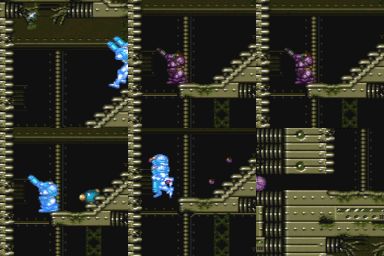
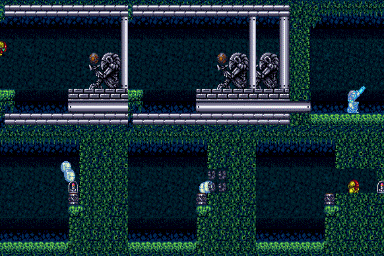
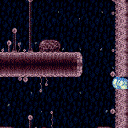
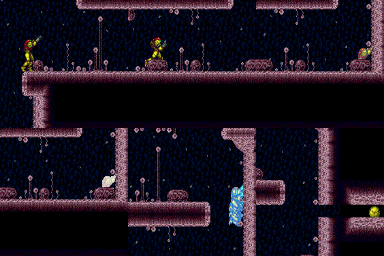
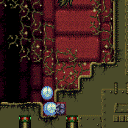
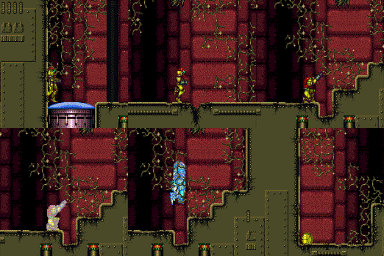
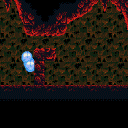
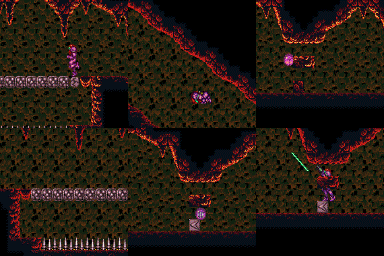
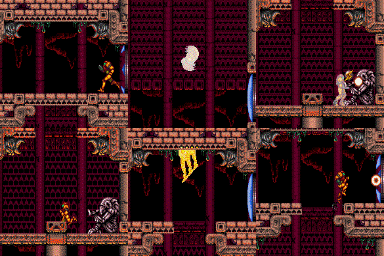
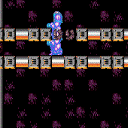
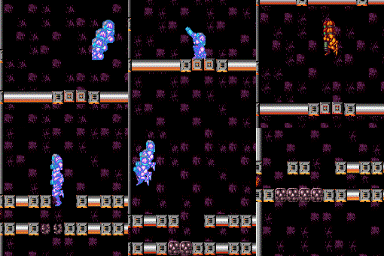
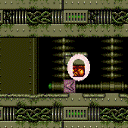
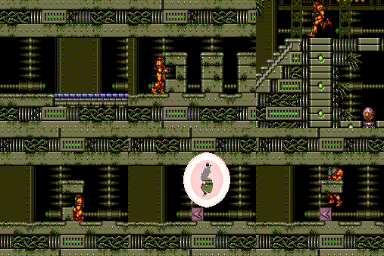
canTemporaryBlue (Very Hard)
Maintaining the desctructive capabilities of speedbooster after running has stopped. Used to fall on top of breakable bomb blocks or enemies. Performed by storing a spark while falling off a ledge, holding angle and crouching after storing a spark, or unmorphing.
Strats ()
|
From: 1
Top Left Door
To: 6
Top Junction with Temporary Blue (Right of Morph Tunnel)
Use Springball on the spikes to cross the room with a Speedball. It helps to not be at full run speed when bouncing through the spike pit, but is still possible with very tight jumps. Then bounce into the Morph tunnel and use Springball to bounce all of the way through. Unmorphing before the Morph tunnel to better control the bounce can help. Entrance condition: {
"comeInShinecharging": {
"length": 3,
"openEnd": 1
}
}
Requires: "canSpeedball"
"canTemporaryBlue"
"canCarefulJump"
"canSpringBallBounce"
{
"or": [
"canTrickyDashJump",
"canChainTemporaryBlue"
]
}
{
"spikeHits": 1
}
|
|
Entrance condition: {
"comeInShinecharging": {
"length": 2,
"openEnd": 0
}
}
Requires: "canTemporaryBlue" "canSpringBallBounce" |
|
Breaking the side blocks can be done with a shinespark, or by moving into them once past the solid blocks. Entrance condition: {
"comeInShinecharging": {
"length": 3,
"openEnd": 1
}
}
Requires: "canTemporaryBlue" Clears obstacles: A |
|
Bring temporary blue from the right side door all the way to the missile location using Springball, SpaceJump, or Morph-UnMorphs. Entrance condition: {
"comeInShinecharging": {
"length": 1,
"openEnd": 1
}
}
Requires: "canTemporaryBlue"
"canInsaneJump"
{
"or": [
"canChainTemporaryBlue",
{
"and": [
"canSpeedball",
"canSpringBallBounce",
"canSlowShortCharge"
]
},
{
"and": [
"canBlueSpaceJump",
"canMockball",
"canSlowShortCharge"
]
}
]
}
|
|
From: 2
Right Door
To: 4
Middle Junction (Left of Morph Tunnel)
A quick jump morph from the top of the slope will bounce into the tunnel and avoid acid damage. Entrance condition: {
"comeInShinecharging": {
"length": 4,
"openEnd": 0
}
}
Requires: "canTemporaryBlue"
"canLateralMidAirMorph"
{
"or": [
"canChainTemporaryBlue",
"can4HighMidAirMorph"
]
}
|
|
From: 2
Right Door
To: 4
Middle Junction (Left of Morph Tunnel)
Entrance condition: {
"comeInShinecharging": {
"length": 5,
"openEnd": 0
}
}
Requires: "canTemporaryBlue"
"canLateralMidAirMorph"
{
"acidFrames": 200
}
|
|
Entrance condition: {
"comeInShinecharging": {
"length": 3,
"openEnd": 0
}
}
Requires: "Morph" "canTemporaryBlue" Clears obstacles: A, B |
|
Entrance condition: {
"comeInShinecharging": {
"length": 1,
"openEnd": 0
}
}
Requires: "canTemporaryBlue" "canSpringBallBounce" Clears obstacles: A |
|
Use the upper platform to run and gain temporary blue. Requires: {
"canShineCharge": {
"usedTiles": 17,
"openEnd": 1
}
}
"canTemporaryBlue"
"canSpringBallBounce"
Clears obstacles: A |
|
From: 1
Left Door
To: 4
Right Hidden Item
Notable: true Speedball through the morphtunnel and use it to break the bomb blocks in front of the hidden Missile location. This can be done using springball, or by unmorphing and using Temporary Blue to bounce through the bomb blocks. Entrance condition: {
"comeInSpeedballing": {
"runway": {
"length": 4,
"openEnd": 1
}
}
}
Requires: "canSpeedball"
"canTrickyJump"
{
"or": [
"canTemporaryBlue",
"h_canUseSpringBall"
]
}
|
|
Entrance condition: {
"comeInShinecharging": {
"length": 5,
"steepUpTiles": 1,
"openEnd": 0
}
}
Requires: "canTemporaryBlue" "canSpringBallBounce" |
|
From: 13
Central Junction
To: 7
Right Side - Bottom Middle Door (Behind the Super Block)
Notable: true Stop with Temporary Blue in front of the bomb blocks then jump and bounce into the morph tunnel to clear them. Requires: "canTrickyJump"
"canTemporaryBlue"
"canLateralMidAirMorph"
{
"canShineCharge": {
"usedTiles": 22,
"openEnd": 2
}
}
"canOffScreenSuperShot"
Clears obstacles: F |
|
From: 5
Kihunter Junction
To: 3
Top Right Door
Notable: true A very low horizontal speed is needed to drop down and break the block without hitting the corner to the left or the block above the bomb block. Or with Temporary Blue, Samus can bounce into the bomb block. Requires: "Morph"
{
"obstaclesCleared": [
"C"
]
}
{
"obstaclesNotCleared": [
"D"
]
}
{
"or": [
{
"and": [
"canSlowShortCharge",
"canSpeedball",
{
"canShineCharge": {
"usedTiles": 17,
"openEnd": 0
}
}
]
},
{
"and": [
"canTemporaryBlue",
"canLateralMidAirMorph",
{
"canShineCharge": {
"usedTiles": 32,
"openEnd": 1
}
}
]
}
]
}
Clears obstacles: B |
|
From: 2
Bottom Left Door
To: 3
Right Vertical Door
Entrance condition: {
"comeInShinecharging": {
"length": 3,
"openEnd": 0
}
}
Requires: "canTemporaryBlue" "canLateralMidAirMorph" |
|
From: 1
Left Door
To: 1
Left Door
Notable: true Use SpeedBooster to construct a structure for Moondancing that has 1 chest height block and 1 head height block to the right of it and no other Speed blocks. Crystal Flash below the lower block, exactly pixel aligned with its right side, to standup and then begin Moondancing. After Samus sinks through the floor tiles, use Grapple to return to a standing position and count an additional 145 moonfalls. Then use Grapple to return to a crouch and wiggle right and Turn-Around Aim Cancel to escape to the right. Finally, use SpeedBooster if needed to break the remaining Speed blocks and reach the door. Requires: "h_canCrystalFlash" "canTrickyJump" "canTurnaroundAimCancel" "canTemporaryBlue" "canExtendedMoondance" "canSpeedball" Exit condition: {
"leaveWithStoredFallSpeed": {
"fallSpeedInTiles": 2
}
}
|
|
From: 1
Left Door
To: 1
Left Door
Notable: true Use SpeedBooster to construct a structure for Moondancing that has 1 chest height block and 1 head height block to the right of it and no other Speed blocks. Crystal Flash below the lower block, exactly pixel aligned with its right side, to standup and then begin Moondancing. After Samus sinks through the bottom tile, it is possible to use Grapple to return to a crouch and wiggle right and then Turn-Around Aim Cancel to escape to the right. Without Grapple, count to 174 Moonfalls and delicately Moonfall so as to remain crouched and then wiggle to the right. Finally, use SpeedBooster if needed to break the remaining Speed blocks and reach the door. Requires: "h_canCrystalFlash" "canTrickyJump" "canTurnaroundAimCancel" "canTemporaryBlue" "canMoondance" "canSpeedball" Exit condition: {
"leaveWithStoredFallSpeed": {
"fallSpeedInTiles": 1
}
}
|
|
From: 1
Left Door
To: 2
Right Door
Notable: true Use SpeedBooster to construct a structure for Moondancing that has 1 chest height block and 1 head height block to the right of it and no other Speed blocks. Crystal Flash below the lower block, exactly pixel aligned with its right side, to standup and then begin Moondancing. After Samus sinks through the floor tiles, use Grapple to return to a standing position and count an additional 145 moonfalls. Then use Grapple to return to a crouch and wiggle right and Turn-Around Aim Cancel to escape to the right. Finally, use SpeedBooster if needed to break the remaining Speed blocks and reach the door. Requires: "h_canCrystalFlash" "canTrickyJump" "canTurnaroundAimCancel" "canTemporaryBlue" "canExtendedMoondance" "canSpeedball" Exit condition: {
"leaveWithStoredFallSpeed": {
"fallSpeedInTiles": 2
}
}
|
|
From: 1
Left Door
To: 2
Right Door
Notable: true Use SpeedBooster to construct a structure for Moondancing that has 1 chest height block and 1 head height block to the right of it and no other Speed blocks. Crystal Flash below the lower block, exactly pixel aligned with its right side, to standup and then begin Moondancing. After Samus sinks through the bottom tile, it is possible to use Grapple to return to a crouch and wiggle right and then Turn-Around Aim Cancel to escape to the right. Without Grapple, count to 174 Moonfalls and delicately Moonfall so as to remain crouched and then wiggle to the right. Finally, use SpeedBooster if needed to break the remaining Speed blocks and reach the door. Requires: "h_canCrystalFlash" "canTrickyJump" "canTurnaroundAimCancel" "canTemporaryBlue" "canMoondance" "canSpeedball" Exit condition: {
"leaveWithStoredFallSpeed": {
"fallSpeedInTiles": 1
}
}
|
|
From: 6
Top Right Door
To: 3
Bottom Left Door
Slide off the ledge while gaining a shinecharge, and hold forward to clear both platforms, killing the Sova with temporary blue. Weave down the left side of the room, avoiding landing on any platforms. Entrance condition: {
"comeInShinecharging": {
"length": 4,
"openEnd": 1
}
}
Requires: "canShinechargeMovementTricky" "canTemporaryBlue" Exit condition: {
"leaveShinecharged": {
"framesRemaining": 30
}
}
|
|
From: 2
Far Left Door
To: 2
Far Left Door
Notable: true Use SpeedBooster to construct a structure for Moondancing that has 1 chest height block and 1 head height block to the right of it and no other Speed blocks. Crystal Flash below the lower block, exactly pixel aligned with its right side, to standup and then begin Moondancing. After Samus sinks through the floor tiles, use Grapple to return to a standing position and count an additional 145 moonfalls. Then use Grapple to return to a crouch and wiggle right and Turn-Around Aim Cancel to escape to the right. Finally, use SpeedBooster if needed to break the remaining Speed blocks and reach the door. Requires: "h_heatProof" "SpeedBooster" "h_canCrystalFlash" "canTrickyJump" "canTurnaroundAimCancel" "canTemporaryBlue" "canExtendedMoondance" "canSpeedball" Exit condition: {
"leaveWithStoredFallSpeed": {
"fallSpeedInTiles": 2
}
}
|
|
From: 2
Far Left Door
To: 2
Far Left Door
Notable: true Use SpeedBooster to construct a structure for Moondancing that has 1 chest height block and 1 head height block to the right of it and no other Speed blocks. Crystal Flash below the lower block, exactly pixel aligned with its right side, to standup and then begin Moondancing. After Samus sinks through the bottom tile, it is possible to use Grapple to return to a crouch and wiggle right and then Turn-Around Aim Cancel to escape to the right. Without Grapple, count to 174 Moonfalls and delicately Moonfall so as to remain crouched and then wiggle to the right. Finally, use SpeedBooster if needed to break the remaining Speed blocks and reach the door. Requires: "h_heatProof" "SpeedBooster" "h_canCrystalFlash" "canTrickyJump" "canTurnaroundAimCancel" "canTemporaryBlue" "canMoondance" "canSpeedball" Exit condition: {
"leaveWithStoredFallSpeed": {
"fallSpeedInTiles": 1
}
}
|
|
Screw Attack Room Temporary Blue Descent and Shinespark Escape Middle Door Part 1 (Expert)
Screw Attack Room
From: 2
Middle Right Door
To: 4
Item
Notable: true Entrance condition: {
"comeInShinecharging": {
"length": 0,
"openEnd": 1
}
}
Requires: "canTemporaryBlue"
"canPrepareForNextRoom"
{
"heatFrames": 75
}
Clears obstacles: B, C |
|
This expects the more controlled Temporary Blue to fall though the blocks, not storing a shinecharge through the door. Entrance condition: {
"comeInShinecharging": {
"length": 0,
"openEnd": 1
}
}
Requires: "canTemporaryBlue"
"canPrepareForNextRoom"
{
"heatFrames": 75
}
Clears obstacles: B |
|
Screw Attack Room Temporary Blue Descent and Shinespark Escape Top Door Part 1 (Expert)
Screw Attack Room
From: 3
Top Right Door
To: 4
Item
Notable: true Simultaneously store a shinespark and break through the bomb blocks down to the Screw Attack item location. Entrance condition: {
"comeInShinecharging": {
"length": 3,
"openEnd": 1
}
}
Requires: "canTemporaryBlue"
"canShinechargeMovementTricky"
{
"heatFrames": 130
}
Clears obstacles: A, B, C |
|
This expects the more controlled Temporary Blue to fall though the blocks, not storing a shinecharge on the first breakable block. Entrance condition: {
"comeInShinecharging": {
"length": 12,
"openEnd": 0
}
}
Requires: "canTemporaryBlue"
"canXRayTurnaround"
{
"heatFrames": 285
}
Clears obstacles: A, B |
|
This expects the more controlled Temporary Blue to fall though the blocks, not storing a shinecharge on the first breakable block. Entrance condition: {
"comeInShinecharging": {
"length": 3,
"openEnd": 0
}
}
Requires: "canTemporaryBlue"
{
"heatFrames": 240
}
Clears obstacles: A, B |
|
From: 2
Top Right Door
To: 4
Junction Below Bomb Blocks
Notable: true Carry Temporary Blue through the top door of Mickey Mouse to break the left side of the bomb blocks. There is a small frame window where Samus can soft unmorph on the crumble blocks and jump again while retaining temporary blue. Entrance condition: {
"comeInWithTemporaryBlue": {}
}
Requires: "h_canNavigateHeatRooms"
{
"obstaclesNotCleared": [
"A"
]
}
"canPrepareForNextRoom"
"canChainTemporaryBlue"
"canInsaneJump"
"canCrumbleJump"
{
"heatFrames": 300
}
Clears obstacles: B |
|
From: 2
Top Right Door
To: 4
Junction Below Bomb Blocks
Carry Temporary Blue through the top door of Mickey Mouse to break the left side of the bomb blocks. Morph while falling through the shot block to bounce on the crumble blocks towards the morph tunnel. Then unmorph near the wall to fall straight down with temporary blue, if needed. Entrance condition: {
"comeInWithTemporaryBlue": {}
}
Requires: "h_canNavigateHeatRooms"
{
"obstaclesNotCleared": [
"A"
]
}
"canPrepareForNextRoom"
"canChainTemporaryBlue"
"h_canUseSpringBall"
{
"heatFrames": 300
}
Clears obstacles: B |
|
From: 1
Top Left Door
To: 1
Top Left Door
Notable: true Use SpeedBooster to construct a structure for Moondancing that has 1 chest height block and 1 head height block to the right of it and no other Speed blocks. Crystal Flash below the lower block, exactly pixel aligned with its right side, to standup and then begin Moondancing. After Samus sinks through the floor tiles, use Grapple to return to a standing position and count an additional 145 moonfalls. Then use Grapple to return to a crouch and wiggle right and Turn-Around Aim Cancel to escape to the right. Finally, shortcharge to break the remaining Speed blocks and reach the door. Requires: "h_canCrystalFlash"
"canTrickyJump"
"canTurnaroundAimCancel"
"canTemporaryBlue"
"canExtendedMoondance"
"canSpeedball"
"Grapple"
{
"canShineCharge": {
"openEnd": 0,
"usedTiles": 16,
"steepDownTiles": 4
}
}
Exit condition: {
"leaveWithStoredFallSpeed": {
"fallSpeedInTiles": 2
}
}
|
|
From: 1
Top Left Door
To: 1
Top Left Door
Notable: true Use SpeedBooster to construct a structure for Moondancing that has 1 chest height block and 1 head height block to the right of it and no other Speed blocks. Crystal Flash below the lower block, exactly pixel aligned with its right side, to standup and then begin Moondancing. After Samus sinks through the bottom tile, it is possible to use Grapple to return to a crouch and wiggle right and then Turn-Around Aim Cancel to escape to the right. Without Grapple, count to 174 Moonfalls and delicately Moonfall so as to remain crouched and then wiggle to the right. Finally, shortcharge to break the remaining Speed blocks and reach the door. Requires: "h_canCrystalFlash"
"canTrickyJump"
"canTurnaroundAimCancel"
"canTemporaryBlue"
"canSpeedball"
"canMoondance"
{
"canShineCharge": {
"openEnd": 0,
"usedTiles": 16,
"steepDownTiles": 4
}
}
Exit condition: {
"leaveWithStoredFallSpeed": {
"fallSpeedInTiles": 1
}
}
|
|
From: 1
Top Left Door
To: 5
Top Right Item (locked)
Notable: true Use SpeedBooster to construct a structure for Moondancing that has 1 chest height block and 1 head height block to the right of it and no other Speed blocks. Crystal Flash below the lower block, exactly pixel aligned with its right side, to standup and then begin Moondancing. After Samus sinks through the bottom tile, it is possible to use Grapple to return to a crouch and wiggle right and then Turn-Around Aim Cancel to escape to the right. Without Grapple, count to 174 Moonfalls and delicately Moonfall so as to remain crouched and then wiggle to the right. The Camera will not follow Samus after clipping. Requires: "h_canCrystalFlash"
"canTrickyJump"
"canTurnaroundAimCancel"
"canTemporaryBlue"
"canMoondance"
"canSpeedball"
{
"canShineCharge": {
"openEnd": 0,
"usedTiles": 16,
"steepDownTiles": 4
}
}
Clears obstacles: B |
|
From: 4
Bottom Chozo Item (locked)
To: 3
Bottom Left Door
Use Temporary Blue to bounce into the Morph Tunnel with temp blue then continue to the bomb block using SpringBall. Just left of center of the pit is a good place to bounce for entering the tunnel. Requires either a tight shortcharge or clearing the power bomb blocks to open up more runway. Requires: {
"obstaclesNotCleared": [
"B"
]
}
"h_canUseSpringBall"
"canTemporaryBlue"
"canCarefulJump"
{
"or": [
{
"and": [
"f_DefeatedPhantoon",
{
"canShineCharge": {
"usedTiles": 16,
"openEnd": 0
}
}
]
},
{
"and": [
{
"obstaclesCleared": [
"A"
]
},
{
"canShineCharge": {
"usedTiles": 33,
"openEnd": 2
}
},
{
"or": [
"f_DefeatedPhantoon",
"canMockball"
]
}
]
}
]
}
|
|
From: 3
Bottom Left Door
To: 6
Bottom Right Door
Entrance condition: {
"comeInShinecharging": {
"length": 12,
"openEnd": 0
}
}
Requires: "canTemporaryBlue" "canSpringBallBounce" Clears obstacles: A |
|
Wrecked Ship Main Shaft Spooky Missiles Temporary Blue with Frozen Enemy Runway (Insane)
Wrecked Ship Main Shaft
From: 3
Bottom Left Door
To: 8
Item
Notable: true Use a frozen Atomic or Covern to extend the runway in front of the Spooky Missiles bomb block, then use temporary blue into a morph ball bounce to break it. Position the enemy horizontally centered in the hole to extend the runway all the way to the wall. Positioning a Covern is tricky. One way to set this up is with Space Jump. Perform Space Jumps half way between the desired Covern position and the ceiling until the Covern spawns in the correct position. Requires: "h_canFrozenEnemyRunway"
{
"or": [
"f_DefeatedPhantoon",
{
"and": [
"SpaceJump",
"h_canTrickyFrozenEnemyRunway"
]
}
]
}
"canSlowShortCharge"
{
"canShineCharge": {
"usedTiles": 14,
"openEnd": 0,
"steepUpTiles": 3
}
}
"canTemporaryBlue"
"Morph"
|
|
Entrance condition: {
"comeInShinecharging": {
"length": 11,
"openEnd": 1,
"steepDownTiles": 7
}
}
Requires: "canTemporaryBlue" "canLateralMidAirMorph" Clears obstacles: C |
|
Shinecharging up the stairs gives a longer effective runway than shinecharging down them. A frozen Atomic (or Covern) can be used for more runway. Requires: "canTemporaryBlue"
"canLateralMidAirMorph"
{
"or": [
{
"canShineCharge": {
"usedTiles": 11,
"openEnd": 2,
"steepUpTiles": 3
}
},
{
"and": [
"f_DefeatedPhantoon",
"h_canFrozenEnemyRunway",
{
"canShineCharge": {
"usedTiles": 13,
"openEnd": 1,
"steepUpTiles": 3
}
}
]
}
]
}
Clears obstacles: C |
|
From: 6
Bottom Right Door
To: 3
Bottom Left Door
Entrance condition: {
"comeInShinecharging": {
"length": 2,
"openEnd": 0
}
}
Requires: "canTemporaryBlue" "canSpringBallBounce" Clears obstacles: A |
|
From: 8
Item
To: 3
Bottom Left Door
Requires: {
"not": "f_DefeatedPhantoon"
}
"canRiskPermanentLossOfAccess"
"canTemporaryBlue"
"can4HighMidAirMorph"
"canSpringBallBounce"
{
"canShineCharge": {
"usedTiles": 16,
"openEnd": 0,
"steepUpTiles": 4
}
}
Clears obstacles: C |
|
Fall through the speed blocks from above with Temporary Blue, or kill the pirates from above with speed echoes. Requires: {
"enemyDamage": {
"enemy": "Tourian Space Pirate (all)",
"type": "contact",
"hits": 1
}
}
{
"or": [
"canTemporaryBlue",
{
"and": [
"canUseSpeedEchoes",
{
"canShineCharge": {
"usedTiles": 33,
"openEnd": 2
}
},
{
"shinespark": {
"frames": 2,
"excessFrames": 2
}
}
]
}
]
}
|
