canStutterWaterShineCharge (Expert)
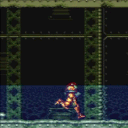
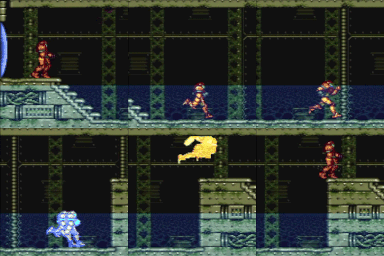
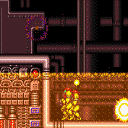
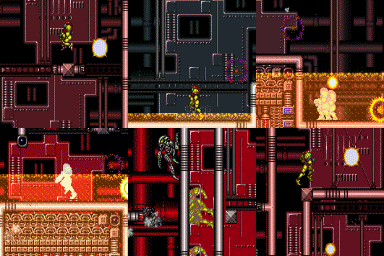
Performing a canWaterShineCharge in a shorter runway by using a stutter that is greatly extended by the water slowdown. Perform a stutter shortly before entering water, typically through a door transition, by briefly releasing and then repressing forward before, but as close to, the transition as possible while continuing the dash. This carries the stutter into the water where Samus will run in place while building the shinecharge, Allowing Samus to enter the water with little momentum. After entering the water, dash should be held the entire time. With Gravity Suit it is possible to do this without leaving water, with or without a room transition, by removing the suit just after stuttering. The same technique is applicable with acid.
Dependencies: canWaterShineCharge, canSuitlessMaridia
Strats ()
|
From: 1
Left Door
To: 1
Left Door
Start at least 2 tiles from the water line, and stutter just before entering the water in order to charge a spark in room. Requires: "f_DefeatedPhantoon"
"canStutterWaterShineCharge"
"canShinechargeMovementTricky"
"canWalljump"
{
"or": [
"canSpaceJumpWaterBounce",
"HiJump"
]
}
{
"canShineCharge": {
"usedTiles": 33,
"openEnd": 2
}
}
{
"shinespark": {
"frames": 29
}
}
Exit condition: {
"leaveWithSpark": {}
}
Unlocks doors: {"types":["ammo"],"requires":[]}
|
|
From: 1
Left Door
To: 1
Left Door
Start at least 2 tiles from the water line, and stutter just before entering the water in order to charge a spark in room. Requires: "f_DefeatedPhantoon"
"canStutterWaterShineCharge"
"canShinechargeMovementComplex"
{
"canShineCharge": {
"usedTiles": 33,
"openEnd": 2
}
}
{
"shinespark": {
"frames": 20
}
}
Exit condition: {
"leaveWithSpark": {
"position": "bottom"
}
}
Unlocks doors: {"types":["ammo"],"requires":[]}
|
|
Start at least 2 tiles from the water line, and stutter just before entering the water in order to charge a spark in room. Requires: "canStutterWaterShineCharge"
{
"canShineCharge": {
"usedTiles": 33,
"openEnd": 2
}
}
{
"shinespark": {
"frames": 7,
"excessFrames": 2
}
}
|
|
From: 1
Left Door
To: 2
Right Door
Start at least 2 tiles from the water line, and stutter just before entering the water in order to charge a spark in room. Requires: "f_DefeatedPhantoon"
"canStutterWaterShineCharge"
"canShinechargeMovementComplex"
"canWalljump"
"HiJump"
{
"canShineCharge": {
"usedTiles": 33,
"openEnd": 2
}
}
Exit condition: {
"leaveShinecharged": {
"framesRemaining": 75
}
}
Unlocks doors: {"types":["ammo"],"requires":[]}
|
|
From: 1
Left Door
To: 2
Right Door
Start at least 2 tiles from the water line, and stutter just before entering the water in order to charge a spark in room. Requires: "f_DefeatedPhantoon"
"canStutterWaterShineCharge"
"canShinechargeMovementComplex"
"canWalljump"
"canSpaceJumpWaterBounce"
{
"canShineCharge": {
"usedTiles": 33,
"openEnd": 2
}
}
Exit condition: {
"leaveShinecharged": {
"framesRemaining": 30
}
}
Unlocks doors: {"types":["ammo"],"requires":[]}
|
|
From: 1
Left Door
To: 1
Left Door
Entrance condition: {
"comeInRunning": {
"speedBooster": true,
"minTiles": 2
}
}
Requires: "canSuitlessMaridia" "canShinechargeMovementTricky" "canStutterWaterShineCharge" Exit condition: {
"leaveShinecharged": {
"framesRemaining": 10
}
}
Unlocks doors: {"types":["super"],"requires":[]}
{"types":["missiles","powerbomb"],"requires":["never"]}
|
|
From: 1
Left Door
To: 1
Left Door
Entrance condition: {
"comeInRunning": {
"speedBooster": true,
"minTiles": 2
}
}
Requires: "canSuitlessMaridia"
"canShinechargeMovementComplex"
"canStutterWaterShineCharge"
{
"shinespark": {
"frames": 3
}
}
Exit condition: {
"leaveWithSpark": {}
}
Unlocks doors: {"types":["super"],"requires":[]}
{"types":["missiles","powerbomb"],"requires":["never"]}
|
|
From: 1
Left Door
To: 2
Right Door
Notable: true Requires a very precise stutter where Samus is moving slow enough while near the gate, so she can shoot it and it is fully open before she collides with it. A runway in the adjacent room of 2 tiles works best - with a longer runway, Samus will be moving too fast. Entrance condition: {
"comeInRunning": {
"speedBooster": true,
"minTiles": 1.4375
}
}
Requires: "canSuitlessMaridia"
"canShinechargeMovementComplex"
"canStutterWaterShineCharge"
"canDodgeWhileShooting"
{
"ammo": {
"type": "Super",
"count": 1
}
}
Exit condition: {
"leaveShinecharged": {
"framesRemaining": 70
}
}
Unlocks doors: {"types":["super"],"requires":[]}
{"types":["missiles","powerbomb"],"requires":["never"]}
|
|
From: 3
Middle Right Door
To: 3
Middle Right Door
Entrance condition: {
"comeInRunning": {
"speedBooster": true,
"minTiles": 1
}
}
Requires: "canStutterWaterShineCharge"
"canShinechargeMovementComplex"
{
"canShineCharge": {
"usedTiles": 33,
"openEnd": 2
}
}
{
"shinespark": {
"frames": 19
}
}
Exit condition: {
"leaveWithSpark": {
"position": "bottom"
}
}
Unlocks doors: {"types":["super"],"requires":[]}
{"types":["missiles","powerbomb"],"requires":["never"]}
|
|
From: 3
Middle Right Door
To: 3
Middle Right Door
Entrance condition: {
"comeInRunning": {
"speedBooster": true,
"minTiles": 2
}
}
Requires: "canStutterWaterShineCharge"
"canShinechargeMovementComplex"
{
"canShineCharge": {
"usedTiles": 33,
"openEnd": 2
}
}
{
"or": [
{
"shinespark": {
"frames": 9
}
},
{
"and": [
"canShinechargeMovementTricky",
{
"shinespark": {
"frames": 2
}
}
]
}
]
}
Exit condition: {
"leaveWithSpark": {}
}
Unlocks doors: {"types":["super"],"requires":[]}
{"types":["missiles","powerbomb"],"requires":["never"]}
|
|
From: 3
Middle Right Door
To: 3
Middle Right Door
Entrance condition: {
"comeInRunning": {
"speedBooster": true,
"minTiles": 1
}
}
Requires: "canStutterWaterShineCharge"
"canShinechargeMovementTricky"
{
"canShineCharge": {
"usedTiles": 33,
"openEnd": 2
}
}
{
"shinespark": {
"frames": 11
}
}
Exit condition: {
"leaveWithSpark": {}
}
Unlocks doors: {"types":["super"],"requires":[]}
{"types":["missiles","powerbomb"],"requires":["never"]}
|
|
From: 3
Middle Right Door
To: 6
Speed Blocked Item
This can be done with only a door-frame runway in the adjacent room. Entrance condition: {
"comeInRunning": {
"speedBooster": true,
"minTiles": 1
}
}
Requires: "canStutterWaterShineCharge"
"canMidairShinespark"
{
"canShineCharge": {
"usedTiles": 33,
"openEnd": 2
}
}
{
"shinespark": {
"frames": 62,
"excessFrames": 2
}
}
Clears obstacles: A |
|
From: 3
Middle Right Door
To: 9
Junction Below Speed Blocks
This can be done with only a door-frame runway in the adjacent room. Entrance condition: {
"comeInRunning": {
"speedBooster": true,
"minTiles": 1
}
}
Requires: "canStutterWaterShineCharge"
"canMidairShinespark"
{
"canShineCharge": {
"usedTiles": 33,
"openEnd": 2
}
}
{
"shinespark": {
"frames": 35,
"excessFrames": 3
}
}
|
|
From: 4
Top Right Door
To: 6
Speed Blocked Item
Bring a Shinecharge from the top door to the speed blocks below the Missile item location. Be especially mindfull of the aquatic life during the descent. Line up directly below the speed blocks when jumping up, especially if using a SpringBall jump. Entrance condition: {
"comeInRunning": {
"speedBooster": true,
"minTiles": 1.4375
}
}
Requires: "canChainTemporaryBlue"
"canXRayTurnaround"
"canStutterWaterShineCharge"
{
"or": [
"Gravity",
{
"and": [
"canSuitlessMaridia",
"HiJump"
]
},
{
"and": [
"canSuitlessMaridia",
"canSpringBallJumpMidAir"
]
}
]
}
|
|
From: 1
Left Door
To: 1
Left Door
Entrance condition: {
"comeInRunning": {
"speedBooster": true,
"minTiles": 2
}
}
Requires: "canStutterWaterShineCharge"
"canShinechargeMovementComplex"
{
"canShineCharge": {
"usedTiles": 33,
"openEnd": 2
}
}
{
"or": [
{
"shinespark": {
"frames": 9
}
},
{
"and": [
"canShinechargeMovementTricky",
{
"shinespark": {
"frames": 2
}
}
]
}
]
}
Exit condition: {
"leaveWithSpark": {}
}
Unlocks doors: {"types":["super"],"requires":[]}
{"types":["missiles","powerbomb"],"requires":["never"]}
|
|
Entrance condition: {
"comeInRunning": {
"speedBooster": true,
"minTiles": 2
}
}
Requires: "canStutterWaterShineCharge"
"canShinechargeMovement"
{
"canShineCharge": {
"usedTiles": 33,
"openEnd": 2
}
}
{
"or": [
{
"shinespark": {
"frames": 61,
"excessFrames": 7
}
},
{
"and": [
"canMidairShinespark",
{
"shinespark": {
"frames": 56,
"excessFrames": 7
}
}
]
},
{
"and": [
"canMidairShinespark",
"HiJump",
{
"shinespark": {
"frames": 52,
"excessFrames": 7
}
}
]
}
]
}
Clears obstacles: B |
|
From: 1
Left Door
To: 3
Hidden Right Item
Requires at least 2 tiles in the adjacent room. Entrance condition: {
"comeInRunning": {
"speedBooster": true,
"minTiles": 2
}
}
Requires: "canStutterWaterShineCharge"
"canShinechargeMovement"
{
"canShineCharge": {
"usedTiles": 33,
"openEnd": 2
}
}
{
"or": [
{
"shinespark": {
"frames": 47,
"excessFrames": 5
}
},
{
"and": [
"canMidairShinespark",
{
"shinespark": {
"frames": 44,
"excessFrames": 5
}
}
]
},
{
"and": [
"canMidairShinespark",
"HiJump",
{
"shinespark": {
"frames": 41,
"excessFrames": 5
}
}
]
}
]
}
|
|
Entrance condition: {
"comeInRunning": {
"speedBooster": true,
"minTiles": 2.4375
}
}
Requires: "canSuitlessMaridia"
"h_canUsePowerBombs"
"canStutterWaterShineCharge"
"canShinechargeMovement"
{
"canShineCharge": {
"usedTiles": 33,
"openEnd": 2
}
}
{
"shinespark": {
"frames": 25,
"excessFrames": 11
}
}
Clears obstacles: A |
|
From: 2
Bottom Left Door
To: 2
Bottom Left Door
Entrance condition: {
"comeInRunning": {
"speedBooster": true,
"minTiles": 2
}
}
Requires: "canSuitlessMaridia"
"canShinechargeMovementComplex"
"canStutterWaterShineCharge"
{
  "canShineCharge": {
    "usedTiles": 33,
    "openEnd": 2
  }
}
{
"or": [
{
"shinespark": {
"frames": 12
}
},
{
"and": [
"canShinechargeMovementTricky",
{
"shinespark": {
"frames": 3
}
}
]
}
]
}
Exit condition: {
"leaveWithSpark": {}
}
Unlocks doors: {"types":["super"],"requires":[]}
{"types":["missiles","powerbomb"],"requires":["never"]}
|
|
From: 4
Right Door
To: 1
Left Door
Entrance condition: {
"comeInRunning": {
"speedBooster": true,
"minTiles": 2
}
}
Requires: "canStutterWaterShineCharge" Clears obstacles: A |
|
From: 4
Right Door
To: 4
Right Door
Entrance condition: {
"comeInRunning": {
"speedBooster": true,
"minTiles": 2
}
}
Requires: "canStutterWaterShineCharge"
"canShinechargeMovementComplex"
{
"or": [
{
"shinespark": {
"frames": 12
}
},
{
"and": [
"canShinechargeMovementTricky",
{
"shinespark": {
"frames": 3
}
}
]
}
]
}
Exit condition: {
"leaveWithSpark": {}
}
Unlocks doors: {"types":["missiles","super"],"requires":[]}
{"types":["powerbomb"],"requires":["never"]}
|
|
From: 4
Right Door
To: 6
Junction Right of Morph Passage
Shinespark diagonally over the zoa pit or run through the speed blocks and shinespark after turning around. Entrance condition: {
"comeInRunning": {
"speedBooster": true,
"minTiles": 2
}
}
Requires: "Morph"
"canStutterWaterShineCharge"
{
"shinespark": {
"frames": 8
}
}
|
|
Entrance condition: {
"comeInRunning": {
"speedBooster": true,
"minTiles": 2
}
}
Requires: "canStutterWaterShineCharge"
"canShinechargeMovementComplex"
{
"canShineCharge": {
"usedTiles": 33,
"openEnd": 2
}
}
{
"or": [
{
"shinespark": {
"frames": 12
}
},
{
"and": [
"canShinechargeMovementTricky",
{
"shinespark": {
"frames": 3
}
}
]
}
]
}
Exit condition: {
"leaveWithSpark": {}
}
Unlocks doors: {"types":["missiles","super"],"requires":[]}
{"types":["powerbomb"],"requires":["never"]}
|
|
After storing the shinecharge, spin jump back to the left and spark aligned against the right side of the left shaft. At the top of the room, hold right in order to land on the platform below the door. Entrance condition: {
"comeInRunning": {
"speedBooster": true,
"minTiles": 2
}
}
Requires: "canStutterWaterShineCharge"
"canShinechargeMovementComplex"
{
"canShineCharge": {
"usedTiles": 33,
"openEnd": 2
}
}
{
"shinespark": {
"frames": 40,
"excessFrames": 6
}
}
{
"or": [
"canCrouchJump",
"Gravity",
"HiJump",
"canSpringBallJumpMidAir",
{
"and": [
"canTrickyUseFrozenEnemies",
{
"ammo": {
"type": "Super",
"count": 1
}
}
]
}
]
}
|
|
From: 2
Bottom Left Door
To: 1
Top Left Door
Enter the room with a careful amount of momentum where Samus must spend extra time slowing down during the stutter, but must not have much run speed. Entrance condition: {
"comeInRunning": {
"speedBooster": true,
"minTiles": 2.4375
}
}
Requires: "canStutterWaterShineCharge"
{
"canShineCharge": {
"usedTiles": 33,
"openEnd": 2
}
}
{
"or": [
{
"enemyDamage": {
"enemy": "Mochtroid",
"type": "contact",
"hits": 2
}
},
{
"and": [
"canDodgeWhileShooting",
{
"or": [
"Wave",
"Spazer",
"Plasma",
{
"ammo": {
"type": "Missile",
"count": 1
}
},
{
"ammo": {
"type": "Super",
"count": 1
}
}
]
}
]
}
]
}
{
"shinespark": {
"frames": 20,
"excessFrames": 3
}
}
|
|
From: 2
Bottom Left Door
To: 2
Bottom Left Door
Enter the room with a careful amount of momentum where Samus must spend extra time slowing down during the stutter, but must not have much run speed. Entrance condition: {
"comeInRunning": {
"speedBooster": true,
"minTiles": 2.4375
}
}
Requires: "canStutterWaterShineCharge"
"canShinechargeMovementComplex"
{
"canShineCharge": {
"usedTiles": 33,
"openEnd": 2
}
}
{
"or": [
{
"enemyDamage": {
"enemy": "Mochtroid",
"type": "contact",
"hits": 2
}
},
{
"and": [
"canDodgeWhileShooting",
{
"or": [
"Wave",
"Spazer",
"Plasma",
{
"ammo": {
"type": "Missile",
"count": 1
}
},
{
"ammo": {
"type": "Super",
"count": 1
}
}
]
}
]
}
]
}
{
"or": [
{
"shinespark": {
"frames": 12
}
},
{
"and": [
"canShinechargeMovementTricky",
{
"shinespark": {
"frames": 3
}
}
]
}
]
}
Exit condition: {
"leaveWithSpark": {}
}
Unlocks doors: {"types":["missiles","super"],"requires":[]}
{"types":["powerbomb"],"requires":["never"]}
|
|
From: 2
Bottom Left Door
To: 4
Top Right Door
Enter the room with a careful amount of momentum where Samus must spend extra time slowing down during the stutter, but must not have much run speed. Entrance condition: {
"comeInRunning": {
"speedBooster": true,
"minTiles": 2.4375
}
}
Requires: "canStutterWaterShineCharge"
{
"canShineCharge": {
"usedTiles": 33,
"openEnd": 2
}
}
{
"or": [
{
"enemyDamage": {
"enemy": "Mochtroid",
"type": "contact",
"hits": 2
}
},
{
"and": [
"canDodgeWhileShooting",
{
"or": [
"Wave",
"Spazer",
"Plasma",
{
"ammo": {
"type": "Missile",
"count": 1
}
},
{
"ammo": {
"type": "Super",
"count": 1
}
}
]
}
]
}
]
}
{
"shinespark": {
"frames": 39,
"excessFrames": 4
}
}
|
|
Entrance condition: {
"comeInRunning": {
"speedBooster": true,
"minTiles": 2.4375
}
}
Requires: "canStutterWaterShineCharge"
{
"canShineCharge": {
"usedTiles": 33,
"openEnd": 2
}
}
{
"shinespark": {
"frames": 40,
"excessFrames": 8
}
}
|
|
From: 2
Bottom Left Door
To: 2
Bottom Left Door
Enter the room with a careful amount of momentum where Samus must spend extra time slowing down during the stutter, but must not have much run speed. Entrance condition: {
"comeInRunning": {
"speedBooster": true,
"minTiles": 2.4375
}
}
Requires: "canStutterWaterShineCharge"
"canShinechargeMovementComplex"
{
"canShineCharge": {
"usedTiles": 33,
"openEnd": 2
}
}
{
"or": [
{
"shinespark": {
"frames": 12
}
},
{
"and": [
"canShinechargeMovementTricky",
{
"shinespark": {
"frames": 3
}
}
]
}
]
}
Exit condition: {
"leaveWithSpark": {}
}
Unlocks doors: {"types":["missiles","super"],"requires":[]}
{"types":["powerbomb"],"requires":["never"]}
|
|
Get the shinecharge then move towards and shinespark out the left door. Entrance condition: {
"comeInRunning": {
"speedBooster": true,
"minTiles": 2.4375
}
}
Requires: "canStutterWaterShineCharge"
"canShinechargeMovementComplex"
{
"canShineCharge": {
"usedTiles": 33,
"openEnd": 2
}
}
{
"or": [
{
"shinespark": {
"frames": 9
}
},
{
"and": [
"canShinechargeMovementTricky",
{
"shinespark": {
"frames": 2
}
}
]
}
]
}
Exit condition: {
"leaveWithSpark": {}
}
Unlocks doors: {"types":["super"],"requires":[]}
{"types":["missiles","powerbomb"],"requires":["never"]}
|
|
Entrance condition: {
"comeInRunning": {
"speedBooster": true,
"minTiles": 2
}
}
Requires: "canStutterWaterShineCharge"
{
"canShineCharge": {
"usedTiles": 33,
"openEnd": 2
}
}
Exit condition: {
"leaveShinecharged": {
"framesRemaining": 179
}
}
Unlocks doors: {"types":["missiles","super"],"requires":[]}
{"types":["powerbomb"],"requires":["never"]}
|
|
From: 1
Left Door
To: 4
Junction Below Top Door
Spark diagonally through the bomb blocks. Entrance condition: {
"comeInRunning": {
"speedBooster": true,
"minTiles": 2.4375
}
}
Requires: "canStutterWaterShineCharge"
{
"canShineCharge": {
"usedTiles": 33,
"openEnd": 2
}
}
{
"shinespark": {
"frames": 23,
"excessFrames": 10
}
}
|
|
From: 1
Left Door
To: 6
Junction Above Bomb Blocks
Spark vertically through the bomb blocks. It is still possible to break the blocks while below 30 Energy by jumping before sparking. Entrance condition: {
"comeInRunning": {
"speedBooster": true,
"minTiles": 2.4375
}
}
Requires: "canStutterWaterShineCharge"
{
"canShineCharge": {
"usedTiles": 33,
"openEnd": 2
}
}
{
"or": [
{
"shinespark": {
"frames": 10,
"excessFrames": 8
}
},
{
"and": [
"canMidairShinespark",
{
"shinespark": {
"frames": 7,
"excessFrames": 7
}
}
]
}
]
}
|
|
Entrance condition: {
"comeInRunning": {
"speedBooster": true,
"minTiles": 2
}
}
Requires: "canStutterWaterShineCharge"
{
"canShineCharge": {
"usedTiles": 33,
"openEnd": 2
}
}
Exit condition: {
"leaveShinecharged": {
"framesRemaining": 179
}
}
Unlocks doors: {"types":["missiles","super"],"requires":[]}
{"types":["powerbomb"],"requires":["never"]}
|
|
Get the shinecharge and move towards then shinespark out the right door. Entrance condition: {
"comeInRunning": {
"speedBooster": true,
"minTiles": 2.4375
}
}
Requires: "canStutterWaterShineCharge"
"canShinechargeMovementComplex"
{
"canShineCharge": {
"usedTiles": 33,
"openEnd": 2
}
}
{
"or": [
{
"shinespark": {
"frames": 9
}
},
{
"and": [
"canShinechargeMovementTricky",
{
"shinespark": {
"frames": 2
}
}
]
}
]
}
Exit condition: {
"leaveWithSpark": {}
}
Unlocks doors: {"types":["super"],"requires":[]}
{"types":["missiles","powerbomb"],"requires":["never"]}
|
|
From: 2
Right Door
To: 4
Junction Below Top Door
Spark diagonally through the bomb blocks. Entrance condition: {
"comeInRunning": {
"speedBooster": true,
"minTiles": 2.4375
}
}
Requires: "canStutterWaterShineCharge"
{
"canShineCharge": {
"usedTiles": 33,
"openEnd": 2
}
}
{
"shinespark": {
"frames": 23,
"excessFrames": 10
}
}
|
|
From: 2
Right Door
To: 6
Junction Above Bomb Blocks
Spark vertically through the bomb blocks. It is still possible to break the blocks while below 30 Energy by jumping before sparking. Entrance condition: {
"comeInRunning": {
"speedBooster": true,
"minTiles": 2.4375
}
}
Requires: "canStutterWaterShineCharge"
{
"canShineCharge": {
"usedTiles": 33,
"openEnd": 2
}
}
{
"or": [
{
"shinespark": {
"frames": 10,
"excessFrames": 8
}
},
{
"and": [
"canMidairShinespark",
{
"shinespark": {
"frames": 7,
"excessFrames": 7
}
}
]
}
]
}
|
|
From: 1
Left Door
To: 1
Left Door
Get the shinecharge while killing the crab, then move towards and shinespark out the left door. Entrance condition: {
"comeInRunning": {
"speedBooster": true,
"minTiles": 2.4375
}
}
Requires: "canStutterWaterShineCharge"
"canShinechargeMovementComplex"
{
"canShineCharge": {
"usedTiles": 33,
"openEnd": 2
}
}
{
"or": [
{
"shinespark": {
"frames": 9
}
},
{
"and": [
"canShinechargeMovementTricky",
{
"shinespark": {
"frames": 2
}
}
]
}
]
}
{
"or": [
"Wave",
"Spazer",
"Plasma",
{
"ammo": {
"type": "Missile",
"count": 2
}
},
{
"ammo": {
"type": "Super",
"count": 1
}
}
]
}
Exit condition: {
"leaveWithSpark": {}
}
Unlocks doors: {"types":["super"],"requires":[]}
{"types":["missiles","powerbomb"],"requires":["never"]}
|
|
Get the shinecharge while killing the crab, then exit the right door. Entrance condition: {
"comeInRunning": {
"speedBooster": true,
"minTiles": 2
}
}
Requires: "canStutterWaterShineCharge"
{
"canShineCharge": {
"usedTiles": 33,
"openEnd": 2
}
}
{
"or": [
"Wave",
"Spazer",
"Plasma",
{
"ammo": {
"type": "Missile",
"count": 2
}
},
{
"ammo": {
"type": "Super",
"count": 1
}
}
]
}
Exit condition: {
"leaveShinecharged": {
"framesRemaining": 179
}
}
Unlocks doors: {"types":["missiles","super"],"requires":[]}
{"types":["powerbomb"],"requires":["never"]}
|
|
Entrance condition: {
"comeInRunning": {
"speedBooster": true,
"minTiles": 2
}
}
Requires: "canStutterWaterShineCharge"
{
"canShineCharge": {
"usedTiles": 33,
"openEnd": 2
}
}
Exit condition: {
"leaveShinecharged": {
"framesRemaining": 179
}
}
Unlocks doors: {"types":["missiles","super"],"requires":[]}
{"types":["powerbomb"],"requires":["never"]}
|
|
From: 2
Right Door
To: 2
Right Door
Get the shinecharge, carefully jump over the crab and move towards then shinespark out the right door. Entrance condition: {
"comeInRunning": {
"speedBooster": true,
"minTiles": 2.4375
}
}
Requires: "canStutterWaterShineCharge"
"canShinechargeMovementComplex"
"canCarefulJump"
{
"canShineCharge": {
"usedTiles": 33,
"openEnd": 2
}
}
{
"or": [
{
"shinespark": {
"frames": 9
}
},
{
"and": [
"canShinechargeMovementTricky",
{
"shinespark": {
"frames": 2
}
}
]
}
]
}
Exit condition: {
"leaveWithSpark": {}
}
Unlocks doors: {"types":["super"],"requires":[]}
{"types":["missiles","powerbomb"],"requires":["never"]}
|
|
From: 3
Bottom of Shaft
To: 1
Left Door
Notable: true Gain a shinecharge by running right-to-left at the bottom of the room, performing a stutter just before the acid reaches Samus' feet. Use spin jumps to minimize damage from the acid, and spark diagonally (to the left) mid-air to make it up the shaft. Requires: "canStutterWaterShineCharge"
"canInsaneJump"
{
"acidFrames": 215
}
"canShinechargeMovementTricky"
"canMidairShinespark"
{
"shinespark": {
"frames": 83,
"excessFrames": 2
}
}
|
