canSpringBallBounce (Hard)
Using a lateral mid-air morph to bounce off a surface with Spring Ball while retaining previous momentum.
Dependencies: canMidAirMorph, canLateralMidAirMorph
Strats ()
|
From: 1
Top Left Door
To: 6
Top Junction with Temporary Blue (Right of Morph Tunnel)
Use Springball on the spikes to cross the room with a Speedball. It helps to not be at full run speed when bouncing through the spike pit, but is still possible with very tight jumps. Then bounce into the Morph tunnel and use Springball to bounce all of the way through. Unmorphing before the Morph tunnel to better control the bounce can help. Entrance condition: {
"comeInShinecharging": {
"length": 3,
"openEnd": 1
}
}
Requires: "canSpeedball"
"canTemporaryBlue"
"canCarefulJump"
"canSpringBallBounce"
{
"or": [
"canTrickyDashJump",
"canChainTemporaryBlue"
]
}
{
"spikeHits": 1
}
|
|
Entrance condition: {
"comeInShinecharging": {
"length": 2,
"openEnd": 0
}
}
Requires: "canTemporaryBlue" "canSpringBallBounce" |
|
Bring temporary blue from the right side door all the way to the missile location using Springball, SpaceJump, or Morph-UnMorphs. Entrance condition: {
"comeInShinecharging": {
"length": 1,
"openEnd": 1
}
}
Requires: "canTemporaryBlue"
"canInsaneJump"
{
"or": [
"canChainTemporaryBlue",
{
"and": [
"canSpeedball",
"canSpringBallBounce",
"canSlowShortCharge"
]
},
{
"and": [
"canBlueSpaceJump",
"canMockball",
"canSlowShortCharge"
]
}
]
}
|
|
From: 1
Left Door
To: 2
Right Door
Notable: true 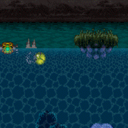
Using an exact runway size of 7 tiles; use extremely precise, controlled springball bounces to cross the ocean. 7 tiles of runspeed can freely be achieved by requipping SpeedBooster after reaching the max normal run speed. Mockball down the submerged ramp and begin SpringBall bouncing either above the water, or under water using the platforms. The final SpringBall bounce must be on the left edge of the rightmost underwater platform. While the bounce is occuring, setup a mid-air SpringBall Jump to escape the water and reach the door. Requires: "canInsaneJump" "SpeedBooster" "canSpringBallBounce" "canDoubleSpringBallJumpMidAir" "canMockball" |
|
From: 1
Left Door
To: 2
Right Door
Notable: true 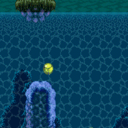
Build up run speed and then use controlled springball bounces to cross the ocean to the far right ledge, and then use SpaceJump to reach the door. Mockball down the submerged ramp and begin SpringBall bouncing under water using the platforms. Disable SpringBall after the final jump once Samus starts falling again as a way to gain extra speed. Requires: "canTrickyJump"
"canSpaceJumpWaterBounce"
"canSpringBallBounce"
"canSpringFling"
"canMockball"
{
"or": [
"canDownGrab",
"canWalljump"
]
}
|
|
Run for 7 tiles for enough speed to springball from the submerged platform up to the platform enemy, above the water. Turning on SpeedBooster midjump, after running 7+ tiles, will automatically hit the run speed requirement. It is not necessary to enter the water to clear the rightmost Choot. Requires: "canTrickyJump" "SpeedBooster" "canSpringBallBounce" "canMockball" "SpaceJump" |
|
Notable: true 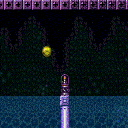
Open the door and step as close to the transition as possible. Run, jump, lateral midair morph on the way down, then bounce off the pedestal to get to the other side. Requires: "canSpringBallBounce"
"canDisableEquipment"
{
"doorUnlockedAtNode": 1
}
{
"obstaclesNotCleared": [
"A"
]
}
|
|
Notable: true
Run, jump, lateral midair morph on the way down, then bounce off the pedestal to get to the other side. Entrance condition: {
"comeInRunning": {
"speedBooster": "any",
"minTiles": 1
}
}
Requires: "canSpringBallBounce"
"canDisableEquipment"
{
"obstaclesNotCleared": [
"A"
]
}
|
|
Entrance condition: {
"comeInShinecharging": {
"length": 1,
"openEnd": 0
}
}
Requires: "canTemporaryBlue" "canSpringBallBounce" Clears obstacles: A |
|
Use the upper platform to run and gain temporary blue. Requires: {
"canShineCharge": {
"usedTiles": 17,
"openEnd": 1
}
}
"canTemporaryBlue"
"canSpringBallBounce"
Clears obstacles: A |
|
Entrance condition: {
"comeInShinecharging": {
"length": 5,
"steepUpTiles": 1,
"openEnd": 0
}
}
Requires: "canTemporaryBlue" "canSpringBallBounce" |
|
From: 7
Right Side - Bottom Middle Door (Behind the Super Block)
To: 13
Central Junction
Position Samus next to the Super block, while keeping the speed effect with a Temporary Blue Chain, and break it. Then bounce into the morph tunnel, while keeping speed, and continuing all the way through with SpringBall Avoiding the Temporary Blue Chain is possible, but harder. Entrance condition: {
"comeInShinecharging": {
"length": 7,
"openEnd": 0
}
}
Requires: "canChainTemporaryBlue"
"canSpringBallBounce"
{
"ammo": {
"type": "Super",
"count": 1
}
}
Clears obstacles: F |
|
From: 13
Central Junction
To: 1
Left Side - Top Door
Build a ShineCharge on the below platform and bring it up to the morph tunnel by chaining Temporary Blue. Aim to bounce into the tunnel opening and use springball to bounce the rest of the way while blue. Requires: "canChainTemporaryBlue"
"canSpringBallBounce"
{
"or": [
{
"and": [
"canXRayTurnaround",
{
"canShineCharge": {
"usedTiles": 25,
"openEnd": 0
}
}
]
},
{
"canShineCharge": {
"usedTiles": 21,
"openEnd": 0
}
}
]
}
Clears obstacles: A |
|
Use the full runway of the top-right door to jump to the ledge below the Cacatac and mockball on it. Either full jump from the left side of this platform, or do a small hop followed by a big jump to cross the gap. Disabling Springball once past the Grapple Blocks makes this much easier. Requires: "canCarefulJump"
"canSpringBallBounce"
"canMockball"
{
"or": [
{
"doorUnlockedAtNode": 7
},
"canTrickyJump"
]
}
|
|
From: 1
Left Door
To: 2
Right Door
Entrance condition: {
"comeInRunning": {
"minTiles": 4,
"speedBooster": false
}
}
Requires: "Gravity"
"canCarefulJump"
"canDisableEquipment"
"canSpringBallBounce"
{
"spikeHits": 2
}
{
"heatFrames": 350
}
{
"lavaFrames": 20
}
|
|
From: 1
Left Door
To: 2
Right Door
Uses a runway of at least 14 tiles in the adjacent room. Disable SpeedBooster after jumping so that the lava will not take away all of Samus' momentum. Entrance condition: {
"comeInRunning": {
"minTiles": 14,
"speedBooster": true
}
}
Requires: "Gravity"
"canDisableEquipment"
"canSpringBallBounce"
"canTrickyJump"
{
"spikeHits": 1
}
{
"heatFrames": 240
}
{
"lavaFrames": 10
}
|
|
From: 1
Left Door
To: 2
Right Door
Uses a runway of at least 21 tiles in the adjacent room. It will help to perform the first jump with HiJump disabled. Disable SpeedBooster before Samus reaches the lava. Entrance condition: {
"comeInRunning": {
"minTiles": 21,
"speedBooster": true
}
}
Requires: "HiJump"
"canDisableEquipment"
"canSpringBallBounce"
"canTrickyJump"
{
"spikeHits": 1
}
{
"heatFrames": 200
}
{
"lavaFrames": 11
}
|
|
From: 1
Left Door
To: 2
Right Door
It may help to perform the first jump with HiJump disabled. Entrance condition: {
"comeInRunning": {
"minTiles": 4,
"speedBooster": false
}
}
Requires: "canCarefulJump"
"HiJump"
"canDisableEquipment"
"canSpringBallBounce"
{
"spikeHits": 3
}
{
"heatFrames": 350
}
{
"lavaFrames": 32
}
|
|
From: 1
Left Door
To: 2
Right Door
Uses a runway of at least 8 tiles in the adjacent room. It will help to perform the first jump with HiJump disabled. Disable SpeedBooster before Samus reaches the lava. Entrance condition: {
"comeInRunning": {
"minTiles": 8,
"speedBooster": true
}
}
Requires: "canTrickyJump"
"HiJump"
"canDisableEquipment"
"canSpringBallBounce"
{
"spikeHits": 2
}
{
"heatFrames": 311
}
{
"lavaFrames": 22
}
|
|
From: 2
Right Door
To: 1
Left Door
Entrance condition: {
"comeInRunning": {
"minTiles": 4,
"speedBooster": false
}
}
Requires: "Gravity"
"canDisableEquipment"
"canSpringBallBounce"
{
"spikeHits": 2
}
{
"heatFrames": 350
}
{
"lavaFrames": 20
}
|
|
From: 2
Right Door
To: 1
Left Door
Uses a runway of at least 14 tiles in the adjacent room. Disable SpeedBooster after jumping so that the lava will not take away all of Samus' momentum. Entrance condition: {
"comeInRunning": {
"minTiles": 14,
"speedBooster": true
}
}
Requires: "Gravity"
"canDisableEquipment"
"canSpringBallBounce"
"canTrickyJump"
{
"spikeHits": 1
}
{
"heatFrames": 240
}
{
"lavaFrames": 10
}
|
|
From: 2
Right Door
To: 1
Left Door
Uses a runway of at least 21 tiles in the adjacent room. It will help to perform the first jump with HiJump disabled. Disable SpeedBooster before Samus reaches the lava. Entrance condition: {
"comeInRunning": {
"minTiles": 21,
"speedBooster": true
}
}
Requires: "HiJump"
"canDisableEquipment"
"canSpringBallBounce"
"canTrickyJump"
{
"spikeHits": 1
}
{
"heatFrames": 200
}
{
"lavaFrames": 11
}
|
|
From: 2
Right Door
To: 1
Left Door
It may help to perform the first jump with HiJump disabled. Entrance condition: {
"comeInRunning": {
"minTiles": 4,
"speedBooster": false
}
}
Requires: "canCarefulJump"
"HiJump"
"canDisableEquipment"
"canSpringBallBounce"
{
"spikeHits": 3
}
{
"heatFrames": 350
}
{
"lavaFrames": 32
}
|
|
From: 2
Right Door
To: 1
Left Door
Uses a runway of at least 8 tiles in the adjacent room. It will help to perform the first jump with HiJump disabled. Disable SpeedBooster before Samus reaches the lava. Entrance condition: {
"comeInRunning": {
"minTiles": 8,
"speedBooster": true
}
}
Requires: "canTrickyJump"
"HiJump"
"canDisableEquipment"
"canSpringBallBounce"
{
"spikeHits": 2
}
{
"heatFrames": 311
}
{
"lavaFrames": 22
}
|
|
From: 1
Left Door
To: 3
Junction Left of Green Gate
With enough run speed, jump over the first moat and MockBall into a regular springball jump over the second moat. Entrance condition: {
"comeInRunning": {
"minTiles": 4,
"speedBooster": "any"
}
}
Requires: "canCarefulJump" "canMockball" "canSpringBallBounce" |
|
From: 1
Left Door
To: 3
Junction Left of Green Gate
With enough run speed, jump over the first moat and MockBall into a regular springball jump over the second moat. Entrance condition: {
"comeInRunning": {
"minTiles": 2,
"speedBooster": "any"
}
}
Requires: "canTrickyJump" "canMockball" "canSpringBallBounce" |
|
From: 1
Right Door
To: 2
Item (locked)
From a standstill at the door, jump just before the first step. Do a lateral mid-air morph and bounce on the first platform. This should bounce on the third platform and get to the item. Requires: "canSpringBallBounce" "f_DefeatedPhantoon" |
|
From: 3
Bottom Left Door
To: 6
Bottom Right Door
Entrance condition: {
"comeInShinecharging": {
"length": 12,
"openEnd": 0
}
}
Requires: "canTemporaryBlue" "canSpringBallBounce" Clears obstacles: A |
|
From: 6
Bottom Right Door
To: 3
Bottom Left Door
Entrance condition: {
"comeInShinecharging": {
"length": 2,
"openEnd": 0
}
}
Requires: "canTemporaryBlue" "canSpringBallBounce" Clears obstacles: A |
|
From: 8
Item
To: 3
Bottom Left Door
Neutral bounce into the Morph tunnel, and SpringBall bounce to continue all the way through. Requires: "Morph"
"canChainTemporaryBlue"
"canXRayTurnaround"
"canSpringBallBounce"
{
"canShineCharge": {
"usedTiles": 16,
"openEnd": 1,
"steepDownTiles": 4
}
}
Clears obstacles: C |
|
From: 8
Item
To: 3
Bottom Left Door
Requires: {
"not": "f_DefeatedPhantoon"
}
"canRiskPermanentLossOfAccess"
"canTemporaryBlue"
"can4HighMidAirMorph"
"canSpringBallBounce"
{
"canShineCharge": {
"usedTiles": 16,
"openEnd": 0,
"steepUpTiles": 4
}
}
Clears obstacles: C |
|
From: 8
Item
To: 3
Bottom Left Door
Run towards the conveyor to more easily build the ShineCharge, and for an easier bounce into the morph tunnel. Neutral bounce into the Morph tunnel, and SpringBall bounce to continue all the way through. Requires: "f_DefeatedPhantoon"
"canXRayTurnaround"
"canSpringBallBounce"
{
"or": [
"HiJump",
"canChainTemporaryBlue"
]
}
{
"canShineCharge": {
"usedTiles": 20,
"openEnd": 1,
"steepDownTiles": 4
}
}
Clears obstacles: C |
|
From: 4
Top Right Door
To: 1
Top Left Door
Notable: true .png)
.gif)
Requires running a very precise distance of 8 tiles in the adjacent room. Morph just before hitting the first ceiling grapple block, then bounce on both grapple block platforms. Entrance condition: {
"comeInJumping": {
"speedBooster": true,
"minTiles": 8
}
}
Requires: "canInsaneJump" "canTrickyDashJump" "canSpringBallBounce" "canCrossRoomJumpIntoWater" |
|
From: 4
Top Right Door
To: 9
Spawn At Junction Below Top Door
Notable: true .png)
.gif)
Requires running a very precise distance of 8 tiles in the adjacent room. Morph just before hitting the first ceiling grapple block, then bounce on the first grapple block platform. Entrance condition: {
"comeInJumping": {
"speedBooster": true,
"minTiles": 8
}
}
Requires: "canInsaneJump" "canTrickyDashJump" "canSpringBallBounce" "canCrossRoomJumpIntoWater" |
|
From: 4
Top Right Door
To: 9
Spawn At Junction Below Top Door
Notable: true .png)
.gif)
Requires running a very precise distance of 7 tiles with no open end in the adjacent room, as this is a peak in jump speed. Morph just before hitting the first ceiling grapple block, then turn on HiJump before bouncing on the first grapple block platform. Entrance condition: {
"comeInJumping": {
"speedBooster": true,
"minTiles": 6.4375
}
}
Requires: "HiJump" "canInsaneJump" "canTrickyDashJump" "canSpringBallBounce" "canCrossRoomJumpIntoWater" |
|
Requires: "Gravity"
"canLateralMidAirMorph"
"canCarefulJump"
{
"or": [
"canTrickyJump",
"canSpringBallBounce"
]
}
|
|
From: 1
Left Door
To: 5
Item
Needs a runway of 7 tiles with no open end in the adjacent room, to get enough height. This is a peak of height with speed booster, no hjb, while underwater. Jump before the transition with SpeedBooster off and then SpeedBooster back on after reaching the ceiling and Morphing. Entrance condition: {
"comeInJumping": {
"speedBooster": true,
"minTiles": 6.4375
}
}
Requires: "canLateralMidAirMorph"
"canDisableEquipment"
"canCrossRoomJumpIntoWater"
"canSpringBallBounce"
{
"or": [
{
"enemyDamage": {
"enemy": "Puyo",
"type": "contact",
"hits": 1
}
},
"canInsaneJump",
{
"and": [
"Plasma",
"canTrickyJump"
]
}
]
}
|
|
From: 3
Junction (Get Past Metroids, Left to Right)
To: 2
Right Door
At max run speed without SpeedBooster, you can bounce on both platforms and avoid all acid. Jump from the center of the rightmost X in the background. Bounce again on the second platform to avoid any Metroid or Rinkas. Requires: "h_canUseSpringBall"
"canSpringBallBounce"
"canCarefulJump"
{
"or": [
{
"obstaclesCleared": [
"A"
]
},
"canMetroidAvoid",
"ScrewAttack",
{
"metroidFrames": 200
}
]
}
|
|
From: 4
Junction (Get Past Metroids, Right to Left)
To: 1
Left Door (locked)
At max non-speed run speed, Spring Ball bounce on both platforms and avoid all acid. Land on the right side of the first platform to avoid the second Metroid. Bouncing on the second platform will usually avoid the third Metroid. Requires: "canSpringBallBounce"
"canCarefulJump"
{
"or": [
{
"obstaclesCleared": [
"A"
]
},
{
"and": [
"canTrickyJump",
"canMetroidAvoid"
]
},
{
"metroidFrames": 270
}
]
}
|