canDoubleSpringBallJumpMidAir (Expert)
Using a mid-air Spring Ball jump twice during a single jump to gain even more height. This consists of a tight variant of mid-air Spring Ball jump, then turning off Spring Ball, then a second mid-air Spring Ball jump all while still climbing upwards. This is typically used underwater with HiJump, but it is technically possible in lava without HiJump or to perform more than two Spring Ball jumps in acid.
Dependencies: canTrickySpringBallJump, canMidAirMorph, canDisableEquipment, canSpringBallJumpMidAir
Strats ()
|
From: 4
Underwater Statues Event (locked)
To: 3
Statues Event (locked)
Requires: "canDoubleSpringBallJumpMidAir" "canUnderwaterBombIntoSpringBallJump" |
|
From: 1
Left Door
To: 2
Right Door
Notable: true 
Using an exact runway size of 7 tiles; use extremely precise, controlled springball bounces to cross the ocean. 7 tiles of runspeed can freely be achieved by requipping SpeedBooster after reaching the max normal run speed. Mockball down the submerged ramp and begin SpringBall bouncing either above the water, or under water using the platforms. The final SpringBall bounce must be on the left edge of the rightmost underwater platform. While the bounce is occuring, setup a mid-air SpringBall Jump to escape the water and reach the door. Requires: "canInsaneJump" "SpeedBooster" "canSpringBallBounce" "canDoubleSpringBallJumpMidAir" "canMockball" |
|
Requires: "canSuitlessMaridia"
"h_canDoubleSpringBallJumpWithHiJump"
{
"obstaclesNotCleared": [
"A"
]
}
|
|
From: 4
Lava, Left Wall
To: 3
Above Lava Junction
Notable: true 
Double springball jump out of a walljump starting from the top of the left wall Namihe. Requires: "canSuitlessLavaDive"
"canUseEnemies"
"canDoubleSpringBallJumpMidAir"
"canSpringwall"
"canPreciseWalljump"
{
"heatFrames": 270
}
{
"lavaFrames": 240
}
|
|
From: 5
Lava, Center Namihe
To: 3
Above Lava Junction
Double Spring Ball Jump from below the Lowest-Right Namihe. Double Spring Ball Jumps are easier in Lava than in Water. Requires: "canSuitlessLavaDive"
"h_canDoubleSpringBallJumpWithHiJump"
{
"heatFrames": 255
}
{
"lavaFrames": 225
}
|
|
From: 4
Center Platform Junction
To: 3
Junction Left of Green Gate
Jump when the water level is at its lowest. Requires: "canSuitlessMaridia" "canTrickyJump" "h_canDoubleSpringBallJumpWithHiJump" |
|
From: 5
Below Left Door Junction
To: 1
Left Door
Notable: true 
Acid allows for more time than water to perform Spring Ball jumps. This gives just barely enough time to fit in three spring ball jumps. Requires: "h_heatProof"
"canSuitlessLavaDive"
"canCrouchJump"
"h_canDoubleSpringBallJumpWithHiJump"
"canTrickyJump"
{
"acidFrames": 330
}
{
"acidFrames": 1000
}
|
|
Requires: "canSuitlessMaridia" "h_canDoubleSpringBallJumpWithHiJump" |
|
From: 1
Bottom Left Door
To: 5
Platform Junction Near Top Left Door
Requires: "canSuitlessMaridia" "h_canDoubleSpringBallJumpWithHiJump" |
|
From: 4
Top Right Door
To: 4
Top Right Door
Follow the crab from the bottom right door to the top right door. Depending on the item setup, this takes 30-50 seconds. Requires: {
"or": [
{
"and": [
"Gravity",
"SpaceJump"
]
},
"canGravityJump",
{
"and": [
"Grapple",
{
"or": [
"HiJump",
"Gravity"
]
}
]
},
"h_canDoubleSpringBallJumpWithHiJump"
]
}
Exit condition: {
"leaveWithGModeSetup": {}
}
|
|
From: 7
Lower Hills Junction
To: 10
Upper Right Ledge Junction
Start the springball jumps from the highest ledge on the wall. Requires: "canSuitlessMaridia" "h_canDoubleSpringBallJumpWithHiJump" Clears obstacles: A, B |
|
From: 10
Upper Right Ledge Junction
To: 4
Top Right Door
Requires: "canSuitlessMaridia" "h_canDoubleSpringBallJumpWithHiJump" |
|
From: 11
Upper Left Ledge Junction
To: 9
Spawn At Junction Below Top Door
Start the spring ball jumps from the bottom of the slope. Requires: "canSuitlessMaridia" "h_canDoubleSpringBallJumpWithHiJump" |
|
Cacatac Alley HiJumpless Double SpringBall Jump and Bomb-Grapple-Jump (Beyond)
East Cactus Alley Room
From: 5
Bottom Middle Junction
To: 4
Top Right Ledge Junction
Notable: true 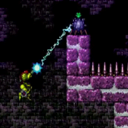
1) Crouch jump and then SpringBall jump. 2) Bomb-Grapple-Jump using the distant Cacatac who is above the water. 3) SpringBall jump again just as Samus exits the water. Requires: "canBombGrappleJump" "canDoubleSpringBallJumpMidAir" "h_canMaxHeightSpringBallJump" |
|
Perform a double springball jump with the first jump being a bounce on the sand. Requires: "canSuitlessMaridia"
{
"or": [
"canPrepareForNextRoom",
"canPlayInSand"
]
}
"h_canDoubleSpringBallJumpWithHiJump"
|
|
From: 2
Bottom Left Door
To: 1
Top Left Door
Requires: "canSuitlessMaridia" "canDoubleSpringBallJumpMidAir" "HiJump" |
|
From: 2
Bottom Right Door
To: 1
Top Left Door
Only requires a runway of approximately 0.5 tiles in the adjacent room. SpringBall jump once on the way up, then use a Bomb to buy just enough time for a second SpringBall jump. Entrance condition: {
"comeInJumping": {
"minTiles": 1,
"speedBooster": false
}
}
Requires: "canCrossRoomJumpIntoWater" "canUnderwaterBombIntoSpringBallJump" "canDoubleSpringBallJumpMidAir" |