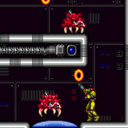
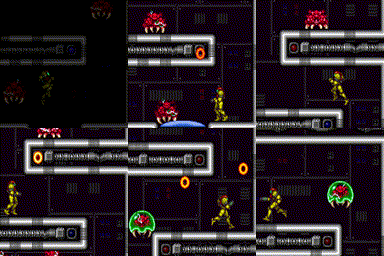
can4HighMidAirMorph (Hard)
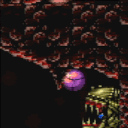
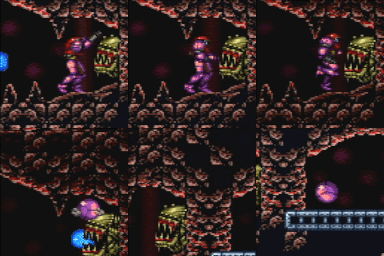
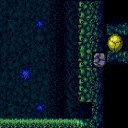
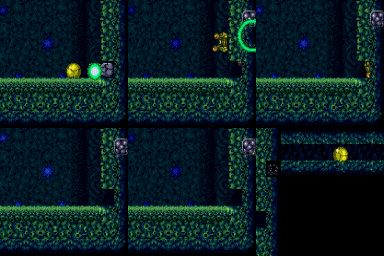
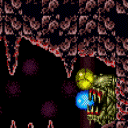
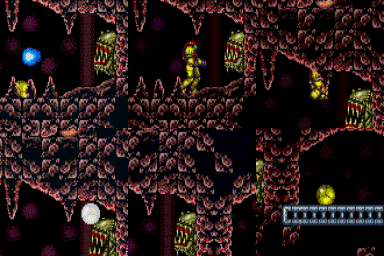
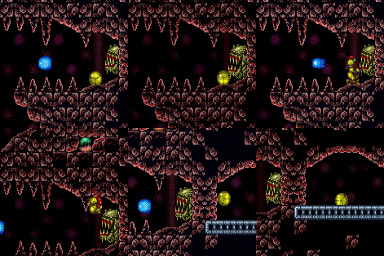
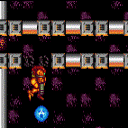
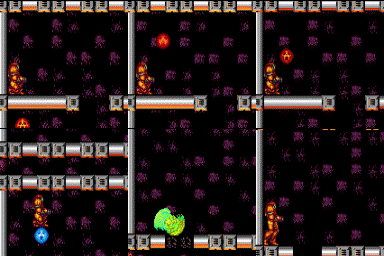
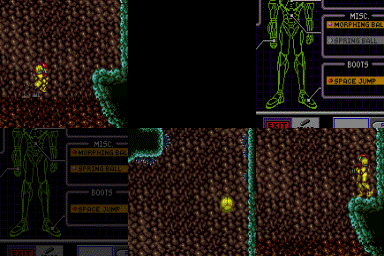
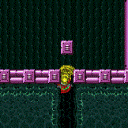
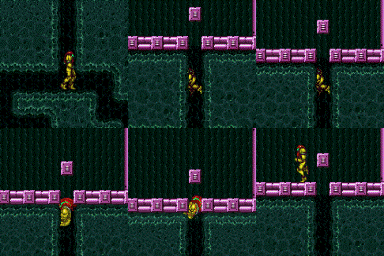
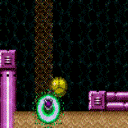
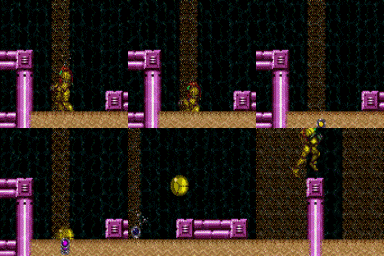
A mid-air morph that has to be done in a 4-tile-high space. It's a lot more precise than with more room. Turn off HiJump before attempting this.
Dependencies: canDisableEquipment, canMidAirMorph
Strats ()
|
Overload PLMs using the scroll block at the top of the stairs immediately in front of the bomb blocks. Reach the bottom and pass through the bomb blocks while still in G-mode. Entrance condition: {
"comeInWithGMode": {
"mode": "any",
"morphed": true
}
}
Requires: {
"or": [
"h_canArtificialMorphSpringBall",
"h_canArtificialMorphBombs",
{
"and": [
"Morph",
"h_canFourTileJumpMorph"
]
}
]
}
|
|
Overload PLMs using the scroll block at the top of the stairs immediately in front of the bomb blocks. Fall down to the lower bomb blocks while still in G-mode Morph. Entrance condition: {
"comeInWithGMode": {
"mode": "any",
"morphed": true
}
}
Requires: {
"or": [
"h_canArtificialMorphSpringBall",
"h_canArtificialMorphBombs",
{
"and": [
"Morph",
"h_canFourTileJumpMorph"
]
}
]
}
|
|
Overload PLMs using the scroll block at the top of the stairs next to the bomb blocks. Entrance condition: {
"comeInWithGMode": {
"mode": "any",
"morphed": true
}
}
Requires: {
"or": [
"h_canArtificialMorphSpringBall",
"h_canArtificialMorphBombs",
{
"and": [
"Morph",
"h_canFourTileJumpMorph"
]
}
]
}
|
|
Overload PLMs using the scroll block at the top of the stairs next to the bomb blocks. Fall down and pass through bomb wall at the bottom while still in G-mode. Entrance condition: {
"comeInWithGMode": {
"mode": "any",
"morphed": true
}
}
Requires: {
"or": [
"h_canArtificialMorphSpringBall",
"h_canArtificialMorphBombs",
{
"and": [
"Morph",
"h_canFourTileJumpMorph"
]
}
]
}
|
|
Entrance condition: {
"comeInWithGMode": {
"mode": "any",
"morphed": true
}
}
Requires: {
"or": [
"h_canArtificialMorphSpringBall",
"h_canArtificialMorphBombs",
{
"and": [
"Morph",
"h_canFourTileJumpMorph"
]
}
]
}
|
|
From: 1
Top Left Door
To: 6
Top Junction with Temporary Blue (Right of Morph Tunnel)
Bounce into the spikes and use a SpeedKeep to run on spikes to setup for a speedball towards the item. Bouncing on the platform near the door saves a spike hit. Or a DamageBoost SpeedKeep could be used instead of a Spike SpeedKeep with enough runspeed. Entrance condition: {
"comeInRunning": {
"speedBooster": true,
"minTiles": 12
}
}
Requires: "canSpeedKeep"
"canCarefulJump"
"canSlowShortCharge"
"can4HighMidAirMorph"
{
"spikeHits": 1
}
"canSpeedball"
|
|
From: 2
Right Door
To: 4
Middle Junction (Left of Morph Tunnel)
A quick jump morph from the top of the slope will bounce into the tunnel and avoid acid damage. Entrance condition: {
"comeInShinecharging": {
"length": 4,
"openEnd": 0
}
}
Requires: "canTemporaryBlue"
"canLateralMidAirMorph"
{
"or": [
"canChainTemporaryBlue",
"can4HighMidAirMorph"
]
}
|
|
From: 13
Below Power Bomb Blocks - Main Junction
To: 14
Right Etecoon Shaft - Wall Jump Climb Checkpoint Junction
Notable: true Break the bomb block at the bottom right of the main shaft. Bring a Zeela down to the bottom of the room. Morph inside the tunnel, take a Zeela hit, then jump, aim down, and shoot to freeze the Zeela as it starts to move up and while Samus is close to landing. Jump and aim down to get on top of the Zeela. If the Zeela is precisely positioned exactly 12 pixels above the ground, you can press up to make Samus stand; Otherwise, if you have X-ray, then the Zeela should be frozen lower, and you can morph and unmorph and use X-ray to force Samus to stand up; in this case there is a 6-pixel window over which it works, with the Zeela being between 4 and 9 pixels above the ground. In either case, after standing up on top of the Zeela, jump and aim down to break the crumble block. Then, before the crumble respawns, morph and use Spring Ball (if available) to jump back up and into the tunnel; without Spring Ball, a quick mid-air morph also works but is more difficult. Requires: "h_canBombThings"
"h_additionalBomb"
{
"enemyDamage": {
"enemy": "Zeela",
"type": "contact",
"hits": 1
}
}
"canTrickyUseFrozenEnemies"
"canTrickyJump"
{
"or": [
"canXRayCeilingClip",
{
"and": [
"canPreciseCeilingClip",
"canInsaneJump",
"canBeVeryPatient"
]
}
]
}
{
"or": [
"h_canUseSpringBall",
{
"and": [
"can4HighMidAirMorph",
"canInsaneJump"
]
}
]
}
{
"or": [
"canBePatient",
{
"obstaclesNotCleared": [
"A"
]
}
]
}
|
|
Requires: "SpeedBooster" "canTrickyJump" "canLateralMidAirMorph" "can4HighMidAirMorph" |
|
From: 2
Bottom Right Door
To: 3
Item
Place two Power Bombs, precisely on the third tile in the morph tunnel to overload PLMs (watch the right side of the screen). Entrance condition: {
"comeInWithGMode": {
"mode": "direct",
"morphed": true
}
}
Requires: {
"itemNotCollectedAtNode": 3
}
"h_canArtificialMorphPowerBomb"
"h_canArtificialMorphPowerBomb"
{
"or": [
"h_canArtificialMorphSpringBall",
{
"ammo": {
"type": "PowerBomb",
"count": 4
}
},
{
"and": [
"Morph",
{
"or": [
"can4HighMidAirMorph",
{
"ammo": {
"type": "PowerBomb",
"count": 2
}
}
]
}
]
}
]
}
|
|
Requires: {
"or": [
"canTrickyJump",
"Ice",
{
"obstaclesCleared": [
"A"
]
},
{
"and": [
"canCarefulJump",
"h_canUseSpringBall"
]
},
"can4HighMidAirMorph",
{
"and": [
"SpaceJump",
"canCarefulJump"
]
},
{
"and": [
"SpaceJump",
"ScrewAttack"
]
},
{
"and": [
"ScrewAttack",
"canCarefulJump"
]
}
]
}
|
|
Requires: {
"or": [
"canTrickyJump",
"Ice",
{
"obstaclesCleared": [
"A"
]
},
{
"and": [
"canCarefulJump",
"h_canUseSpringBall"
]
},
"can4HighMidAirMorph",
{
"and": [
"SpaceJump",
"canCarefulJump"
]
},
{
"and": [
"SpaceJump",
"ScrewAttack"
]
},
{
"and": [
"ScrewAttack",
"canCarefulJump"
]
}
]
}
|
|
From: 2
Bottom Left Door
To: 6
Junction Behind Fune
Notable: true A well-done mid-air morph can get up and over the Fune using the boost from a projectile hit. It's best to hit the flame as soon as it spawns. It's a 2.5 tile high mid air morph. It can be performed similar to how a 2 or 3 tile high morph is performed. Requires: "h_canFourTileJumpMorph"
"canNeutralDamageBoost"
"canTrickyJump"
{
"enemyDamage": {
"enemy": "Fune",
"type": "fireball",
"hits": 3
}
}
|
|
From: 2
Bottom Left Door
To: 6
Junction Behind Fune
Notable: true A paricularly precise mid-air morph can get up and over the Fune without damage. Stand a half tile away from the Fune when jump morphing for a higher ceiling. It's a 2.5 tile high mid air morph. It can be performed similar to how a 2 or 3 tile high morph is performed. Requires: "h_canFourTileJumpMorph" "canTrickyJump" |
|
From: 4
Junction Below Bomb Blocks
To: 2
Top Right Door
This is possible by jumping on the crumble blocks into a mid-air spring ball jump, or by avoiding them. The crumbles can be avoided by starting with either an air ball, a 3 tile high mid-air morph, or a low spring wall. These are generally safer, as bouncing on the crumble blocks with Spring Ball is trivial. Requires: {
"obstaclesCleared": [
"A"
]
}
"canTrickySpringBallJump"
{
"heatFrames": 250
}
{
"or": [
{
"and": [
"can4HighMidAirMorph",
"canSpringFling"
]
},
"canLateralMidAirMorph",
"canCrumbleJump",
{
"and": [
"h_canTrickySpringwall",
"canPreciseWalljump"
]
}
]
}
|
|
From: 9
Junction Below Crumble Blocks, Set Up to Clip
To: 4
Junction Below Bomb Blocks
Notable: true Ice Clip through the crumble blocks using a Multiviola from the bottom of the room and then Crumble Jump to clip through the bomb blocks. The ice clip can be setup by standing in a corner and firing forward when the Multiviola hits Samus, if it is moving downwards towards Samus. Very quickly jump and morph to place a bomb against the bomb blocks. Or break the crumble blocks and use SpringBall to jump again to place the bomb. Then jump again while the Multiviola is still frozen to clip through. Requires: "h_heatProof"
"canPreciseCeilingClip"
"canTrickyUseFrozenEnemies"
{
"enemyDamage": {
"enemy": "Multiviola",
"type": "contact",
"hits": 1
}
}
{
"obstaclesNotCleared": [
"A"
]
}
"h_canUseMorphBombs"
{
"or": [
"h_canUseSpringBall",
"can4HighMidAirMorph"
]
}
Clears obstacles: B |
|
From: 5
Middle Right Door
To: 8
Item
Shinecharging up the stairs gives a longer effective runway than shinecharging down them. Bounce down the stairs to make movement simpler. A frozen Atomic (or Covern) can be used for more runway. Requires: "canChainTemporaryBlue"
"canXRayTurnaround"
{
"or": [
{
"and": [
"can4HighMidAirMorph",
{
"doorUnlockedAtNode": 5
},
{
"canShineCharge": {
"usedTiles": 11,
"openEnd": 2,
"steepUpTiles": 7
}
}
]
},
{
"and": [
"f_DefeatedPhantoon",
"h_canFrozenEnemyRunway",
"can4HighMidAirMorph",
{
"doorUnlockedAtNode": 5
},
{
"canShineCharge": {
"usedTiles": 13,
"openEnd": 1,
"steepUpTiles": 7
}
}
]
},
{
"canShineCharge": {
"usedTiles": 10,
"openEnd": 2,
"steepUpTiles": 7
}
},
{
"and": [
"f_DefeatedPhantoon",
"h_canFrozenEnemyRunway",
{
"canShineCharge": {
"usedTiles": 12,
"openEnd": 1,
"steepUpTiles": 7
}
}
]
}
]
}
Clears obstacles: C |
|
From: 8
Item
To: 3
Bottom Left Door
Requires: {
"not": "f_DefeatedPhantoon"
}
"canRiskPermanentLossOfAccess"
"canTemporaryBlue"
"can4HighMidAirMorph"
"canSpringBallBounce"
{
"canShineCharge": {
"usedTiles": 16,
"openEnd": 0,
"steepUpTiles": 4
}
}
Clears obstacles: C |
|
From: 2
Bottom Door
To: 3
Bottom Right Ledge
Notable: true Use a Space Jump water bounce followed by a tight mid-air morph, to get a mid-air Spring Ball jump out of the water. Requires: "canSpaceJumpWaterBounce" "canTrickySpringBallJump" "can4HighMidAirMorph" |
|
It's possible to get out of the sand suitless and without HiJump after falling from the chute, by hugging the left side and moving quickly. Requires: "canSuitlessMaridia"
"canPlayInSand"
{
"or": [
{
"and": [
"h_canMaxHeightSpringBallJump",
{
"or": [
"canWalljump",
"can4HighMidAirMorph",
"h_canJumpIntoIBJ"
]
}
]
}
]
}
|
|
From: 5
Morph Tunnel Junction
To: 6
Junction Between Items
Requires: "h_canFourTileJumpMorph" |
|
From: 2
Bottom Door
To: 4
Water Level Junction
Standing on the platform in the room below, perform a spring ball jump mid-air a few tiles below the transition. Hold right through the transition, and do not bonk the door frame. Entrance condition: {
"comeInWithPlatformBelow": {
"minHeight": 9,
"maxHeight": 10,
"maxLeftPosition": 1,
"minRightPosition": 1
},
"comesThroughToilet": "no"
}
Requires: "canCrossRoomJumpIntoWater" "canTrickySpringBallJump" "can4HighMidAirMorph" |
|
From: 2
Bottom Door
To: 4
Water Level Junction
Standing on the platform in the room below, perform a spring ball jump mid-air a few tiles below the transition. It is necessary to morph very quickly after jumping in order to spring ball jump as low as necessary. Hold right through the transition, and do not bonk the door frame. Entrance condition: {
"comeInWithPlatformBelow": {
"minHeight": 8,
"maxHeight": 8,
"maxLeftPosition": 1,
"minRightPosition": 1
},
"comesThroughToilet": "no"
}
Requires: "canCrossRoomJumpIntoWater" "can4HighMidAirMorph" "canTrickySpringBallJump" "canInsaneJump" |
|
From: 1
Left Door
To: 3
Junction Below Right Door
It is recommended to shoot the ceiling block immediately upon room entry to bring one of the Puyos down so that it will not be a problem later. Requires: "canSuitlessMaridia"
"h_canMaxHeightSpringBallJump"
{
"or": [
"can4HighMidAirMorph",
"canStationaryLateralMidAirMorph",
{
"and": [
"canNeutralDamageBoost",
{
"enemyDamage": {
"enemy": "Puyo",
"type": "contact",
"hits": 2
}
}
]
}
]
}
|
|
From: 1
Left Door
To: 3
Junction Below Right Door
It is recommended to shoot the ceiling block immediately upon room entry to bring one of the Puyos down so that it will not be a problem later. Requires: "canSuitlessMaridia"
"canTrickySpringBallJump"
"canTrickyJump"
"canJumpIntoRespawningBlock"
{
"or": [
"can4HighMidAirMorph",
"canStationaryLateralMidAirMorph"
]
}
|
|
Requires: "Gravity"
{
"or": [
"Ice",
"ScrewAttack",
{
"enemyKill": {
"enemies": [
[
"Evir"
]
],
"explicitWeapons": [
"Plasma",
"Super",
"PowerBombPeriphery"
]
}
},
{
"enemyDamage": {
"enemy": "Evir",
"type": "particle",
"hits": 1
}
}
]
}
{
"and": [
"canPlayInSand",
{
"or": [
"canWalljump",
"HiJump",
"canUseFrozenEnemies",
"canGravityJump",
{
"and": [
"canTrickyJump",
"can4HighMidAirMorph",
"canTrickySpringBallJump"
]
}
]
}
]
}
|
|
From: 2
Item
To: 1
Left Door
Notable: true Perform a canSunkenTileWideWallClimb to get to the water surface, then use space jump at the water surface. Then either use space jump when the water is low then a spring ball jump to escape, or space jump when the water is high into a tight midair morph. Requires: "Morph" "canSuitlessMaridia" "canSpringBallJumpMidAir" "canSunkenTileWideWallClimb" "canTrickyJump" "can4HighMidAirMorph" "canSpaceJumpWaterBounce" |
|
Space jump while partially submerged for more time to mid-air morph. Requires: "Morph" "canSuitlessMaridia" "HiJump" "canSpaceJumpWaterBounce" "can4HighMidAirMorph" |
|
From: 1
Left Door
To: 5
Left Pillar Junction
Notable: true Time a bomb to hit Samus when she is morphed, 1 pixel into the sand, inside a sandfall, and moving horizontally. There is a setup using a Sand IBJ to rise up the sandfall from the floor and Sandfall Bounce with the correct timing. An alternate setup places the bomb before entering the sand and jumps into it with a very fast jump morph, using HiJump. Requires: "canSuitlessMaridia"
"canTrickyJump"
"canSandfallBounce"
"h_canUseMorphBombs"
{
"or": [
"canSandIBJ",
{
"and": [
"HiJump",
"can4HighMidAirMorph"
]
}
]
}
|
|
From: 3
Junction (Get Past Metroids, Left to Right)
To: 2
Right Door
Jump from the left platform and mid air morph to bounce through the lava quickly. This is only useful when morphing before reaching the ceiling. Requires: {
"acidFrames": 50
}
"canBounceBall"
"canLateralMidAirMorph"
"can4HighMidAirMorph"
{
"obstaclesCleared": [
"A"
]
}
|
|
From: 2
Bottom Door (locked)
To: 1
Top Left Door
Notable: true Move to the left side of the lowest section and jump morph before placing the Power Bomb to kill all three Metroids. Then Kill all three Metroids with Power Bombs while avoiding damage. Requires: {
"enemyKill": {
"enemies": [
[
"Metroid",
"Metroid",
"Metroid"
]
],
"explicitWeapons": [
"PowerBomb"
]
}
}
"canMetroidAvoid"
"canHitbox"
{
"or": [
"can4HighMidAirMorph",
"canInsaneJump"
]
}
Clears obstacles: A |
|
Climb to the middle section and kill all three Metroids while taking damage. Or use a tricky jump morph into the bottom left corner of room to kill all three Metroids from the bottom section. Requires: {
"enemyKill": {
"enemies": [
[
"Metroid",
"Metroid",
"Metroid"
]
],
"explicitWeapons": [
"PowerBomb"
]
}
}
{
"or": [
{
"and": [
"can4HighMidAirMorph",
"canTrickyJump",
{
"metroidFrames": 330
}
]
},
{
"metroidFrames": 530
}
]
}
Clears obstacles: A |
