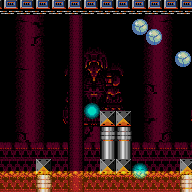
canTrickySpringBallBounce (Expert)
Performing spring ball bounces in tricky situations, such as precisely platforming while bouncing to keep blue speed.
Dependencies: canMidAirMorph, canSpringBallBounce, canLateralMidAirMorph, canTrivialMidAirMorph, canSpeedyJump, canDash
Strats ()
From: 1
Top Left Door
To: 6
Right of Morph Tunnel with Temporary Blue

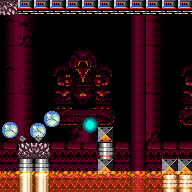
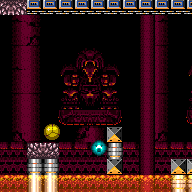
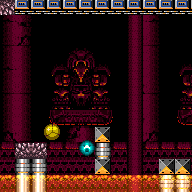
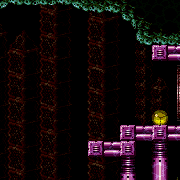
Use Springball on the spikes to cross the room with a Speedball. Then bounce into the Morph tunnel and use Springball to bounce all of the way through. It can help to unmorph before the Morph tunnel and use temporary blue to start the bounce into the tunnel. Entrance condition: {
"comeInGettingBlueSpeed": {
"length": 5,
"openEnd": 1,
"minExtraRunSpeed": "$2.0",
"maxExtraRunSpeed": "$3.F"
}
}Requires: "h_blueJump"
"canTrickySpringBallBounce"
{
"or": [
"canInsaneJump",
"canChainTemporaryBlue"
]
}
{
"spikeHits": 1
}Dev note: Higher and lower run speeds can also work but may need to jump earlier or take additional spike hits. |
From: 1
Left Door
To: 2
Right Door
Requires: {
"obstaclesCleared": [
"B"
]
}
{
"getBlueSpeed": {
"usedTiles": 15,
"steepUpTiles": 1,
"steepDownTiles": 1,
"openEnd": 1
}
}
"h_blueJump"
"canInsaneJump"
"canTrickySpringBallBounce"
"canChainTemporaryBlue"Clears obstacles: A, E Dev note: This assumes getting blue speed using significantly less than the available runway, because at higher speed it would be more difficult to bounce across the room. |
From: 2
Right Door
To: 1
Left Door
Carry temporary blue across the room, breaking the bomb blocks along the way. Use Spring Ball to bounce through the morph tunnel at the beginning, and across the final stretch at the end. Entrance condition: {
"comeInShinecharging": {
"length": 4,
"openEnd": 1
}
}Requires: "canLongChainTemporaryBlue"
"canTrickySpringBallBounce"
{
"acidFrames": 5
}
{
"or": [
"canInsaneJump",
{
"acidFrames": 30
}
]
}Clears obstacles: A, B |
From: 1
Left Door
To: 2
Right Door


Enter with blue speed and bounce on the item pedestal to make it across, then unmorph into temporary blue. If entering at high speed, morph on the left side of the pedestal so that there is enough space to use a controlled Spring Ball bounce. If entering with very low speed, a spring fling can help make it across. Entrance condition: {
"comeInGettingBlueSpeed": {
"length": 2,
"openEnd": 0,
"steepDownTiles": 1,
"minExtraRunSpeed": "$0.8"
}
}Requires: "canTrickySpringBallBounce" "canChainTemporaryBlue" "canSpeedball" Exit condition: {
"leaveWithTemporaryBlue": {}
}Collects items: 3 Unlocks doors: {"types":["ammo"],"requires":[]} |
From: 5
Lower Section - Bottom Right Door
To: 5
Lower Section - Bottom Right Door

Use the runway on the left side of the room to gain speed and bounce across the room. Requires: "canTrickySpringBallBounce" Exit condition: {
"leaveWithSpringBallBounce": {
"remoteRunway": {
"length": 22,
"openEnd": 1
},
"landingRunway": {
"length": 9,
"openEnd": 1,
"steepUpTiles": 2
},
"minExtraRunSpeed": "$1.2",
"maxExtraRunSpeed": "$4.8",
"blue": "any",
"movementType": "controlled"
}
}Dev note: Higher speed (at least up to $4.C) is possible with greater difficulty. |
|
Either use a long chain of controlled, short spring ball bounces to make it past the crumbles without touching the spikes, or simply hold jump and forward and take 7 spike hits. Requires: "h_useSpringBall"
{
"or": [
{
"tech": "canTrickySpringBallBounce"
},
{
"spikeHits": 7
}
]
}Dev note: This is a dashless strat. |
|
Entrance condition: {
"comeInWithBlueSpringBallBounce": {
"movementType": "controlled",
"maxExtraRunSpeed": "$2.8"
}
}Requires: "canTrickySpringBallBounce" "canInsaneJump" Dev note: Higher speeds can work but are more difficult. |
From: 13
Central Junction
To: 4
Left Side - Door Behind Power Bomb Blocks

Gain a shinecharge running right-to-left to obtain temporary blue. Then jump and morph, bouncing through the tunnel above, with the crumble block already broken. Unmorph when exiting the tunnel, and chain temporary blue into the next room. Requires: {
"notable": "Return Through Crumble Blocks"
}
{
"obstaclesCleared": [
"C"
]
}
{
"canShineCharge": {
"usedTiles": 16,
"openEnd": 0
}
}
"canTrickySpringBallBounce"
"canChainTemporaryBlue"
"canInsaneJump"Exit condition: {
"leaveWithTemporaryBlue": {}
}Unlocks doors: {"types":["ammo"],"requires":[]} |
From: 13
Central Junction
To: 7
Right Side - Door Behind Super Block
Perform a precise mockball or speedball into the morph tunnel. Then spring ball bounce through the door. Requires: {
"obstaclesCleared": [
"F"
]
}
"canTrickyJump"
"canLateralMidAirMorph"
"canTrickySpringBallBounce"Exit condition: {
"leaveWithSpringBallBounce": {
"remoteRunway": {
"length": 20,
"openEnd": 2
},
"landingRunway": {
"length": 3,
"openEnd": 1
},
"maxExtraRunSpeed": "$2.8",
"movementType": "controlled"
}
}Unlocks doors: {"types":["ammo"],"requires":[]}Dev note: Higher run speeds are possible but more difficult. |
From: 13
Central Junction
To: 7
Right Side - Door Behind Super Block
Stop with temporary blue in front of the bomb blocks then jump and bounce all the way through the morph tunnel. On the other side, unmorph and chain temporary blue through the door. Requires: {
"obstaclesCleared": [
"F"
]
}
{
"canShineCharge": {
"usedTiles": 22,
"openEnd": 2
}
}
"canChainTemporaryBlue"
"canTrickyJump"
"canLateralMidAirMorph"
"canTrickySpringBallBounce"Exit condition: {
"leaveWithTemporaryBlue": {}
}Unlocks doors: {"types":["ammo"],"requires":[]} |
From: 13
Central Junction
To: 8
Right Side - Bottom Door

Use Spring Ball to bounce through the morph tunnel. Then continue chaining temporary blue into the next room. Requires: {
"canShineCharge": {
"usedTiles": 24,
"openEnd": 1
}
}
"canXRayTurnaround"
"canTrickySpringBallBounce"
"canLongChainTemporaryBlue"Exit condition: {
"leaveWithTemporaryBlue": {}
}Unlocks doors: {"types":["ammo"],"requires":[]} |
From: 1
Right Door
To: 1
Right Door
Requires: {
"obstaclesCleared": [
"B"
]
}
"canTrickySpringBallBounce"
{
"or": [
{
"obstaclesCleared": [
"A"
]
},
{
"enemyDamage": {
"enemy": "Boyon",
"type": "contact",
"hits": 1
}
}
]
}Exit condition: {
"leaveWithSpringBallBounce": {
"remoteRunway": {
"length": 11,
"openEnd": 1
},
"landingRunway": {
"length": 4,
"openEnd": 1
},
"movementType": "controlled"
}
} |
From: 1
Right Door
To: 1
Right Door


At high speed, it is possible to avoid Boyon damage. Requires: {
"obstaclesCleared": [
"B"
]
}
"canTrickySpringBallBounce"Exit condition: {
"leaveWithSpringBallBounce": {
"remoteRunway": {
"length": 11,
"openEnd": 1
},
"landingRunway": {
"length": 4,
"openEnd": 1
},
"minExtraRunSpeed": "$2.D",
"movementType": "controlled"
}
} |
From: 3
Top Right Door
To: 1
Left Door
Once Samus is close enough to the ledge, the shot block can be cleared by jumping, releasing angle, shooting, and aiming down before hitting the ceiling; then continue chaining temporary blue until Samus is close enough to Spring Ball bounce through the morph tunnel. Entrance condition: {
"comeInWithTemporaryBlue": {}
}Requires: "canChainTemporaryBlue" "canTrickySpringBallBounce" |
From: 3
Top Right Door
To: 5
Kihunter Junction


Spring ball bounce directly into the tunnel to break the bomb block with blue speed. The Kihunters can be killed by retreating to the morph tunnel if needed. Entrance condition: {
"comeInWithBlueSpringBallBounce": {
"movementType": "controlled",
"maxExtraRunSpeed": "$2.8"
}
}Requires: "canTrickySpringBallBounce" "canInsaneJump" Clears obstacles: B, C |
From: 3
Top Right Door
To: 5
Kihunter Junction
Approach the morph tunnel by chaining temporary blue; then spring ball bounce through the tunnel to break the bomb block. The Kihunters can be killed by retreating to the morph tunnel if needed. Entrance condition: {
"comeInWithTemporaryBlue": {}
}Requires: "canChainTemporaryBlue" "canTrickySpringBallBounce" Clears obstacles: B, C |
From: 3
Right Vertical Door
To: 2
Bottom Left Door
Entrance condition: {
"comeInWithTemporaryBlue": {
"direction": "left"
},
"comesThroughToilet": "any"
}Requires: "canChainTemporaryBlue" "canTrickySpringBallBounce" Clears obstacles: A |
From: 3
Right Vertical Door
To: 2
Bottom Left Door
Entrance condition: {
"comeInWithTemporaryBlue": {
"direction": "right"
},
"comesThroughToilet": "any"
}Requires: "canChainTemporaryBlue" "canXRayTurnaround" "canTrickySpringBallBounce" Clears obstacles: A |
From: 7
Top Right Door
To: 1
Left Side - Top Door

Entrance condition: {
"comeInGettingBlueSpeed": {
"length": 2.5,
"openEnd": 1,
"minExtraRunSpeed": "$1.9",
"maxExtraRunSpeed": "$2.8"
}
}Requires: "canSpeedball" "canTrickySpringBallBounce" "canChainTemporaryBlue" Exit condition: {
"leaveWithTemporaryBlue": {}
}Unlocks doors: {"types":["ammo"],"requires":[]}Dev note: Speeds higher or lower than this can work but with greater difficulty. |
|
Requires: "h_heatedRemoteRunwaySpringBall"
{
"heatFrames": 530
}Exit condition: {
"leaveWithSpringBallBounce": {
"remoteRunway": {
"length": 12,
"openEnd": 1
},
"landingRunway": {
"length": 6,
"openEnd": 1
},
"minExtraRunSpeed": "$2.0",
"movementType": "any"
}
}Dev note: This uses the runway in the middle of the room but logically starts at the door, to ensure it can be opened. |
From: 1
Left Door
To: 2
Right Door
Use angle-down shots to kill the Geruta from the left of the morph tunnel. Entrance condition: {
"comeInShinecharging": {
"length": 2,
"openEnd": 1
}
}Requires: "canLongChainTemporaryBlue"
"canTrickySpringBallBounce"
{
"heatFrames": 865
}
{
"or": [
"canXRayCancelShinecharge",
{
"heatFrames": 160
}
]
}Exit condition: {
"leaveWithTemporaryBlue": {}
}Unlocks doors: {"types":["super","powerbomb"],"requires":[]}
{"types":["missiles"],"requires":[{"heatFrames":50}]} |
From: 2
Right Door
To: 1
Left Door

Entrance condition: {
"comeInShinecharging": {
"length": 2,
"openEnd": 0
}
}Requires: "canLongChainTemporaryBlue"
"canTrickySpringBallBounce"
{
"heatFrames": 650
}
{
"or": [
"canXRayCancelShinecharge",
{
"heatFrames": 190
}
]
}Exit condition: {
"leaveWithTemporaryBlue": {}
}Unlocks doors: {"types":["super","powerbomb"],"requires":[]}
{"types":["missiles"],"requires":[{"heatFrames":50}]} |
From: 2
Middle Left Door
To: 1
Top Left Door
Entrance condition: {
"comeInShinecharging": {
"length": 4,
"openEnd": 1,
"gentleUpTiles": 2
}
}Requires: "canLongChainTemporaryBlue"
{
"heatFrames": 900
}
{
"or": [
"canXRayCancelShinecharge",
{
"heatFrames": 160
}
]
}
"canTrickySpringBallBounce"
"canXRayTurnaround"Exit condition: {
"leaveWithTemporaryBlue": {}
}Unlocks doors: {"types":["super","powerbomb"],"requires":[]}
{"types":["missiles"],"requires":[{"heatFrames":50}]} |
From: 2
Middle Left Door
To: 4
Top Right Door
Entrance condition: {
"comeInShinecharging": {
"length": 4,
"openEnd": 1,
"gentleUpTiles": 2
}
}Requires: "canLongChainTemporaryBlue"
{
"heatFrames": 860
}
{
"or": [
"canXRayCancelShinecharge",
{
"heatFrames": 160
}
]
}
"canTrickySpringBallBounce"
"canXRayTurnaround"Exit condition: {
"leaveWithTemporaryBlue": {}
}Unlocks doors: {"types":["super","powerbomb"],"requires":[]}
{"types":["missiles"],"requires":[{"heatFrames":50}]} |
|
Use controlled Spring Ball bounces to cross the whole room while avoiding all enemy damage. There is a significant chance of failure due to bad Squeept RNG. Entrance condition: {
"comeInRunning": {
"speedBooster": "no",
"minTiles": 4
}
}Requires: "canTrickySpringBallBounce"
"canInsaneJump"
"canBeVeryPatient"
{
"heatFrames": 390
} |
|
Requires: "h_heatedRemoteRunwayTrickySpringBall"
{
"heatFrames": 600
}
{
"or": [
"canTrickyDodgeEnemies",
{
"and": [
{
"heatFrames": 100
},
{
"enemyKill": {
"enemies": [
[
"Dragon"
],
[
"Dragon"
]
],
"excludedWeapons": [
"Bombs"
]
}
}
]
}
]
}Exit condition: {
"leaveWithSpringBallBounce": {
"remoteRunway": {
"length": 5,
"openEnd": 2
},
"landingRunway": {
"length": 4,
"openEnd": 1
},
"minExtraRunSpeed": "$1.A",
"movementType": "controlled"
}
} |
From: 2
Bottom Left Door
To: 1
Top Left Door
Move quickly (when X-Ray is not active) to climb the shaft before the Fune fireballs would reach Samus. Entrance condition: {
"comeInGettingBlueSpeed": {
"length": 5,
"openEnd": 1
}
}Requires: "canTrickySpringBallBounce"
"canLongChainTemporaryBlue"
"canXRayTurnaround"
{
"heatFrames": 1020
}Exit condition: {
"leaveWithTemporaryBlue": {}
}Unlocks doors: {"types":["super","powerbomb"],"requires":[]}
{"types":["missiles"],"requires":[{"heatFrames":50}]} |
From: 6
Bottom Right Junction
To: 4
Bottom Right Door
Requires: {
"obstaclesCleared": [
"A"
]
}
"h_heatedRemoteRunwaySpringBall"
{
"heatFrames": 360
}Exit condition: {
"leaveWithSpringBallBounce": {
"remoteRunway": {
"length": 37,
"openEnd": 2,
"gentleDownTiles": 2
},
"landingRunway": {
"length": 2,
"openEnd": 1
},
"minExtraRunSpeed": "$3.2",
"movementType": "uncontrolled"
}
}Unlocks doors: {"types":["missiles"],"requires":[{"heatFrames":50}]}
{"types":["super"],"requires":[]}
{"types":["powerbomb"],"requires":[{"heatFrames":70}]}Dev note: FIXME: This should be changed to start at node 9. |
|
Entrance condition: {
"comeInWithTemporaryBlue": {}
}Requires: "canLongChainTemporaryBlue" "canXRayTurnaround" "canTrickySpringBallBounce" Clears obstacles: C |
From: 1
Left Door
To: 2
Right Door
Entrance condition: {
"comeInGettingBlueSpeed": {
"length": 2,
"openEnd": 1,
"minExtraRunSpeed": "$1.D",
"maxExtraRunSpeed": "$2.F"
}
}Requires: {
"or": [
{
"and": [
"canBlueSpaceJump",
{
"heatFrames": 215
}
]
},
{
"and": [
"canTrickySpringBallBounce",
{
"heatFrames": 215
}
]
},
{
"and": [
"canLongChainTemporaryBlue",
{
"heatFrames": 370
}
]
}
]
}Exit condition: {
"leaveWithTemporaryBlue": {}
}Unlocks doors: {"types":["super","powerbomb"],"requires":[]}
{"types":["missiles"],"requires":[{"heatFrames":50}]} |
From: 2
Right Door
To: 1
Left Door
Entrance condition: {
"comeInGettingBlueSpeed": {
"length": 2,
"openEnd": 1,
"minExtraRunSpeed": "$1.9",
"maxExtraRunSpeed": "$2.F"
}
}Requires: "canChainTemporaryBlue"
{
"or": [
{
"and": [
"canBlueSpaceJump",
{
"heatFrames": 215
}
]
},
{
"and": [
"canTrickySpringBallBounce",
{
"heatFrames": 215
}
]
},
{
"and": [
"canLongChainTemporaryBlue",
"canInsaneJump",
{
"heatFrames": 380
}
]
}
]
}Exit condition: {
"leaveWithTemporaryBlue": {}
}Unlocks doors: {"types":["super","powerbomb"],"requires":[]}
{"types":["missiles"],"requires":[{"heatFrames":50}]} |
From: 2
Right Vertical Door
To: 1
Left Door
Requires: {
"obstaclesCleared": [
"A",
"B",
"E"
]
}
"canTrickySpringBallJump"
"canTrickySpringBallBounce"
"canInsaneJump"Exit condition: {
"leaveWithSpringBallBounce": {
"remoteRunway": {
"length": 45,
"openEnd": 1
},
"landingRunway": {
"length": 10,
"openEnd": 1
},
"minExtraRunSpeed": "$4.0",
"movementType": "controlled"
}
}Unlocks doors: {"types":["ammo"],"requires":[],"useImplicitRequires":false} |
From: 2
Right Vertical Door
To: 1
Left Door
Requires: {
"obstaclesCleared": [
"B",
"E"
]
}
"canSpeedyJump"
"canTrickySpringBallJump"
"canTrickySpringBallBounce"
"canInsaneJump"Exit condition: {
"leaveWithSpringBallBounce": {
"remoteRunway": {
"length": 32,
"openEnd": 1,
"gentleUpTiles": 6
},
"landingRunway": {
"length": 10,
"openEnd": 1
},
"minExtraRunSpeed": "$4.0",
"movementType": "controlled"
}
}Unlocks doors: {"types":["ammo"],"requires":[],"useImplicitRequires":false} |
From: 5
Bottom Junction Right of Morph Tunnel
To: 2
Bottom Right Door
Requires: {
"obstaclesCleared": [
"A"
]
}
"h_heatedRemoteRunwayTrickySpringBall"
{
"heatFrames": 185
}Exit condition: {
"leaveWithSpringBallBounce": {
"remoteRunway": {
"length": 10,
"openEnd": 1
},
"landingRunway": {
"length": 4,
"openEnd": 1
},
"minExtraRunSpeed": "$2.0",
"movementType": "controlled"
}
}Unlocks doors: {"types":["missiles"],"requires":[{"heatFrames":50}]}
{"types":["super"],"requires":[]}
{"types":["powerbomb"],"requires":[{"heatFrames":50}]}Dev note: It is assumed that the door was shot open when entering on the right, but extra heat frames are included here for it. |
From: 2
Right Door
To: 1
Left Door
Requires: {
"obstaclesCleared": [
"A",
"B",
"C"
]
}
"canDash"
"h_heatedRemoteRunwayTrickySpringBall"
{
"heatFrames": 205
}Exit condition: {
"leaveWithSpringBallBounce": {
"remoteRunway": {
"length": 18,
"openEnd": 1
},
"landingRunway": {
"length": 5,
"openEnd": 1
},
"minExtraRunSpeed": "$4.0",
"movementType": "controlled"
}
}Unlocks doors: {"types":["ammo"],"requires":[],"useImplicitRequires":false} |
From: 3
Junction Left of Green Gate
To: 1
Left Door
Requires: {
"obstaclesCleared": [
"B",
"C"
]
}
"canDash"
"h_heatedRemoteRunwayTrickySpringBall"
{
"heatFrames": 240
}Exit condition: {
"leaveWithSpringBallBounce": {
"remoteRunway": {
"length": 18,
"openEnd": 1
},
"landingRunway": {
"length": 5,
"openEnd": 1
},
"minExtraRunSpeed": "$2.0",
"movementType": "controlled"
}
}Unlocks doors: {"types":["ammo"],"requires":[],"useImplicitRequires":false} |
From: 1
Left Door
To: 2
Right Door
Entrance condition: {
"comeInWithSpringBallBounce": {
"speedBooster": "no",
"movementType": "controlled",
"remoteAndLandingMinTiles": [
[
30,
1
]
]
}
}Requires: "canTrickySpringBallBounce"
"canSpringFling"
{
"heatFrames": 140
} |
From: 1
Left Door
To: 2
Right Door

Entrance condition: {
"comeInJumping": {
"speedBooster": "no",
"minTiles": 3
}
}Requires: "canTrickySpringBallBounce"
{
"heatFrames": 315
} |
From: 1
Left Door
To: 2
Right Door
Entrance condition: {
"comeInJumping": {
"speedBooster": "no",
"minTiles": 4
}
}Requires: "canTrickySpringBallBounce"
{
"heatFrames": 285
} |
From: 1
Left Door
To: 2
Right Door

Entrance condition: {
"comeInJumping": {
"speedBooster": "no",
"minTiles": 5
}
}Requires: "canTrickySpringBallBounce"
{
"heatFrames": 265
} |
From: 1
Left Door
To: 2
Right Door
Entrance condition: {
"comeInWithSpringBallBounce": {
"speedBooster": "any",
"movementType": "controlled",
"remoteAndLandingMinTiles": [
[
7,
0
]
]
}
}Requires: "canTrickySpringBallBounce"
{
"heatFrames": 240
} |
From: 2
Right Door
To: 1
Left Door
Entrance condition: {
"comeInWithSpringBallBounce": {
"speedBooster": "yes",
"movementType": "any",
"remoteAndLandingMinTiles": [
[
33,
1
]
]
}
}Requires: "canTrickySpringBallBounce"
"canSpringFling"
{
"heatFrames": 155
} |
From: 2
Right Door
To: 1
Left Door

Entrance condition: {
"comeInRunning": {
"speedBooster": "no",
"minTiles": 3
}
}Requires: "canTrickySpringBallBounce"
{
"heatFrames": 260
} |
From: 2
Right Door
To: 1
Left Door
Entrance condition: {
"comeInRunning": {
"speedBooster": "no",
"minTiles": 3
}
}Requires: "canTrickySpringBallBounce"
{
"heatFrames": 235
} |
From: 2
Right Door
To: 1
Left Door
Entrance condition: {
"comeInWithSpringBallBounce": {
"speedBooster": "any",
"movementType": "controlled",
"remoteAndLandingMinTiles": [
[
7,
0
]
]
}
}Requires: "canTrickySpringBallBounce"
{
"heatFrames": 240
} |
|
Gain max run speed, without Speed Booster equipped, and perform precise, controlled bounces to cross the room. Bounce on each of the Hibashi platforms, avoiding damage by going underneath the flames: the bottom of the flame disappears before the top. Requires: {
"disableEquipment": "SpeedBooster"
}
"canTrickySpringBallBounce"
"canInsaneJump"
{
"heatFrames": 375
} |
|
Gain max run speed, without Speed Booster equipped, and bounce onto the second 2-tile-wide platform. Continue uncontrolled bouncing all the way across the room, taking a boost from a Hibashi hit. Perform a neutral bounce on the final single-tile platform. If Samus is positioned relatively far left, she may miss the last platform and fall into the acid; this can be avoided by unequipping Spring Ball (a 'spring fling') to reset Samus' vertical speed, bypassing the final platform. Requires: {
"disableEquipment": "SpeedBooster"
}
"canTrickySpringBallBounce"
{
"hibashiHits": 1
}
{
"or": [
"canSpringFling",
"canInsaneJump"
]
}
{
"heatFrames": 375
} |
From: 2
Bottom Right Vertical Door
To: 3
Middle Right Door


Position Samus no farther left than the center of the door when entering the room. Jump into the ceiling towards the Morph tunnel using a neutral bounce followed by Spring Ball bounces to break all the bomb blocks in the tunnel. Entrance condition: {
"comeInWithTemporaryBlue": {
"direction": "left"
},
"comesThroughToilet": "any"
}Requires: {
"heatFrames": 650
}
"canChainTemporaryBlue"
"canTrickySpringBallBounce" |
|


Requires: {
"obstaclesCleared": [
"A"
]
}
"canTrickySpringBallBounce"Exit condition: {
"leaveWithSpringBallBounce": {
"remoteRunway": {
"length": 38,
"openEnd": 0
},
"landingRunway": {
"length": 3,
"openEnd": 1
},
"movementType": "controlled"
}
} |
|


Requires: {
"obstaclesCleared": [
"A"
]
}
"canTrickySpringBallBounce"
"f_DefeatedPhantoon"Exit condition: {
"leaveWithSpringBallBounce": {
"remoteRunway": {
"length": 45,
"openEnd": 1
},
"landingRunway": {
"length": 3,
"openEnd": 1
},
"movementType": "controlled"
}
} |
|


Bounce directly into the morph tunnel. This version allows preserving a flash suit. Entrance condition: {
"comeInWithBlueSpringBallBounce": {
"movementType": "controlled",
"maxExtraRunSpeed": "$1.A",
"minLandingTiles": 2
}
}Requires: "canTrickySpringBallBounce" "canInsaneJump" Clears obstacles: A |
From: 3
Right Door
To: 3
Right Door
If power is off, kago inside the left Workrobot, gaining speed at the start of the run by running in place. For extra run speeds between $5.9 and $5.C, Samus can jump over the island; For extra run speeds of $5.8 or lower, Samus can run under the island and jump over the Workrobot (only required if power is off). Higher speeds than $5.C could be obtained with the power on but with greater difficulty. Requires: {
"obstaclesCleared": [
"A"
]
}
{
"or": [
"canKago",
"f_DefeatedPhantoon"
]
}
"canTrickySpringBallBounce"
"canInsaneJump"Exit condition: {
"leaveWithSpringBallBounce": {
"remoteRunway": {
"length": 35,
"openEnd": 1
},
"landingRunway": {
"length": 1,
"openEnd": 1
},
"maxExtraRunSpeed": "$5.C",
"blue": "any",
"movementType": "controlled"
}
}Dev note: One tile of landing runway is considered unusable because at higher speeds it may not be possible to land far from the door. |
From: 3
Top Right Door
To: 3
Top Right Door
Requires: {
"obstaclesCleared": [
"A"
]
}
"canTrickySpringBallBounce"Exit condition: {
"leaveWithSpringBallBounce": {
"remoteRunway": {
"length": 15,
"openEnd": 2
},
"landingRunway": {
"length": 8,
"openEnd": 1
},
"maxExtraRunSpeed": "$1.8",
"blue": "yes",
"movementType": "controlled"
}
} |
Come in Shinecharging, Leave With Temporary Blue (Suitless Spring Ball Bounce, Pause Remorph)
(Extreme+)
Crab Hole
From: 1
Top Left Doorway
To: 2
Bottom Left Door

Use Spring Ball to bounce into the hole, then unmorph to descend. Use a pause buffer to remorph, then chain temporary blue into the next room. Entrance condition: {
"comeInShinecharging": {
"length": 1,
"openEnd": 0
}
}Requires: "canSuitlessMaridia" "canTrickySpringBallBounce" "canPauseRemorphTemporaryBlue" "canXRayTurnaround" Exit condition: {
"leaveWithTemporaryBlue": {}
}Unlocks doors: {"types":["ammo"],"requires":[]} |
Come in Shinecharging, Leave With Temporary Blue (Suitless Spring Ball Bounce, Pause Remorph)
(Extreme+)
Crab Hole
From: 1
Top Left Doorway
To: 3
Bottom Right Door

Use Spring Ball to bounce into the hole, then unmorph to descend. Use a pause buffer to remorph, then chain temporary blue into the next room. Entrance condition: {
"comeInShinecharging": {
"length": 1,
"openEnd": 0
}
}Requires: "canSuitlessMaridia" "canTrickySpringBallBounce" "canPauseRemorphTemporaryBlue" Exit condition: {
"leaveWithTemporaryBlue": {}
}Unlocks doors: {"types":["ammo"],"requires":[]} |
Come in Shinecharging, Leave With Temporary Blue (Suitless Spring Ball Bounce, Pause Remorph)
(Extreme+)
Crab Hole
From: 4
Top Right Doorway
To: 2
Bottom Left Door

Use Spring Ball to bounce into the hole, then unmorph to descend. Use a pause buffer to remorph, then chain temporary blue into the next room. Entrance condition: {
"comeInShinecharging": {
"length": 1,
"openEnd": 0
}
}Requires: "canSuitlessMaridia" "canTrickySpringBallBounce" "canPauseRemorphTemporaryBlue" Exit condition: {
"leaveWithTemporaryBlue": {}
}Unlocks doors: {"types":["ammo"],"requires":[]} |
Come in Shinecharging, Leave With Temporary Blue (Suitless Spring Ball Bounce, Pause Remorph)
(Extreme+)
Crab Hole
From: 4
Top Right Doorway
To: 3
Bottom Right Door
Use Spring Ball to bounce into the hole, then unmorph to descend. Use a pause buffer to remorph, then chain temporary blue into the next room. Entrance condition: {
"comeInShinecharging": {
"length": 1,
"openEnd": 0
}
}Requires: "canSuitlessMaridia" "canTrickySpringBallBounce" "canPauseRemorphTemporaryBlue" "canXRayTurnaround" Exit condition: {
"leaveWithTemporaryBlue": {}
}Unlocks doors: {"types":["ammo"],"requires":[]} |
From: 2
Bottom Right Door
To: 3
Middle Right Door
Morph while descending through the door transition in order to bounce after the transition. Getting a high enough bounce requires speed in a specific range, corresponding to using about 7 tiles of runway. For the lowest speed in this range, a spring ball jump is needed to make it up; to prepare for this case, pause immediately when entering the room in order to unequip Spring Ball after the bounce. Entrance condition: {
"comeInSpinning": {
"speedBooster": "yes",
"unusableTiles": 1,
"minExtraRunSpeed": "$2.0",
"maxExtraRunSpeed": "$2.3"
}
}Requires: "canSuitlessMaridia" "canTrickyDashJump" "canTrickySpringBallBounce" "canDoubleSpringBallJumpMidAir" |
From: 2
Bottom Right Door
To: 3
Middle Right Door
Use Spring Ball to bounce after the transition. Getting a high enough bounce requires speed in a specific range, corresponding to using about 7 tiles of runway. For the lowest speed in this range, a spring ball jump is needed to make it up; to prepare for this case, pause immediately when entering the room in order to unequip Spring Ball after the bounce. Entrance condition: {
"comeInWithSpringBallBounce": {
"speedBooster": "yes",
"movementType": "any",
"remoteAndLandingMinTiles": [
[
6.4375,
0
]
]
}
}Requires: "canSuitlessMaridia" "canTrickyDashJump" "canTrickySpringBallBounce" "canDoubleSpringBallJumpMidAir" |
|
In the other room, use 6 runway tiles to gain an extra run speed of exactly $1.D, with Speed Booster unequipped. Jump into a lateral mid-air morph and touch the door transition while descending close to the ground. Hold jump to do an uncontrolled bounce immediately after the transition. Pause as Samus passes under the first ceiling Grapple block. Equip Speed Booster and unequip Spring Ball, to get a spring fling. Pause again and re-equip Spring Ball to get a second spring fling. Continue holding jump to bounce on both Grapple platforms with uncontrolled bounces; Samus must bounce on the left edge of the first platform in order to just barely make the bounce on the right edge of the second platform. Perform one more spring fling, by unequipping Spring Ball as Samus begins to descend. Samus should make it into the nook below the right door; A Flatley jump into mid-air spring ball jump will get Samus up to the door. Entrance condition: {
"comeInSpinning": {
"speedBooster": "no",
"unusableTiles": 3,
"minExtraRunSpeed": "$1.D",
"maxExtraRunSpeed": "$1.D"
}
}Requires: {
"notable": "Spring Ball Bounce Left to Right"
}
"canTrickyDashJump"
"canInsaneJump"
"canCrossRoomJumpIntoWater"
"canTrickySpringBallBounce"
"canFlatleyJump"
"canTrickySpringBallJump"Dev note: A comeInSpinning entrance condition is used to ensure it is possible to enter in the right position, even though technically Samus should enter morphed rather than spinning. With longer runway, a number of variations of this strat are possible: entering with a mockball (or controlled bounce) with speed at least $4.4, it is possible to bounce immediately on entry and do two spring flings to reach the second Grapple platform directly. with the same type of entry and speeds at least $5.4, it is possible do controlled bounces on both Grapple platforms, with no spring fling needed. |
|
In the other room, use at least 6 runway tiles to gain an extra run speed at least $1.D, with Speed Booster unequipped. Jump into a lateral mid-air morph and touch the door transition while descending close to the ground. Hold jump to do an uncontrolled bounce immediately after the transition. Pause as Samus passes under the first ceiling Grapple block. Equip Speed Booster and unequip Spring Ball, to get a spring fling. Pause again and re-equip Spring Ball to get a second spring fling. Entrance condition: {
"comeInSpinning": {
"speedBooster": "no",
"unusableTiles": 3,
"minExtraRunSpeed": "$1.D"
}
}Requires: {
"notable": "Spring Ball Bounce Left to Right"
}
"canInsaneJump"
"canSpeedyJump"
"canCrossRoomJumpIntoWater"
"canTrickySpringBallBounce"Dev note: A comeInSpinning entrance condition is used to ensure it is possible to enter in the right position, even though technically Samus should enter morphed rather than spinning. |
From: 4
Top Right Door
To: 9
Platform Below Top Door
In the previous room, gain max run speed without Speed Booster equipped, requiring about 7 tiles of runway (obtaining an extra run speed of $2.0). After the transition, jump to slightly less than full height, performing a lateral mid-air morph just early enough to avoid bonking the ceiling Grapple block. Pause to equip Speed Booster before bouncing on the first Grapple platform; this provides a boost in the bounce height to be able to make it to the Grapple platform below the top door. Entrance condition: {
"comeInRunning": {
"speedBooster": "no",
"minTiles": 6.4375
}
}Requires: {
"notable": "Spring Ball Bounce Right to Left"
}
"canSpeedyJump"
"canCrossRoomJumpIntoWater"
"canTrickySpringBallBounce" |
From: 4
Top Right Door
To: 9
Platform Below Top Door

In the previous room, gain max run speed without Speed Booster equipped, requiring about 7 tiles of runway (obtaining an extra run speed of $2.0). Enter the room either in a mockball (or process of mockballing), or descending from a controlled Spring Ball bounce. Just after the transition, jump or bounce to slightly less than full height. Pause to equip Speed Booster before bouncing on the first Grapple platform; this provides a boost in the bounce height to be able to make it to the Grapple platform below the top door. Entrance condition: {
"comeInWithSpringBallBounce": {
"speedBooster": "no",
"movementType": "controlled",
"remoteAndLandingMinTiles": [
[
6.4375,
0
]
]
}
}Requires: {
"notable": "Spring Ball Bounce Right to Left"
}
"canSpeedyJump"
"canCrossRoomJumpIntoWater"
"canTrickySpringBallBounce" |
From: 4
Top Right Door
To: 11
Upper Left Ledge Junction
With Speed Booster equipped, run into the room using at least about 2 tiles of runway (at least $0.C extra run speed). If needed, perform two spring flings by pausing and unequipping Spring Ball, then pausing again and re-equipping it before bouncing on the first Grapple platform. Afterward, perform additional spring flings as needed to make it across the room, taking care to avoid the Powamp. Entrance condition: {
"comeInRunning": {
"speedBooster": "yes",
"minTiles": 1.4375
}
}Requires: {
"notable": "Spring Ball Bounce Right to Left"
}
"canCrossRoomJumpIntoWater"
"canTrickySpringBallBounce"
"canSpringFling"
"h_unpauseKeepMomentum"
"canInsaneJump" |
From: 4
Top Right Door
To: 11
Upper Left Ledge Junction

Enter the room morphed, either in a mockball on the ground or descending from a controlled bounce, with about 1 tile worth of speed (at least $0.9 extra run speed). Use Spring Ball to jump or do a controlled bounce after the transition. While descending and before bouncing on the first Grapple platform, perform two spring flings by pausing and unequipping Spring Ball, then pausing again and re-equipping it. Afterward, perform additional spring flings as needed to make it across the room, taking care to avoid the Powamp. Note that Samus must be fully morphed when entering the room (not in the middle of a morphing animation), or the spring flings will not work, assuming Speed Booster is not equipped. Entrance condition: {
"comeInWithSpringBallBounce": {
"speedBooster": "any",
"movementType": "controlled",
"adjacentMinTiles": 4,
"remoteAndLandingMinTiles": [
[
0.4375,
1
]
]
}
}Requires: {
"notable": "Spring Ball Bounce Right to Left"
}
"canCrossRoomJumpIntoWater"
"canTrickySpringBallBounce"
"canSpringFling"
"canInsaneJump" |
From: 4
Top Right Door
To: 11
Upper Left Ledge Junction
Enter the room morphed, either in a mockball on the ground or descending from a controlled bounce, with about 5 or more runway tiles worth of speed (at least $1.8 extra run speed). Use Spring Ball to jump or do a controlled bounce after the transition. Bounce on the first Grapple platform. Then perform a 'spring fling' by unequipping Spring Ball while descending, to reset Samus' vertical speed and be able to make it across room. Note that Samus must be fully morphed when entering the room (not in the middle of a morphing animation), or the spring fling will not work, assuming Speed Booster is not equipped. Entrance condition: {
"comeInWithSpringBallBounce": {
"speedBooster": "any",
"movementType": "controlled",
"adjacentMinTiles": 8,
"remoteAndLandingMinTiles": [
[
4.4375,
2
]
]
}
}Requires: {
"notable": "Spring Ball Bounce Right to Left"
}
"canCrossRoomJumpIntoWater"
"canTrickySpringBallBounce"
"canSpringFling"Dev note: This can be done with a mockball with only 1 landing tile, but this is more difficult and it's unclear if we can guarantee it works in every possible room; it shouldn't be important to model, because the low-speed variant of this strat already covers the more difficult case. |
From: 4
Top Right Door
To: 11
Upper Left Ledge Junction

Come in with speed in a specific range (extra run speed between $2.0 and $2.3), corresponding to using about 7 tiles of runway. Bounce on the two islands below, in order to make it up to the top-left part of the room. Entrance condition: {
"comeInWithSpringBallBounce": {
"speedBooster": "yes",
"movementType": "controlled",
"remoteAndLandingMinTiles": [
[
6.4375,
0
]
]
}
}Requires: "canTrickyDashJump" "canTrickySpringBallBounce" |
From: 5
Right Door
To: 7
Top Right Left Item

Depending on Samus' speed and position, either perform a speedball or an uncontrolled bounce onto the platform below the Speed blocks. Unmorph and continue holding up in order to break the Speed blocks while passing up through them. The top Speed blocks will respawn; to get on top of them, it can help to press against the wall (to discard blue speed) and then aim down to reduce Samus' hitbox. If available, using Grapple while aiming down can also help. Alternatively, if Samus breaks only the right column of Speed blocks, Samus can use the center left Speed block as a stepping stone. Be careful not to fall through the Speed blocks below as it will result in a softlock. Entrance condition: {
"comeInBlueSpinning": {
"minExtraRunSpeed": "$3.4",
"maxExtraRunSpeed": "$4.C",
"unusableTiles": 1
}
}Requires: {
"notable": "Suitless Blue Bomber"
}
"canSuitlessMaridia"
"HiJump"
"canSpeedball"
"canTrickySpringBallBounce"
"canMomentumConservingMorph"Dev note: Slightly lower or higher speeds could work but with greater difficulty. |
From: 5
Right Door
To: 7
Top Right Left Item
Bounce onto the platform below the Speed blocks. Unmorph and continue holding up in order to break the Speed blocks while passing up through them. The top Speed blocks will respawn; to get on top of them, it can help to press against the wall (to discard blue speed) and then aim down to reduce Samus' hitbox. If available, using Grapple while aiming down can also help. Alternatively, if Samus breaks only the right column of Speed blocks, Samus can use the center left Speed block as a stepping stone. Be careful not to fall through the Speed blocks below as it will result in a softlock. Entrance condition: {
"comeInWithBlueSpringBallBounce": {
"movementType": "controlled",
"minExtraRunSpeed": "$3.4",
"maxExtraRunSpeed": "$4.C"
}
}Requires: {
"notable": "Suitless Blue Bomber"
}
"canSuitlessMaridia"
"HiJump"
"canTrickySpringBallBounce"
"canInsaneJump"
"canMomentumConservingMorph"Dev note: Lower or higher speeds could work but with greater difficulty. |
From: 5
Right Door
To: 7
Top Right Left Item


In the previous room, perform a relatively precise 1-tap in order to gain blue speed with momentum in a specific range, then spin jump through the door transition. Depending on Samus' speed and position, either perform a speedball or an uncontrolled bounce onto the platform below the Speed blocks. Unmorph and continue holding up in order to break the Speed blocks while passing up through them. The top Speed blocks will respawn; to get on top of them, it can help to press against the wall (to discard blue speed) and then aim down to reduce Samus' hitbox. If available, using Grapple while aiming down can also help. Alternatively, if Samus breaks only the right column of Speed blocks, Samus can use the center left Speed block as a stepping stone. Be careful not to fall through the Speed blocks below as it will result in a softlock. Entrance condition: {
"comeInBlueSpinning": {
"minExtraRunSpeed": "$4.0",
"maxExtraRunSpeed": "$4.3",
"unusableTiles": 1
}
}Requires: {
"notable": "Suitless Blue Bomber"
}
"canSuitlessMaridia"
"canTrickyDashJump"
"canSpeedball"
"canTrickySpringBallBounce"
"canMomentumConservingMorph" |
From: 5
Right Door
To: 7
Top Right Left Item
In the previous room, perform a relatively precise 1-tap in order to gain blue speed with momentum in a specific range, then use spring ball to bounce through the door transition. Bounce onto the platform below the Speed blocks. Unmorph and continue holding up in order to break the Speed blocks while passing up through them. The top Speed blocks will respawn; to get on top of them, it can help to press against the wall (to discard blue speed) and then aim down to reduce Samus' hitbox. If available, using Grapple while aiming down can also help. Alternatively, if Samus breaks only the right column of Speed blocks, Samus can use the center left Speed block as a stepping stone. Be careful not to fall through the Speed blocks below as it will result in a softlock. Entrance condition: {
"comeInWithBlueSpringBallBounce": {
"movementType": "controlled",
"minExtraRunSpeed": "$4.0",
"maxExtraRunSpeed": "$4.3"
}
}Requires: {
"notable": "Suitless Blue Bomber"
}
"canSuitlessMaridia"
"canTrickyDashJump"
"canInsaneJump"
"canTrickySpringBallBounce"
"canMomentumConservingMorph" |
|


Gain temporary blue using the in-room runway. Wait by the morph tunnel until the tidal water is about halfway through its rising phase; also, if the Owtch to the right of the morph tunnel is still alive, wait for it to be safely out of the way to the right. Perform a neutral bounce into the morph tunnel, using Spring Ball to continue bouncing through it and across the room. Requires: {
"obstaclesCleared": [
"A"
]
}
{
"canShineCharge": {
"usedTiles": 22,
"openEnd": 2
}
}
"canTrickySpringBallBounce"
"canChainTemporaryBlue"Exit condition: {
"leaveWithTemporaryBlue": {}
}Unlocks doors: {"types":["ammo"],"requires":[]} |
|
Requires: "canTrickySpringBallBounce" Exit condition: {
"leaveWithSpringBallBounce": {
"remoteRunway": {
"length": 10,
"openEnd": 1
},
"landingRunway": {
"length": 6,
"openEnd": 1
},
"movementType": "controlled"
}
} |
From: 1
Left Door
To: 2
Right Door
Use Space jumps or Spring Ball bounces to carry blue speed across the room. Then chain temporary blue into the next room. It helps to enter with a relatively low amount of run speed, using a 4-tap. Entrance condition: {
"comeInGettingBlueSpeed": {
"length": 4,
"openEnd": 1,
"minExtraRunSpeed": "$1.2",
"maxExtraRunSpeed": "$1.F"
}
}Requires: {
"notable": "Leave With Temporary Blue"
}
"canChainTemporaryBlue"
{
"or": [
"canTrickySpringBallBounce",
"canPreciseSpaceJump"
]
}Exit condition: {
"leaveWithTemporaryBlue": {}
}Unlocks doors: {"types":["ammo"],"requires":[]}Dev note: Higher or lower amounts of run speed can work in some cases. |
From: 2
Right Door
To: 1
Left Door


Use Space jumps or Spring Ball bounces to carry blue speed across the room. Then chain temporary blue into the next room. It helps to enter with a relatively low amount of run speed, using a 4-tap. Entrance condition: {
"comeInGettingBlueSpeed": {
"length": 4,
"openEnd": 1,
"minExtraRunSpeed": "$1.4",
"maxExtraRunSpeed": "$1.F"
}
}Requires: {
"notable": "Leave With Temporary Blue"
}
"canChainTemporaryBlue"
{
"or": [
"canTrickySpringBallBounce",
"canPreciseSpaceJump"
]
}Exit condition: {
"leaveWithTemporaryBlue": {}
}Unlocks doors: {"types":["ammo"],"requires":[]}Dev note: Higher or lower amounts of run speed can work in some cases. |
From: 1
Left Door
To: 2
Right Door

Use a 3-tap or 4-tap to gain a speedball with a specific amount of speed in the other room (between $2.1 and $2.3 extra run speed), and either roll in or do a controlled bounce to enter while descending close to the ground. Bounce on the platform in front of the door, then bounce on the second-to-last pillar. Entrance condition: {
"comeInWithBlueSpringBallBounce": {
"movementType": "controlled",
"minExtraRunSpeed": "$2.1",
"maxExtraRunSpeed": "$2.3"
}
}Requires: {
"notable": "Cross-Room Blue Spring Ball Bounce (Left to Right)"
}
"canTrickyDashJump"
"canTrickySpringBallBounce"
"canInsaneJump" |
From: 1
Left Door
To: 2
Right Door
Use a 3-tap or 4-tap to gain a speedball with a specific amount of speed in the other room (between $2.1 and $2.3 extra run speed), and either roll in or do a controlled bounce to enter while descending close to the ground. Cross the room by bouncing on the pillars. Then chain temporary blue into the next room. Entrance condition: {
"comeInWithBlueSpringBallBounce": {
"movementType": "controlled",
"minExtraRunSpeed": "$2.1",
"maxExtraRunSpeed": "$2.3"
}
}Requires: {
"notable": "Cross-Room Blue Spring Ball Bounce (Left to Right)"
}
"canTrickyDashJump"
"canTrickySpringBallBounce"
"canInsaneJump"
"canChainTemporaryBlue"
"canBeVeryPatient"Exit condition: {
"leaveWithTemporaryBlue": {}
}Unlocks doors: {"types":["ammo"],"requires":[]}Dev note: The 'canBeVeryPatient' requirement is for difficulty placement as this is quite precise and unforgiving. |
From: 1
Left Door
To: 2
Right Door
Enter with an extra run speed between $2.1 and $2.3. Jump over the first set of Evirs, and bounce on the first pillar to cross the room. Entrance condition: {
"comeInRunning": {
"speedBooster": "yes",
"minTiles": 6.4375
}
}Requires: {
"notable": "Cross-Room Tricky Spring Ball Bounce (Left to Right)"
}
"canTrickyDashJump"
"canInsaneJump"
"canTrickySpringBallBounce" |
From: 1
Left Door
To: 2
Right Door


Enter with an extra run speed of between $2.1 and $2.3. Bounce over the first set of Evirs, and bounce on the first pillar to cross the room. If entering at lower speed ($2.1), it can help to time a pause to hit soon after bouncing on the first pillar, unequipping Spring Ball to boost Samus' horizontal speed. If Samus enters with low base speed (i.e. if mockballing with a short landing runway), it can affect Samus' horizontal speed even after the bounce. This can make it harder to clear the final pillar, though it can also help with clearing the initial Evirs. Entrance condition: {
"comeInWithSpringBallBounce": {
"speedBooster": "yes",
"movementType": "controlled",
"remoteAndLandingMinTiles": [
[
6.4375,
1
]
]
}
}Requires: {
"notable": "Cross-Room Tricky Spring Ball Bounce (Left to Right)"
}
"canTrickyDashJump"
"canInsaneJump"
"canTrickySpringBallBounce"
"canBeVeryPatient"Dev note: The canBeVeryPatient requirement is for difficulty placement, given the high likelihood of failure: with a mockball or bouncing entry, a frame-perfect release of jump is usually required. |
From: 2
Right Door
To: 1
Left Door
Use a 3-tap or 4-tap to gain a speedball with a specific amount of speed in the other room (between $2.1 and $2.3 extra run speed), and either roll in or do a controlled bounce to enter while descending close to the ground. Bounce across the room, destroying the Evirs along the path, then bounce on the sand at the left side of the room, and unmorph to go straight up in the single-tile-wide space with no sandfall; perform a pause remorph to chain temporary blue to the door. Entrance condition: {
"comeInWithBlueSpringBallBounce": {
"movementType": "controlled",
"minExtraRunSpeed": "$2.1",
"maxExtraRunSpeed": "$2.3"
}
}Requires: {
"notable": "Cross-Room Blue Spring Ball Bounce (Right to Left)"
}
"canTrickyDashJump"
"canTrickySpringBallBounce"
"canPauseRemorphTemporaryBlue"
"canBeVeryPatient"Exit condition: {
"leaveWithTemporaryBlue": {}
}Unlocks doors: {"types":["ammo"],"requires":[]}Dev note: The 'canBeVeryPatient' requirement is for difficulty placement as this is quite precise and unforgiving. Bouncing on the pillars is also possible, as an alternative to doing a pause remorph. |
From: 2
Right Door
To: 1
Left Door


Gain max run speed with Speed Booster unequipped (extra run speed $2.0), reequipping Speed Booster before the transition. Jump over the first pillar and first Evir, bouncing on the second pillar; this requires releasing jump when Samus is about 3 tiles past the first pillar. From there, Samus should bounce over all the remaining Evirs. A safe way to get out of the sand is to land inside the sandfall and do a spin jump to the left to less than full height, then turn right while spinning, break spin, and turnaround spin jump to the left. Entrance condition: {
"comeInRunning": {
"speedBooster": "yes",
"minTiles": 6.4375
}
}Requires: {
"notable": "Cross-Room Tricky Spring Ball Bounce (Right to Left)"
}
"canTrickyDashJump"
"canTrickySpringBallBounce"
"canPlayInSand" |
From: 2
Right Door
To: 1
Left Door
Gain max run speed with Speed Booster unequipped (extra run speed $2.0), reequipping Speed Booster before the transition. Bounce over the first pillar and first Evir, bouncing on the second pillar; this requires releasing jump when Samus is about 2 tiles past the first pillar. From there, Samus should bounce over all the remaining Evirs. Entrance condition: {
"comeInWithSpringBallBounce": {
"speedBooster": "yes",
"movementType": "controlled",
"remoteAndLandingMinTiles": [
[
6.4375,
1
]
]
}
}Requires: {
"notable": "Cross-Room Tricky Spring Ball Bounce (Right to Left)"
}
"canTrickyDashJump"
"canTrickySpringBallBounce"
"canPlayInSand" |
|


Enter the room with a normalized extra run speed of $2.0, which can be obtained by gaining max run speed with Speedbooster unequipped; Speedbooster must then be reequipped before the transition. Use Spring Ball to jump within about the last half tile of runway, hold jump, and Samus should bounce off the floating block before the first Evir. After the bounce, perform a spring fling by unequipping and re-equipping Spring Ball, to make it easier to reach the pillar at the right of the room. If jumping or bouncing from further left of the entrance runway, an additional spring fling can be used to ensure Samus makes the bounce on the first floating block. Entrance condition: {
"comeInWithSpringBallBounce": {
"speedBooster": "yes",
"movementType": "controlled",
"adjacentMinTiles": 12,
"remoteAndLandingMinTiles": [
[
7,
1
]
]
}
}Requires: "canTrickySpringBallBounce" "canSpringFling" |
|

Requires: {
"or": [
"canTrickyDodgeEnemies",
{
"and": [
"canMetroidAvoid",
"Ice"
]
},
"ScrewAttack",
"canPseudoScrew",
{
"obstaclesCleared": [
"A",
"B"
]
}
]
}
"canTrickySpringBallBounce"Exit condition: {
"leaveWithSpringBallBounce": {
"remoteRunway": {
"length": 31,
"openEnd": 1
},
"landingRunway": {
"length": 3,
"openEnd": 1
},
"minExtraRunSpeed": "$1.3",
"movementType": "controlled"
}
}Unlocks doors: {"types":["ammo"],"requires":[]}Dev note: FIXME: It is possible to open the door and leave with a controlled bounce in one motion. But then avoiding damage becomes unreliable. |