canStationaryLateralMidAirMorph (Expert)
While performing a stationary vertical jump, it's possible to mid-air morph in a manner similar to a lateral mid-air morph. Doing this immediately gives lateral momentum equivalent to maximum walk speed. This is meaningless under normal physics, but has underwater applications.
Dependencies: canMidAirMorph, canLateralMidAirMorph
Strats ()
|
From: 4
Junction (Right side Pit)
To: 2
Right Door
Freeze the Choot when it swings right on its jump. Quickly get on top of it by first getting onto the pillar to the left, or with a SpringBall Jump. Perform a precise spring ball jump to get to the far right ledge, while avoiding hitting the water surface. While on the ledge, stand on the raised ground to the right and jump to the surface, then space jump across the water to the left. Requires: "canSuitlessMaridia"
"canTrickyUseFrozenEnemies"
"canCarefulJump"
"canSpringBallJumpMidAir"
{
"or": [
"canTrickySpringBallJump",
"canResetFallSpeed",
"canStationaryLateralMidAirMorph"
]
}
"canSpaceJumpWaterBounce"
"canWalljump"
|
|
From: 2
Bottom Left Door
To: 1
Top Left Doorway
Notable: true 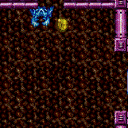
Freeze one crab on the lip of the overhead opening and another on the edge of a doors platform then springballjump up. Use a Stationary Lateral Mid-Air Morph to gain enough jump height without bonking the ceiling. It is possible with a crouch jump to not need the second crab. Requires: "canSuitlessMaridia" "canTrickyJump" "canTrickySpringBallJump" "canTrickyUseFrozenEnemies" "canStationaryLateralMidAirMorph" |
|
From: 2
Bottom Right Door
To: 6
Middle Junction Near Top Left Pirate
The second jump is harder than a normal mid-air springball jump. Use either a stationary lateral mid air morph, to gain enough horizontal momentum, or a SpringFling to reduce Samus' fall speed as soon as it begins to build up. Requires: "canSuitlessMaridia"
"canTrickySpringBallJump"
{
"or": [
"canStationaryLateralMidAirMorph",
"canSpringFling"
]
}
{
"or": [
"canTrickyJump",
{
"enemyDamage": {
"enemy": "Pink Space Pirate (standing)",
"type": "contact",
"hits": 1
}
},
{
"enemyKill": {
"enemies": [
[
"Pink Space Pirate (standing)"
]
],
"explicitWeapons": [
"Plasma"
]
}
}
]
}
|
|
From: 5
Platform Junction Near Top Left Door
To: 4
Top Left Door
Notable: true 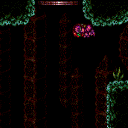
Jump towards the door with a Springball Jump, jumping as late as possible. A Flatley style jump can position Samus over the edge of the ledge, closer to the door, allowing for an earlier Springball jump. The slight fall from a Flatley Jump helps with the Springball jump, but then Samus must unmorph to extend her hitbox to touch the transition. A Stationary Lateral MidAir Morph also helps with this jump. Unmorphing after a missed jump can return Samus to the ledge to try again. Requires: "canSuitlessMaridia"
"canTrickySpringBallJump"
{
"or": [
"canTrickyJump",
"canStationaryLateralMidAirMorph"
]
}
|
|
From: 9
Junction Below Speed Blocks
To: 4
Top Right Door
Be sure not to get the first downward moving crab on screen until Samus is in position to quickly and accurately shoot and freeze it. This is much tighter with spring ball relative to HiJump. Performing a max height spring ball jump from the frozen crab can get Samus to the next ledge. Getting to the ledge with the fish is particularly precise. Either stand at the very edge of the platform and perform a very precise max heigh spring ball jump, or stand against the left wall and and perform a slightly less tight stationary lateral morph into spring ball jump. Requires: "canSuitlessMaridia"
"canTrickyUseFrozenEnemies"
"canTrickySpringBallJump"
"canDodgeWhileShooting"
{
"or": [
"canInsaneJump",
{
"and": [
"Spazer",
"Wave"
]
},
"h_canMaxHeightSpringBallJump",
"Plasma"
]
}
{
"or": [
"h_canMaxHeightSpringBallJump",
"canStationaryLateralMidAirMorph"
]
}
|
|
Requires: "canSuitlessMaridia"
{
"or": [
"HiJump",
{
"and": [
"canTrickySpringBallJump",
{
"or": [
"canCrouchJump",
"canSpringFling",
"canStationaryLateralMidAirMorph"
]
}
]
}
]
}
|
|
From: 9
Junction Below Top Door
To: 5
Right Door
Requires: "canSuitlessMaridia" "canStationaryLateralMidAirMorph" "canTrickySpringBallJump" "canResetFallSpeed" |
|
From: 2
Right Door
To: 4
Top Right Ledge Junction
SpringBall jump just as Samus exits the water to reach the distant ledge. To get enough horizontal distance, either use a Stationary Lateral Mid-Air Morph with a crouch jump for extra height, or spin jump out before morphing. Or SpringBall jump part of the way over and land on a Bomb explosion to cross the rest of the distance. Requires: "canSuitlessMaridia"
"HiJump"
"h_canMaxHeightSpringBallJump"
"canTrickyJump"
{
"or": [
"canStationaryLateralMidAirMorph",
{
"and": [
"canJumpIntoIBJ",
"h_canBombHorizontally"
]
}
]
}
|
|
SpringBall jump just as Samus exits the water to reach the distant ledge. A Crouch jump makes the SpringBall jump easier, but at the cost of some horizontal movement. Requires: "canSuitlessMaridia" "HiJump" "canTrickyJump" "h_canMaxHeightSpringBallJump" "canStationaryLateralMidAirMorph" |
|
From: 1
Left Door
To: 3
Junction Below Right Door
It is recommended to shoot the ceiling block immediately upon room entry to bring one of the Puyos down so that it will not be a problem later. Requires: "canSuitlessMaridia"
"h_canMaxHeightSpringBallJump"
{
"or": [
"can4HighMidAirMorph",
"canStationaryLateralMidAirMorph",
{
"and": [
"canNeutralDamageBoost",
{
"enemyDamage": {
"enemy": "Puyo",
"type": "contact",
"hits": 2
}
}
]
}
]
}
|
|
From: 1
Left Door
To: 3
Junction Below Right Door
It is recommended to shoot the ceiling block immediately upon room entry to bring one of the Puyos down so that it will not be a problem later. Requires: "canSuitlessMaridia"
"canTrickySpringBallJump"
"canTrickyJump"
"canJumpIntoRespawningBlock"
{
"or": [
"can4HighMidAirMorph",
"canStationaryLateralMidAirMorph"
]
}
|
|
From: 4
Junction Below Sand Entrance
To: 2
Right Door
Notable: true 
On the left side of the raised platform, jump for max height. Lateral Midair Morph for horizontal momentum, and perform the springball jump the moment before touching the sandfall. Pause again to disable springball as soon as possible. Requires: "canSuitlessMaridia"
"HiJump"
"canTrickySpringBallJump"
"canStationaryLateralMidAirMorph"
"canSpringFling"
"canPlayInSand"
{
"or": [
{
"enemyDamage": {
"enemy": "Evir",
"type": "particle",
"hits": 1
}
},
{
"enemyKill": {
"enemies": [
[
"Evir"
]
],
"explicitWeapons": [
"Plasma",
"Super",
"PowerBomb"
]
}
}
]
}
|
|
From: 4
Junction Below Sand Entrance
To: 2
Right Door
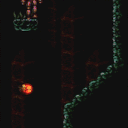
Notable: true .png)
.gif)
From the sand fall, quickly get onto the left platform to prevent the right side Evir from lowering too far. Jump on the sand to the right while freezing the Evir as high as possible. Refreeze the Evir so it is a slightly higher platform than the right pillar. Perform a spring ball jump with a stationary lateral mid-air morph from the left side of the current platform to get onto the Evir. Use a running jump off of the Evir. As a backup, it may be possible to make the Evir rise again by hitting it with a PB - place the PB in the air to avoid double hitting and killing it. Requires: "canSuitlessMaridia" "canTrickyUseFrozenEnemies" "canPlayInSand" "h_canMaxHeightSpringBallJump" "canStationaryLateralMidAirMorph" |
|
From: 4
Below Sand Entrance
To: 2
Right Door
Notable: true 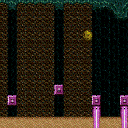
Perform multiple stationary lateral mid-air morphs, while avoiding the Evir projectiles, to cross the room. It is necessary to start the jumps from the far side of the platforms in order to gain more horizontal momentum before entering the sand falls. Falling into the sand will often result in a soft lock. Requires: "canSuitlessMaridia"
"canPlayInSand"
"h_canMaxHeightSpringBallJump"
"canStationaryLateralMidAirMorph"
{
"or": [
{
"enemyKill": {
"enemies": [
[
"Evir"
]
],
"explicitWeapons": [
"Super",
"Missile",
"PowerBombPeriphery",
"Plasma"
]
}
},
{
"enemyDamage": {
"enemy": "Evir",
"type": "particle",
"hits": 1
}
}
]
}
|
|
From: 5
Left Pillar Junction
To: 4
Below Sand Entrance
Notable: true
Perform multiple stationary lateral mid-air morphs, while avoiding the Evir projectiles, to cross the room. It is necessary to start the jumps from the far side of the platforms in order to gain more horizontal momentum before entering the sand falls. Falling into the sand will often result in a soft lock. Requires: "canSuitlessMaridia" "canPlayInSand" "h_canMaxHeightSpringBallJump" "canStationaryLateralMidAirMorph" |