canPlayInSand (Hard)
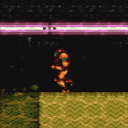
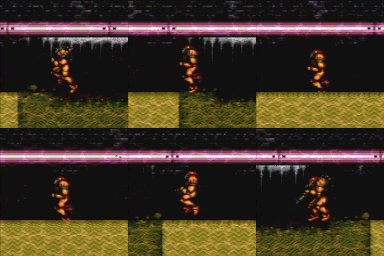
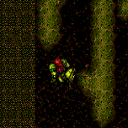
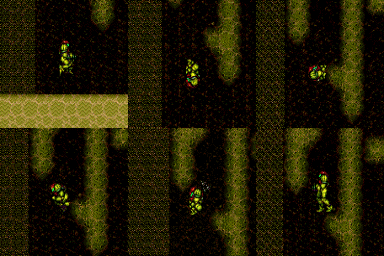
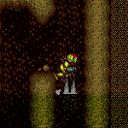
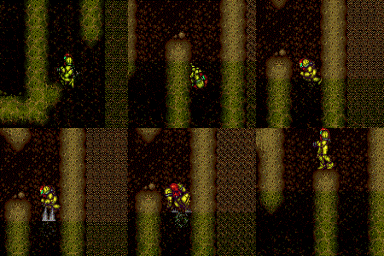
The ability to control Samus while under the effects of sand physics. This includes the ability to perform a clean jump from the top of sand, to platform while impeded by sandfalls, and to escape from a sand floor in water with Gravity. This also allows using a sandfall to escape a sand floor with HiJump, and using Bombs to escape a 1-tile deep sand pit, and to cross on top of sand with no items, by spin jumping from the surface and canceling spin before landing. This does not include simply falling through sand or touching a negligible sandfall or using Spring Ball to avoid interacting with the sand.
Strats ()
|
Requires: "Gravity"
{
"or": [
"SpaceJump",
"canPlayInSand",
{
"canShineCharge": {
"usedTiles": 32,
"openEnd": 1
}
},
"h_canUseSpringBall"
]
}
|
|
Requires: "canSuitlessMaridia"
{
"or": [
{
"and": [
"HiJump",
"h_canUseSpringBall"
]
},
"canPlayInSand"
]
}
|
|
Requires: "Gravity"
{
"or": [
"SpaceJump",
"canPlayInSand",
"h_canUseSpringBall"
]
}
|
|
Requires: "canSuitlessMaridia"
"HiJump"
{
"or": [
"h_canUseSpringBall",
"canPlayInSand"
]
}
|
|
Requires: "h_canNavigateUnderwater" "canTrickyUseFrozenEnemies" "canPlayInSand" |
|
Requires: "canSuitlessMaridia"
"canPlayInSand"
{
"or": [
"HiJump",
"canEscapeSand",
"h_canUseMorphBombs"
]
}
|
|
Requires: "h_canNavigateUnderwater" "canTrickyUseFrozenEnemies" "canPlayInSand" |
|
Requires: "canSuitlessMaridia"
"canPlayInSand"
{
"or": [
"HiJump",
"canEscapeSand",
"h_canUseMorphBombs"
]
}
|
|
From: 1
Left Door
To: 4
Right Door
Requires: "Gravity"
{
"canShineCharge": {
"usedTiles": 33,
"openEnd": 2
}
}
{
"or": [
{
"canShineCharge": {
"usedTiles": 22,
"gentleDownTiles": 4,
"openEnd": 1
}
},
"h_canUseSpringBall",
"SpaceJump",
"h_canUseMorphBombs",
"canPlayInSand"
]
}
Exit condition: {
"leaveWithRunway": {
"length": 45,
"openEnd": 1
}
}
|
|
From: 1
Left Door
To: 4
Right Door
Requires: "canSuitlessMaridia"
"HiJump"
{
"or": [
"h_canUseSpringBall",
"canPlayInSand"
]
}
{
"obstaclesCleared": [
"A"
]
}
|
|
From: 4
Right Door
To: 1
Left Door
Requires: "canSuitlessMaridia"
"HiJump"
{
"or": [
"h_canUseSpringBall",
"canPlayInSand"
]
}
{
"obstaclesCleared": [
"A"
]
}
|
|
From: 4
Right Door
To: 1
Left Door
Requires: "Gravity"
{
"or": [
"canPlayInSand",
"SpaceJump",
"h_canUseSpringBall"
]
}
{
"obstaclesCleared": [
"A"
]
}
|
|
From: 1
Left Door
To: 3
Top Right Door
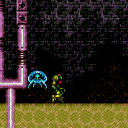
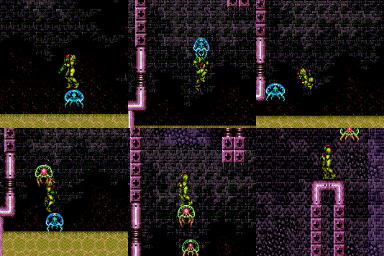
Notable: true Climb a mochtroid with ice using the wall to help guide them. Mochtroid damage is pretty hard to avoid, but it is possible. Requires: "canSuitlessMaridia"
"canMochtroidIceClimb"
"canPlayInSand"
"canCameraManip"
"canTrickyJump"
{
"or": [
"canInsaneJump",
{
"enemyDamage": {
"enemy": "Mochtroid",
"type": "contact",
"hits": 2
}
}
]
}
|
|
From: 1
Left Door
To: 3
Top Right Door
Notable: true Use the spikes, which are not in the water, to jump from platform to platform as a way to cross the Colosseum. Requires knowing the position of every spike in the room, and hitting the spikes while morphed can help. The first jump is particularly tough. A SpringBallJump from the sand with HiJump, or Grapple can be used to get past it. Requires: "canWalljump"
"Morph"
"canCarefulJump"
"canIframeSpikeJump"
{
"or": [
"Grapple",
{
"and": [
"canSuitlessMaridia",
"canPlayInSand",
"HiJump",
"canNeutralDamageBoost",
"canTrickySpringBallJump",
{
"spikeHits": 2
}
]
}
]
}
{
"spikeHits": 1
}
{
"or": [
{
"spikeHits": 1
},
"canHorizontalDamageBoost"
]
}
|
|
Climb a mochtroid with ice using the wall to help guide them. It is very easy to take damage if not preemptive with freezes. Mochtroid movement and freeze timing gets harder at the waterline. Requires: "h_canNavigateUnderwater"
"canMochtroidIceClimb"
"canPlayInSand"
"canCameraManip"
{
"or": [
"Gravity",
"HiJump"
]
}
"canTrickyJump"
{
"or": [
"canInsaneJump",
{
"enemyDamage": {
"enemy": "Mochtroid",
"type": "contact",
"hits": 2
}
}
]
}
|
|
Requires: "Gravity" "HiJump" "canPlayInSand" "canTrickySpringBallJump" |
|
From: 2
Bottom Right Door
To: 2
Bottom Right Door
Use a frozen Mochtroid to extend the length of the runway. Positioning the Mochtroid is easiest by dropping into the sand and freezing it. Maintain a half-tile gap between the Mochtroid and the runway in order to extend it as much as possible. Requires: "h_canFrozenEnemyRunway"
"Gravity"
"canPlayInSand"
{
"enemyDamage": {
"enemy": "Mochtroid",
"type": "contact",
"hits": 1
}
}
Exit condition: {
"leaveWithRunway": {
"length": 6,
"openEnd": 0
}
}
|
|
From: 3
Top Right Door
To: 1
Left Door
Notable: true Jump out of the sand to lure down mochtroids to freeze. It's recommended to bring a Mochtroid into the middle section of the room. Mochtroid damage is pretty hard to avoid, but can be. Requires: "canSuitlessMaridia"
"canTrickyJump"
"canPlayInSand"
"canMochtroidIceClimb"
"canCameraManip"
{
"or": [
"canInsaneJump",
{
"enemyDamage": {
"enemy": "Mochtroid",
"type": "contact",
"hits": 2
}
}
]
}
|
|
Jump out of the sand to lure down mochtroids to freeze. It's recommended to bring a Mochtroid into the middle section of the room. Mochtroid damage is pretty hard to avoid, but can be. Mochtroid movement and freeze timing gets harder at the waterline. Requires: "h_canNavigateUnderwater"
{
"or": [
"Gravity",
"HiJump"
]
}
"canTrickyJump"
"canPlayInSand"
"canMochtroidIceClimb"
"canCameraManip"
{
"or": [
"canInsaneJump",
{
"enemyDamage": {
"enemy": "Mochtroid",
"type": "contact",
"hits": 2
}
}
]
}
|
|
Requires: "Gravity" "HiJump" "canPlayInSand" "canTrickySpringBallJump" |
|
Requires: "canSuitlessMaridia"
"Grapple"
{
"or": [
"canPlayInSand",
"canPreciseGrapple"
]
}
|
|
From: 1
Top Sand Entrance
To: 3
Top Left Item
Notable: true Reach the left side item using a single bomb explosion barely reach it. Use HiJump to reach the water line and then use a Bomb Jump Water Escape motion to Bomb jump out of the water. Do not Morph until fully out of the water to place the Bomb with the correct height. And do not place the Bomb at the max possible height, but a little lower where it will bounce Samus higher. Requires: "canSuitlessMaridia" "HiJump" "canPlayInSand" "h_canCrouchJumpDownGrab" "canBombJumpWaterEscape" |
|
Jump out of the sand before Shinesparking. Entrance condition: {
"comeInShinecharged": {
"framesRequired": 105
},
"comesThroughToilet": "any"
}
Requires: "canPlayInSand"
"canSunkenTileWideWallClimb"
"canShinechargeMovementComplex"
{
"or": [
"canMidairShinespark",
"canCarefulJump"
]
}
{
"shinespark": {
"frames": 11
}
}
|
|
It's possible to get out of the sand suitless and without HiJump after falling from the chute, by hugging the left side and moving quickly. Requires: "canSuitlessMaridia"
"canPlayInSand"
{
"or": [
{
"and": [
"h_canMaxHeightSpringBallJump",
{
"or": [
"canWalljump",
"can4HighMidAirMorph",
"h_canJumpIntoIBJ"
]
}
]
}
]
}
|
|
Requires: "canSuitlessMaridia"
"HiJump"
{
"or": [
"canPlayInSand",
{
"and": [
"canPrepareForNextRoom",
"h_canUseSpringBall"
]
}
]
}
{
"or": [
{
"and": [
{
"or": [
"canWalljump",
"canSpaceJumpWaterEscape"
]
},
{
"or": [
"h_canCrouchJumpDownGrab",
"canSunkenTileWideWallClimb"
]
}
]
},
"canSpringBallJumpMidAir",
{
"and": [
"h_canCrouchJumpDownGrab",
"canBombJumpWaterEscape",
"h_canIBJ"
]
}
]
}
|
|
Perform a double springball jump with the first jump being a bounce on the sand. Requires: "canSuitlessMaridia"
{
"or": [
"canPrepareForNextRoom",
"canPlayInSand"
]
}
"h_canDoubleSpringBallJumpWithHiJump"
|
|
From: 1
Top Sand Entrance
To: 4
Right Item
Notable: true Walljump up and instant morph with exact timing and positioning so as to enter the Power Bomb location through the maze's exit. Requires: "canSuitlessMaridia" "canConsecutiveWalljump" "canPlayInSand" "HiJump" "canInsaneWalljump" "can3HighWallMidAirMorph" |
|
From: 1
Top Sand Entrance
To: 4
Right Item
Notable: true Jump off the sand and use Underwater Walljumps to enter the maze leading to the Power Bomb location. Requires: "Morph" "canPlayInSand" "canUnderwaterWalljump" |
|
Requires: "Gravity"
"Morph"
"canPlayInSand"
{
"or": [
"canWalljump",
"canGravityJump",
"HiJump",
"canSpringBallJumpMidAir",
"canSandIBJ",
{
"and": [
"h_canUseSpringBall",
"h_canJumpIntoIBJ"
]
}
]
}
|
|
Shinespark vertically from the sand to get onto the first ledge. Carefully jump onto the second ledge and return to lure the Boulder, or shoot it with a Super. Entrance condition: {
"comeInShinecharged": {
"framesRequired": 90
},
"comesThroughToilet": "any"
}
Requires: "Gravity"
"Morph"
"canPlayInSand"
"canShinechargeMovement"
{
"shinespark": {
"frames": 12
}
}
{
"or": [
"canCarefulJump",
{
"ammo": {
"type": "Super",
"count": 1
}
},
{
"enemyDamage": {
"enemy": "Boulder",
"type": "contact",
"hits": 1
}
}
]
}
|
|
Requires: "Morph" "canSuitlessMaridia" "canPlayInSand" "HiJump" "canSpringBallJumpMidAir" |
|
From: 1
Top Sand Entrance
To: 4
Right Item
Shinespark vertically from the sand to get onto the first ledge. Carefully get to the second ledge and return to lure the Boulder, or shoot it with a Super. Entrance condition: {
"comeInShinecharged": {
"framesRequired": 140
},
"comesThroughToilet": "any"
}
Requires: "canSuitlessMaridia"
"Morph"
"canPlayInSand"
"canShinechargeMovementComplex"
{
"shinespark": {
"frames": 12
}
}
{
"or": [
"HiJump",
"canSpringBallJumpMidAir",
"canSunkenTileWideWallClimb"
]
}
{
"or": [
"canTrickyJump",
{
"ammo": {
"type": "Super",
"count": 1
}
},
{
"enemyDamage": {
"enemy": "Boulder",
"type": "contact",
"hits": 1
}
}
]
}
|
|
Gravity with a good jump from the sand can reach the Solid Rock Maze region. Requires: "Gravity"
"canPlayInSand"
{
"or": [
"HiJump",
"canSpringBallJumpMidAir",
"canWalljump",
"h_canIBJ",
"canGravityJump"
]
}
|
|
From: 1
Top Sand Entrance
To: 7
Below Morph Tunnel Junction
Shoot the shot block before reaching the sand and then shinespark up. A diagonal ShineSpark will most likely not have any horizontal movement when performed from the sand. Entrance condition: {
"comeInShinecharged": {
"framesRequired": 85
},
"comesThroughToilet": "any"
}
Requires: "h_canNavigateUnderwater"
"canPlayInSand"
"canShinechargeMovementComplex"
"Wave"
{
"shinespark": {
"frames": 24,
"excessFrames": 5
}
}
|
|
From: 1
Top Sand Entrance
To: 7
Below Morph Tunnel Junction
Break the shot block before reaching the sand and then shinespark up. A diagonal ShineSpark will most likely not have any horizontal movement when performed from the sand. Entrance condition: {
"comeInShinecharged": {
"framesRequired": 160
},
"comesThroughToilet": "any"
}
Requires: "h_canNavigateUnderwater"
"canPlayInSand"
"canHeroShot"
"canTrickyJump"
"canShinechargeMovementTricky"
{
"shinespark": {
"frames": 25,
"excessFrames": 4
}
}
|
|
From: 1
Top Sand Entrance
To: 7
Below Morph Tunnel Junction
Break the shot block before reaching the sand and then shinespark up. Samus cannot shinespark after unmorphing until she touches the sand and this can be used to shoot upwards without sparking. A diagonal ShineSpark will most likely not have any horizontal movement when performed from the sand. Entrance condition: {
"comeInShinecharged": {
"framesRequired": 150
},
"comesThroughToilet": "any"
}
Requires: "h_canNavigateUnderwater"
"canPlayInSand"
"canShinechargeMovementTricky"
{
"or": [
"canResetFallSpeed",
{
"and": [
"canPrepareForNextRoom",
"h_canUsePowerBombs"
]
}
]
}
{
"shinespark": {
"frames": 24,
"excessFrames": 5
}
}
|
|
From: 1
Top Sand Entrance
To: 7
Below Morph Tunnel Junction
HiJump with a good jump from the sand can reach the Solid Rock Maze region. Use the sandfall if Samus gets stuck in the sand. Bouncing on the sand as springball can reach the above maze by altering Samus' fall height, like by bouncing under the solid ledge before trying to jump up. Requires: "canSuitlessMaridia"
{
"or": [
"canPrepareForNextRoom",
"canPlayInSand"
]
}
"HiJump"
"h_canMaxHeightSpringBallJump"
|
|
From: 1
Top Sand Entrance
To: 7
Below Morph Tunnel Junction
HiJump with a good jump from the sand can reach the Solid Rock Maze region. Use the sandfall if Samus gets stuck in the sand. Requires: "canSuitlessMaridia" "canPlayInSand" "HiJump" "canConsecutiveWalljump" "canSpaceJumpWaterBounce" |
|
From: 1
Top Sand Entrance
To: 7
Below Morph Tunnel Junction
Notable: true HiJump with a good jump from the sand can reach the Solid Rock Maze region. Use the sandfall if Samus gets stuck in the sand. Perform several wall jumps to climb up to the water level, then precise wall jumps to break free. Requires: "canSuitlessMaridia" "canPlayInSand" "HiJump" "canConsecutiveWalljump" "canPreciseWalljump" |
|
From: 4
Junction Below Left Door
To: 5
Junction Below Right Door
Notable: true Avoid the Yapping Maw after entering by not standing in one place for too long. Kill the Zoa and quickly jump across the sand. Hitting the Zoas will drop Samus deep into the sand below. Requires: "canSuitlessMaridia" "canTrickyJump" "canPlayInSand" |
|
From: 4
Junction Below Left Door
To: 5
Junction Below Right Door
Kill the Zoa while avoiding the Yapping Maw, then cross the sand. Spring ball can be used to help cross the sand. Requires: "canSuitlessMaridia"
"HiJump"
{
"or": [
"canPlayInSand",
"h_canUseSpringBall",
"SpaceJump"
]
}
|
|
From: 4
Junction Below Left Door
To: 5
Junction Below Right Door
Requires: "canSuitlessMaridia"
"canPlayInSand"
{
"ammo": {
"type": "Super",
"count": 1
}
}
|
|
From: 5
Junction Below Right Door
To: 4
Junction Below Left Door
Notable: true Avoid the Yapping Maw after entering by not standing in one place for too long. Kill the Zoa and quickly jump across the sand. Hitting the Zoas will drop Samus deep into the sand below. Requires: "canSuitlessMaridia" "canTrickyJump" "canPlayInSand" |
|
From: 5
Junction Below Right Door
To: 4
Junction Below Left Door
Kill the Zoa while avoiding the Yapping Maw, then cross the sand. Spring ball can be used to help cross the sand. Requires: "canSuitlessMaridia"
"HiJump"
{
"or": [
"canPlayInSand",
"h_canUseSpringBall",
"SpaceJump"
]
}
|
|
From: 5
Junction Below Right Door
To: 4
Junction Below Left Door
Requires: "canSuitlessMaridia"
"canPlayInSand"
{
"ammo": {
"type": "Super",
"count": 1
}
}
|
|
From: 1
Left Door
To: 2
Right Door
Notable: true Kill all the Zoas and don't pick up their drops. If the door is unlocked, stand in the doorframe and jump across the room. Otherwise, jump across the sand, starting 1.5 tiles away from the sandfall. Hold jump and forward the whole time. Samus will dip into the sand, but still make it to the other side. Requires: "canSuitlessMaridia"
"canCarefulJump"
{
"or": [
{
"doorUnlockedAtNode": 1
},
"canTrickyJump"
]
}
"canPlayInSand"
|
|
Use the frozen Zoas as a bridge. Falling will require Samus to use ice beam and a crouch jump to escape. Requires: "canSuitlessMaridia" "canUseFrozenEnemies" "canPlayInSand" |
|
It is relatively easy to get out of the sand by rapidly placing bombs. Requires: "canSuitlessMaridia" "canPlayInSand" "h_canUseMorphBombs" |
|
From: 2
Right Door
To: 1
Left Door
Notable: true Kill all the Zoas and don't pick up their drops. If the door is unlocked, stand in the doorframe and jump across the room. Otherwise, jump across the sand, starting 1.5 tiles away from the sandfall. Hold jump and forward the whole time. Samus will dip into the sand, but still make it to the other side. Requires: "canSuitlessMaridia"
"canCarefulJump"
{
"or": [
{
"doorUnlockedAtNode": 2
},
"canTrickyJump"
]
}
"canPlayInSand"
|
|
Use the frozen Zoas as a bridge. Falling will require Samus to use ice beam and a crouch jump to escape. Requires: "canSuitlessMaridia" "canUseFrozenEnemies" "canPlayInSand" |
|
It is relatively easy to get out of the sand with rapidly placing bombs. Requires: "canSuitlessMaridia" "h_canUseMorphBombs" "canPlayInSand" |
|
From: 1
Left Door
To: 2
Right Door
Notable: true Stand at an effective distance of between about 20 and 21 tiles from the door. Run through the door, and jump any time after the transition, holding jump through the entire room to make it to the other side. Samus will go over the Evirs, so there is no need for blue speed. Entrance condition: {
"comeInRunning": {
"minTiles": 19.3625,
"maxTiles": 21.25,
"speedBooster": true
}
}
Requires: "canPlayInSand" "canCrossRoomJumpIntoWater" "canTrickyDashJump" |
|
From: 1
Left Door
To: 2
Right Door
Notable: true Enter with enough run speed to jump (after the transition) across the full room using one SpringBall Jump. When exiting the first Sandfall, Samus will be rising still. That is the time to Springball jump. Entrance condition: {
"comeInRunning": {
"minTiles": 10,
"speedBooster": true
}
}
Requires: "canPlayInSand" "canCrossRoomJumpIntoWater" "canLateralMidAirMorph" "canTrickySpringBallJump" "canTrickyJump" |
|
From: 1
Left Door
To: 4
Junction Below Sand Entrance
Requires a runway of 7 tiles (with no open end) in the adjacent room. Jump into an air ball on room entry in order to get to the first pillar. Aim down after the transition to avoid hitting the overhang near the door. Entrance condition: {
"comeInJumping": {
"speedBooster": false,
"minTiles": 6.4375
}
}
Requires: "canCrossRoomJumpIntoWater"
"canPlayInSand"
"canLateralMidAirMorph"
{
"or": [
"canTrickyJump",
{
"and": [
"canCarefulJump",
{
"enemyDamage": {
"enemy": "Evir",
"type": "contact",
"hits": 1
}
}
]
}
]
}
|
|
From: 1
Left Door
To: 4
Junction Below Sand Entrance
Notable: true Requires a runway of 7 tiles (with no open end) in the adjacent room. Requires two precise inputs of jumping through the doorway and aiming down before hitting the ceiling. Damage boost off of the right Evir in order to land on the first pillar. With Ice, instead freeze the Evir to land on it and avoid the damage. When entering the room with a bad jump, it is possible to perform a midair wiggle to get back to the door platform. Entrance condition: {
"comeInJumping": {
"speedBooster": false,
"minTiles": 6.4375
}
}
Requires: "canCrossRoomJumpIntoWater"
"canPlayInSand"
"canInsaneJump"
{
"or": [
"canTrickyUseFrozenEnemies",
{
"and": [
"canNeutralDamageBoost",
{
"enemyDamage": {
"enemy": "Evir",
"type": "contact",
"hits": 1
}
}
]
}
]
}
|
|
Requires: "canSuitlessMaridia"
"HiJump"
"canPlayInSand"
{
"or": [
"Ice",
{
"enemyKill": {
"enemies": [
[
"Evir"
],
[
"Evir"
]
],
"explicitWeapons": [
"Plasma",
"Super",
"PowerBombPeriphery"
]
}
}
]
}
|
|
Gain momentum in the room to the left, then jump at the edge of the runway in this room in order to jump off of the sand and land on the first pillar. Requires a runway of 7 tiles (with no open end) in the adjacent room, and killing the second Evir with a quick super or two plasma hits (note that the particle despawns as the Evir dies). Entrance condition: {
"comeInJumping": {
"speedBooster": false,
"minTiles": 6.4375
}
}
Requires: "canCrossRoomJumpIntoWater"
"canPlayInSand"
"canTrickyJump"
{
"enemyKill": {
"enemies": [
[
"Evir"
]
],
"explicitWeapons": [
"Plasma",
"Super"
]
}
}
|
|
From: 1
Left Door
To: 4
Junction Below Sand Entrance
Requires: "canSuitlessMaridia"
"HiJump"
"canPlayInSand"
{
"enemyDamage": {
"enemy": "Evir",
"type": "particle",
"hits": 1
}
}
|
|
From: 2
Right Door
To: 1
Left Door
Notable: true Stand at an effective distance of about 20 tiles from the door. Run through the door, and jump any time after the transition, holding jump through the entire room to make it to the other side. Samus will go over the Evirs, so there is no need for blue speed. Entrance condition: {
"comeInRunning": {
"minTiles": 19.3625,
"maxTiles": 20.3,
"speedBooster": true
}
}
Requires: "canPlayInSand" "canCrossRoomJumpIntoWater" "canTrickyDashJump" |
|
From: 2
Right Door
To: 1
Left Door
Notable: true Enter with enough run speed to jump (after the transition) across the full room using one SpringBall Jump. When exiting the first Sandfall, Samus will be rising still. That is the time to Springball jump. Alternatively, an immediate pause can be used to SpringBall jump during the first narrow gap between Sandfalls. Sometimes Samus will land above the sand on the far left end of the room, where it will be necessary to unmorph and jump out. Entrance condition: {
"comeInRunning": {
"minTiles": 10,
"speedBooster": true
}
}
Requires: "canPlayInSand" "canCrossRoomJumpIntoWater" "canLateralMidAirMorph" "canTrickySpringBallJump" "canTrickyJump" |
|
From: 2
Right Door
To: 2
Right Door
Notable: true The Evir won't shoot unless Samus enters the sand falls. Getting to the transition tiles while standing before the projectile while suitless is very precise. From the sand, turnaround spinjump towards the right. Turn towards the sandfall about when you're level with the platform. Turn right and shoot as soon as you enter the sandfall. And try to land right next to the transition. Requires: "canSuitlessMaridia" "canPlayInSand" "canMidairWiggle" "HiJump" "canInsaneJump" Exit condition: {
"leaveWithGModeSetup": {}
}
|
|
Gain momentum in the room to the right, then jump immediately on entry in order to land on the first pillar. Jumping too late will likely put Samus into the pit. Requires a small runway of only one tile or less in the adjacent room. Jumping before the door transition will set Samus straight into an Evir projectile, knocking her into the sand. Entrance condition: {
"comeInRunning": {
"speedBooster": false,
"minTiles": 0.4375
}
}
Requires: "canCrossRoomJumpIntoWater" "canPlayInSand" "canTrickyJump" "canTrickyUseFrozenEnemies" |
|
Requires: "canSuitlessMaridia" "HiJump" "canPlayInSand" |
|
To safely avoid the Evir shot, enter in a spin jump from either the far left or far right side of the transition. Requires: "canPrepareForNextRoom"
"canPlayInSand"
"canTrickyJump"
{
"or": [
"Gravity",
"HiJump",
"canInsaneJump"
]
}
|
|
From: 4
Junction Below Sand Entrance
To: 1
Left Door
Notable: true If entering from the sandfall above, come in at the far left of the transition, with either a spin-jump or i-frames, to avoid the Evir shot; land on the right side of the pillar to the left, being careful to not bring left Evir on camera. If coming from the right side of the room, then moonwalk on the center pillar to scroll the camera as far right as possible, to avoid getting hit by an Evir shot; alternatively, jump slightly to the left and freeze the Evir, then return back to the center pillar before jumping across the sand. Freeze the right Evir and jump onto it. Quickly move left and fire an angle-down shot to freeze the left Evir before it descends too far. Jump onto the left Evir, back up to the right side of it to maximize space to build momentum, and jump to the left onto the sand and then onto the ledge. If Samus does not quite get enough height to make it onto the ledge, then break spin, turn around to the right, land on the sand again, and do a turnaround spin-jump to the left. If the Evirs descend too far, it is possible to use a Power Bomb to bring them back up again, but caution is needed to avoid killing the first Evir, and it is difficult to avoid getting shot. Requires: "canSuitlessMaridia"
"canTrickyJump"
"canTrickyUseFrozenEnemies"
"canPlayInSand"
{
"or": [
"canCameraManip",
{
"and": [
{
"ammo": {
"type": "PowerBomb",
"count": 1
}
},
{
"enemyDamage": {
"enemy": "Evir",
"type": "particle",
"hits": 2
}
}
]
}
]
}
|
|
Requires: "canSuitlessMaridia"
"HiJump"
"canPlayInSand"
{
"or": [
"canTrickyJump",
{
"enemyDamage": {
"enemy": "Evir",
"type": "particle",
"hits": 1
}
},
"Ice",
{
"enemyKill": {
"enemies": [
[
"Evir"
],
[
"Evir"
]
],
"explicitWeapons": [
"Super",
"Plasma",
"PowerBombPeriphery"
]
}
}
]
}
|
|
From: 4
Junction Below Sand Entrance
To: 1
Left Door
Requires: "Gravity"
{
"or": [
"canPlayInSand",
"canWalljump",
"h_canUseSpringBall"
]
}
{
"or": [
"canTrickyJump",
{
"enemyDamage": {
"enemy": "Evir",
"type": "particle",
"hits": 1
}
},
"Ice",
"ScrewAttack",
{
"enemyKill": {
"enemies": [
[
"Evir"
],
[
"Evir"
]
],
"explicitWeapons": [
"Super",
"Plasma",
"PowerBombPeriphery"
]
}
}
]
}
|
|
From: 4
Junction Below Sand Entrance
To: 2
Right Door
Notable: true On the left side of the raised platform, jump for max height. Lateral Midair Morph for horizontal momentum, and perform the springball jump the moment before touching the sandfall. Pause again to disable springball as soon as possible. Requires: "canSuitlessMaridia"
"HiJump"
"canTrickySpringBallJump"
"canStationaryLateralMidAirMorph"
"canSpringFling"
"canPlayInSand"
{
"or": [
{
"enemyDamage": {
"enemy": "Evir",
"type": "particle",
"hits": 1
}
},
{
"enemyKill": {
"enemies": [
[
"Evir"
]
],
"explicitWeapons": [
"Plasma",
"Super",
"PowerBomb"
]
}
}
]
}
|
|
From: 4
Junction Below Sand Entrance
To: 2
Right Door
Notable: true From the sand fall, quickly get onto the left platform to prevent the right side Evir from lowering too far. Jump on the sand to the right while freezing the Evir as high as possible. Refreeze the Evir so it is a slightly higher platform than the right pillar. Perform a spring ball jump with a stationary lateral mid-air morph from the left side of the current platform to get onto the Evir. Use a running jump off of the Evir. As a backup, it may be possible to make the Evir rise again by hitting it with a PB - place the PB in the air to avoid double hitting and killing it. Requires: "canSuitlessMaridia" "canTrickyUseFrozenEnemies" "canPlayInSand" "h_canMaxHeightSpringBallJump" "canStationaryLateralMidAirMorph" |
|
Requires: "Gravity"
{
"or": [
"Ice",
"ScrewAttack",
{
"enemyKill": {
"enemies": [
[
"Evir"
]
],
"explicitWeapons": [
"Plasma",
"Super",
"PowerBombPeriphery"
]
}
},
{
"enemyDamage": {
"enemy": "Evir",
"type": "particle",
"hits": 1
}
}
]
}
{
"and": [
"canPlayInSand",
{
"or": [
"canWalljump",
"HiJump",
"canUseFrozenEnemies",
"canGravityJump",
{
"and": [
"canTrickyJump",
"can4HighMidAirMorph",
"canTrickySpringBallJump"
]
}
]
}
]
}
|
|
From: 4
Junction Below Sand Entrance
To: 2
Right Door
Let the Evir descend slightly from its spawn point to be at the correct height. A power bomb can be used to bring it back up if it falls too far. Requires: "canSuitlessMaridia" "HiJump" "canTrickyJump" "canTrickyUseFrozenEnemies" "canPlayInSand" |
|
Requires: "h_canNavigateUnderwater"
{
"or": [
"canPlayInSand",
{
"and": [
"HiJump",
"h_canUseSpringBall"
]
},
{
"and": [
"Gravity",
{
"or": [
"HiJump",
"h_canUseSpringBall",
"SpaceJump"
]
}
]
}
]
}
|
|
Requires: "h_canNavigateUnderwater"
{
"or": [
"canPlayInSand",
{
"and": [
"HiJump",
"h_canUseSpringBall"
]
},
{
"and": [
"Gravity",
{
"or": [
"HiJump",
"h_canUseSpringBall",
"SpaceJump"
]
}
]
}
]
}
|
|
From: 4
West Leg Sand
To: 5
Junction Above Grapple Block
Notable: true Gets above the grapple block by doing a well-positioned and well-timed Gravity jump following a good jump off the sand. It is also possible to do this off of a wall jump on the side immediately followed by a gravity jump. Break spin before touching the sand, and then spinjump to get a good jump off of the sand. Breaking spin after jumping from the sand will remove horizontal momentum, or a stationary spinjump can help. Requires: "Grapple"
"canGravityJump"
"canPlayInSand"
"canCarefulJump"
{
"or": [
"canStationarySpinJump",
"canTrickyJump"
]
}
|
|
From: 4
West Leg Sand
To: 5
Junction Above Grapple Block
Break spin before touching the sand, and then spinjump to get a good jump off of the sand. Requires: "Gravity" "Grapple" "canTrickySpringBallJump" "canPlayInSand" |
|
From: 4
West Leg Sand
To: 5
Junction Above Grapple Block
Break the grapple block, then jump on the sand to get through the hole. Break spin before touching the sand, and then spinjump to get a good jump off of the sand. Breaking spin after jumping from the sand will remove horizontal momentum, or a stationary spinjump can help. Requires: "Gravity" "Grapple" "HiJump" "canCarefulJump" "canPlayInSand" |
|
From: 4
West Leg Sand
To: 5
Junction Above Grapple Block
Requires a mid-air SpringBall jump off the sand. Break spin before touching the sand, and then spinjump to get a good jump off of the sand. A stationary spinjump or a turnaround spin jump can help but morphing will remove all horizontal momentum. Requires: "Grapple" "canSuitlessMaridia" "HiJump" "canSpringBallJumpMidAir" "canPlayInSand" "canTrickyJump" |
|
Requires a runway of 7 tiles (with no open end) in the adjacent room. Perform an air ball before hitting the ceiling in order to land on the first pillar. Entrance condition: {
"comeInJumping": {
"speedBooster": false,
"minTiles": 6.4375
}
}
Requires: "canLateralMidAirMorph" "canCrossRoomJumpIntoWater" "canPlayInSand" |
|
From: 1
Left Door
To: 5
Left Pillar Junction
Requires a runway of only approximately 0.5 tiles in the adjacent room. Perform an air ball before hitting the ceiling in order to land on the first pillar. Entrance condition: {
"comeInJumping": {
"speedBooster": "any",
"minTiles": 1
}
}
Requires: "canLateralMidAirMorph" "canCrossRoomJumpIntoWater" "HiJump" "canPlayInSand" |
|
Gain momentum in the room to the left, then jump at the edge of the runway in order to land on the first pillar. Requires a runway of at least 2 tiles (with no open end) in the adjacent room. Entrance condition: {
"comeInRunning": {
"speedBooster": "any",
"minTiles": 1.4375
}
}
Requires: "HiJump" "canCrossRoomJumpIntoWater" "canTrickyJump" "canPlayInSand" |
|
Gain momentum in the room to the left, then jump in this room in order to land on the first pillar. Ensure that Speed Booster is disabled. With a short runway of 5 tiles in the adjacent room, it is required to jump as late as possible at the edge of the runway in this room. With any longer of a runway, the jump is much less precise. Entrance condition: {
"comeInRunning": {
"speedBooster": false,
"minTiles": 5
}
}
Requires: "canCrossRoomJumpIntoWater" "canPlayInSand" "canCarefulJump" |
|
Requires: "canSuitlessMaridia" "HiJump" "canTrickySpringBallJump" "canPlayInSand" |
|
Gain momentum in the room to the left, then jump in this room in order to land on the first pillar. Ensure that Speed Booster is disabled. With a short runway of 5 tiles (with no open end) in the adjacent room, it is required to jump as late as possible at the edge of the runway in this room. With any longer of a runway, the jump is much less precise. Entrance condition: {
"comeInRunning": {
"speedBooster": false,
"minTiles": 4.4375
}
}
Requires: "canCrossRoomJumpIntoWater" "canPlayInSand" "canTrickyJump" |
|
From: 1
Left Door
To: 5
Left Pillar Junction
Notable: true Enter with at least 1 tile of run speed from an air room, with Speedbooster unequipped. Jump from near the end of the runway (though a jump from 1-2 tiles away from the end can still work). Press pause while crossing the narrow first sandfall, then perform a lateral mid-air morph after exiting the sandfall. Equip both Spring Ball and Speed Booster, and perform a mid-air Spring Ball jump at somewhere close to the maximum height. Unequip Spring Ball while descending through the wide second sidefall. Entrance condition: {
"comeInRunning": {
"speedBooster": true,
"minTiles": 1
}
}
Requires: "canCrossRoomJumpIntoWater" "canPlayInSand" "canLateralMidAirMorph" "canTrickySpringBallJump" "canSpringFling" |
|
From: 2
Right Door
To: 4
Below Sand Entrance
Requires: "canSuitlessMaridia"
"HiJump"
"canPlayInSand"
{
"or": [
"canCarefulJump",
{
"enemyDamage": {
"enemy": "Evir",
"type": "particle",
"hits": 1
}
}
]
}
|
|
From: 2
Right Door
To: 4
Below Sand Entrance
It is possible to cross this segment with nothing. Cancel spin before hitting the sand, then get a good jump off the sand in multiple places. Requires: "canSuitlessMaridia" "canTrickyJump" "canPlayInSand" |
|
Enter on the right side of the transition and move left to avoid damage. Requires: "canPrepareForNextRoom"
"canPlayInSand"
"canTrickyJump"
{
"or": [
"Gravity",
"HiJump",
"canInsaneJump"
]
}
|
|
From: 4
Below Sand Entrance
To: 2
Right Door
Requires: "Gravity"
{
"or": [
"canPlayInSand",
"canUseFrozenEnemies",
"canCarefulJump"
]
}
{
"or": [
"canCarefulJump",
{
"enemyDamage": {
"enemy": "Evir",
"type": "particle",
"hits": 1
}
}
]
}
|
|
From: 4
Below Sand Entrance
To: 2
Right Door
Requires: "canSuitlessMaridia"
"canPlayInSand"
"HiJump"
{
"or": [
"canCarefulJump",
{
"enemyDamage": {
"enemy": "Evir",
"type": "particle",
"hits": 1
}
}
]
}
|
|
From: 4
Below Sand Entrance
To: 2
Right Door
Notable: true From the sand fall, quickly get onto the left platform to prevent the right side Evir from lowering too far. Freeze the right Evir, then jump on the sand to the right while shooting ice over the first Evir to also freeze the second. Freezing the first Evir very high up would also work. As a backup, it may be possible to make them rise again by hitting them with a PB - place the PB in the air to avoid double hitting and killing them. Requires: "canSuitlessMaridia" "canPlayInSand" "canTrickyJump" "canTrickyUseFrozenEnemies" |
|
From: 4
Below Sand Entrance
To: 2
Right Door
Notable: true Perform multiple stationary lateral mid-air morphs, while avoiding the Evir projectiles, to cross the room. It is necessary to start the jumps from the far side of the platforms in order to gain more horizontal momentum before entering the sand falls. Falling into the sand will often result in a soft lock. Requires: "canSuitlessMaridia"
"canPlayInSand"
"h_canMaxHeightSpringBallJump"
"canStationaryLateralMidAirMorph"
{
"or": [
{
"enemyKill": {
"enemies": [
[
"Evir"
]
],
"explicitWeapons": [
"Super",
"Missile",
"PowerBombPeriphery",
"Plasma"
]
}
},
{
"enemyDamage": {
"enemy": "Evir",
"type": "particle",
"hits": 1
}
}
]
}
|
|
From: 4
Below Sand Entrance
To: 5
Left Pillar Junction
Requires: "Gravity"
{
"or": [
"canPlayInSand",
"canWalljump",
"h_canUseSpringBall",
"canCarefulJump"
]
}
{
"or": [
{
"and": [
"ScrewAttack",
"canCarefulJump"
]
},
"canTrickyJump",
{
"enemyDamage": {
"enemy": "Evir",
"type": "particle",
"hits": 1
}
}
]
}
|
|
From: 4
Below Sand Entrance
To: 5
Left Pillar Junction
Requires: "canSuitlessMaridia"
"HiJump"
"canPlayInSand"
{
"or": [
"canTrickyJump",
{
"enemyDamage": {
"enemy": "Evir",
"type": "particle",
"hits": 1
}
}
]
}
|
|
From: 4
Below Sand Entrance
To: 5
Left Pillar Junction
Notable: true Freeze the Evir quickly before it descends and use it to get to the platforms. Getting a good jump while on the right side of the floating block can get Samus to the leftmost block. With a clean jump off of the sand, Samus can then get onto the final vertical pillar. Requires: "canSuitlessMaridia" "canPlayInSand" "canTrickyJump" "canTrickyUseFrozenEnemies" |
|
From: 4
Below Sand Entrance
To: 5
Left Pillar Junction
Notable: true Perform multiple stationary lateral mid-air morphs, while avoiding the Evir projectiles, to cross the room. It is necessary to start the jumps from the far side of the platforms in order to gain more horizontal momentum before entering the sand falls. Falling into the sand will often result in a soft lock. Requires: "canSuitlessMaridia"
"canPlayInSand"
"h_canMaxHeightSpringBallJump"
{
"or": [
{
"enemyKill": {
"enemies": [
[
"Evir"
]
],
"explicitWeapons": [
"Super",
"Missile",
"PowerBombPeriphery",
"Plasma"
]
}
},
{
"enemyDamage": {
"enemy": "Evir",
"type": "particle",
"hits": 1
}
}
]
}
|
|
From: 4
Below Sand Entrance
To: 5
Left Pillar Junction
Notable: true Use the projectile from a fully submerged Evir to boost Samus into the sandfall, providing just enough height to make the first and hardest jump. Time the projectile to hit Samus when at the maximum height from a jump. The hit must be on the right side of Samus and with no inputs held, but also hold forward during the damage knockback to move through the sandfall. Getting a good jump while on the right side of the next floating block can get Samus to the leftmost block. With a clean jump off of the sand, Samus can then get onto the final vertical pillar. Requires: "canSuitlessMaridia"
"canPlayInSand"
"canInsaneJump"
"canCrouchJump"
"canNeutralDamageBoost"
{
"enemyDamage": {
"enemy": "Evir",
"type": "particle",
"hits": 1
}
}
|
|
Requires: "h_canNavigateUnderwater"
{
"or": [
"Gravity",
"canPlayInSand",
"HiJump"
]
}
|
|
From: 5
Left Pillar Junction
To: 4
Below Sand Entrance
Requires: "Gravity"
{
"or": [
"HiJump",
"canPreciseWalljump",
"canPlayInSand"
]
}
{
"or": [
"canTrickyJump",
{
"enemyDamage": {
"enemy": "Evir",
"type": "particle",
"hits": 1
}
}
]
}
|
|
From: 5
Left Pillar Junction
To: 4
Below Sand Entrance
Requires: "canSuitlessMaridia"
"HiJump"
"canPlayInSand"
{
"or": [
"canCarefulJump",
"canSpringBallJumpMidAir"
]
}
{
"or": [
"canTrickyJump",
{
"enemyDamage": {
"enemy": "Evir",
"type": "particle",
"hits": 1
}
}
]
}
|
|
From: 5
Left Pillar Junction
To: 4
Below Sand Entrance
Notable: true Perform multiple stationary lateral mid-air morphs, while avoiding the Evir projectiles, to cross the room. It is necessary to start the jumps from the far side of the platforms in order to gain more horizontal momentum before entering the sand falls. Falling into the sand will often result in a soft lock. Requires: "canSuitlessMaridia" "canPlayInSand" "h_canMaxHeightSpringBallJump" "canStationaryLateralMidAirMorph" |
.png)
.gif)
.png)
.gif)
.png)
.gif)
.png)
.gif)
.png)
.gif)
.png)
.gif)