canMidairWiggle (Very Hard)
Turning around quickly so as to manipulate game physics. For using Screw Attack to break blocks and to shrink Samus' hitbox following a wall jump, and for maneuvering sharply underwater.
Strats ()
|
From: 3
Junction (Left side Pit)
To: 2
Right Door
Notable: true .png)
.gif)
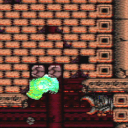
Standing from the rightmost platform, jump to the right of the stalagmite. Perform a midair wiggle to get to the left to the stalagmite, then precisely wall jump off of it. Then perform a frame perfect space jump at the water line to bounce on the water over to the Kamer platform. Requires: "canSpaceJumpWaterBounce" "canPreciseWalljump" "canMidairWiggle" |
|
From: 2
Right Door
To: 3
Above Lava Junction
Notable: true 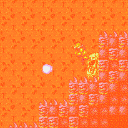
BounceBall into the Lava, Unmorphing with good timing to sink faster and drift effeciently towards the bottom right Namihe. Walljump at about eye height (4 pixel window) to gain enough height to reach the center portion of ceiling. While rising, wiggle to shrink Samus' hitbox. Some walljump positions will not need to wiggle, when walljumping far away from the Namihe. Jumping, from the wall, around the next lowest overhang is very precise and taking any extra time to position will increase the amount of lava damage being taken. It may help to disable HiJump for this part. Then Walljump again to exit the Lava and reach the left ledge. Requires: "canSuitlessLavaDive"
"canUseEnemies"
"HiJump"
"canBounceBall"
"canMidairWiggle"
"canInsaneWalljump"
{
"lavaFrames": 392
}
{
"heatFrames": 515
}
|
|
From: 5
Golden Torizo (locked)
To: 4
Hidden Right Item
This is kind of tricky because Screw off a walljump can only break bomb blocks if you change directions before bonking. Requires: "h_canNavigateHeatRooms"
"ScrewAttack"
"canPreciseWalljump"
"canMidairWiggle"
{
"heatFrames": 200
}
|
|
From: 6
Bottom Platform Junction With Pirates Killed
To: 4
Junction Above Bomb Blocks
Notable: true 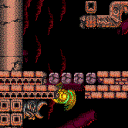
Break the bomb blocks in The Worst Room In The Game with extremely precise walljumps. Either with a fully delayed max height jump from the wall, or with an instant turnaround after jumping from the lower layer of bomb blocks. Requires: "h_heatProof" "HiJump" "ScrewAttack" "canInsaneWalljump" "canInsaneJump" "canConsecutiveWalljump" "canMidairWiggle" Clears obstacles: A |
|
From: 2
Bottom Right Door
To: 4
Top Left Door
Notable: true 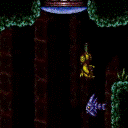
Swing to the right, shoot open the door above, and grapple jump through it. Entrance condition: {
"comeInWithGrappleTeleport": {
"blockPositions": [
[
5,
3
]
]
}
}
Requires: {
"doorUnlockedAtNode": 4
}
"canMidairWiggle"
"canTrickyGrappleJump"
"canInsaneJump"
|
|
From: 4
Top Left Door
To: 5
Platform Junction Near Top Left Door
Notable: true 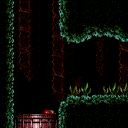
Wall jump in the room above, on the right wall of the doorway, immdiately before the door transition. Failure will likely result in a soft lock. To get to the ledge: If the room above has normal physics, hold right in this room. If the room above has water physics, shoot to break spin while holding right in this room. Entrance condition: {
"comeInNormally": {},
"comesThroughToilet": "any"
}
Requires: "canSuitlessMaridia" "canPreciseWalljump" "canPrepareForNextRoom" "canMidairWiggle" "canCarefulJump" |
|
Assumes a runway of at least 21 tiles in the adjacent room. End Samus' momentum where no platforms are over head. Shoot the door while rising to pass through. Entrance condition: {
"comeInJumping": {
"speedBooster": true,
"minTiles": 21
}
}
Requires: {
"obstaclesCleared": [
"f_MaridiaTubeBroken"
]
}
"canCrossRoomJumpIntoWater"
"canMidairWiggle"
"canTrickyJump"
|
|
Glass Tunnel Grapple Teleport into Grapple Jump or Tube Intact (Lower Entrance) (Insane)
Glass Tunnel
From: 2
Bottom Right Door
To: 4
Top Door
Notable: true .png)
.gif)
Swing to the right, shoot open the door above, and grapple jump through it. The grapple beam will need to be retracted while swinging to the right, to avoid bonking on the small platform. Entrance condition: {
"comeInWithGrappleTeleport": {
"blockPositions": [
[
5,
3
]
]
}
}
Requires: {
"doorUnlockedAtNode": 4
}
{
"or": [
{
"and": [
"canMidairWiggle",
"canTrickyGrappleJump",
"canInsaneJump"
]
},
{
"and": [
{
"not": "f_MaridiaTubeBroken"
},
"canRiskPermanentLossOfAccess"
]
}
]
}
|
|
Glass Tunnel Grapple Teleport into Grapple Jump or Tube Intact (Right Entrance) (Insane)
Glass Tunnel
From: 3
Top Right Doorway
To: 4
Top Door
Notable: true
Swing to the right, shoot open the door above, and grapple jump through it. The grapple beam will need to be retracted while swinging to the right, to avoid bonking on the small platform. Entrance condition: {
"comeInWithGrappleTeleport": {
"blockPositions": [
[
5,
3
]
]
}
}
Requires: {
"doorUnlockedAtNode": 4
}
{
"or": [
{
"and": [
"canMidairWiggle",
"canTrickyGrappleJump",
"canInsaneJump"
]
},
{
"and": [
{
"not": "f_MaridiaTubeBroken"
},
"canRiskPermanentLossOfAccess"
]
}
]
}
|
|
From: 1
Bottom Door
To: 3
Middle Right Door
Run from left with Speedbooster in the room below and jump up through the door. Perform a snap turnaround to the left to cancel horizontal momentum before passing through the transition. This is done by turning around and then canceling spin, e.g. by shooting. Stay to the right of the fish as you go up. Entrance condition: {
"comeInWithPlatformBelow": {
"minHeight": 9,
"maxHeight": 10,
"maxLeftPosition": -38.5,
"minRightPosition": -7
},
"comesThroughToilet": "any"
}
Requires: "canCrossRoomJumpIntoWater" "SpeedBooster" "canMidairWiggle" |
|
Wall jump relatively low off the right side of the door frame of the room below. Stay to the right of the fish as you go up. Entrance condition: {
"comeInWithWallJumpBelow": {
"minHeight": 2
},
"comesThroughToilet": "any"
}
Requires: "canCrossRoomJumpIntoWater" "canMidairWiggle" |
|
From: 8
Bottom Junction
To: 3
Middle Right Door
Notable: true 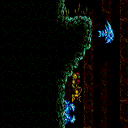
Wait a long time for the slow global crab. Freeze it when it comes around on the left, one tile above the bottom slope. Freeze the fish, get on the frozen crab, and wall jump between the fish and the wall and the wall. Wall jump towards the fish to gain height faster. Requires: "canSuitlessMaridia"
"canCrazyCrabClimb"
"canSunkenTileWideWallClimb"
"canBeVeryPatient"
"canMidairWiggle"
{
"obstaclesNotCleared": [
"A"
]
}
|
|
From: 2
Bottom Right Door
To: 1
Top Left Door
Requires a runway of 1 tile in the adjacent room. A momentum conserving turnaround is easier than a midair wiggle. Entrance condition: {
"comeInJumping": {
"speedBooster": "any",
"minTiles": 0.4375
}
}
Requires: "HiJump"
"canCrossRoomJumpIntoWater"
{
  "or": [
    "canMomentumConservingTurnaround",
    "canMidairWiggle"
  ]
}
|
|
From: 2
Bottom Right Door
To: 1
Top Left Door
Requires a runway of at least 7 tiles (with no open end) in the adjacent room. A momentum conserving turnaround is easier than a midair wiggle. Entrance condition: {
"comeInJumping": {
"speedBooster": true,
"minTiles": 6.4375
}
}
Requires: "canCrossRoomJumpIntoWater"
"canTrickyDashJump"
{
"or": [
"canMomentumConservingTurnaround",
"canMidairWiggle"
]
}
|
|
From: 2
Bottom Right Door
To: 1
Top Left Door
The lenient version requires a runway of at about 10 tiles in the adjacent room. A momentum conserving turnaround is easier than climbing the right side of the room. Entrance condition: {
"comeInJumping": {
"speedBooster": true,
"minTiles": 10
}
}
Requires: "canCrossRoomJumpIntoWater"
{
"or": [
"canMomentumConservingTurnaround",
"canMidairWiggle"
]
}
|
|
From: 2
Bottom Door
To: 4
Water Level Junction
Using SpeedBooster in the room below, run and jump through the door without bonking the door frame or breaking spin. Perform a mid-air wiggle to make into onto either ledge. Entrance condition: {
"comeInWithPlatformBelow": {
"minHeight": 9,
"maxHeight": 10,
"maxLeftPosition": -34.5,
"minRightPosition": -7
},
"comesThroughToilet": "yes"
}
Requires: "canCrossRoomJumpIntoWater" "SpeedBooster" "canInsaneJump" "canMidairWiggle" |
|
From: 2
Right Door
To: 2
Right Door
Notable: true 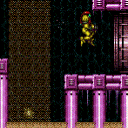
The Evir won't shoot unless Samus enters the sand falls. Getting to the transition tiles while standing before the projectile while suitless is very precise. From the sand, turnaround spinjump towards the right. Turn towards the sandfall about when you're level with the platform. Turn right and shoot as soon as you enter the sandfall. And try to land right next to the transition. Requires: "canSuitlessMaridia" "canPlayInSand" "canMidairWiggle" "HiJump" "canInsaneJump" Exit condition: {
"leaveWithGModeSetup": {}
}
|
|
From: 4
West Leg Sand
To: 2
East Leg Right Door
Notable: true 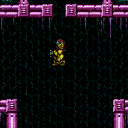
Use the grapple block to initiate a Grapple Jump to climb up to the higher level and above the water line. Aiming the Grapple Jump to line up with the one tile hole is difficult and Samus is moving at high speeds. Escaping the water is also difficult as Samus must be standing at the water line when jumping for the next part of the grapple jump. It may be easier to jump out of the water by turning HiJump off. A Grapple Jump can be a spin jump by running briefly before jumping and that can be used to begin Walljumping or Space Jumping. Requires: "canSuitlessMaridia"
"canTrickyGrappleJump"
"canMidairWiggle"
{
"or": [
{
"enemyDamage": {
"enemy": "Menu",
"type": "contact",
"hits": 1
}
},
"SpaceJump",
{
"and": [
"canConsecutiveWalljump",
{
"or": [
"ScrewAttack",
"canStaggeredWalljump"
]
}
]
}
]
}
|
|
From: 4
West Leg Sand
To: 5
Junction Above Grapple Block
Notable: true
Use the grapple block to initiate a Grapple Jump to climb up to the higher level. Aiming the Grapple Jump to line up with the one tile hole is difficult and Samus is moving at high speeds. Requires: "canSuitlessMaridia" "canTrickyGrappleJump" "canMidairWiggle" |
|
From: 2
Bottom Right Door (locked)
To: 1
Top Right Door
Wall jump up the right wall and use a mid-air wiggle to reduce the height of Samus' hitbox after the walljump, to be able to fit through the gap without morphing. Entrance condition: {
"comeInShinecharged": {
"framesRequired": 120
}
}
Requires: "canWalljump"
"canMidairWiggle"
"canShinechargeMovementTricky"
{
"or": [
"f_KilledMetroidRoom2",
"canMetroidAvoid"
]
}
Exit condition: {
"leaveShinecharged": {
"framesRemaining": "auto"
}
}
|
|
From: 2
Bottom Right Door (locked)
To: 1
Top Right Door
Wall jump up the right wall and use a mid-air wiggle to reduce the height of Samus' hitbox after the walljump, to be able to fit through the gap without morphing. Shoot the door open and spark out. Entrance condition: {
"comeInShinecharged": {
"framesRequired": 105
}
}
Requires: "canWalljump"
"canMidairWiggle"
"canShinechargeMovementTricky"
{
"shinespark": {
"frames": 5
}
}
{
"or": [
"f_KilledMetroidRoom2",
"canMetroidAvoid"
]
}
Exit condition: {
"leaveWithSpark": {}
}
|
|
From: 2
Bottom Right Door (locked)
To: 1
Top Right Door
Use a mid-air wiggle to reduce the height of Samus' hitbox after the walljump, to be able to fit through the gap without morphing. Entrance condition: {
"comeInShinecharging": {
"length": 2,
"openEnd": 0
}
}
Requires: "canWalljump" "canMidairWiggle" "canShinechargeMovementTricky" "f_KilledMetroidRoom2" Exit condition: {
"leaveShinecharged": {
"framesRemaining": 50
}
}
|