canPauseRemorphTemporaryBlue (Extreme+)
The ability to continue chaining temporary blue after mid-air unmorphing. This is done by pausing while aiming down, then pressing down during the unpause black screen to buffer a morph. Coming out of the pause, roll from down into forward before the morph animation finishes. Alternatively, press diagonally down-forward during the black screen to buffer a stationary lateral morph.
Dependencies: canChainTemporaryBlue, canDash, canLateralMidAirMorph, canMidAirMorph, canTrivialMidAirMorph, canTemporaryBlue
Strats ()
From: 8
Central Junction
To: 5
Alcatraz Door
Requires: {
"canShineCharge": {
"usedTiles": 25,
"steepUpTiles": 3,
"steepDownTiles": 3,
"openEnd": 1
}
}
"canSpringBallBounce"
"canPauseRemorphTemporaryBlue"Exit condition: {
"leaveWithTemporaryBlue": {}
}Unlocks doors: {"types":["ammo"],"requires":[]} |
From: 2
Top Right Door
To: 3
Bottom Left Door

Land on the crumble blocks while unmorphing, to retain temporary blue. Then aim down and use a pause buffer to remorph and chain temporary blue. Requires: {
"canShineCharge": {
"usedTiles": 20,
"openEnd": 0
}
}
"canPauseRemorphTemporaryBlue"Exit condition: {
"leaveWithTemporaryBlue": {}
}Unlocks doors: {"types":["ammo"],"requires":[]} |
From: 2
Bottom Left Door
To: 3
Right Vertical Door
Unmorph immediately after exiting the tunnel while still descending, to continue chaining temporary blue. The frame window for the unmorph depends on the alignment of Samus' bounces. Even if Samus bounces upward out of the tunnel, it is possible to unmorph and use a pause buffer to remorph while retaining blue. Entrance condition: {
"comeInShinecharging": {
"length": 3,
"openEnd": 0
}
}Requires: "canChainTemporaryBlue"
"canSpringBallBounce"
{
"or": [
"canInsaneJump",
"canPauseRemorphTemporaryBlue"
]
}Exit condition: {
"leaveWithTemporaryBlue": {
"direction": "right"
}
}Unlocks doors: {"types":["ammo"],"requires":[]}Dev note: The runway has 1 unusable tile, to allow space to perform the blue bounce. |
Come in Getting Blue Speed, Leave With Temporary Blue (HiJump, Pause Remorph)
(Extreme+)
Bubble Mountain
From: 2
Left Side - Top Middle Door
To: 6
Middle Right Door
With blue speed, jump over or through the Cacatac. With a precisely controlled jump, morph, and unmorph it is possible to land on the platform past the Cac; but it is easier to unmorph in the open space past the platform and use a pause to buffer a remorph. Entrance condition: {
"comeInGettingBlueSpeed": {
"length": 0,
"openEnd": 1,
"minExtraRunSpeed": "$2.6"
}
}Requires: "HiJump" "canPauseRemorphTemporaryBlue" Exit condition: {
"leaveWithTemporaryBlue": {}
}Unlocks doors: {"types":["ammo"],"requires":[]}Dev note: The 2 in-room runway tiles are unusable, since at the minimal speed ($2.6) it is necessary to jump either through the transition or on the first frame after, to avoid bonking the ledge below the Cacatac. |
Blue Cross-Room Jump, Leave With Temporary Blue (HiJump, Spring Ball Jump)
(Extreme+)
Double Chamber
From: 2
Bottom Left Door
To: 1
Top Left Door

Entrance condition: {
"comeInGettingBlueSpeed": {
"length": 0,
"openEnd": 1
}
}Requires: "HiJump"
"canXRayTurnaround"
"canSpringBallJumpMidAir"
"canPauseRemorphTemporaryBlue"
{
"heatFrames": 380
}Exit condition: {
"leaveWithTemporaryBlue": {}
}Unlocks doors: {"types":["super","powerbomb"],"requires":[]}
{"types":["missiles"],"requires":[{"heatFrames":50}]} |
From: 2
Bottom Left Door
To: 1
Top Left Door

Entrance condition: {
"comeInGettingBlueSpeed": {
"length": 0,
"openEnd": 1,
"minExtraRunSpeed": "$2.0"
}
}Requires: "HiJump"
"canSpeedyJump"
"canLateralMidAirMorph"
"canInsaneJump"
"canPauseRemorphTemporaryBlue"
"canXRayTurnaround"
{
"heatFrames": 360
}Exit condition: {
"leaveWithTemporaryBlue": {}
}Unlocks doors: {"types":["super","powerbomb"],"requires":[]}
{"types":["missiles"],"requires":[{"heatFrames":50}]} |
Blue Cross-Room Jump, Leave With Temporary Blue (Speedy Jump, Spring Ball Jump)
(Extreme+)
Double Chamber
From: 2
Bottom Left Door
To: 1
Top Left Door


Entrance condition: {
"comeInGettingBlueSpeed": {
"length": 0,
"openEnd": 1,
"minExtraRunSpeed": "$2.0"
}
}Requires: "canSpeedyJump"
"canLateralMidAirMorph"
"canTrickySpringBallJump"
"canInsaneJump"
"canPauseRemorphTemporaryBlue"
"canXRayTurnaround"
{
"heatFrames": 440
}Exit condition: {
"leaveWithTemporaryBlue": {}
}Unlocks doors: {"types":["super","powerbomb"],"requires":[]}
{"types":["missiles"],"requires":[{"heatFrames":50}]} |
From: 2
Bottom Left Door
To: 1
Top Left Door
Entrance condition: {
"comeInGettingBlueSpeed": {
"length": 0,
"openEnd": 1
}
}Requires: "HiJump"
"canSpringBallJumpMidAir"
{
"canShineCharge": {
"usedTiles": 19,
"gentleUpTiles": 2,
"gentleDownTiles": 2,
"openEnd": 1
}
}
"canPauseRemorphTemporaryBlue"
{
"heatFrames": 550
}
{
"or": [
"canXRayCancelShinecharge",
{
"heatFrames": 160
}
]
}Exit condition: {
"leaveWithTemporaryBlue": {}
}Unlocks doors: {"types":["super","powerbomb"],"requires":[]}
{"types":["missiles"],"requires":[{"heatFrames":50}]} |
From: 2
Right Vertical Door
To: 1
Left Door


Requires: {
"obstaclesCleared": [
"B",
"E"
]
}
{
"getBlueSpeed": {
"usedTiles": 32,
"gentleUpTiles": 6,
"openEnd": 1
}
}
{
"or": [
{
"and": [
"HiJump",
"canSpeedyJump"
]
},
"SpaceJump",
{
"and": [
"canTrickySpringBallJump",
"canPauseRemorphTemporaryBlue"
]
}
]
}
"canTrickyJump"
"canChainTemporaryBlue"Exit condition: {
"leaveWithTemporaryBlue": {}
}Unlocks doors: {"types":["ammo"],"requires":[],"useImplicitRequires":false} |
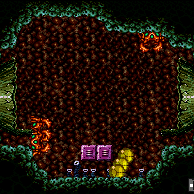
From: 4
Bottom Chozo Item
To: 3
Bottom Left Door

Gain temporary blue, and bounce into the morph tunnel, using Spring Ball to reach the left side while retaining temporary blue. After bouncing up out of the tunnel, unmorph, aim down, and use a pause buffer to remorph and land or bounce on the door frame, chaining temporary blue into the next room. FIXME: This needs the item to be collected or unspawned, at least if using the long runway variant. Requires: {
"obstaclesNotCleared": [
"B"
]
}
{
"or": [
{
"and": [
"f_DefeatedPhantoon",
{
"canShineCharge": {
"usedTiles": 16,
"openEnd": 0
}
}
]
},
{
"and": [
{
"obstaclesCleared": [
"A"
]
},
{
"getBlueSpeed": {
"usedTiles": 35,
"openEnd": 1
}
},
{
"or": [
"f_DefeatedPhantoon",
"canSpeedball"
]
}
]
}
]
}
"canSpringBallBounce"
"canPauseRemorphTemporaryBlue"Exit condition: {
"leaveWithTemporaryBlue": {}
}Unlocks doors: {"types":["ammo"],"requires":[]} |
From: 1
Top Left Doorway
To: 2
Bottom Left Door

Use a neutral bounce to enter the hole, then unmorph to descend. Use a pause buffer to remorph, then chain temporary blue into the next room. Entrance condition: {
"comeInShinecharging": {
"length": 1,
"openEnd": 0
}
}Requires: "Gravity" "Morph" "canPauseRemorphTemporaryBlue" "canXRayTurnaround" Exit condition: {
"leaveWithTemporaryBlue": {}
}Unlocks doors: {"types":["ammo"],"requires":[]}Dev note: FIXME: add a tech for bouncing into the tunnel. |
Come in Shinecharging, Leave With Temporary Blue (Suitless Spring Ball Bounce, Pause Remorph)
(Extreme+)
Crab Hole
From: 1
Top Left Doorway
To: 2
Bottom Left Door

Use Spring Ball to bounce into the hole, then unmorph to descend. Use a pause buffer to remorph, then chain temporary blue into the next room. Entrance condition: {
"comeInShinecharging": {
"length": 1,
"openEnd": 0
}
}Requires: "canSuitlessMaridia" "canTrickySpringBallBounce" "canPauseRemorphTemporaryBlue" "canXRayTurnaround" Exit condition: {
"leaveWithTemporaryBlue": {}
}Unlocks doors: {"types":["ammo"],"requires":[]} |
From: 1
Top Left Doorway
To: 3
Bottom Right Door

Use a neutral bounce to enter the hole, then unmorph to descend. Use a pause buffer to remorph, then chain temporary blue into the next room. Entrance condition: {
"comeInShinecharging": {
"length": 1,
"openEnd": 0
}
}Requires: "Gravity" "Morph" "canPauseRemorphTemporaryBlue" Exit condition: {
"leaveWithTemporaryBlue": {}
}Unlocks doors: {"types":["ammo"],"requires":[]}Dev note: FIXME: add a tech for bouncing into the tunnel. |
Come in Shinecharging, Leave With Temporary Blue (Suitless Spring Ball Bounce, Pause Remorph)
(Extreme+)
Crab Hole
From: 1
Top Left Doorway
To: 3
Bottom Right Door

Use Spring Ball to bounce into the hole, then unmorph to descend. Use a pause buffer to remorph, then chain temporary blue into the next room. Entrance condition: {
"comeInShinecharging": {
"length": 1,
"openEnd": 0
}
}Requires: "canSuitlessMaridia" "canTrickySpringBallBounce" "canPauseRemorphTemporaryBlue" Exit condition: {
"leaveWithTemporaryBlue": {}
}Unlocks doors: {"types":["ammo"],"requires":[]} |
From: 2
Bottom Left Door
To: 1
Top Left Doorway

Perform a gravity jump and use Spring Ball to bounce through the top of the hole. Use a pause buffer to remorph, also taking the opportunity to equip Gravity again. Then chain temporary blue into the next room. Entrance condition: {
"comeInShinecharging": {
"length": 1,
"openEnd": 0
}
}Requires: "canXRayCancelShinecharge" "canXRayTurnaround" "canGravityJump" "canSpringBallBounce" "canPauseRemorphTemporaryBlue" Exit condition: {
"leaveWithTemporaryBlue": {}
}Unlocks doors: {"types":["ammo"],"requires":[]} |
From: 2
Bottom Left Door
To: 4
Top Right Doorway
Jump through the transition with blue speed. Perform a very short speedball to kill the bottom crab and get into position below the hole. Perform a gravity jump and use Spring Ball to bounce through the top of the hole. Use a pause buffer to remorph, also taking the opportunity to equip Gravity again. Then chain temporary blue into the next room. Entrance condition: {
"comeInGettingBlueSpeed": {
"length": 0,
"openEnd": 1,
"maxExtraRunSpeed": "$1.A"
}
}Requires: "canSpeedball" "canGravityJump" "canSpringBallBounce" "canPauseRemorphTemporaryBlue" Exit condition: {
"leaveWithTemporaryBlue": {}
}Unlocks doors: {"types":["ammo"],"requires":[]}Dev note: This can be done at higher run speeds, with greater precision or an earlier jump through the door. |
From: 2
Bottom Left Door
To: 4
Top Right Doorway
Gain a shinecharge while entering, and either kill the crab before it touches Samus, or use X-Ray to cancel the shinecharge. Perform a gravity jump and use Spring Ball to bounce through the top of the hole. Use a pause buffer to remorph, also taking the opportunity to equip Gravity again. Then chain temporary blue into the next room. Entrance condition: {
"comeInShinecharging": {
"length": 1,
"openEnd": 0
}
}Requires: {
"or": [
"canXRayCancelShinecharge",
{
"enemyKill": {
"enemies": [
[
"Sciser"
]
],
"explicitWeapons": [
"Missile",
"Super",
"Grapple",
"Wave",
"Spazer",
"Plasma",
"Ice Shield"
]
}
}
]
}
"canGravityJump"
"canSpringBallBounce"
"canPauseRemorphTemporaryBlue"
Exit condition: {
"leaveWithTemporaryBlue": {}
}Unlocks doors: {"types":["ammo"],"requires":[]} |
From: 3
Bottom Right Door
To: 1
Top Left Doorway
Perform a gravity jump and use Spring Ball to bounce through the top of the hole. Use a pause buffer to remorph, also taking the opportunity to equip Gravity again. Then chain temporary blue into the next room. Entrance condition: {
"comeInShinecharging": {
"length": 1,
"openEnd": 0
}
}Requires: "canGravityJump" "canSpringBallBounce" "canPauseRemorphTemporaryBlue" Exit condition: {
"leaveWithTemporaryBlue": {}
}Unlocks doors: {"types":["ammo"],"requires":[]} |
From: 3
Bottom Right Door
To: 4
Top Right Doorway

Perform a gravity jump and use Spring Ball to bounce through the top of the hole. Use a pause buffer to remorph, also taking the opportunity to equip Gravity again. Then chain temporary blue into the next room. Entrance condition: {
"comeInShinecharging": {
"length": 1,
"openEnd": 0
}
}Requires: "canXRayTurnaround" "canGravityJump" "canSpringBallBounce" "canPauseRemorphTemporaryBlue" Exit condition: {
"leaveWithTemporaryBlue": {}
}Unlocks doors: {"types":["ammo"],"requires":[]} |
From: 4
Top Right Doorway
To: 2
Bottom Left Door

Use a neutral bounce to enter the hole, then unmorph to descend. Use a pause buffer to remorph, then chain temporary blue into the next room. Entrance condition: {
"comeInShinecharging": {
"length": 1,
"openEnd": 0
}
}Requires: "Gravity" "Morph" "canPauseRemorphTemporaryBlue" Exit condition: {
"leaveWithTemporaryBlue": {}
}Unlocks doors: {"types":["ammo"],"requires":[]}Dev note: FIXME: add a tech for bouncing into the tunnel. |
Come in Shinecharging, Leave With Temporary Blue (Suitless Spring Ball Bounce, Pause Remorph)
(Extreme+)
Crab Hole
From: 4
Top Right Doorway
To: 2
Bottom Left Door

Use Spring Ball to bounce into the hole, then unmorph to descend. Use a pause buffer to remorph, then chain temporary blue into the next room. Entrance condition: {
"comeInShinecharging": {
"length": 1,
"openEnd": 0
}
}Requires: "canSuitlessMaridia" "canTrickySpringBallBounce" "canPauseRemorphTemporaryBlue" Exit condition: {
"leaveWithTemporaryBlue": {}
}Unlocks doors: {"types":["ammo"],"requires":[]} |
From: 4
Top Right Doorway
To: 3
Bottom Right Door
Use a neutral bounce to enter the hole, then unmorph to descend. Use a pause buffer to remorph, then chain temporary blue into the next room. Entrance condition: {
"comeInShinecharging": {
"length": 1,
"openEnd": 0
}
}Requires: "Gravity" "Morph" "canPauseRemorphTemporaryBlue" "canXRayTurnaround" Exit condition: {
"leaveWithTemporaryBlue": {}
}Unlocks doors: {"types":["ammo"],"requires":[]}Dev note: FIXME: add a tech for bouncing into the tunnel. |
Come in Shinecharging, Leave With Temporary Blue (Suitless Spring Ball Bounce, Pause Remorph)
(Extreme+)
Crab Hole
From: 4
Top Right Doorway
To: 3
Bottom Right Door
Use Spring Ball to bounce into the hole, then unmorph to descend. Use a pause buffer to remorph, then chain temporary blue into the next room. Entrance condition: {
"comeInShinecharging": {
"length": 1,
"openEnd": 0
}
}Requires: "canSuitlessMaridia" "canTrickySpringBallBounce" "canPauseRemorphTemporaryBlue" "canXRayTurnaround" Exit condition: {
"leaveWithTemporaryBlue": {}
}Unlocks doors: {"types":["ammo"],"requires":[]} |
Come in Shinecharging, Leave With Temporary Blue (Gravity Jump, Spring Ball Jump, Pause Remorph)
(Extreme+)
Colosseum
From: 2
Bottom Right Door
To: 3
Top Right Door

Position as far left as possible, hanging over the ledge, and use X-Ray to turn around to the right. Perform a gravity jump into a spring ball jump. Immediately after the spring ball jump, unmorph to avoid bonking the wall and losing blue speed. Use a pause buffer to morph again without losing temporary blue: pause as early as possible, and hold angle and aim-down while the pause hits; during the black screen, hold only the down input, to buffer a morph; coming out of the pause, during the morphing animation roll from down to right, and then hold angle and unmorph to chain temporary blue. Entrance condition: {
"comeInShinecharging": {
"length": 3,
"openEnd": 0
}
}Requires: "canXRayTurnaround" "canGravityJump" "canSpringBallJumpMidAir" "canInsaneJump" "canChainTemporaryBlue" "canPauseRemorphTemporaryBlue" Exit condition: {
"leaveWithTemporaryBlue": {}
}Unlocks doors: {"types":["ammo"],"requires":[]} |
Come in Getting Blue Speed, Leave With Temporary Blue (Spring Ball Jump, Pause Remorph)
(Insane)
Crab Shaft
From: 2
Right Door
To: 3
Top Door
Perform a long series of tricky spring ball jumps to get up through the room while chaining temporary blue. After each spring ball jump, immediately unmorph to avoid bonking the wall and losing temporary blue. Aim down and use a pause buffer to remorph and continue chaining temporary blue. Entrance condition: {
"comeInGettingBlueSpeed": {
"length": 1,
"openEnd": 1
}
}Requires: "HiJump" "canSuitlessMaridia" "canLongChainTemporaryBlue" "canXRayTurnaround" "canTrickySpringBallJump" "canPauseRemorphTemporaryBlue" "canBeVeryPatient" Exit condition: {
"leaveWithTemporaryBlue": {
"direction": "any"
}
}Unlocks doors: {"types":["ammo"],"requires":[]} |
|
Requires: "HiJump"
{
"shineChargeFrames": 0
}
"h_getBlueSpeedMaxRunway"
"canXRayTurnaround"
"canLongChainTemporaryBlue"
"canTrickySpringBallJump"
"canPauseRemorphTemporaryBlue"Exit condition: {
"leaveWithTemporaryBlue": {
"direction": "any"
}
}Unlocks doors: {"types":["ammo"],"requires":[]}Dev note: The `h_getBlueSpeedMaxRunway` requirement is to satisfy the tests, since we don't have a way to represent that the temporary blue originates from the startsWithShineCharge. |
Tricky Cross Room Spring Ball Bounce into Spring Ball Jump, Leave With Temporary Blue
(Extreme+)
Halfie Climb Room
From: 2
Bottom Left Door
To: 4
Top Right Door

Gaining blue speed with a precise amount of run speed (extra run speed of $2.0 or $2.1), and bounce through the transition. After the transition, press pause, unmorph, aim down, and unequip Spring Ball. Buffer a morph out of the pause. Pause again to equip Spring Ball and perform a mid-air spring ball jump, chaining temporary blue to the top of the room. Entrance condition: {
"comeInWithBlueSpringBallBounce": {
"movementType": "any",
"minExtraRunSpeed": "$2.0",
"maxExtraRunSpeed": "$2.1"
}
}Requires: "canTrickyDashJump" "canCrossRoomJumpIntoWater" "canPauseRemorphTemporaryBlue" "canDoubleSpringBallJumpMidAir" Exit condition: {
"leaveWithTemporaryBlue": {}
}Unlocks doors: {"types":["ammo"],"requires":[]} |
From: 2
Bottom Left Door
To: 1
Top Left Door

Gaining blue speed with a precise amount of run speed (extra run speed of $2.0 or $2.1), and bounce through the transition. After the transition, unmorph, hold an angle button, aim down, and pause near the peak of Samus' jump. Buffer a morph out of the pause to continue chaining temporary blue. Use a spring ball jump to escape the water. Entrance condition: {
"comeInWithBlueSpringBallBounce": {
"movementType": "any",
"minExtraRunSpeed": "$2.0",
"maxExtraRunSpeed": "$2.1"
}
}Requires: "canTrickyDashJump" "canCrossRoomJumpIntoWater" "canPauseRemorphTemporaryBlue" "canXRayTurnaround" "canTrickySpringBallJump" Exit condition: {
"leaveWithTemporaryBlue": {}
}Unlocks doors: {"types":["ammo"],"requires":[]} |
From: 1
Bottom Left Door
To: 2
Top Right Door
Perform a sequence of three mid-air Spring Ball jumps, each immediately followed by an unmorph to avoid bonking the wall; after each unmorph, use a pause-buffered remorph to continue chaining temporary blue. Entrance condition: {
"comeInShinecharging": {
"length": 0,
"openEnd": 1
}
}Requires: "HiJump"
"canTrickySpringBallJump"
"canPauseRemorphTemporaryBlue"
"canLongChainTemporaryBlue"
{
"enemyDamage": {
"enemy": "Choot",
"type": "contact",
"hits": 1
}
}Exit condition: {
"leaveWithTemporaryBlue": {}
}Unlocks doors: {"types":["ammo"],"requires":[]}Dev note: The Choot hit is possible to avoid, but it's not yet clear if this can be done reliably. |
From: 1
Bottom Left Door
To: 2
Right Door
Entrance condition: {
"comeInShinecharging": {
"length": 1,
"openEnd": 0
}
}Requires: "canLongChainTemporaryBlue"
{
"or": [
"HiJump",
{
"and": [
"canTrickySpringBallJump",
"canPauseRemorphTemporaryBlue"
]
}
]
}Exit condition: {
"leaveWithTemporaryBlue": {}
}Unlocks doors: {"types":["ammo"],"requires":[]} |
|
Requires: "HiJump"
{
"canShineCharge": {
"usedTiles": 22,
"openEnd": 2
}
}
"canSpringBallJumpMidAir"
"canPauseRemorphTemporaryBlue"Exit condition: {
"leaveWithTemporaryBlue": {}
}Unlocks doors: {"types":["ammo"],"requires":[]} |
From: 2
Right Door
To: 1
Left Door
Perform a 1-tap to gain blue speed with a significant amount of momentum. Run through the door, and jump into an airball any time after the transition, crossing the room. At higher speeds, it may be necessary to unmorph at the left side of the room while still high in the air, to discard horizontal speed, then pause to remorph (`canPauseRemorphTemporaryBlue`). Entrance condition: {
"comeInGettingBlueSpeed": {
"length": 1,
"openEnd": 1,
"minExtraRunSpeed": "$4.4"
}
}Requires: {
"notable": "Cross-Room Blue Speed Jump (Right to Left)"
}
"canPlayInSand"
"canCrossRoomJumpIntoWater"
"canInsaneJump"
"canPauseRemorphTemporaryBlue"
"canChainTemporaryBlue"Exit condition: {
"leaveWithTemporaryBlue": {}
}Unlocks doors: {"types":["ammo"],"requires":[]}Dev note: This needs an extra run speed of at least $4.4. For speed $4.5, it helps to jump early and hold an aim-down pose. Speed $4.6 doesn't seem possible, as you end up too high to land without bonking the door, and too low to have time for a pause remorph? For speeds between $4.7 and $4.9, a pause remorph works. Speed $4.A is difficult but can be done with a last-frame jump, a momentum-conserving morph (ceiling mockball) while touching the second overhang, and a pause remorph. Speed $4.B doesn't seem to work as you can't avoid bonking the first overhang? |
From: 2
Right Door
To: 1
Left Door
Use a 3-tap or 4-tap to gain a speedball with a specific amount of speed in the other room (between $2.1 and $2.3 extra run speed), and either roll in or do a controlled bounce to enter while descending close to the ground. Bounce across the room, destroying the Evirs along the path, then bounce on the sand at the left side of the room, and unmorph to go straight up in the single-tile-wide space with no sandfall; perform a pause remorph to chain temporary blue to the door. Entrance condition: {
"comeInWithBlueSpringBallBounce": {
"movementType": "controlled",
"minExtraRunSpeed": "$2.1",
"maxExtraRunSpeed": "$2.3"
}
}Requires: {
"notable": "Cross-Room Blue Spring Ball Bounce (Right to Left)"
}
"canTrickyDashJump"
"canTrickySpringBallBounce"
"canPauseRemorphTemporaryBlue"
"canBeVeryPatient"Exit condition: {
"leaveWithTemporaryBlue": {}
}Unlocks doors: {"types":["ammo"],"requires":[]}Dev note: The 'canBeVeryPatient' requirement is for difficulty placement as this is quite precise and unforgiving. Bouncing on the pillars is also possible, as an alternative to doing a pause remorph. |