canStaggeredWalljump (Hard)
Controlling wall jump height and positioning to dodge enemies or to wait for something.
Dependencies: canConsecutiveWalljump
Strats ()
|
From: 4
Middle Junction (Left of Morph Tunnel)
To: 1
Left Door
After destroying a single bomb block, Samus can spin jump into its spot to quickly escape the acid. To avoid the acid completely, morph quickly at the right height and place a bomb. Requires: {
"or": [
"canCarefulJump",
{
"acidFrames": 35
}
]
}
"h_canUseMorphBombs"
{
"or": [
"canTrickyJump",
{
"and": [
"canCarefulJump",
"h_canBombHorizontally",
{
"acidFrames": 35
}
]
},
{
"acidFrames": 100
}
]
}
{
"or": [
{
"and": [
"canTrickyJump",
"canStaggeredWalljump"
]
},
{
"and": [
"canCarefulJump",
{
"acidFrames": 35
}
]
},
{
"acidFrames": 100
}
]
}
Clears obstacles: A, B |
|
From: 13
Central Junction
To: 5
Left Side - Bottom Middle Door (Blocked by Crumble Blocks)
Notable: true 
Raise a Zeb to be just below the crumble blocks and blindly freeze it to set up an ice clip to reach the Power Bomb room exit door. Get a bug from the pipe to spawn facing left and freeze it while moving to the ledge below the Hopper room door. While crouched, a spazer or wave beam shot will shoot through the floor in front of Samus. The bug must be frozen at a height between where Samus is crouched and where she is standing. Once frozen, somehow track how long until the freeze effect expires, and when the bug will reach the crumble blocks. If the bug is off camera when not frozen, it will despawn. Refreeze the Zeb below the crumble blocks and ice clip up to reach the door. Requires: "canTrickyUseFrozenEnemies"
"canStaggeredWalljump"
"canCameraManip"
{
"or": [
"Wave",
"Spazer"
]
}
"canPreciseCeilingClip"
|
|
Notable: true 
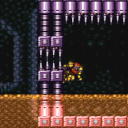
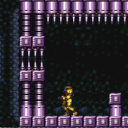
Wall jump between the Rippers. Either shoot the block, fall, and quickly climb again, or shoot from the bottom and follow Samus's shot up the tower. Requires: "canHeroShot" "canPreciseWalljump" "canStaggeredWalljump" |
|
King Cac can be killed by scrolling the camera before jumping across. Requires: "canWalljump"
"canCarefulJump"
{
"or": [
"canCameraManip",
"canStaggeredWalljump",
{
"and": [
"canNeutralDamageBoost",
{
"enemyDamage": {
"enemy": "Cacatac",
"type": "contact",
"hits": 1
}
}
]
}
]
}
|
|
From: 4
Lava, Left Wall
To: 3
Above Lava Junction
Notable: true 
Enter the Bottom-Left Namihe by Kagoing inside of it. Wait for a second hit to gain I-Frames and then very quickly walljump up the spikes and across to the right side wall. Requires: "canSuitlessLavaDive"
"canInsaneWalljump"
"canInsaneJump"
"canIframeSpikeJump"
"canStaggeredWalljump"
"canFastWalljumpClimb"
"canUseEnemies"
"canKago"
{
"heatFrames": 510
}
{
"lavaFrames": 480
}
{
"enemyDamage": {
"enemy": "Namihe",
"type": "kago",
"hits": 2
}
}
|
|
Walljump off of the lower half of the Upper-Left Namihe to cross to the right side wall. Continue Walljumping up from there, waiting for the above flame to pass if it is in the way. Requires: "HiJump"
"canSuitlessLavaDive"
"canUseEnemies"
"canTrickyJump"
"canStaggeredWalljump"
{
"heatFrames": 270
}
{
"lavaFrames": 240
}
|
|
From: 5
Lava, Center Namihe
To: 3
Above Lava Junction
Gravity jump from below the Lowest-Right Namihe. Walljump using the right side wall to reach the top of the lava, avoiding the Namihe fireball. Turning Gravity Suit back on can reduce lava damage, but may make the walljumps more difficult. Requires: "canSuitlessLavaDive"
"canGravityJump"
"canStaggeredWalljump"
{
"heatFrames": 290
}
{
"gravitylessLavaFrames": 230
}
{
"lavaFrames": 20
}
|
|
Notable: true 
Use the bottommost right side namihe to generate a flame and walk with it to the bottommost left namihe head Use a turnaround animation as Samus is hit by the flame to cancel out knockback frames. While invulnerability frames are active, walljump up the spikes either 2 or 3 times and jump accross to catch the middle wall and climb from there. Requires: "canSuitlessLavaDive"
"canIframeSpikeJump"
"canStaggeredWalljump"
"canFastWalljumpClimb"
"canUseEnemies"
"canCameraManip"
{
"heatFrames": 600
}
{
"lavaFrames": 500
}
{
"enemyDamage": {
"enemy": "Namihe",
"type": "fireball",
"hits": 1
}
}
|
|
From: 3
Junction Left of Green Gate
To: 4
Center Platform Junction
Requires: {
"or": [
"Grapple",
"SpaceJump",
"canResetFallSpeed",
{
"and": [
"canTrickyJump",
"canLateralMidAirMorph"
]
},
{
"and": [
"Gravity",
"canStaggeredWalljump"
]
}
]
}
|
|
From: 5
Firefleas Bottom Left Platform Junction
To: 7
Fireflea Statue's Claw Junction
This can only be attempted once. Requires: "canStaggeredWalljump"
"canCarefulJump"
"canHorizontalDamageBoost"
{
"enemyDamage": {
"enemy": "Fireflea",
"type": "contact",
"hits": 1
}
}
|
|
From: 4
Junction Above Bomb Block
To: 2
Right Door
Walljump in place while the acid goes away. Requires: "h_canNavigateHeatRooms"
"Morph"
"canStaggeredWalljump"
{
"heatFrames": 660
}
|
|
From: 1
Bottom Left Door
To: 4
G-Mode Junction (Top by Elevator)
Entrance condition: {
"comeInWithGMode": {
"mode": "any",
"morphed": false
}
}
Requires: {
"or": [
"canUseFrozenEnemies",
{
"and": [
"canPreciseWalljump",
"canStaggeredWalljump"
]
}
]
}
|
|
The walljumps are considered to require precision only if the Rippers are not killed Requires: "canPreciseWalljump" "canStaggeredWalljump" |
|
Entrance condition: {
"comeInWithGMode": {
"mode": "any",
"morphed": false
}
}
Requires: {
"or": [
"canUseFrozenEnemies",
{
"and": [
"canPreciseWalljump",
"canStaggeredWalljump"
]
}
]
}
|
|
From: 4
West Leg Sand
To: 2
East Leg Right Door
Notable: true 
Use the grapple block to initiate a Grapple Jump to climb up to the higher level and above the water line. Aiming the Grapple Jump to line up with the one tile hole is difficult and Samus is moving at high speeds. Escaping the water is also difficult as Samus must be standing at the water line when jumping for the next part of the grapple jump. It may be easier to jump out of the water by turning HiJump off. A Grapple Jump can be a spin jump by running briefly before jumping and that can be used to begin Walljumping or Space Jumping. Requires: "canSuitlessMaridia"
"canTrickyGrappleJump"
"canMidairWiggle"
{
"or": [
{
"enemyDamage": {
"enemy": "Menu",
"type": "contact",
"hits": 1
}
},
"SpaceJump",
{
"and": [
"canConsecutiveWalljump",
{
"or": [
"ScrewAttack",
"canStaggeredWalljump"
]
}
]
}
]
}
|
|
Watch for the water level to start falling to time the jump to escape at its lowest point. Then use SpaceJump to splash on top of the water. Time another jump with the water level or walljump to fully escape the water. Requires: "canSuitlessMaridia"
{
"or": [
{
"and": [
"canSpaceJumpWaterBounce",
"canWalljump"
]
},
"canSpaceJumpWaterEscape"
]
}
"HiJump"
{
"or": [
{
"enemyDamage": {
"enemy": "Menu",
"type": "contact",
"hits": 1
}
},
"ScrewAttack",
"canStaggeredWalljump",
"canPseudoScrew"
]
}
|
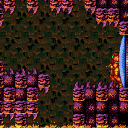
|
The swarm of Menus will attack Samus at the top of the room. Tank them, carefully dodge them, or kill them with Screw or Pseudo Screw. Requires: "Gravity"
"canConsecutiveWalljump"
{
"or": [
"ScrewAttack",
"canStaggeredWalljump",
"canWalljumpWithCharge",
{
"enemyDamage": {
"enemy": "Menu",
"type": "contact",
"hits": 1
}
}
]
}
|