canSpaceJumpWaterBounce (Medium)
Using Space Jump to bounce along the water line. It can be used to escape the water with a wall jump, or to get onto low platforms just above the water level.
Dependencies: canSuitlessMaridia
Strats ()
|
From: 1
Left Door
To: 2
Right Door
Notable: true 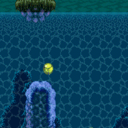
Build up run speed and then use controlled springball bounces to cross the ocean to the far right ledge, and then use SpaceJump to reach the door. Mockball down the submerged ramp and begin SpringBall bouncing under water using the platforms. Disable SpringBall after the final jump once Samus starts falling again as a way to gain extra speed. Requires: "canTrickyJump"
"canSpaceJumpWaterBounce"
"canSpringBallBounce"
"canSpringFling"
"canMockball"
{
"or": [
"canDownGrab",
"canWalljump"
]
}
|
|
Enter the room while building a shinespark and use it on the lowest part of the ramp to cross the room and reach a raised ledge on the right side wall. From there, use SpaceJump to escape the water. Carry the shinespark to the bottom of the ramp by delaying the first Choot with two Power Beam shots, killing it, or bounceballing through it. The Choot can be shot diagonally from the middle platform, and again by running off that platform and aiming down to float above it. Entrance condition: {
"comeInShinecharging": {
"length": 6,
"openEnd": 1,
"steepDownTiles": 1
}
}
Requires: "canShinechargeMovementComplex"
"canCarefulJump"
{
"or": [
{
"and": [
"canMidairShinespark",
"canDodgeWhileShooting"
]
},
{
"and": [
{
"enemyDamage": {
"enemy": "Choot",
"type": "contact",
"hits": 1
}
},
"canNeutralDamageBoost",
"canBounceBall"
]
},
{
"and": [
"canMockball",
{
"or": [
"canPseudoScrew",
"ScrewAttack",
"Plasma",
"Wave",
{
"ammo": {
"type": "Missile",
"count": 1
}
},
{
"ammo": {
"type": "Super",
"count": 1
}
}
]
}
]
}
]
}
"canHorizontalShinespark"
{
"shinespark": {
"frames": 123,
"excessFrames": 5
}
}
"canSpaceJumpWaterBounce"
{
"or": [
{
"and": [
"HiJump",
"canSpaceJumpWaterEscape"
]
},
{
"and": [
"canTrickyJump",
"canDownGrab"
]
},
"canWalljump"
]
}
|
|
Requires: "canSuitlessMaridia"
"canSpaceJumpWaterBounce"
{
"or": [
"canWalljump",
{
"and": [
"canSpaceJumpWaterEscape",
"HiJump"
]
},
{
"and": [
"canTrickyJump",
"canDownGrab"
]
}
]
}
|
|
From: 3
Junction (Left side Pit)
To: 2
Right Door
Notable: true .png)
.gif)
Standing from the rightmost platform, jump to the right of the stalagmite. Perform a midair wiggle to get to the left to the stalagmite, then precisely wall jump off of it. Then perform a frame perfect space jump at the water line to bounce on the water over to the Kamer platform. Requires: "canSpaceJumpWaterBounce" "canPreciseWalljump" "canMidairWiggle" |
|
From: 3
Junction (Left side Pit)
To: 2
Right Door
Notable: true .png)
.gif)
Get to the right of the Choot on the rightmost platform. Spin jump up to the right, break spin while aligned with the wall, then freeze the Choot and stand on it while it is midair to the right of the stalagmite. Jump from the Choot to the water line and space jump at the water line to the Kamer platform. Requires: "canSpaceJumpWaterBounce" "canTrickyUseFrozenEnemies" "canTrickyJump" |
|
From: 3
Junction (Left side Pit)
To: 2
Right Door
Notable: true 
Freeze the right-most ramp Choot in a way where Samus can climb on top of it and use Space Jump to escape the water. Use a turn around to avoid knockback when making contact with the Choot to better time the use of Ice. Freeze the Choot as far to the right (on its lowest swoop), but this method is less precise than the alternatives. If Samus is inside the Choot when it is frozen, she can continuing moving freely. Jump on top either in spinjump or in Morph Ball Use XRay to standup, clipping partially into the above slope. Use a flately jump to fall out of the wall while still keeping enough height to spacejump on top of the water and escape. Requires: {
"enemyDamage": {
"enemy": "Choot",
"type": "contact",
"hits": 1
}
}
"canTrickyUseFrozenEnemies"
"Morph"
"canXRayStandUp"
"canSpaceJumpWaterBounce"
"canFlatleyJump"
"canHitbox"
|
|
Requires: "canSuitlessMaridia"
"HiJump"
{
"or": [
"canSpringBallJumpMidAir",
"canSpaceJumpWaterBounce"
]
}
|
|
From: 4
Junction (Right side Pit)
To: 2
Right Door
Freeze the Choot when it swings right on its jump. Quickly get on top of it by first getting onto the pillar to the left, or with a SpringBall Jump. Perform a precise spring ball jump to get to the far right ledge, while avoiding hitting the water surface. While on the ledge, stand on the raised ground to the right and jump to the surface, then space jump across the water to the left. Requires: "canSuitlessMaridia"
"canTrickyUseFrozenEnemies"
"canCarefulJump"
"canSpringBallJumpMidAir"
{
"or": [
"canTrickySpringBallJump",
"canResetFallSpeed",
"canStationaryLateralMidAirMorph"
]
}
"canSpaceJumpWaterBounce"
"canWalljump"
|
|
Requires: "canSuitlessLavaDive"
"Morph"
{
"or": [
{
"and": [
"canCarefulJump",
"canMockball",
{
"lavaFrames": 180
}
]
},
{
"lavaFrames": 220
}
]
}
{
"or": [
{
"and": [
"canSpaceJumpWaterBounce",
{
"lavaFrames": 120
}
]
},
{
"lavaFrames": 150
}
]
}
|
|
Requires: {
"or": [
"Morph",
"Gravity",
"canSpaceJumpWaterBounce"
]
}
|
|
Requires: {
"or": [
"Morph",
"Gravity",
"canSpaceJumpWaterBounce"
]
}
|
|
From: 1
Left Door
To: 1
Left Door
Start at least 2 tiles from the water line, and stutter just before entering the water in order to charge a spark in room. Requires: "f_DefeatedPhantoon"
"canStutterWaterShineCharge"
"canShinechargeMovementTricky"
"canWalljump"
{
"or": [
"canSpaceJumpWaterBounce",
"HiJump"
]
}
{
"canShineCharge": {
"usedTiles": 33,
"openEnd": 2
}
}
{
"shinespark": {
"frames": 29
}
}
Exit condition: {
"leaveWithSpark": {}
}
|
|
From: 1
Left Door
To: 2
Right Door
Start at least 2 tiles from the water line, and stutter just before entering the water in order to charge a spark in room. Requires: "f_DefeatedPhantoon"
"canStutterWaterShineCharge"
"canShinechargeMovementComplex"
"canWalljump"
"canSpaceJumpWaterBounce"
{
"canShineCharge": {
"usedTiles": 33,
"openEnd": 2
}
}
Exit condition: {
"leaveShinecharged": {
"framesRemaining": 30
}
}
|
|
Letting Mama Turtle sleep, climb the right wall using HiJump (with a down-grab) and escape the water with Space Jump . Requires: "canSuitlessMaridia"
"HiJump"
"canDownGrab"
{
"or": [
{
"and": [
"canSpaceJumpWaterBounce",
"canWalljump"
]
},
"canSpaceJumpWaterEscape"
]
}
|
|
From: 2
Bottom Door
To: 3
Bottom Right Ledge
Notable: true 
Use a Space Jump water bounce followed by a tight mid-air morph, to get a mid-air Spring Ball jump out of the water. Requires: "canSpaceJumpWaterBounce" "canTrickySpringBallJump" "can4HighMidAirMorph" |
|
Requires: "canSuitlessMaridia"
{
"or": [
{
"and": [
"canSpaceJumpWaterBounce",
"canWalljump"
]
},
{
"and": [
"canSpaceJumpWaterEscape",
"HiJump"
]
}
]
}
|
|
Requires: "canUnderwaterWalljump" "canSpaceJumpWaterBounce" |
|
Requires: {
"or": [
{
"and": [
"Gravity",
{
"or": [
"SpaceJump",
{
"and": [
"canPreciseWalljump",
"canConsecutiveWalljump"
]
},
{
"and": [
"HiJump",
"canWalljump"
]
}
]
}
]
},
{
"and": [
"canSpaceJumpWaterBounce",
"canWalljump"
]
}
]
}
{
"resetRoom": {
"nodes": [
1
],
"mustStayPut": false
}
}
{
"refill": [
"Super"
]
}
|
|
Requires: {
"or": [
{
"and": [
"Gravity",
{
"or": [
"SpaceJump",
"canWalljump"
]
}
]
},
{
"and": [
"HiJump",
"canSpaceJumpWaterBounce",
"canWalljump"
]
}
]
}
{
"resetRoom": {
"nodes": [
2
],
"mustStayPut": false
}
}
{
"refill": [
"Energy",
"Super"
]
}
|
|
From: 2
Right Door
To: 4
Top Right Ledge Junction
Use SpaceJump to break out of the water. Afterward, it's easiest to use a wall jump to gain height but this is not required. Requires: "canSuitlessMaridia"
"HiJump"
{
"or": [
"canSpaceJumpWaterEscape",
{
"and": [
"canSpaceJumpWaterBounce",
"canWalljump"
]
}
]
}
|
|
From: 3
Junction Left of Morph Tunnel
To: 1
Left Door
Requires: "canSuitlessMaridia"
{
"or": [
{
"and": [
"canSpaceJumpWaterBounce",
"canWalljump"
]
},
{
"and": [
"canSpaceJumpWaterEscape",
"HiJump"
]
}
]
}
|
|
From: 5
Bottom Middle Junction
To: 4
Top Right Ledge Junction
Requires: "canUnderwaterWalljump" "canSpaceJumpWaterBounce" |
|
From: 5
Bottom Middle Junction
To: 6
East Cactus Alley Junction (Right of Morph Tunnel)
This can be done by turning off Gravity and HiJump to jump over both spike pits. Requires: "canSuitlessMaridia"
"canSpringBallJumpMidAir"
{
"spikeHits": 1
}
{
"or": [
"canTrickySpringBallJump",
{
"and": [
"canWalljump",
"canSpaceJumpWaterBounce"
]
},
{
"and": [
"h_canJumpIntoIBJ",
"h_canUseSpringBall"
]
},
{
"and": [
"h_canIBJ",
"canBombJumpWaterEscape"
]
},
{
"spikeHits": 1
}
]
}
|
|
Requires: "canSuitlessMaridia"
"HiJump"
{
"or": [
{
"and": [
"canSpaceJumpWaterBounce",
"canWalljump"
]
},
"canSpaceJumpWaterEscape"
]
}
|
|
From: 1
Bottom Left Door
To: 2
Top Right Door
Requires: "canSuitlessMaridia"
"HiJump"
{
"or": [
"canSpringBallJumpMidAir",
"canSpaceJumpWaterBounce",
"canUseFrozenEnemies"
]
}
|
|
From: 1
Top Sand Entrance
To: 7
Below Morph Tunnel Junction
HiJump with a good jump from the sand can reach the Solid Rock Maze region. Use the sandfall if Samus gets stuck in the sand. Requires: "canSuitlessMaridia" "canPlayInSand" "HiJump" "canConsecutiveWalljump" "canSpaceJumpWaterBounce" |
|
From: 7
Below Morph Tunnel Junction
To: 1
Top Sand Entrance
Requires: "canSuitlessMaridia"
"HiJump"
{
"or": [
"canPreciseWalljump",
"canSpaceJumpWaterBounce"
]
}
|
|
From: 7
Below Morph Tunnel Junction
To: 5
Morph Tunnel Junction
Escape the water with either HiJump or SpaceJump, then carefully jump and morph into the tunnel. Requires: "canSuitlessMaridia"
"Morph"
{
"or": [
{
"and": [
"HiJump",
"canPreciseWalljump",
"canWallJumpInstantMorph"
]
},
{
"and": [
"HiJump",
"canSpaceJumpWaterEscape"
]
},
{
"and": [
"canPreciseWalljump",
"canSpaceJumpWaterBounce"
]
}
]
}
|
|
Kill the Choot, then space jump across the water and onto the center platform - it is slightly lower than the sides. Requires: "canSpaceJumpWaterBounce" |
|
Watch for the water level to start falling to time the jump to escape at its lowest point. Then use SpaceJump to splash on top of the water. Time another jump with the water level or walljump to fully escape the water. Requires: "canSuitlessMaridia"
{
"or": [
{
"and": [
"canSpaceJumpWaterBounce",
"canWalljump"
]
},
"canSpaceJumpWaterEscape"
]
}
"HiJump"
{
"or": [
{
"enemyDamage": {
"enemy": "Menu",
"type": "contact",
"hits": 1
}
},
"ScrewAttack",
"canStaggeredWalljump",
"canPseudoScrew"
]
}
|
|
From: 2
Item
To: 1
Left Door
Notable: true 
Perform a canSunkenTileWideWallClimb to get to the water surface, then use space jump at the water surface. Then either use space jump when the water is low then a spring ball jump to escape, or space jump when the water is high into a tight midair morph. Requires: "Morph" "canSuitlessMaridia" "canSpringBallJumpMidAir" "canSunkenTileWideWallClimb" "canTrickyJump" "can4HighMidAirMorph" "canSpaceJumpWaterBounce" |
|
Space jump while partially submerged for more time to mid-air morph. Requires: "Morph" "canSuitlessMaridia" "HiJump" "canSpaceJumpWaterBounce" "can4HighMidAirMorph" |