canSlowShortCharge (Expert)
The ability to control Samus' run speed while shortcharging by releasing run after achieving blue. Being able to 4 tap is expected as that brings out the most value from this tech.
Strats ()
|
Notable: true 
Enter the room with a very specific run speed to jump from the door, and land a speedball perfectly in the tunnel to break the Bomb block. Entrance condition: {
"comeInShinecharging": {
"length": 0,
"openEnd": 0
}
}
Requires: "canInsaneJump" "canSpeedball" "canTrickyDashJump" "canSlowShortCharge" |
|
From: 4
Middle Right Door
To: 6
Main Junction
Notable: true
Enter the room with a very specific run speed to jump from the door, squeeze by the ceiling, and land a speedball perfectly in the tunnel to break the Bomb block. Entrance condition: {
"comeInShinecharging": {
"length": 1,
"openEnd": 0
}
}
Requires: "canSpeedball" "canTrickyDashJump" "canSlowShortCharge" "canInsaneJump" |
|
From: 1
Top Left Door
To: 6
Top Junction with Temporary Blue (Right of Morph Tunnel)
Notable: true 
Using only the short runway and spike pit, use one or more SpeedKeeps to Speedball towards the Super Missile item location. This requires either a very short shortcharge, or a second SpeedKeep in the spikes which also resets Samus' run speed with a crouch jump before spike I-Frames expire. Requires: "canSpeedKeep"
"canSlowShortCharge"
{
"doorUnlockedAtNode": 1
}
{
"or": [
{
"and": [
"canChainTemporaryBlue",
{
"canShineCharge": {
"usedTiles": 13,
"openEnd": 1
}
},
{
"spikeHits": 1
}
]
},
{
"and": [
{
"canShineCharge": {
"usedTiles": 14,
"openEnd": 1
}
},
{
"spikeHits": 2
}
]
},
{
"and": [
"canChainTemporaryBlue",
{
"spikeHits": 3
}
]
}
]
}
"canSpeedball"
|
|
From: 1
Top Left Door
To: 6
Top Junction with Temporary Blue (Right of Morph Tunnel)
Bounce into the spikes and use a SpeedKeep to run on spikes to setup for a speedball towards the item. Bouncing on the platform near the door saves a spike hit. Or a DamageBoost SpeedKeep could be used instead of a Spike SpeedKeep with enough runspeed. Entrance condition: {
"comeInRunning": {
"speedBooster": true,
"minTiles": 12
}
}
Requires: "canSpeedKeep"
"canCarefulJump"
"canSlowShortCharge"
"can4HighMidAirMorph"
{
"spikeHits": 1
}
"canSpeedball"
|
|
Bring temporary blue from the right side door all the way to the missile location using Springball, SpaceJump, or Morph-UnMorphs. Entrance condition: {
"comeInShinecharging": {
"length": 1,
"openEnd": 1
}
}
Requires: "canTemporaryBlue"
"canInsaneJump"
{
"or": [
"canChainTemporaryBlue",
{
"and": [
"canSpeedball",
"canSpringBallBounce",
"canSlowShortCharge"
]
},
{
"and": [
"canBlueSpaceJump",
"canMockball",
"canSlowShortCharge"
]
}
]
}
|
|
From: 2
Right Door
To: 1
Left Door
Notable: true 
Use SpeedBooster to break the runway Bomb block and then to shinespark across the room, saving Power Bombs. One Power Bomb is still needed to break the tunnel block. The shinespark timer is very tight and breaking the runway block while storing the Shinespark is required as it saves movement frames. Entrance condition: {
"comeInShinecharging": {
"length": 8,
"openEnd": 0
}
}
Requires: "canSlowShortCharge"
"canShinechargeMovementTricky"
"h_canUsePowerBombs"
"HiJump"
"Gravity"
{
"acidFrames": 16
}
"canInsaneJump"
{
"shinespark": {
"frames": 93,
"excessFrames": 15
}
}
|
|
From: 2
Right Door
To: 4
Middle Junction (Left of Morph Tunnel)
Entrance condition: {
"comeInShinecharging": {
"length": 1,
"openEnd": 0
}
}
Requires: "canSpeedball"
"canCarefulJump"
"canSlowShortCharge"
{
"acidFrames": 60
}
|
|
Run on the upper platform to perform the speedball. Requires: "canSlowShortCharge"
{
"canShineCharge": {
"usedTiles": 14,
"openEnd": 1
}
}
"canSpeedball"
Clears obstacles: A |
|
From: 2
Right Door
To: 1
Left Door
Use a frozen Zeela to extend the upper platform to help set up the speedball. Requires: "h_canFrozenEnemyRunway"
"canSlowShortCharge"
{
"canShineCharge": {
"usedTiles": 15,
"openEnd": 1
}
}
"canSpeedball"
Clears obstacles: A |
|
From: 7
Right Side - Bottom Middle Door (Behind the Super Block)
To: 13
Central Junction
Notable: true 
Quickly jump and precisely shoot the super block and in the same motion take out the bomb blocks with a speedball. Entrance condition: {
"comeInShinecharging": {
"length": 5,
"openEnd": 0
}
}
Requires: "canSpeedball"
"canTrickyJump"
"canSlowShortCharge"
{
"ammo": {
"type": "Super",
"count": 1
}
}
Clears obstacles: F |
|
From: 13
Central Junction
To: 7
Right Side - Bottom Middle Door (Behind the Super Block)
Notable: true 
Break the bomb blocks by jumping into them with speed. These is more easily done at low run speed. Requires: "canSpeedball"
"canLateralMidAirMorph"
"canSlowShortCharge"
"canTrickyJump"
{
"canShineCharge": {
"usedTiles": 20,
"openEnd": 2
}
}
"canOffScreenSuperShot"
Clears obstacles: F |
|
The Kihunters can be killed by retreating to the morph tunnel if needed. Entrance condition: {
"comeInShinecharging": {
"length": 3,
"openEnd": 1
}
}
Requires: "canSpeedball" "canSlowShortCharge" Clears obstacles: B, C |
|
From: 5
Kihunter Junction
To: 3
Top Right Door
Notable: true 
A very low horizontal speed is needed to drop down and break the block without hitting the corner to the left or the block above the bomb block. Or with Temporary Blue, Samus can bounce into the bomb block. Requires: "Morph"
{
"obstaclesCleared": [
"C"
]
}
{
"obstaclesNotCleared": [
"D"
]
}
{
"or": [
{
"and": [
"canSlowShortCharge",
"canSpeedball",
{
"canShineCharge": {
"usedTiles": 17,
"openEnd": 0
}
}
]
},
{
"and": [
"canTemporaryBlue",
"canLateralMidAirMorph",
{
"canShineCharge": {
"usedTiles": 32,
"openEnd": 1
}
}
]
}
]
}
Clears obstacles: B |
|
Entrance condition: {
"comeInSpeedballing": {
"runway": {
"length": 3,
"openEnd": 1
}
}
}
Requires: "canSpeedball"
"canSlowShortCharge"
{
"heatFrames": 360
}
|
|
From: 2
Right Door
To: 5
Below Left Door Junction
Notable: true 
Enter the room blue with very low run speed (e.g. with a 4-tap). Use a precisely timed jump to bonk the large stalagtite in the ceiling and fall through both pirates, killing them with the blue speed. Enter the acid while aiming down to shrink Samus' hitbox. This strat works with all combinations of movement items and suits. Entrance condition: {
"comeInShinecharging": {
"length": 9,
"gentleDownTiles": 4,
"openEnd": 1
}
}
Requires: "h_canNavigateHeatRooms"
"canInsaneJump"
"canSuitlessLavaDive"
"canSlowShortCharge"
{
"heatFrames": 330
}
{
"acidFrames": 210
}
|
|
Entrance condition: {
"comeInShinecharging": {
"length": 0,
"openEnd": 1
}
}
Requires: "canSpeedball" "canCarefulJump" "canSlowShortCharge" Clears obstacles: A |
|
From: 1
Left Door
To: 2
Item (Behind the Bomb Wall) (locked)
Notable: true 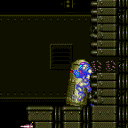
Kago into the worker robot and start running away from the wall until the bomb blocks are broken with SpeedBooster. The short charge taps are extremely precise because gaining too much run speed and Samus will exit the robot. Requires: "Morph"
"canSlowShortCharge"
"canKago"
{
"canShineCharge": {
"usedTiles": 14,
"openEnd": 0
}
}
|
|
Wrecked Ship Main Shaft Spooky Missiles Temporary Blue with Frozen Enemy Runway (Insane)
Wrecked Ship Main Shaft
From: 3
Bottom Left Door
To: 8
Item
Notable: true 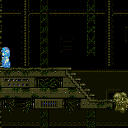
Use a frozen Atomic or Covern to extend the runway in front of the Spooky Missiles bomb block, then use temporary blue into a morph ball bounce to break it. Position the enemy horizontally centered in the hole to extend the runway all the way to the wall. Positioning a Covern is tricky. One way to set this up is with Space Jump. Perform Space Jumps half way between the desired Covern position and the ceiling until the Covern spawns in the correct position. Requires: "h_canFrozenEnemyRunway"
{
"or": [
"f_DefeatedPhantoon",
{
"and": [
"SpaceJump",
"h_canTrickyFrozenEnemyRunway"
]
}
]
}
"canSlowShortCharge"
{
"canShineCharge": {
"usedTiles": 14,
"openEnd": 0,
"steepUpTiles": 3
}
}
"canTemporaryBlue"
"Morph"
|
|
From: 3
Bottom Right Door
To: 2
Bottom Left Door
Notable: true 
Jump into the room and shoot out at least the bottom shotblock. Jumping into the top of the door frame at low speeds lines up the shot well. Speedball through and unmorph on top of the first set of speedblocks. Reposition with a Chain Temporary Blue closer to the remaining speed blocks. Jump into the rest of the Speed Blocks clearing a path for the Oums. Wait for the Oums to roll on their own to a place where they can be climbed. Do not stand on the Oums when they begin to attack. Entrance condition: {
"comeInSpeedballing": {
"runway": {
"length": 0,
"openEnd": 0
}
}
}
Requires: "canSpeedball" "canCrossRoomJumpIntoWater" "canUseEnemies" "canChainTemporaryBlue" "canSlowShortCharge" |
|
From: 1
Left Door
To: 2
Right Door
Gain an extra half-tile of runway by coming in very slowly to prevent falling off. Entrance condition: {
"comeInShinecharging": {
"length": 1,
"openEnd": 0
}
}
Requires: "canShinechargeMovementComplex"
"canSlowShortCharge"
"canMidairShinespark"
{
"canShineCharge": {
"usedTiles": 14,
"openEnd": 0
}
}
{
"shinespark": {
"frames": 69,
"excessFrames": 7
}
}
|
|
From: 2
Right Door
To: 1
Left Door
Gain an extra half-tile of runway by coming in very slowly to prevent falling off. Entrance condition: {
"comeInShinecharging": {
"length": 1,
"openEnd": 0
}
}
Requires: "canShinechargeMovementComplex"
"canSlowShortCharge"
"canMidairShinespark"
{
"canShineCharge": {
"usedTiles": 14,
"openEnd": 0
}
}
{
"shinespark": {
"frames": 69,
"excessFrames": 7
}
}
|
|
From: 1
Left Door
To: 2
Right Door
Gain an extra half-tile of runway by coming in very slowly to prevent falling off. Entrance condition: {
"comeInShinecharging": {
"length": 1,
"openEnd": 0
}
}
Requires: "canShinechargeMovementComplex"
"canSlowShortCharge"
"canMidairShinespark"
{
"canShineCharge": {
"usedTiles": 14,
"openEnd": 0
}
}
{
"shinespark": {
"frames": 88,
"excessFrames": 5
}
}
|
|
From: 2
Right Door
To: 1
Left Door
Gain an extra half-tile of runway by coming in very slowly to prevent falling off. Entrance condition: {
"comeInShinecharging": {
"length": 1,
"openEnd": 0
}
}
Requires: "canShinechargeMovementComplex"
"canSlowShortCharge"
"canMidairShinespark"
{
"canShineCharge": {
"usedTiles": 14,
"openEnd": 0
}
}
{
"shinespark": {
"frames": 90,
"excessFrames": 5
}
}
|