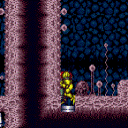
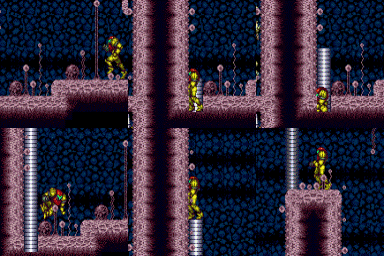
canPseudoScrew (Medium)
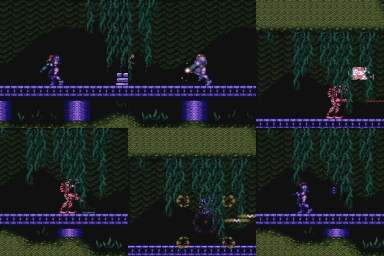
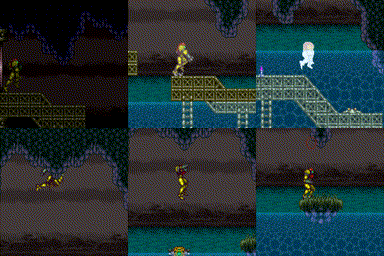
The ability to spinjump with Charge beam stored. Pseudo screw gives Samus some protection from projecitles and enemies. It will damage enemies who are vulnerable to this attack and Samus will only take damage if the enemy takes damage and is not killed.
Strats ()
|
Requires: {
"or": [
{
"enemyKill": {
"enemies": [
[
"Boyon",
"Boyon",
"Boyon",
"Boyon"
]
],
"excludedWeapons": [
"Bombs",
"PseudoScrew"
]
}
},
{
"and": [
"canBePatient",
"h_canUseMorphBombs"
]
},
{
"and": [
{
"enemyDamage": {
"enemy": "Boyon",
"type": "contact",
"hits": 16
}
},
"canCarefulJump",
"canPseudoScrew"
]
}
]
}
Clears obstacles: A |
|
Notable: true Enter the room while building a shinespark and use it on the lowest part of the ramp to diagonally spark up and out of the water. Use very low jump height space jumps to carry momentum to the far side of the submerged ramp. Both Choots must be killed. Using Screw Attack: stay a little bit high in the water so that it remains active for the second Choot. Using Plasma or ammo: kill the first Choot while running down the middle platform, and the second while gliding above it after spacejumping through the water. Then shinespark up and use SpaceJump to reach the door. Entrance condition: {
"comeInShinecharging": {
"length": 6,
"openEnd": 1,
"steepDownTiles": 1
}
}
Requires: {
"or": [
"ScrewAttack",
"canPseudoScrew",
"Plasma",
{
"ammo": {
"type": "Missile",
"count": 1
}
},
{
"ammo": {
"type": "Super",
"count": 1
}
}
]
}
{
"or": [
"ScrewAttack",
"Plasma",
{
"ammo": {
"type": "Missile",
"count": 1
}
},
{
"ammo": {
"type": "Super",
"count": 1
}
}
]
}
{
"shinespark": {
"frames": 14,
"excessFrames": 5
}
}
"canShinechargeMovementComplex"
"SpaceJump"
"canTrickyJump"
"canMidairShinespark"
|
|
Enter the room while building a shinespark and use it on the lowest part of the ramp to cross the room and reach a raised ledge on the right side wall. From there, use SpaceJump to escape the water. Carry the shinespark to the bottom of the ramp by delaying the first Choot with two Power Beam shots, killing it, or bounceballing through it. The Choot can be shot diagonally from the middle platform, and again by running off that platform and aiming down to float above it. Entrance condition: {
"comeInShinecharging": {
"length": 6,
"openEnd": 1,
"steepDownTiles": 1
}
}
Requires: "canShinechargeMovementComplex"
"canCarefulJump"
{
"or": [
{
"and": [
"canMidairShinespark",
"canDodgeWhileShooting"
]
},
{
"and": [
{
"enemyDamage": {
"enemy": "Choot",
"type": "contact",
"hits": 1
}
},
"canNeutralDamageBoost",
"canBounceBall"
]
},
{
"and": [
"canMockball",
{
"or": [
"canPseudoScrew",
"ScrewAttack",
"Plasma",
"Wave",
{
"ammo": {
"type": "Missile",
"count": 1
}
},
{
"ammo": {
"type": "Super",
"count": 1
}
}
]
}
]
}
]
}
"canHorizontalShinespark"
{
"shinespark": {
"frames": 123,
"excessFrames": 5
}
}
"canSpaceJumpWaterBounce"
{
"or": [
{
"and": [
"HiJump",
"canSpaceJumpWaterEscape"
]
},
{
"and": [
"canTrickyJump",
"canDownGrab"
]
},
"canWalljump"
]
}
|
|
From: 2
Right Door
To: 3
Top Junction
Notable: true Start the elevator ride by using Screw Attack or Pseudo Screw in the hole. Kago the elevator to fall back in and hit the elevator again. This is much easier while the elevator is still rising, but can still be done with Morph afterwards. Unless HiJump is owned, this will need to be done once more to get high enough to get to the blue gate. Requires: "canKago"
{
"or": [
"ScrewAttack",
"canPseudoScrew"
]
}
{
"or": [
{
"and": [
"HiJump",
{
"or": [
"canCrouchJump",
"canDownGrab"
]
}
]
},
"canTrickyJump",
"Morph"
]
}
Clears obstacles: B |
|
From: 1
Top Right Door
To: 4
Top Left Junction
Pseudo Screw can help with the Sidehopper kills. Requires: {
"enemyDamage": {
"enemy": "Sidehopper",
"type": "contact",
"hits": 2
}
}
{
"or": [
"Spazer",
"canPseudoScrew",
"Wave"
]
}
Clears obstacles: A |
|
Requires: {
"or": [
{
"enemyKill": {
"enemies": [
[
"Boyon",
"Boyon",
"Boyon",
"Boyon"
]
],
"excludedWeapons": [
"Bombs",
"PseudoScrew"
]
}
},
{
"and": [
"canBePatient",
"h_canUseMorphBombs"
]
},
{
"and": [
{
"enemyDamage": {
"enemy": "Boyon",
"type": "contact",
"hits": 16
}
},
"canPseudoScrew"
]
}
]
}
Clears obstacles: A |
|
Requires: "canTrickyJump"
{
"or": [
"ScrewAttack",
{
"and": [
"canDodgeWhileShooting",
{
"or": [
"Wave",
"Spazer",
"Plasma",
"canPseudoScrew",
{
"ammo": {
"type": "Missile",
"count": 1
}
},
{
"ammo": {
"type": "Super",
"count": 1
}
}
]
}
]
},
{
"heatFrames": 5
}
]
}
{
"heatFrames": 220
}
|
|
Requires: "canPseudoScrew"
{
"heatFrames": 540
}
|
|
Requires: {
"or": [
{
"ammo": {
"type": "Super",
"count": 2
}
},
{
"and": [
{
"ammo": {
"type": "Super",
"count": 1
}
},
{
"enemyDamage": {
"enemy": "Boulder",
"type": "contact",
"hits": 1
}
}
]
},
{
"and": [
"canDisableEquipment",
"canPseudoScrew"
]
}
]
}
{
"or": [
"Ice",
"canCarefulJump"
]
}
|
|
Requires: "ScrewAttack"
{
"or": [
"canCarefulJump",
"h_canUsePowerBombs",
{
"ammo": {
"type": "Super",
"count": 1
}
},
{
"and": [
"canDisableEquipment",
"canPseudoScrew"
]
},
{
"enemyDamage": {
"enemy": "Fune",
"type": "fireball",
"hits": 1
}
}
]
}
|
|
Use Space Jump to reset Samus' fall speed, by jumping, to avoid the topmost boulder. Requires: "SpaceJump"
"canCarefulJump"
{
"or": [
{
"ammo": {
"type": "Super",
"count": 1
}
},
{
"and": [
"canDisableEquipment",
"canPseudoScrew"
]
},
"Ice",
"canTrickyJump",
{
"enemyDamage": {
"enemy": "Boulder",
"type": "contact",
"hits": 1
}
}
]
}
|
|
From: 3
Bottom Horizontal Door
To: 7
Junction By Lower Alcoons (Left of Spike Pits)
Kill the Alcoon without stopping. Requires: "h_canNavigateHeatRooms"
"canDodgeWhileShooting"
{
"or": [
{
"enemyKill": {
"enemies": [
[
"Alcoon"
]
],
"explicitWeapons": [
"Missile",
"Super",
"Wave+Plasma"
]
}
},
{
"and": [
"canPrepareForNextRoom",
"Charge",
"Wave",
"Spazer"
]
},
{
"and": [
"canPseudoScrew",
{
"heatFrames": 30
}
]
}
]
}
{
"or": [
"canCarefulJump",
{
"heatFrames": 10
}
]
}
{
"heatFrames": 100
}
|
|
Requires: "f_DefeatedPhantoon"
{
"or": [
"ScrewAttack",
"canPseudoScrew",
"Plasma",
"Grapple"
]
}
{
"resetRoom": {
"nodes": [
1
],
"mustStayPut": false
}
}
{
"refill": [
"PowerBomb"
]
}
|
|
Requires: "f_DefeatedPhantoon"
{
"or": [
"ScrewAttack",
"canPseudoScrew",
"Plasma",
"Grapple"
]
}
{
"resetRoom": {
"nodes": [
2
],
"mustStayPut": false
}
}
{
"refill": [
"PowerBomb"
]
}
|
|
Pseudo screw the left pirate, or clear the left side with shinesparks, then IBJ out Requires: "h_canIBJ"
{
"or": [
{
"and": [
"canShinechargeMovement",
"canUseSpeedEchoes",
{
"canShineCharge": {
"usedTiles": 19,
"openEnd": 0
}
},
{
"shinespark": {
"frames": 1,
"excessFrames": 1
}
}
]
},
{
"and": [
"canShinechargeMovement",
"canUseSpeedEchoes",
{
"enemyDamage": {
"enemy": "Pink Space Pirate (standing)",
"type": "contact",
"hits": 1
}
},
{
"canShineCharge": {
"usedTiles": 21,
"openEnd": 0
}
},
{
"shinespark": {
"frames": 2,
"excessFrames": 2
}
}
]
},
{
"and": [
"canPseudoScrew",
{
"enemyDamage": {
"enemy": "Pink Space Pirate (standing)",
"type": "contact",
"hits": 1
}
}
]
}
]
}
|
|
From: 2
Item
To: 3
Central Junction with all Standing Pirates Killed
The 4 standing pirates take 2 Pseudo Screws to kill each, so Samus must take 4 hits. No damage is taken when the enemy dies. Requires: "canPseudoScrew"
{
"enemyDamage": {
"enemy": "Pink Space Pirate (standing)",
"type": "contact",
"hits": 4
}
}
Clears obstacles: A |
|
The swarm of Menus will attack Samus at the top of the room. Tank them or kill them with Screw or Pseudo Screw. Requires: "Gravity"
"SpaceJump"
{
"or": [
"ScrewAttack",
"canPseudoScrew",
{
"enemyDamage": {
"enemy": "Menu",
"type": "contact",
"hits": 1
}
}
]
}
|
|
Watch for the water level to start falling to time the jump to escape at its lowest point. Then use SpaceJump to splash on top of the water. Time another jump with the water level or walljump to fully escape the water. Requires: "canSuitlessMaridia"
{
"or": [
{
"and": [
"canSpaceJumpWaterBounce",
"canWalljump"
]
},
"canSpaceJumpWaterEscape"
]
}
"HiJump"
{
"or": [
{
"enemyDamage": {
"enemy": "Menu",
"type": "contact",
"hits": 1
}
},
"ScrewAttack",
"canStaggeredWalljump",
"canPseudoScrew"
]
}
|
|
From: 3
Junction (Get Past Metroids, Left to Right)
To: 2
Right Door
SpinJump often to reduce the amount of time spent in the acid. Requires: {
"acidFrames": 65
}
{
"or": [
{
"obstaclesCleared": [
"A"
]
},
{
"and": [
"canMetroidAvoid",
"canInsaneJump"
]
},
"ScrewAttack",
{
"and": [
"canPseudoScrew",
"canTrickyJump"
]
},
{
"metroidFrames": 150
}
]
}
{
"or": [
"canTrickyJump",
{
"enemyDamage": {
"enemy": "Rinka",
"type": "contact",
"hits": 1
}
}
]
}
|
|
From: 3
Junction (Get Past Metroids, Left to Right)
To: 2
Right Door
Requires: {
"or": [
{
"and": [
{
"or": [
"canWalljump",
"HiJump"
]
},
{
"acidFrames": 20
}
]
},
{
"and": [
"Gravity",
{
"acidFrames": 10
}
]
}
]
}
{
"or": [
{
"obstaclesCleared": [
"A"
]
},
"Ice",
"ScrewAttack",
{
"and": [
"canPseudoScrew",
"canDodgeWhileShooting"
]
},
"canMetroidAvoid",
{
"metroidFrames": 150
}
]
}
|
|
From: 3
Junction (Get Past Metroids, Left to Right)
To: 2
Right Door
Requires: "SpaceJump"
{
"or": [
{
"obstaclesCleared": [
"A"
]
},
"Ice",
"ScrewAttack",
"canPseudoScrew",
"canMetroidAvoid",
{
"metroidFrames": 270
}
]
}
|
|
From: 3
Junction (Get Past Metroids, Left to Right)
To: 2
Right Door
Use the full runway to gain echoes and enough speed to reach the far platform. Requires: "SpeedBooster"
"canCarefulJump"
{
"or": [
{
"obstaclesCleared": [
"A"
]
},
"Ice",
"ScrewAttack",
"canPseudoScrew",
"canMetroidAvoid",
{
"metroidFrames": 130
}
]
}
|
|
From: 4
Junction (Get Past Metroids, Right to Left)
To: 1
Left Door (locked)
Requires: {
"acidFrames": 65
}
{
"or": [
{
"obstaclesCleared": [
"A"
]
},
"Ice",
"ScrewAttack",
{
"and": [
"canPseudoScrew",
"canDodgeWhileShooting"
]
},
{
"and": [
"canInsaneJump",
"canMetroidAvoid"
]
},
{
"metroidFrames": 670
}
]
}
|
|
From: 4
Junction (Get Past Metroids, Right to Left)
To: 1
Left Door (locked)
Requires: {
"or": [
{
"and": [
"canDelayedWalljump",
{
"acidFrames": 20
}
]
},
{
"and": [
"HiJump",
"canWalljump",
{
"acidFrames": 20
}
]
},
{
"and": [
"Gravity",
{
"acidFrames": 10
}
]
}
]
}
{
"or": [
{
"obstaclesCleared": [
"A"
]
},
"Ice",
"ScrewAttack",
"canMetroidAvoid",
{
"and": [
"canPseudoScrew",
"canTrickyJump"
]
},
{
"metroidFrames": 420
}
]
}
{
"or": [
"canInsaneJump",
{
"and": [
"canTrickyJump",
"canLateralMidAirMorph"
]
},
{
"and": [
"canTrickyJump",
"canPreciseWalljump",
{
"acidFrames": 16
}
]
},
{
"and": [
"Gravity",
{
"acidFrames": 16
}
]
},
{
"acidFrames": 27
}
]
}
|
|
From: 4
Junction (Get Past Metroids, Right to Left)
To: 1
Left Door (locked)
Requires: "canMidairShinespark"
{
"canShineCharge": {
"usedTiles": 23,
"openEnd": 0
}
}
{
"shinespark": {
"frames": 80,
"excessFrames": 5
}
}
{
"or": [
{
"obstaclesCleared": [
"A"
]
},
"Ice",
"ScrewAttack",
"canPseudoScrew",
{
"metroidFrames": 200
}
]
}
|
|
From: 4
Junction (Get Past Metroids, Right to Left)
To: 1
Left Door (locked)
Requires: "SpaceJump"
{
"or": [
{
"obstaclesCleared": [
"A"
]
},
"ScrewAttack",
"canPseudoScrew",
"Ice",
"canMetroidAvoid",
{
"metroidFrames": 420
}
]
}
|
|
Use ScrewAttack or a PseudoScrew to prevent Metroids from attaching to Samus. Requires: "canDodgeWhileShooting"
{
"or": [
"ScrewAttack",
"canPseudoScrew"
]
}
|
|
Use ScrewAttack or a PseudoScrew to prevent Metroids from attaching to Samus. Requires: {
"or": [
{
"and": [
"ScrewAttack",
"canDodgeWhileShooting"
]
},
{
"and": [
"canPseudoScrew",
"canPrepareForNextRoom",
"canDodgeWhileShooting"
]
}
]
}
|
|
Use ScrewAttack or a PseudoScrew to prevent Metroids from attaching to Samus. These abilities may also be used to temporarily prevent damage from Metroids if they do attach. Requires: {
"or": [
"ScrewAttack",
"canPseudoScrew"
]
}
{
"or": [
"canDodgeWhileShooting",
{
"and": [
"canCarefulJump",
"SpaceJump"
]
}
]
}
|
|
From: 3
Bottom of Shaft
To: 1
Left Door
Use Pseudo Screw to avoid Space Pirate attacks while climbing the central shaft. The Screw Attack effect is not active when Samus is preparing to Walljump. Requires: {
"or": [
{
"and": [
"canConsecutiveWalljump",
"canWalljumpWithCharge"
]
},
{
"and": [
"SpaceJump",
"HiJump",
"canPseudoScrew"
]
}
]
}
|
