canFreeFallClip (Insane+)


The ability to fall with enough speed to clip through solid tiles without a normalized setup. This can be initiated with either a Moonfall or a Grapple bounce.
Strats ()
From: 7
Bottom Left Vertical Door
To: 7
Bottom Left Vertical Door
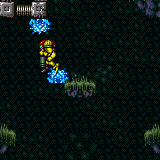
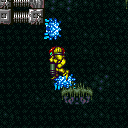
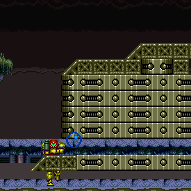
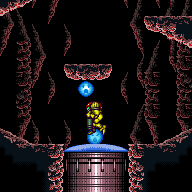
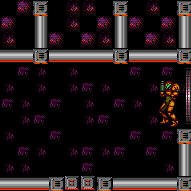
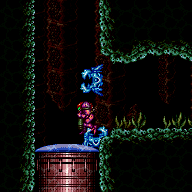
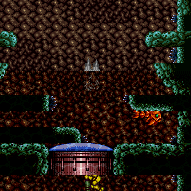
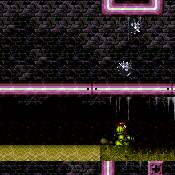
Freeze a Geemer on the bottom of the overhang just below the door to Final Missile Bombway. Freeze a second Geemer on the top left of its platform and setup a moonfall between them. Fall off the Geemers and clip into the tile left of the door. Press up to get out of crouch and lose the stored vertical speed (so that X-Ray works). Then turn-around, open the door, and go into the door transition as the third Geemer hits you. Falling off the frozen Geemers requires relatively high precision: This setup is a 4 frame window, not too far left, so you can get to the door transition, not too far right such that you enter the transition when falling. Requires: {
"notable": "Downward G-Mode Setup with Ice"
}
"h_ZebesIsAwake"
"canEnemyStuckMoonfall"
"canFreeFallClip"
"canTrickyUseFrozenEnemies"
"canDownwardGModeSetup"Exit condition: {
"leaveWithGModeSetup": {}
} |
From: 7
Bottom Left Vertical Door
To: 7
Bottom Left Vertical Door
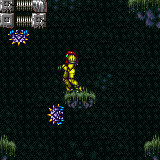
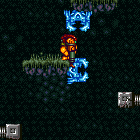
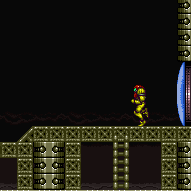
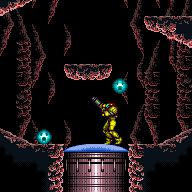
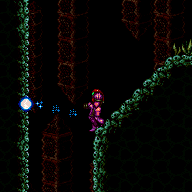
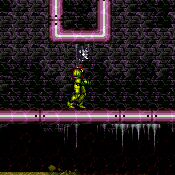
Use a Super to bring a Geemer down to the bottom floating platform. Freeze this Geemer along with a Geemer on the floor and use them to perform an enemy-stuck moonfall. After gaining sufficient speed, move toward the door and clip through the door shell. Falling with too much speed can cause Samus to go out of bounds. Requires: "h_ZebesIsAwake"
{
"ammo": {
"type": "Super",
"count": 1
}
}
"canEnemyStuckMoonfall"
"canFreeFallClip"
"canTrickyUseFrozenEnemies"Bypasses door shell: true |
From: 7
Bottom Left Vertical Door
To: 7
Bottom Left Vertical Door

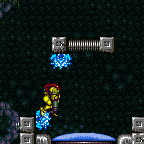
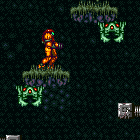
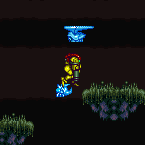
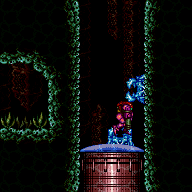
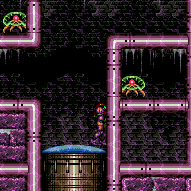
Freeze a Geemer on the right of the overhang just below the door to Final Missile Bombway. Freeze a second Geemer on the top left of its platform and setup a moonfall between them. Fall off the Geemers and clip past the floating platform below, past the door shell, and into the transition. This setup is highly precise; if you do not have the right speed you may land on the platform below or the door shell. Falling with too much speed can also cause Samus to go out of bounds. Requires: {
"notable": "Ice Moonfall Door Lock Skip Without Supers"
}
"h_ZebesIsAwake"
"canEnemyStuckMoonfall"
"canTrickyUseFrozenEnemies"
"canFreeFallClip"Bypasses door shell: true |
|
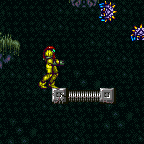
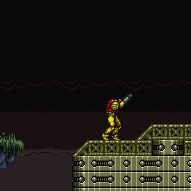
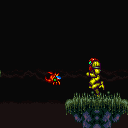
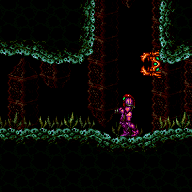
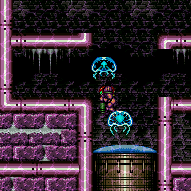
Freeze the two Scisers to set up a moonfall between them, and aim down. Hold left to move to the right at the correct time, which will set up an automatic turn-around, allowing Samus to clip past the floating platform below, past the door shell, and through the transition. The amount of speed required is highly precise. Requires: {
"notable": "Ice Moonfall Door Lock Skip"
}
"canEnemyStuckMoonfall"
"canFreeFallClip"
"canTrickyUseFrozenEnemies"Bypasses door shell: true |
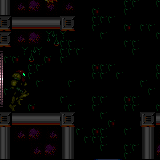
From: 3
Upper Right Section - Bottom Right Door
To: 5
Lower Section - Bottom Right Door

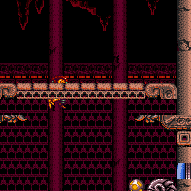
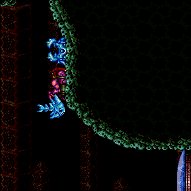
Moonfall onto the Homing Geemer walkway twice to clip all the way down into the ocean below. The Moonfall must be performed at the very edge of the slope so that Samus fully falls to the lower area. The first Moonfall will clip into the slope above the walkway, and the second Moonfall will clip all the way through. Pose changing can send Samus inside of the walkway, where the right door connects to the WS main entrance door, and the left door connects to the Moat door. Entrance condition: {
"comeInWithStoredFallSpeed": {
"fallSpeedInTiles": 2
}
}Requires: "canFreeFallClip" |
From: 3
Upper Right Section - Bottom Right Door
To: 8
Bridge Right Door (Leads to Bottom Right Door)
Moonfall onto the Homing Geemer walkway twice to clip down into the bridge below. The Moonfall must be performed at the very edge of the slope so that Samus fully falls to the lower area. The first Moonfall will clip into the slope above the walkway, and the second Moonfall will clip all the way through. Pose changing will allow Samus to remain inside of the bridge, where the right door connects to the WS main entrance door, and the left door connects to the Moat door. Entrance condition: {
"comeInWithStoredFallSpeed": {
"fallSpeedInTiles": 2
}
}Requires: {
"notable": "Get Inside the Bridge"
}
"canFreeFallClip"
"canSkipDoorLock" |
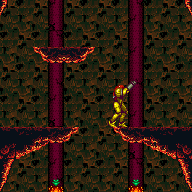
From: 12
Top Junction
To: 8
Bridge Right Door (Leads to Bottom Right Door)

Watch the middle Tripper move until it reaches the rightmost platform and then move it off camera. Move to the Zeb Spawner and freeze the bug as it is rising and facing right. Travel through the Morph tunnel and wait above the Zeb. Once it rises to the correct height, let it start moving right. Freeze the Zeb and the Tripper above the Bridge and perform the Enemy Stuck Moonfall. Move off after building enough fall speed and wiggle back and forth to clip through the Bridge and land inside. Requires: {
"notable": "Get Inside the Bridge"
}
"canSkipDoorLock"
"canEnemyStuckMoonfall"
"canFreeFallClip"
"canTrickyUseFrozenEnemies"
{
"or": [
"h_useSpringBall",
{
"and": [
"h_bombThings",
"h_additionalBomb"
]
}
]
}Dev note: FIXME: A [6, 8] version of this strat is possible with slightly different requirements but is more difficult. |
From: 12
Top Junction
To: 14
Morph Maze Junction (Below Super Block)

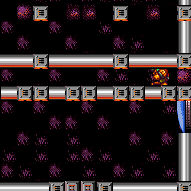
Watch the lowest Tripper move until it reaches the left side wall and then move it off camera. Move to the Zeb Spawner and freeze the bug as it is rising and facing left. Travel through the Morph tunnel and wait above the Zeb. Once it rises to about halfway up the floating platform, let it start moving left. Freeze the Zeb and the Tripper above the Super Block and perform the Enemy Stuck Moonfall. Move off after building enough fall speed and aim down to clip through the Super block. Requires: {
"notable": "Enemy Stuck Moonfall Super Block Clip"
}
"canEnemyStuckMoonfall"
"canFreeFallClip"
"canTrickyUseFrozenEnemies"
{
"or": [
"h_useSpringBall",
{
"and": [
"h_bombThings",
"h_additionalBomb"
]
}
]
}Dev note: FIXME: A [6, 14] version of this strat is possible with slightly different requirements but is more difficult. |
|

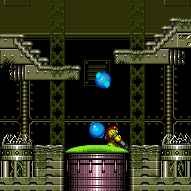
Prepare an extended Moondance and wait for SporeSpawn to move to a side. In quick succession, Moonfall, turn left, and turn right while holding a spin break button to clip down into the fight arena. Entrance condition: {
"comeInWithStoredFallSpeed": {
"fallSpeedInTiles": 2
}
}Requires: {
"notable": "Moondance Clip"
}
"canFreeFallClip"
{
"enemyDamage": {
"enemy": "Spore Spawn",
"type": "contact",
"hits": 1
}
}Dev note: Even though the fight is active, node 2 can freely enter the fight or leave the room. FIXME: A different exact fall speed value changes the movements needed for the clip. |
From: 3
Left Side - Top Middle Door (Main Entrance)
To: 4
Left Side - Door Behind Power Bomb Blocks
Setup a Moondance such that Samus will fall through 2 tiles Moonfall towards the door, aim down while falling, and turn around twice. Entrance condition: {
"comeInWithStoredFallSpeed": {
"fallSpeedInTiles": 2
}
}Requires: {
"notable": "Extended Moondance Clip"
}
"canFreeFallClip"Dev note: FIXME: A different exact fall speed value changes the movements needed for the clip. |
From: 1
Left Vertical Door
To: 1
Left Vertical Door


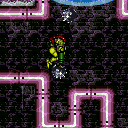
Freeze two Kihunters above the door to be able to moonfall between them. After gaining enough speed, hold backward to move forward and buffer a turnaround to clip through the door. Plasma or Charge are needed in order to be able to freeze the Kihunters mid-air; otherwise they would lose their wings and fall to the ground. Requires: {
"noBlueSuit": {}
}
"canTrickyUseFrozenEnemies"
{
"or": [
"Charge",
"Plasma"
]
}
{
"enemyDamage": {
"enemy": "Kihunter (green)",
"type": "contact",
"hits": 2
}
}
"canEnemyStuckMoonfall"
"canFreeFallClip"Bypasses door shell: true Dev note: Manipulating the Kihunters is difficult. It might be possible to avoid enemy damage but this would be even more difficult. |
From: 4
Left Side - Bottom Door
To: 5
Bottom Door
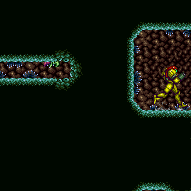
Use two frozen Sovas to moonfall and clip down past the door shell. One of the Sovas behind the bomb blocks will need to be released using a bomb or Power Bomb. In Norfair rooms, enemies thaw more quickly, so there is probably not enough time to clip down through the enemy; instead, before it thaws, slide off the edge or shoot it. Entrance condition: {
"comeInNormally": {}
}Requires: "h_bombThings" "canTrickyUseFrozenEnemies" "canEnemyStuckMoonfall" "canFreeFallClip" Bypasses door shell: true Dev note: FIXME: add strats for entering from the top, through the Power Bomb blocks or Bomb tunnel. |
From: 5
Top Right Door
To: 3
Bottom Door

Setup a moondance such that Samus will fall through 2 tiles. Perform a moonfall near the edge of the ledge, then quickly aim down and turn around to the right. Use caution to avoid being hit by a Cacatac spike. The horizontal position for performing the moonfall is lenient: it does not need to be done at the very edge, just far enough left to avoid the Cac below. Entrance condition: {
"comeInWithStoredFallSpeed": {
"fallSpeedInTiles": 2
}
}Requires: {
"heatFrames": 70
}
"canFreeFallClip" |
From: 2
Bottom Left Door
To: 2
Bottom Left Door
Stand next to the Gamet farm on the left side. Freeze the Gamets and destroy the second and third Gamet from the top. Allow the first and fourth Gamets from the top to move left, and refreeze them above the door. Perform a moonfall between them and aim down. After gaining enough speed, move forward to fall down and clip past the door shell below. Falling with too much speed can cause Samus to go out of bounds. Requires: "canEnemyStuckMoonfall" "canFreeFallClip" "canTrickyUseFrozenEnemies" Bypasses door shell: true |
From: 2
Bottom Door
To: 2
Bottom Door
Use a Super to bring a Viola down to the floor. Freeze it near or on the door, freeze the Viola on the floating platform above it, moonfall between them, and aim down. After gaining enough speed, move forward to fall down and clip past the door shell below. This one needs relatively little fall speed. With too much or too little speed, Samus will land on the door shell instead of passing through. It is also possible to do this without a Super, using the Violas higher up, but it is very precise: one method is to shoot the bottom Viola to begin falling, wait a moment, then turn around 3 times. Requires: {
"or": [
{
"ammo": {
"type": "Super",
"count": 1
}
},
"canBeExtremelyPatient"
]
}
"canEnemyStuckMoonfall"
"canFreeFallClip"
"canTrickyUseFrozenEnemies"Bypasses door shell: true |
|

Moonfall to clip through the Bomb blocks to the bottom of the room. Entrance condition: {
"comeInWithStoredFallSpeed": {
"fallSpeedInTiles": 1
}
}Requires: "canPrepareForNextRoom"
"canMoonfall"
"canFreeFallClip"
{
"heatFrames": 85
} |
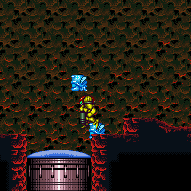
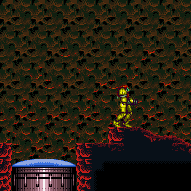
From: 1
Top Left Door
To: 5
Bottom Junction


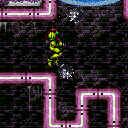
Freeze the standing Pirate and one of the wall Pirates above it, to be able to moonfall between them. While moonfalling, charge a shot to kill the bottom Pirate, hold forward to change poses and clip past the Power Bomb blocks below. To freeze the standing Pirate, it can help to 'doppler' it: stun the Pirate by firing an uncharged shot from a distance, then walk toward it while charging. Crouch while the standing Pirate is frozen, and when it thaws it will not see Samus. Allow it to walk as far left as possible, and freeze it again. Manipulate a wall Pirate using the fact that it climb upwards after jumping to the left and downward after jumping to the right. Frozen enemies thaw sooner in Norfair rooms, which makes this trick very precise. The clip will fail if Samus has either too little or too much fall speed. There is a 6-frame window to kill the bottom Pirate to fall with a correct amount of speed. Requires: "Charge" "h_heatProof" "canTrickyUseFrozenEnemies" "canEnemyStuckMoonfall" "canFreeFallClip" |
From: 2
Top Right Door
To: 6
Bottom Right Corner Junction
Moonfall into the door transition and stay in spin to fall through the top 4 levels of solid tiles. A flatley style turnaround will land between the Bomb and Crumble blocks and can be continued with another Moonfall. Entrance condition: {
"comeInWithStoredFallSpeed": {
"fallSpeedInTiles": 1
}
}Requires: "canPrepareForNextRoom"
"canMoonfall"
"canFreeFallClip"
{
"enemyDamage": {
"enemy": "Multiviola",
"type": "contact",
"hits": 1
}
}
{
"or": [
{
"ammo": {
"type": "Missile",
"count": 3
}
},
{
"ammo": {
"type": "Super",
"count": 3
}
},
"Plasma",
"h_heatProof"
]
}
{
"heatFrames": 300
}Dev note: Entering the room with a moonfall can be assumed always possible for comeInWithStoredFallSpeed. FIXME: This could benefit from another node below 4. |
|


Clear out the Kihunters near the door, and freeze two Atomics to set up a moonfall between them, and aim down. After gaining enough speed, press forward to fall down and clip past the door shell below. Falling with too much speed can cause Samus to go out of bounds. Requires: {
"obstaclesCleared": [
"A"
]
}
"f_DefeatedPhantoon"
"canEnemyStuckMoonfall"
"canFreeFallClip"
"canTrickyUseFrozenEnemies"Bypasses door shell: true |
From: 3
Bottom Left Door
To: 7
Bottom Door

Lure two Atomics down to the bottom of the room, and freeze them to be able to moonfall between them and aim down. After gaining enough speed, press forward to fall down and clip past the door shell below. Falling with too much speed can cause Samus to go out of bounds. Requires: "f_DefeatedPhantoon"
"Morph"
{
"obstaclesCleared": [
"B"
]
}
"canEnemyStuckMoonfall"
"canFreeFallClip"
"canTrickyUseFrozenEnemies"Bypasses door shell: true |
From: 1
Bottom Door
To: 1
Bottom Door
Freeze the bottom Skulltera and a Sciser above the door, to set up a moonfall between them, and aim down. After gaining enough speed, press forward to fall down and clip past the door shell below. Falling with too much speed can cause Samus to go out of bounds. Gravity Suit is needed in order to gain enough fall speed before the enemies thaw. Requires: "Gravity"
{
"or": [
"canWallJump",
"canGravityJump",
"SpaceJump",
"canIBJ",
"HiJump",
"canSpringBallJumpMidAir"
]
}
"canEnemyStuckMoonfall"
"canFreeFallClip"
"canTrickyUseFrozenEnemies"Bypasses door shell: true |
|
Use a Super to position two frozen Scisers above the door, then moonfall between them to clip down past the door shell. When a Sciser is about to thaw, hold backwards to move forward off the bottom Sciser while buffering a turnaround. It is easy to accidentally go out-of-bounds if too much speed is gained or if not buffering a turnaround. Requires: "Gravity"
{
"ammo": {
"type": "Super",
"count": 1
}
}
"canTrickyUseFrozenEnemies"
"canEnemyStuckMoonfall"
"canFreeFallClip"Bypasses door shell: true Dev note: FIXME: It may be possible to avoid the Super use, if Space Jump is available to follow a Sciser all the way around the ceiling. |
|
Use two frozen Scisers to moonfall and clip down past the door shell. When a Sciser is about to thaw, hold backwards to move forward off the bottom Sciser while buffering a turnaround. It is easy to accidentally go out-of-bounds if too much speed is gained or if not buffering a turnaround. Requires: "Gravity" "canTrickyUseFrozenEnemies" "canEnemyStuckMoonfall" "canFreeFallClip" Bypasses door shell: true |
|
Use two frozen Zebbos to moonfall and clip down past the door shell. It can help to unequip Ice to synchronize the Zebbos, and freeze them while standing on the right ledge. Requires: "Morph" "canTrickyUseFrozenEnemies" "canEnemyStuckMoonfall" "canFreeFallClip" Bypasses door shell: true |
|
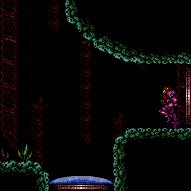
Use two snails to perform an 'Enemy Stuck Moonfall' to bypass the bomb blocks above the middle left door. Position one snail on the above door shell, and the second above the corner of pipe below. Samus will clip through the lower snail, taking damage, then continue through a segment of pipe where the crumble blocks can be reached. Facing both snails during the moonfall while positioning Samus for the clip can be precise. Depending on the exact heights of the snails, it may be necessary to pose change while clipping. Damage from the snail can be avoided by shooting the snail at a precise time: the water cycle or Samus' air bubbles can be used as a cue for the timing. Requires: {
"notable": "Snail Stuck Moonfall"
}
"h_navigateUnderwater"
"canEnemyStuckMoonfall"
"canBePatient"
{
"or": [
{
"enemyDamage": {
"enemy": "Yard",
"type": "contact",
"hits": 1
}
},
"canFreeFallClip",
{
"haveBlueSuit": {}
}
]
} |
From: 12
G-Mode Junction (By Bottom Left Door)
To: 3
Left Sand Pit
Use two snails to moonfall down through the pipe to the section below. The snails should be easy to align, with one on the floor and another on a ceiling 4 tiles higher. Shoot the lower snail after Samus has enough fall speed in order to avoid taking a snail hit. There is a small set of frames between these two, in which Samus will fall out of bounds. With Gravity, there is approximately a 5 second fall, with a 15 frame window. Suitless, there is approximately a 17 second fall, with almost a full second window - this is approximately 8 sets of bubbles out of Samus' arm. With blue suit no timing is necessary, with or without Gravity. Samus will clip automatically once enough fall speed is reached without taking damage, killing the bottom yard. Requires: "canComplexGMode"
"h_navigateUnderwater"
"canEnemyStuckMoonfall"
{
"or": [
"canFreeFallClip",
{
"enemyDamage": {
"enemy": "Yard",
"type": "contact",
"hits": 1
}
},
{
"haveBlueSuit": {}
}
]
}Exit condition: {
"leaveWithGMode": {
"morphed": false
}
} |
From: 12
G-Mode Junction (By Bottom Left Door)
To: 4
Right Sand Pit
Use two snails to moonfall down through the pipe to the section below. The snails should be easy to align, with one on the floor and another on a ceiling 4 tiles higher. Slide off or shoot the lower snail after Samus has enough fall speed in order to avoid taking a snail hit. There is a small set of frames between these two, in which Samus will fall out of bounds. With Gravity, there is approximately a 5 second fall, with a 15 frame window. Suitless, there is approximately a 17 second fall, with almost a full second window - this is approximately 8 sets of bubbles out of Samus' arm. With blue suit no timing is necessary, with or without Gravity. Samus will clip automatically once enough fall speed is reached without taking damage, killing the bottom yard. Requires: "canComplexGMode"
"h_navigateUnderwater"
"canEnemyStuckMoonfall"
{
"or": [
"canFreeFallClip",
{
"enemyDamage": {
"enemy": "Yard",
"type": "contact",
"hits": 1
}
},
{
"haveBlueSuit": {}
}
]
}Exit condition: {
"leaveWithGMode": {
"morphed": false
}
} |
From: 12
G-Mode Junction (By Bottom Left Door)
To: 11
G-Mode Overloaded PLMs (By Bottom Left Door)


Use two snails to moonfall down through the pipe to the section below. The snails should be easy to align, with one on the floor and another on a ceiling 4 tiles higher. Slide off or shoot the lower snail after Samus has enough fall speed in order to avoid taking a snail hit. There is a small set of frames between these two, in which Samus will fall out of bounds. With Gravity, there is approximately a 5 second fall, with a 15 frame window. Suitless, there is approximately a 17 second fall, with almost a full second window - this is approximately 8 sets of bubbles out of Samus' arm. With blue suit no timing is necessary, with or without Gravity. Samus will clip automatically once enough fall speed is reached without taking damage, killing the bottom yard. Clip down on the right side of the room without luring the snail underneath, or clip down in the center of the room with Spring Ball or Gravity and Space Jump and carefully cross the sand. Stand partially on the sand's edge to quickly overload PLMs, then go to the right and set up a pixel-precise high ceiling snail clip first try. Requires: "canTrickyGMode"
"h_navigateUnderwater"
"canEnemyStuckMoonfall"
{
"or": [
"canFreeFallClip",
{
"enemyDamage": {
"enemy": "Yard",
"type": "contact",
"hits": 1
}
},
{
"haveBlueSuit": {}
}
]
}
"canHighPixelCeilingClip"
{
"or": [
"canBeVeryPatient",
"h_useSpringBall",
{
"and": [
"Gravity",
"SpaceJump"
]
}
]
}Dev note: It is possible to try multiple times with Gravity+Space+patience by moving the snail around the bottom of the room. It is also possible to use the gentle slopes in the middle of the room for a larger window ceiling clip, but the snails behave unusually on slopes and it ends up not really being easier. |
From: 1
Bottom Left Door
To: 1
Bottom Left Door
Freeze two Mochtroids above the door to set up a moonfall between them, and aim down. After gaining enough speed, press forward to fall down and clip past the door shell below. Falling with too much speed can cause Samus to go out of bounds. Gravity Suit is needed in order to gain enough fall speed before the Mochtroids thaw. Requires: "Gravity" "canEnemyStuckMoonfall" "canFreeFallClip" "canTrickyUseFrozenEnemies" Bypasses door shell: true |
|
Freeze the two Skullteras above the door to set up a moonfall between them, and aim down. After gaining enough speed, press forward to fall down and clip past the door shell below. Falling with too much speed can cause Samus to go out of bounds. Gravity Suit is needed in order to gain enough fall speed before the Skullteras thaw. Requires: "Gravity" "canEnemyStuckMoonfall" "canFreeFallClip" "canTrickyUseFrozenEnemies" Bypasses door shell: true |