canMomentumConservingTurnaround (Very Hard)
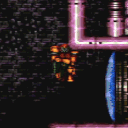
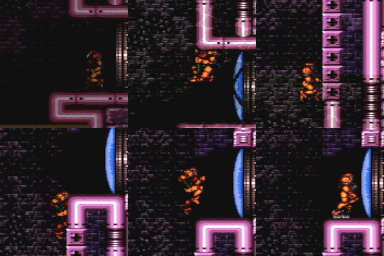
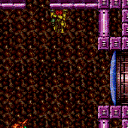
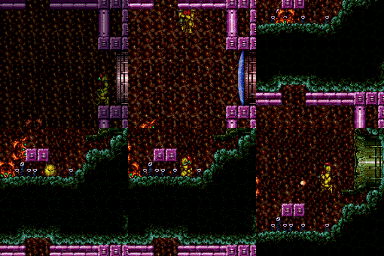
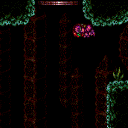
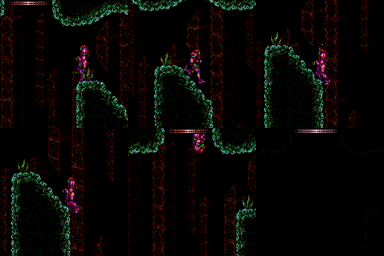
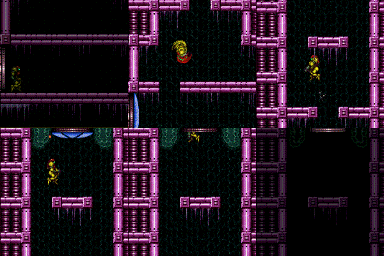
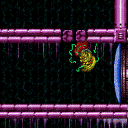
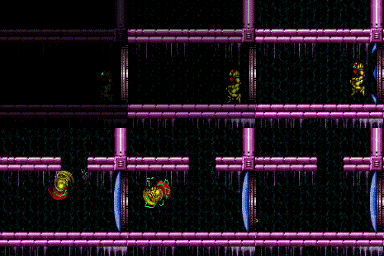
Uses the uninteruptable frames of turning around in order to continue moving after hitting a solid object. Can be used to make it through an opening door, or barely just past a ledge. It is often beneficial to be in a downward pose when hitting the ceiling, in order to shrink Samus' hitbox to delay contact.
Strats ()
|
From: 2
Bottom Left Door
To: 1
Top Left Doorway
Notable: true Only requires a runway of 6 tiles (with no open end) in the adjacent room. Perform an air ball while against the ceiling to make it up and through the morph tunnel. Use a Cross Room Jump into Water followed by a delayed Momentum Conserving Turnaround to reach the Morph tunnel above. Crossing to the right from the left door requires a more precise turnaround or morph timing which slides along the ceiling. Samus must also stay near a side of the center hole to reach the Morph tunnels. Entrance condition: {
"comeInJumping": {
"speedBooster": false,
"minTiles": 5.4375
}
}
Requires: "canCrossRoomJumpIntoWater" "canLateralMidAirMorph" "canMomentumConservingTurnaround" |
|
From: 2
Bottom Left Door
To: 1
Top Left Doorway
Notable: true Requires a runway of at least 4 tiles (with no open end) in the adjacent room. Use a Cross Room Jump into Water followed by a delayed Momentum Conserving Turnaround to reach the Morph tunnel above. Climbing the Left side of the center hole will run into an unavoidable Scisor that can be passed through by Morphing. Crossing to the right from the left door requires slightly more runway and takes a more precise turnaround. Samus must also stay near a side of the center hole to reach the Morph tunnels. Entrance condition: {
"comeInJumping": {
"speedBooster": false,
"minTiles": 3.4375
}
}
Requires: "canMidAirMorph"
"canCrossRoomJumpIntoWater"
"canMomentumConservingTurnaround"
"canKago"
{
"enemyDamage": {
"enemy": "Sciser",
"type": "contact",
"hits": 1
}
}
|
|
Notable: true Requires a runway of at least 4 tiles (with no open end) in the adjacent room. Use a Cross Room Jump into Water followed by a delayed Momentum Conserving Turnaround to reach the Morph tunnel above. Climbing the Left side of the center hole will run into an unavoidable Scisor. Samus must also stay near a side of the center hole to reach the Morph tunnels. Entrance condition: {
"comeInJumping": {
"speedBooster": false,
"minTiles": 3.4375
}
}
Requires: "Morph" "canCrossRoomJumpIntoWater" "canMomentumConservingTurnaround" |
|
From: 1
Bottom Left Door
To: 4
Top Left Door
Requires a runway of at least 4 tiles in the adjacent room. Entrance condition: {
"comeInJumping": {
"speedBooster": true,
"minTiles": 4
}
}
Requires: "HiJump" "canCrossRoomJumpIntoWater" "canMomentumConservingTurnaround" |
|
From: 1
Bottom Left Door
To: 5
Platform Junction Near Top Left Door
Requires 3 tiles of run speed (with no open end) to make it past the overhang above the door. Cross Room jump and aim towards the left side where the fish is. Shooting at it from below can deal damage sooner to get a faster freeze. Hug the frozen fish to gain the extra height needed to climb on top. Entrance condition: {
"comeInJumping": {
"speedBooster": true,
"minTiles": 2.4375
}
}
Requires: "HiJump"
"canCrossRoomJumpIntoWater"
"canMomentumConservingTurnaround"
"canTrickyUseFrozenEnemies"
"canInsaneJump"
"canDownGrab"
{
"or": [
"Wave",
"Spazer",
"Plasma"
]
}
|
|
From: 1
Bottom Left Door
To: 5
Platform Junction Near Top Left Door
Requires a runway of at least 4 tiles in the adjacent room. Entrance condition: {
"comeInJumping": {
"speedBooster": "any",
"minTiles": 4
}
}
Requires: "HiJump" "canCrossRoomJumpIntoWater" "canMomentumConservingTurnaround" |
|
From: 1
Bottom Left Door
To: 5
Platform Junction Near Top Left Door
Requires a runway of at least 3 tiles in the adjacent room. Entrance condition: {
"comeInJumping": {
"speedBooster": true,
"minTiles": 3
}
}
Requires: "HiJump" "canCrossRoomJumpIntoWater" "canMomentumConservingTurnaround" "canTrickyJump" |
|
From: 1
Bottom Left Door
To: 5
Platform Junction Near Top Left Door
Requires 3 tiles of run speed (with no open end) to make it past the overhang above the door. Entrance condition: {
"comeInJumping": {
"speedBooster": true,
"minTiles": 2.4375
}
}
Requires: "HiJump" "canCrossRoomJumpIntoWater" "canMomentumConservingTurnaround" "canTrickySpringBallJump" "canInsaneJump" |
|
From: 1
Bottom Left Door
To: 5
Platform Junction Near Top Left Door
Requires running a very precise distance of 7 tiles in the adjacent room, to hit a peak of the speed vs height graph. Entrance condition: {
"comeInJumping": {
"speedBooster": true,
"minTiles": 7
}
}
Requires: "canTrickyDashJump" "canCrossRoomJumpIntoWater" "canMomentumConservingTurnaround" |
|
From: 5
Platform Junction Near Top Left Door
To: 4
Top Left Door
Notable: true Jump towards the door with HiJump equipped. A Flatley style jump can position Samus over the edge of the ledge, closer to the door. Turning around while facing down, just before touching the ceiling, is another way to move Samus a few pixels closer to the door. Requires: "canSuitlessMaridia"
"HiJump"
"canTrickyJump"
{
"or": [
"canFlatleyJump",
"canMomentumConservingTurnaround"
]
}
|
|
From: 2
Bottom Right Door
To: 4
Top Door
Notable: true Requires a runway of at least 18 tiles in the adjacent room. Ride up the right wall just above the doorway, then turnaround before and after hitting the platform following the doorway slope. Continue up the rest of the way to reach the door. Entrance condition: {
"comeInJumping": {
"speedBooster": true,
"minTiles": 18
}
}
Requires: {
"obstaclesCleared": [
"f_MaridiaTubeBroken"
]
}
"canCrossRoomJumpIntoWater"
"canMomentumConservingTurnaround"
"canTrickyDashJump"
"canInsaneJump"
|
|
Requires a runway of one tile in the adjacent room. Entrance condition: {
"comeInJumping": {
"speedBooster": "any",
"minTiles": 1
}
}
Requires: "HiJump" "canTrickyJump" "canCrossRoomJumpIntoWater" "canMomentumConservingTurnaround" "canDownGrab" |
|
Requires a runway of one tile in the adjacent room. Entrance condition: {
"comeInJumping": {
"speedBooster": false,
"minTiles": 1
}
}
Requires: "h_canJumpIntoIBJ"
"canTrickyJump"
"canCrossRoomJumpIntoWater"
"canMomentumConservingTurnaround"
{
"enemyDamage": {
"enemy": "Mochtroid",
"type": "contact",
"hits": 2
}
}
|
|
Requires running a very precise distance of 7 tiles with no open end in the adjacent room, to hit a peak of the speed vs height graph. Entrance condition: {
"comeInJumping": {
"speedBooster": true,
"minTiles": 6.4375
}
}
Requires: "canTrickyDashJump" "canCrossRoomJumpIntoWater" "canMomentumConservingTurnaround" "canDownGrab" |
|
From: 2
Bottom Right Door
To: 3
Top Right Door
Requires a runway of one tile in the adjacent room. Entrance condition: {
"comeInJumping": {
"speedBooster": false,
"minTiles": 1
}
}
Requires: "canTrickySpringBallJump" "canCrossRoomJumpIntoWater" "canMomentumConservingTurnaround" |
|
Only requires a runway of approximately 1 tile in the adjacent room. Entrance condition: {
"comeInJumping": {
"speedBooster": "any",
"minTiles": 1
}
}
Requires: "HiJump" "canTrickyJump" "canCrossRoomJumpIntoWater" "canMomentumConservingTurnaround" |
|
Requires around 19 tiles in the adjacent room. Entrance condition: {
"comeInJumping": {
"speedBooster": true,
"minTiles": 19
}
}
Requires: "canCrossRoomJumpIntoWater"
"canMomentumConservingTurnaround"
{
"or": [
"canCrouchJump",
"Gravity",
"HiJump",
"canSpringBallJumpMidAir",
{
"and": [
"canTrickyUseFrozenEnemies",
{
"ammo": {
"type": "Super",
"count": 1
}
}
]
}
]
}
|
|
Requires running a very precise distance equivalent to a runway of 7 tiles with no open end in the adjacent room, to hit a peak in the speed / height relationship. The spring ball jump is used after landing near the top, to get to the platform below the door. Entrance condition: {
"comeInJumping": {
"speedBooster": true,
"minTiles": 6.4375
}
}
Requires: "canTrickyDashJump" "canSpringBallJumpMidAir" "canCrossRoomJumpIntoWater" "canMomentumConservingTurnaround" |
|
Requires running a very precise distance of 12 tiles in the adjacent room. Entrance condition: {
"comeInJumping": {
"speedBooster": true,
"minTiles": 12
}
}
Requires: "canCrossRoomJumpIntoWater"
"canMomentumConservingTurnaround"
"canTrickyDashJump"
"canDownGrab"
{
"or": [
"canCrouchJump",
"Gravity",
"HiJump",
"canSpringBallJumpMidAir",
{
"and": [
"canTrickyUseFrozenEnemies",
{
"ammo": {
"type": "Super",
"count": 1
}
}
]
}
]
}
|
|
Only requires a runway of approximately 1 tile in the adjacent room. Take two Mochtroid hits or kill it using a Power Bomb or 5 Bombs. Entrance condition: {
"comeInJumping": {
"minTiles": 1,
"speedBooster": "any"
}
}
Requires: "h_canJumpIntoIBJ"
{
"or": [
{
"ammo": {
"type": "PowerBomb",
"count": 1
}
},
{
"and": [
"h_canCeilingBombJump",
{
"enemyDamage": {
"enemy": "Mochtroid",
"type": "contact",
"hits": 1
}
}
]
},
{
"and": [
"h_canDoubleBombJump",
{
"enemyDamage": {
"enemy": "Mochtroid",
"type": "contact",
"hits": 2
}
}
]
}
]
}
"canCrossRoomJumpIntoWater"
"canMomentumConservingTurnaround"
"canTrickyJump"
|
|
From: 2
Bottom Left Door
To: 4
Top Right Door
Requires a runway of 1 tile in the adjacent room. Entrance condition: {
"comeInJumping": {
"speedBooster": "any",
"minTiles": 1
}
}
Requires: "HiJump" "canMomentumConservingTurnaround" "canTrickySpringBallJump" "canCrossRoomJumpIntoWater" |
|
From: 2
Bottom Right Door
To: 1
Top Left Door
Requires a runway of 1 tile in the adjacent room. A momentum conserving turnaround is easier than a midair wiggle. Entrance condition: {
"comeInJumping": {
"speedBooster": "any",
"minTiles": 0.4375
}
}
Requires: "HiJump"
"canCrossRoomJumpIntoWater"
{
  "or": [
    "canMomentumConservingTurnaround",
    "canMidairWiggle"
  ]
}
|
|
From: 2
Bottom Right Door
To: 1
Top Left Door
Requires a runway of at least 7 tiles (with no open end) in the adjacent room. A momentum conserving turnaround is easier than a midair wiggle. Entrance condition: {
"comeInJumping": {
"speedBooster": true,
"minTiles": 6.4375
}
}
Requires: "canCrossRoomJumpIntoWater"
"canTrickyDashJump"
{
"or": [
"canMomentumConservingTurnaround",
"canMidairWiggle"
]
}
|
|
From: 2
Bottom Right Door
To: 1
Top Left Door
The lenient version requires a runway of at about 10 tiles in the adjacent room. A momentum conserving turnaround is easier than climbing the right side of the room. Entrance condition: {
"comeInJumping": {
"speedBooster": true,
"minTiles": 10
}
}
Requires: "canCrossRoomJumpIntoWater"
{
"or": [
"canMomentumConservingTurnaround",
"canMidairWiggle"
]
}
|
|
Requires a runway of at least 2 tiles (with no open end) in the adjacent room. Entrance condition: {
"comeInJumping": {
"speedBooster": false,
"minTiles": 1.4375
}
}
Requires: "canCrossRoomJumpIntoWater" "canMomentumConservingTurnaround" "canTrickyJump" |
|
From: 2
Bottom Door
To: 4
Water Level Junction
Run and spin jump from the platform in the room below, gaining horizontal speed but without bonking the door frame. Perform a momentum-conserving turn-around to make it around the corner of the ledge above. With limited runway for gaining horizontal speed, the timing of the jump and turn-around may be very precise. Entrance condition: {
"comeInWithPlatformBelow": {
"minHeight": 8.5,
"maxHeight": 9,
"maxLeftPosition": -1.5,
"minRightPosition": 1.5
},
"comesThroughToilet": "yes"
}
Requires: "canCrossRoomJumpIntoWater" "HiJump" "canMomentumConservingTurnaround" "canInsaneJump" |
|
From: 2
Bottom Door
To: 4
Water Level Junction
Run left-to-right and spin jump from the platform in the room below, passing through the transition without bonking the door. Pass through the Toilet, and then perform a momentum conserving turnaround to make it onto the ledge. Entrance condition: {
"comeInWithPlatformBelow": {
"minHeight": 7,
"maxHeight": 7,
"maxLeftPosition": -2.5,
"minRightPosition": 0.5
},
"comesThroughToilet": "yes"
}
Requires: "canCrossRoomJumpIntoWater" "HiJump" "canMomentumConservingTurnaround" |
|
From: 2
Bottom Door
To: 4
Water Level Junction
Gain a few tiles of run speed and jump through the transition, without bonking against the door frame. Perform a momentum-conserving turn-around to make it around the corner of the ledge above. Entrance condition: {
"comeInWithPlatformBelow": {
"minHeight": 10,
"maxHeight": 10,
"maxLeftPosition": -4,
"minRightPosition": 0
},
"comesThroughToilet": "yes"
}
Requires: "canCrossRoomJumpIntoWater" "HiJump" "SpeedBooster" "canMomentumConservingTurnaround" |
|
From: 2
Bottom Door
To: 4
Water Level Junction
Run and spin jump from the platform in the room below, gaining horizontal speed but without bonking the door frame. Perform a momentum-conserving turn-around to make it around the corner of the ledge above. Entrance condition: {
"comeInWithPlatformBelow": {
"minHeight": 8,
"maxHeight": 9,
"maxLeftPosition": -3,
"minRightPosition": 0
},
"comesThroughToilet": "yes"
}
Requires: "canCrossRoomJumpIntoWater" "HiJump" "canMomentumConservingTurnaround" |
|
From: 2
Bottom Door
To: 4
Water Level Junction
Spin jump from the platform in the room below, pressing right against the door frame through the transition. Perform a momentum-conserving turn-around to make it around the corner of the ledge above. Entrance condition: {
"comeInWithPlatformBelow": {
"minHeight": 7,
"maxHeight": 7,
"maxLeftPosition": 1,
"minRightPosition": 2
},
"comesThroughToilet": "no"
}
Requires: "canCrossRoomJumpIntoWater" "HiJump" "canMomentumConservingTurnaround" |
|
From: 2
Bottom Door
To: 4
Water Level Junction
Do a low spin jump and press against the right side of the door frame. Wall jump as low as possible, jumping as soon as possible after moving away from the wall. Immediately turn back to the right and try to press against the door frame again before the transition, while maintaining spin. After the transition, typically a momentum-conserving turnaround is needed to avoid bonking. Entrance condition: {
"comeInWithWallJumpBelow": {
"minHeight": 2
},
"comesThroughToilet": "no"
}
Requires: "canCrossRoomJumpIntoWater"
{
"or": [
"canInsaneWalljump",
{
"and": [
"canPreciseWalljump",
"canMomentumConservingTurnaround"
]
}
]
}
|
|
From: 1
Left Door
To: 3
Junction Below Right Door
Quickly shoot to break the shot block and then do a momentumConservingTurnaround to ascend into the little region. Another movement item will be needed to get closer to the crumble blocks. Entrance condition: {
"comeInJumping": {
"speedBooster": false,
"minTiles": 2
}
}
Requires: "canTrickyJump"
"canCrossRoomJumpIntoWater"
"canMomentumConservingTurnaround"
{
"or": [
"canUseFrozenEnemies",
"canSpringBallJumpMidAir",
"HiJump"
]
}
|
|
Oasis Cross Room Jump with Screw Attack and Speed through the Top Door (From the Left) (Insane)
Oasis
From: 1
Left Door
To: 3
Top Door
Notable: true Use Screw Attack to break the bomb block by entering from a non-water room with a spin jump, and make it all the way through the top door. This uses exactly 14 tiles (with no open end) - more rises too fast to do the trick, less does not have the height needed to reach the door. Use angle to break spin, then a momentumConservingTurnaround as early as possible, right as you pass the above tile horizontally. Using the background for positioning may help. The second momentumConservingTurnaround is as late as possible, just before touching the above platform. A third momentumConservingTurnaround is used on the door as it is opening. Entrance condition: {
"comeInJumping": {
"speedBooster": true,
"minTiles": 13.4375
}
}
Requires: "canInsaneJump" "canCrossRoomJumpIntoWater" "ScrewAttack" "canMomentumConservingTurnaround" |
|
From: 1
Left Door
To: 4
Junction Below Top Door
Notable: true Use Screw Attack to break the bomb block by entering from a non-water room with a spin jump, and make it to the top. It helps to enter as low as possible and with as much horizontal speed as possible and with HiJump turned off. Entrance condition: {
"comeInJumping": {
"speedBooster": true,
"minTiles": 13
}
}
Requires: "canInsaneJump" "canCrossRoomJumpIntoWater" "ScrewAttack" "canMomentumConservingTurnaround" |
|
Oasis Cross Room Jump with Screw Attack and Speed through the Top Door (From the Right) (Insane)
Oasis
From: 2
Right Door
To: 3
Top Door
Notable: true Use Screw Attack to break the bomb block by entering from a non-water room with a spin jump, and make it all the way through the top door. This uses exactly 14 tiles (with no open end) - more rises too fast to do the trick, less does not have the height needed to reach the door. Use angle to break spin, then a momentumConservingTurnaround as early as possible, right as you pass the above tile horizontally. Using the background for positioning may help. The second momentumConservingTurnaround is as late as possible, just before touching the above platform. A third momentumConservingTurnaround is used on the door as it is opening. Entrance condition: {
"comeInJumping": {
"speedBooster": true,
"minTiles": 13.4375
}
}
Requires: "canInsaneJump" "canCrossRoomJumpIntoWater" "ScrewAttack" "canMomentumConservingTurnaround" |
|
From: 2
Right Door
To: 4
Junction Below Top Door
Notable: true Use Screw Attack to break the bomb block by entering from a non-water room with a spin jump, and make it to the top. It helps to enter as low as possible and with as much horizontal speed as possible and with HiJump turned off. Entrance condition: {
"comeInJumping": {
"speedBooster": true,
"minTiles": 13
}
}
Requires: "canInsaneJump" "canCrossRoomJumpIntoWater" "ScrewAttack" "canMomentumConservingTurnaround" |
