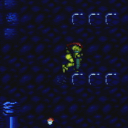
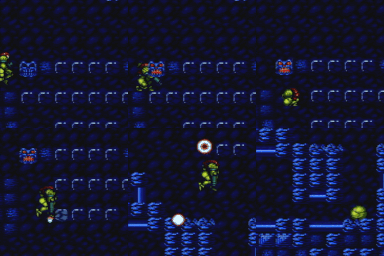
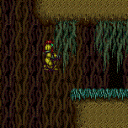
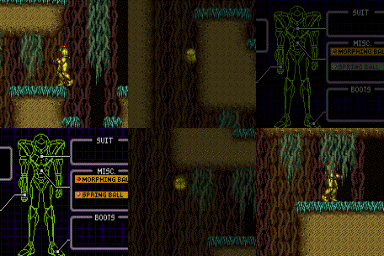
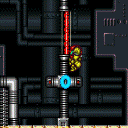
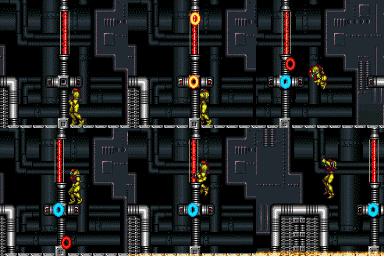
canDownBack (Basic)
Holding the direction buttons down and then also backwards in order to move forwards, while in the correct falling state.
Strats ()
|
From: 1
Top Left Door
To: 5
Junction The Left End of Morph Tube
Spark flush against the right wall (diagonal helps) then quickly down back to barely get into the pipe. Requires: "canDownBack"
"canShinechargeMovementComplex"
{
"canShineCharge": {
"usedTiles": 18,
"openEnd": 1
}
}
{
"shinespark": {
"frames": 15
}
}
|
|
Entrance condition: {
"comeInShinecharged": {
"framesRequired": 115
}
}
Requires: "canDownBack" "canShinechargeMovementTricky" Exit condition: {
"leaveShinecharged": {
"framesRemaining": "auto"
}
}
|
|
From: 1
Top Left Door
To: 2
Middle Left Door
Entrance condition: {
"comeInShinecharged": {
"framesRequired": 125
}
}
Requires: {
"or": [
{
"enemyKill": {
"enemies": [
[
"Sova"
]
],
"explicitWeapons": [
"ScrewAttack",
"Wave",
"Spazer",
"Plasma",
"Missile",
"Super"
]
}
},
{
"and": [
{
"enemyKill": {
"enemies": [
[
"Sova"
]
],
"explicitWeapons": [
"PowerBeam"
]
}
},
"canDownBack"
]
}
]
}
"canShinechargeMovementComplex"
Exit condition: {
"leaveShinecharged": {
"framesRemaining": "auto"
}
}
|
|
From: 1
Top Left Door
To: 2
Middle Left Door
Entrance condition: {
"comeInShinecharging": {
"length": 4,
"openEnd": 1,
"gentleDownTiles": 2
}
}
Requires: "canShinechargeMovementComplex"
{
"or": [
"canDownBack",
{
"enemyDamage": {
"enemy": "Sova",
"type": "contact",
"hits": 1
}
}
]
}
Exit condition: {
"leaveShinecharged": {
"framesRemaining": 85
}
}
|
|
From: 1
Top Left Door
To: 3
Bottom Left Door
Entrance condition: {
"comeInShinecharging": {
"length": 4,
"openEnd": 1,
"gentleDownTiles": 2
}
}
Requires: "canShinechargeMovementTricky" "canDownBack" Exit condition: {
"leaveShinecharged": {
"framesRemaining": 30
}
}
|
|
From: 3
Bottom Left Door
To: 4
Bottom Right Door
Fall around the floating platform with either a Downback or by jumping down with a Spinjump. Entrance condition: {
"comeInShinecharging": {
"length": 12,
"openEnd": 0
}
}
Requires: "canShinechargeMovementComplex" "canDownBack" Exit condition: {
"leaveShinecharged": {
"framesRemaining": 30
}
}
|
|
From: 3
Bottom Left Door
To: 4
Bottom Right Door
Fall around the floating platform with either a Downback or by jumping down with a Spinjump. Entrance condition: {
"comeInShinecharging": {
"length": 6,
"openEnd": 0
}
}
Requires: "canShinechargeMovementComplex" "canDownBack" Exit condition: {
"leaveShinecharged": {
"framesRemaining": 60
}
}
|
|
Fall around the floating platform with either a Downback or by jumping down with a Spinjump. Entrance condition: {
"comeInShinecharged": {
"framesRequired": 135
}
}
Requires: "canShinechargeMovementComplex" "canDownBack" Exit condition: {
"leaveShinecharged": {
"framesRemaining": "auto"
}
}
|
|
From: 5
Middle Right Door
To: 4
Bottom Right Door
Fall around the floating platform with either a Downback or by jumping down with a Spinjump. Entrance condition: {
"comeInShinecharging": {
"length": 12,
"openEnd": 0
}
}
Requires: "canShinechargeMovementComplex" "canDownBack" Exit condition: {
"leaveShinecharged": {
"framesRemaining": 30
}
}
|
|
From: 5
Middle Right Door
To: 4
Bottom Right Door
Fall around the floating platform with either a Downback or by jumping down with a Spinjump. Entrance condition: {
"comeInShinecharging": {
"length": 4,
"openEnd": 1
}
}
Requires: "canShinechargeMovementComplex" "canDownBack" Exit condition: {
"leaveShinecharged": {
"framesRemaining": 60
}
}
|
|
From: 6
Top Right Door
To: 2
Middle Left Door
Shoot the top Sova while falling to delay its movement. Entrance condition: {
"comeInShinecharging": {
"length": 3,
"openEnd": 0
}
}
Requires: "canShinechargeMovementTricky" "canDownBack" Exit condition: {
"leaveShinecharged": {
"framesRemaining": 70
}
}
|
|
Entrance condition: {
"comeInShinecharged": {
"framesRequired": 140
}
}
Requires: "canShinechargeMovementComplex" "canDownBack" Exit condition: {
"leaveShinecharged": {
"framesRemaining": "auto"
}
}
|
|
Fall around the floating platform with either a Downback or by jumping down with a Spinjump. Requires: {
"or": [
{
"and": [
{
"doorUnlockedAtNode": 3
},
{
"doorUnlockedAtNode": 5
},
{
"canShineCharge": {
"usedTiles": 14,
"openEnd": 0
}
}
]
},
{
"and": [
{
"or": [
{
"doorUnlockedAtNode": 3
},
{
"doorUnlockedAtNode": 5
}
]
},
{
"canShineCharge": {
"usedTiles": 13,
"openEnd": 0
}
}
]
},
{
"canShineCharge": {
"usedTiles": 12,
"openEnd": 0
}
}
]
}
"canShinechargeMovementComplex"
"canDownBack"
Exit condition: {
"leaveShinecharged": {
"framesRemaining": 30
}
}
|
|
From: 1
Top Right Door
To: 3
Acid Chozo Statue (locked)
There is a hole in the left side wall that Samus can fit into by shrinking her hitbox. Once in the wall, stand up if crouched then turnaround into a buffered spinjump to jump out of the acid. Requires: "h_canNavigateHeatRooms"
"canPartialFloorClip"
"canSuitlessLavaDive"
{
"or": [
{
"and": [
"canLateralMidAirMorph",
"canDownBack",
"canTrickyJump",
{
"acidFrames": 108
}
]
},
{
"and": [
"canTrickyJump",
{
"heatFrames": 30
},
{
"acidFrames": 136
}
]
},
{
"and": [
{
"heatFrames": 90
},
{
"acidFrames": 216
}
]
}
]
}
{
"heatFrames": 285
}
|
|
From: 1
Left Door
To: 7
Junction By Lower Alcoons (Left of Spike Pits)
Requires: "h_canNavigateHeatRooms"
{
"or": [
"canDownBack",
"canCarefulJump"
]
}
{
"heatFrames": 120
}
|
|
From: 6
Junction By Left Door (Right of Pit)
To: 7
Junction By Lower Alcoons (Left of Spike Pits)
Requires: "h_canNavigateHeatRooms"
{
"or": [
"canDownBack",
"canCarefulJump"
]
}
{
"heatFrames": 120
}
|
|
From: 1
Top Left Door
To: 7
Junction At Middle Right Door With Bottom KiHunter Cleared
By breaking the shot blocks and maneuvering through the room effeciently Samus will not have to spend much time waiting on KiHunters. Entrance condition: {
"comeInRunning": {
"minTiles": 1,
"speedBooster": "any"
}
}
Requires: "canDodgeWhileShooting"
"canCarefulJump"
{
"or": [
"canTrickyJump",
"canDownBack"
]
}
{
"or": [
"Charge",
"Spazer",
"Plasma",
"Wave",
"canInsaneJump"
]
}
{
"heatFrames": 540
}
|
|
From: 4
Top Right Door
To: 7
Junction At Middle Right Door With Bottom KiHunter Cleared
By breaking the shot blocks and maneuvering through the room effeciently Samus will not have to spend much time waiting on KiHunters. Entrance condition: {
"comeInRunning": {
"minTiles": 1,
"speedBooster": "any"
}
}
Requires: "canDodgeWhileShooting"
"canTrickyJump"
{
"or": [
"Charge",
"Spazer",
"Plasma",
"Wave",
{
"and": [
"canInsaneJump",
{
"or": [
"canDownBack",
"Morph"
]
}
]
}
]
}
{
"heatFrames": 540
}
|
|
From: 5
Top Junction Between Doors
To: 7
Junction At Middle Right Door With Bottom KiHunter Cleared
Very quickly move through the room to meet the bottom KiHunter in a position where it is possible to jump over it. Down back through the shot blocks. If coming through the right door, Morphing may be easier. Jump over the KiHunter where it dips while moving left. Additionally, build full run speed before jumping to land all the way next to the door. Requires: "canInsaneJump"
"canDodgeWhileShooting"
"canPrepareForNextRoom"
{
"or": [
"Charge",
"Spazer",
"Plasma",
"Wave"
]
}
"canDownBack"
{
"heatFrames": 420
}
|
|
From: 5
Top Junction Between Doors
To: 7
Junction At Middle Right Door With Bottom KiHunter Cleared
Use Plasma to run through Kihunters instead of waiting. Requires: "h_canNavigateHeatRooms"
"canHitbox"
"Plasma"
{
"or": [
"canDownBack",
{
"and": [
"canCarefulJump",
{
"heatFrames": 50
}
]
},
{
"heatFrames": 130
}
]
}
{
"heatFrames": 410
}
|
|
From: 5
Top Junction
To: 4
Top Right Door
Notable: true Roll off the above ledge and use both the vertical speed resets from first (un)equipping SpringBall and then by unmorphing in order to reach the door. Pause shortly after rolling off the ledge, after falling for 1 tile. The timing is very precise. A downback helps by shrinking Samus' hitbox. Requires: "canInsaneJump" "h_canSpringFling" "canResetFallSpeed" "canDownBack" |
|
Using movement tricks to reduce fall speed even slightly can avoid touching the sand. A Flatley style turnaround over the grapple block hole reduces fall speed some, but also needs a down back or a tiny jump. Requires: "canSuitlessMaridia"
{
"or": [
{
"and": [
"canFlatleyJump",
{
"or": [
"canTrickyJump",
"canDownBack"
]
}
]
},
"canWalljump",
"h_canResetFallSpeed"
]
}
|
|
From: 8
Before First Zebetite (locked)
To: 3
Mother Brain (locked)
Notable: true Glitch through the Mother Brain Zebetites by using a frozen Rinka and i-frames. Freeze the Rinka at its spawn location, then spinjump or Down-Back onto it after acquiring i-frames to clip inside of the Zebetite, then jump through. Note that Zebetites cause i-frames but deal no damage. Ice+Wave can freeze the Rinka from above. Ice+Plasma must freeze the Rinka from below while crouched. Requires: "canTrickyUseFrozenEnemies"
"Morph"
{
"or": [
"canTrickyJump",
{
"and": [
"canDownBack",
{
"enemyDamage": {
"enemy": "Rinka",
"type": "contact",
"hits": 1
}
}
]
}
]
}
{
"enemyDamage": {
"enemy": "Mother Brain 1",
"type": "turret",
"hits": 1
}
}
|
