canCeilingBombJump (Insane)
The ability to IBJ at the ceiling and place bombs at a steady rhythm while slowly moving horizontally.
Dependencies: canBombAboveIBJ, canIBJ
Strats ()
|
Entrance condition: {
"comeInWithGMode": {
"mode": "direct",
"morphed": true
}
}
Requires: {
"or": [
"h_canArtificialMorphDiagonalBombJump",
"h_canArtificialMorphCeilingBombJump"
]
}
Clears obstacles: C |
|
Entrance condition: {
"comeInWithGMode": {
"mode": "any",
"morphed": true
}
}
Requires: {
"or": [
"h_canArtificialMorphDiagonalBombJump",
"h_canArtificialMorphCeilingBombJump",
{
"and": [
"h_canArtificialMorphSpringBall",
{
"spikeHits": 3
},
{
"or": [
"h_canArtificialMorphBombHorizontally",
{
"spikeHits": 1
}
]
}
]
},
{
"and": [
"h_canArtificialMorphIBJ",
{
"spikeHits": 10
},
{
"or": [
"h_canArtificialMorphBombHorizontally",
{
"spikeHits": 2
}
]
}
]
}
]
}
|
|
From: 1
Top Left Door
To: 4
Top Junction (Right of Spikes)
Requires: {
"or": [
"h_canDiagonalBombJump",
"h_canCeilingBombJump"
]
}
|
|
From: 1
Top Left Door
To: 5
Bottom Junction (Right of Boyons)
Entrance condition: {
"comeInWithGMode": {
"mode": "any",
"morphed": true
}
}
Requires: "h_canArtificialMorphBombs"
{
"or": [
{
"and": [
"h_canArtificialMorphSpringBall",
{
"spikeHits": 3
},
{
"or": [
"h_canArtificialMorphBombHorizontally",
{
"spikeHits": 1
}
]
}
]
},
{
"and": [
"Morph",
{
"or": [
"SpaceJump",
{
"and": [
{
"spikeHits": 1
},
{
"or": [
"canIframeSpikeJump",
{
"spikeHits": 1
}
]
}
]
}
]
}
]
},
{
"and": [
"h_canArtificialMorphIBJ",
{
"spikeHits": 10
},
{
"or": [
"h_canArtificialMorphBombHorizontally",
{
"spikeHits": 2
}
]
}
]
},
"h_canArtificialMorphDiagonalBombJump",
"h_canArtificialMorphCeilingBombJump"
]
}
|
|
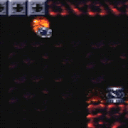
From: 2
Bottom Left Door
To: 3
Item
Notable: true 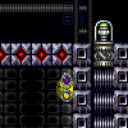
Ascend with a long IBJ, then ceiling bomb jump against the speed blocks to overload the PLMs. Falling is very unforgiving. Note that the boyons can be killed with bombs. Entrance condition: {
"comeInWithGMode": {
"mode": "any",
"morphed": true
}
}
Requires: "h_canArtificialMorphCeilingBombJump" "canBeVeryPatient" |
|
From: 4
Top Junction (Right of Spikes)
To: 1
Top Left Door
Requires: {
"or": [
"h_canDiagonalBombJump",
{
"and": [
"h_canCeilingBombJump",
"canPreciseWalljump",
"canWallJumpInstantMorph",
"canJumpIntoIBJ"
]
}
]
}
|
|
From: 10
G-Mode Morph Junction (Middle Right Door)
To: 9
Junction Below Items
Place bombs against the bottom of the crumble blocks to overload PLMs. Requires: "h_canArtificialMorphBombs"
{
"or": [
{
"and": [
"h_canArtificialMorphSpringBall",
{
"or": [
"canBePatient",
"HiJump"
]
}
]
},
"h_canArtificialMorphCeilingBombJump"
]
}
|
|
Entrance condition: {
"comeInWithGMode": {
"mode": "any",
"morphed": true
}
}
Requires: {
"or": [
"h_canArtificialMorphCeilingBombJump",
"h_canArtificialMorphHBJ"
]
}
|
|
Requires: "h_canCeilingBombJump"
{
"obstaclesNotCleared": [
"A"
]
}
|
|
From: 15
G-Mode Morph Junction (By Left Door)
To: 16
G-Mode Morph Overloaded PLMs Junction (By Left Door)
Start the IBJ on the second downward tile from the door. The crumble block is the leftmost flat ceiling tile. Requires: "h_canArtificialMorphIBJ" "h_canArtificialMorphCeilingBombJump" |
|
From: 15
G-Mode Morph Junction (By Left Door)
To: 16
G-Mode Morph Overloaded PLMs Junction (By Left Door)
The crumble block is the leftmost flat ceiling tile. Requires: "h_canUseMorphBombs"
"SpaceJump"
{
"or": [
"h_canCeilingBombJump",
"canBeVeryPatient"
]
}
|
|
From: 1
Left Door
To: 2
Right Door
Notable: true 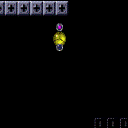
This is a very long ceiling bomb jump. Wait for the Wavers to come and kill them before crossing the room. Requires: "h_canCeilingBombJump" "canLongCeilingBombJump" "canBeVeryPatient" |
|
From: 1
Left Door
To: 2
Right Door
Notable: true
This is a very long ceiling bomb jump. Crossing the room with artificial morph is particularly difficult without a good way to kill the Wavers. Entrance condition: {
"comeInWithGMode": {
"mode": "any",
"morphed": true
}
}
Requires: "h_canArtificialMorphCeilingBombJump" "canLongCeilingBombJump" "canBeVeryPatient" "canInsaneJump" |
|
From: 2
Right Door
To: 1
Left Door
Notable: true
This is a very long ceiling bomb jump. Kill the Wavers before crossing the room. Requires: "h_canCeilingBombJump" "canLongCeilingBombJump" "canBeVeryPatient" |
|
From: 2
Right Door
To: 1
Left Door
Notable: true
This is a very long ceiling bomb jump. Crossing the room with artificial morph is particularly difficult without a good way to kill the Wavers. It is recommended to avoid killing the Firefleas, as the room gets dark fast. Entrance condition: {
"comeInWithGMode": {
"mode": "any",
"morphed": true
}
}
Requires: "h_canArtificialMorphBombHorizontally" "h_canArtificialMorphIBJ" "h_canArtificialMorphCeilingBombJump" "canLongCeilingBombJump" "canBeVeryPatient" "canInsaneJump" |
|
Requires: "h_canCeilingBombJump" "canLongCeilingBombJump" "canBePatient" |
|
Requires: "h_canCeilingBombJump" "canLongCeilingBombJump" "canBePatient" |
|
Requires: "h_heatProof" "h_canCeilingBombJump" |
|
From: 2
Middle Left Door
To: 6
Bowling Chozo Statue (locked)
Notable: true 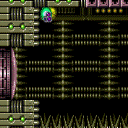
This is a very long ceiling bomb jump. Requires: "h_canCeilingBombJump" "canLongCeilingBombJump" "canBeVeryPatient" |
|
Requires: "h_canCeilingBombJump" |
|
Kill the Bull with bombs, by switching between the high and low ground. Rapidly place bombs while rolling slowly. Entrance condition: {
"comeInWithGMode": {
"mode": "any",
"morphed": true
}
}
Requires: "h_canArtificialMorphCeilingBombJump" |
|
Requires: "h_canCeilingBombJump" "canLongCeilingBombJump" "canBePatient" |
|
From: 1
Right Door
To: 2
Item (locked)
Entrance condition: {
"comeInWithGMode": {
"mode": "any",
"morphed": true
}
}
Requires: "h_canArtificialMorphCeilingBombJump" "canLongCeilingBombJump" "canBePatient" Clears obstacles: A |
|
Requires: "h_canCeilingBombJump" "canLongCeilingBombJump" "canBePatient" |
|
From: 2
Item (locked)
To: 1
Right Door
Touch the item while remaining in artificial morph. Ceiling bomb jump back to the right, then use x-ray to cancel g-mode and obtain the item. Requires: "h_canArtificialMorphCeilingBombJump"
"canLongCeilingBombJump"
"canBeVeryPatient"
{
"obstaclesCleared": [
"A"
]
}
|
|
From: 1
Bottom Door
To: 6
Speed Blocked Item
Notable: true 
This is a long climb, and getting around the fish under the missiles can be tricky or slow. Place bombs against the speed blocks until they are overloaded. Afterwards, freeze a crab on the edge of the speed blocks, such that Samus can jump inside and stand on the crab. Exit G-Mode and rotate to obtain the item, then kill the crab with Wave Beam to fall back down. Entrance condition: {
"comeInWithGMode": {
"mode": "any",
"morphed": true
},
"comesThroughToilet": "any"
}
Requires: "h_canArtificialMorphIBJ"
"Gravity"
"canTrickyUseFrozenEnemies"
"Wave"
{
"or": [
"h_canArtificialMorphJumpIntoIBJ",
{
"and": [
"h_canArtificialMorphSpringBall",
"HiJump"
]
},
{
"and": [
"h_canArtificialMorphSpringBall",
"canGravityJump"
]
},
"canDoubleBombJump",
"canStaggeredIBJ",
"canBeVeryPatient",
{
"enemyKill": {
"enemies": [
[
"Skultera"
]
],
"explicitWeapons": [
"PowerBomb"
]
}
}
]
}
{
"or": [
"h_canArtificialMorphSpringBall",
"h_canArtificialMorphCeilingBombJump",
"canBeVeryPatient"
]
}
|
|
From: 1
Bottom Door
To: 6
Speed Blocked Item
Notable: true
Place bombs against the speed blocks until they are overloaded. Afterwards, freeze a crab on the edge of the speed blocks, such that Samus can jump inside and stand on the crab. Exit G-Mode and rotate to obtain the item, then kill the crab with Wave Beam to fall back down. Entrance condition: {
"comeInWithGMode": {
"mode": "any",
"morphed": false
},
"comesThroughToilet": "any"
}
Requires: "canTrickyUseFrozenEnemies"
"Wave"
"h_canUseMorphBombs"
{
"or": [
"Gravity",
{
"and": [
"canSuitlessMaridia",
"HiJump"
]
}
]
}
{
"or": [
"h_canUseSpringBall",
"canBeVeryPatient",
{
"and": [
"Gravity",
"h_canCeilingBombJump",
"h_canIBJ"
]
}
]
}
|
|
From: 2
Bottom Right Door
To: 6
Speed Blocked Item
Notable: true
This is a long climb, and getting around the fish under the missiles can be tricky or slow. Place bombs against the speed blocks until they are overloaded. Afterwards, freeze a crab on the edge of the speed blocks, such that Samus can jump inside and stand on the crab. Exit G-Mode and rotate to obtain the item, then kill the crab with Wave Beam to fall back down. Entrance condition: {
"comeInWithGMode": {
"mode": "any",
"morphed": true
}
}
Requires: "h_canArtificialMorphIBJ"
"Gravity"
"canTrickyUseFrozenEnemies"
"Wave"
{
"or": [
"h_canArtificialMorphJumpIntoIBJ",
{
"and": [
"h_canArtificialMorphSpringBall",
"HiJump"
]
},
{
"and": [
"h_canArtificialMorphSpringBall",
"canGravityJump"
]
},
"canDoubleBombJump",
"canStaggeredIBJ",
"canBeVeryPatient",
{
"enemyKill": {
"enemies": [
[
"Skultera"
]
],
"explicitWeapons": [
"PowerBomb"
]
}
}
]
}
{
"or": [
"h_canArtificialMorphSpringBall",
"h_canArtificialMorphCeilingBombJump",
"canBeVeryPatient"
]
}
|
|
From: 2
Bottom Right Door
To: 6
Speed Blocked Item
Notable: true
Place bombs against the speed blocks until they are overloaded. Afterwards, freeze a crab on the edge of the speed blocks, such that Samus can jump inside and stand on the crab. Exit G-Mode and rotate to obtain the item, then kill the crab with Wave Beam to fall back down. Entrance condition: {
"comeInWithGMode": {
"mode": "any",
"morphed": false
}
}
Requires: "canTrickyUseFrozenEnemies"
"Wave"
"h_canUseMorphBombs"
{
"or": [
"Gravity",
{
"and": [
"canSuitlessMaridia",
"HiJump"
]
}
]
}
{
"or": [
"h_canUseSpringBall",
"canBeVeryPatient",
{
"and": [
"Gravity",
"h_canCeilingBombJump",
"h_canIBJ"
]
}
]
}
|
|
From: 3
Middle Right Door
To: 6
Speed Blocked Item
Notable: true
This is a long climb, and getting around the fish under the missiles can be tricky or slow. Place bombs against the speed blocks until they are overloaded. Afterwards, freeze a crab on the edge of the speed blocks, such that Samus can jump inside and stand on the crab. Exit G-Mode and rotate to obtain the item, then kill the crab with Wave Beam to fall back down. Entrance condition: {
"comeInWithGMode": {
"mode": "any",
"morphed": true
}
}
Requires: "h_canArtificialMorphIBJ"
"Gravity"
"canTrickyUseFrozenEnemies"
"Wave"
{
"or": [
"h_canArtificialMorphJumpIntoIBJ",
{
"and": [
"h_canArtificialMorphSpringBall",
"HiJump"
]
},
{
"and": [
"h_canArtificialMorphSpringBall",
"canGravityJump"
]
},
"h_canArtificialMorphDoubleBombJump",
"h_canArtificialMorphStaggeredIBJ",
"canBeVeryPatient",
{
"enemyKill": {
"enemies": [
[
"Skultera"
]
],
"explicitWeapons": [
"PowerBomb"
]
}
}
]
}
{
"or": [
"h_canArtificialMorphSpringBall",
"h_canArtificialMorphCeilingBombJump",
"canBeVeryPatient"
]
}
|
|
From: 3
Middle Right Door
To: 6
Speed Blocked Item
Notable: true
Place bombs against the speed blocks until they are overloaded. Afterwards, freeze a crab on the edge of the speed blocks, such that Samus can jump inside and stand on the crab. Exit G-Mode and rotate to obtain the item, then kill the crab with Wave Beam to fall back down. Entrance condition: {
"comeInWithGMode": {
"mode": "any",
"morphed": false
}
}
Requires: "canTrickyUseFrozenEnemies"
"Wave"
"h_canUseMorphBombs"
{
"or": [
"Gravity",
{
"and": [
"canSuitlessMaridia",
"HiJump"
]
}
]
}
{
"or": [
"h_canUseSpringBall",
"canBeVeryPatient",
{
"and": [
"Gravity",
"h_canCeilingBombJump",
"h_canIBJ"
]
}
]
}
|
|
From: 4
Top Right Door
To: 6
Speed Blocked Item
Notable: true
Place bombs against the speed blocks until they are overloaded. Afterwards, freeze a crab on the edge of the speed blocks, such that Samus can jump inside and stand on the crab. Exit G-Mode and rotate to obtain the item, then kill the crab with Wave Beam to fall back down. Entrance condition: {
"comeInWithGMode": {
"mode": "any",
"morphed": true
}
}
Requires: {
"or": [
"Gravity",
{
"and": [
"canSuitlessMaridia",
"HiJump"
]
}
]
}
"canTrickyUseFrozenEnemies"
"Wave"
"h_canArtificialMorphBombs"
{
"or": [
"h_canArtificialMorphSpringBall",
{
"and": [
"Morph",
"canBeVeryPatient"
]
},
{
"and": [
"Gravity",
"h_canArtificialMorphIBJ",
"h_canArtificialMorphCeilingBombJump"
]
},
{
"and": [
"Gravity",
"h_canArtificialMorphIBJ",
"canBeVeryPatient"
]
}
]
}
|
|
Only requires a runway of approximately 1 tile in the adjacent room. Take two Mochtroid hits or kill it using a Power Bomb or 5 Bombs. Entrance condition: {
"comeInJumping": {
"minTiles": 1,
"speedBooster": "any"
}
}
Requires: "h_canJumpIntoIBJ"
{
"or": [
{
"ammo": {
"type": "PowerBomb",
"count": 1
}
},
{
"and": [
"h_canCeilingBombJump",
{
"enemyDamage": {
"enemy": "Mochtroid",
"type": "contact",
"hits": 1
}
}
]
},
{
"and": [
"h_canDoubleBombJump",
{
"enemyDamage": {
"enemy": "Mochtroid",
"type": "contact",
"hits": 2
}
}
]
}
]
}
"canCrossRoomJumpIntoWater"
"canMomentumConservingTurnaround"
"canTrickyJump"
|
|
Entrance condition: {
"comeInWithGMode": {
"mode": "any",
"morphed": true
}
}
Requires: "f_KilledMetroidRoom1" "h_canArtificialMorphCeilingBombJump" "canLongCeilingBombJump" "canBePatient" |
|
Entrance condition: {
"comeInWithGMode": {
"mode": "any",
"morphed": true
}
}
Requires: "f_KilledMetroidRoom1" "h_canArtificialMorphCeilingBombJump" |
|
From: 3
Junction (Get Past Metroids, Left to Right)
To: 2
Right Door
Bomb Jump between the two floating platforms. Requires: {
"or": [
{
"obstaclesCleared": [
"A"
]
},
{
"and": [
"canCameraManip",
"canMetroidAvoid"
]
}
]
}
{
"or": [
{
"and": [
"h_canHBJ",
"canResetFallSpeed"
]
},
{
"and": [
{
"obstaclesCleared": [
"A"
]
},
"h_canDiagonalBombJump"
]
},
"h_canCeilingBombJump"
]
}
|
|
From: 4
Junction (Get Past Metroids, Right to Left)
To: 1
Left Door (locked)
Bomb Jump between the two floating platforms. Requires: {
"obstaclesCleared": [
"A"
]
}
{
"or": [
"h_canCeilingBombJump",
"h_canDiagonalBombJump"
]
}
|
|
From: 1
Left Door
To: 2
Right Door
Take the bottom path and place many bombs near the speed blocks to overload PLMs and go through them. Entrance condition: {
"comeInWithGMode": {
"mode": "any",
"morphed": true
}
}
Requires: "h_canArtificialMorphIBJ"
{
"or": [
"h_canArtificialMorphCeilingBombJump",
"canBeVeryPatient"
]
}
|