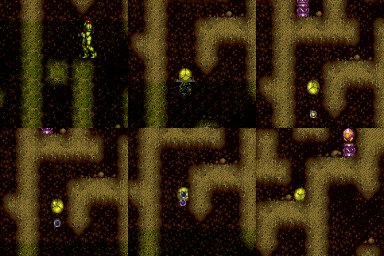
canBombJumpWaterEscape (Very Hard)
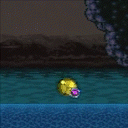
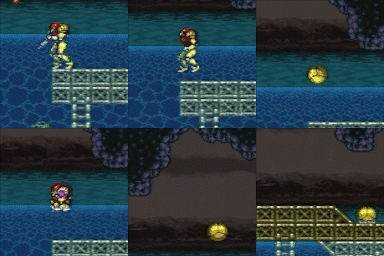
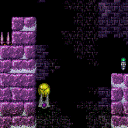
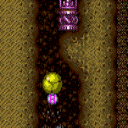
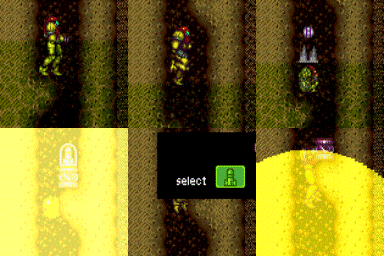
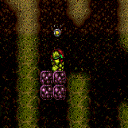
From a submerged platform, setting up a single bomb jump above the water line to propel Samus up and out of the water.
Dependencies: canMidAirMorph, canTrivialMidAirMorph
Strats ()
|
Requires: "canSuitlessMaridia" "canBombJumpWaterEscape" |
|
Requires: "canSuitlessMaridia"
{
"or": [
"canBombJumpWaterEscape",
{
"and": [
"h_canUseSpringBall",
"canJumpIntoIBJ"
]
}
]
}
|
|
Samus will be slowed by lava if SpeedBooster is equipped, even with Gravity. Requires: {
"or": [
"h_lavaProof",
"canSuitlessLavaDive"
]
}
{
"or": [
{
"and": [
"HiJump",
{
"heatFrames": 270
},
{
"lavaFrames": 270
}
]
},
{
"and": [
{
"heatFrames": 295
},
{
"lavaFrames": 295
}
]
}
]
}
{
"or": [
"canTrickyJump",
{
"and": [
{
"heatFrames": 60
},
{
"lavaFrames": 60
}
]
}
]
}
{
"or": [
{
"and": [
"SpaceJump",
"canCarefulJump",
{
"heatFrames": 100
}
]
},
{
"and": [
"canWalljump",
{
"heatFrames": 60
}
]
},
{
"and": [
"canSpringBallJumpMidAir",
{
"heatFrames": 100
}
]
},
{
"and": [
"canBombJumpWaterEscape",
{
"heatFrames": 180
},
{
"lavaFrames": 30
}
]
},
{
"and": [
"HiJump",
{
"heatFrames": 60
},
{
"lavaFrames": 10
}
]
}
]
}
|
|
Requires: "canBombJumpWaterEscape" |
|
Requires: "canSuitlessMaridia"
"canUseFrozenEnemies"
{
"or": [
"canWalljump",
"canSpringBallJumpMidAir",
{
"and": [
"HiJump",
"canDownGrab"
]
},
"canBombJumpWaterEscape"
]
}
|
|
Notable: true Stay out of the water, and by extension the sand, of Colosseum by using the spikes as platforms. Morphing before landing on the spikes helps to be able to control the knockback. The final spike jump (which would be the most difficult) is avoided by doing a crouch jump into spring ball jump into IBJ to reach the left door. Perform the spring ball jump near max height. Place the first bomb between about 4 and 6 frames after the spring ball jump; ideally it should be just above the water line. Press pause between about 5 and 10 frames after placing the bomb, to disable Spring Ball (a 'spring fling', to reset fall speed). Place the second bomb soon after regaining control, while the game is fading back in. Requires: "HiJump"
"canPreciseWalljump"
"canIframeSpikeJump"
{
"spikeHits": 2
}
"canNeutralDamageBoost"
{
"or": [
"canHorizontalDamageBoost",
{
"spikeHits": 1
}
]
}
"h_canMaxHeightSpringBallJump"
{
"or": [
"canSpringFling",
"canInsaneJump"
]
}
"canBombJumpWaterEscape"
"canJumpIntoIBJ"
|
|
From: 5
Bottom Middle Junction
To: 4
Top Right Ledge Junction
Notable: true Perform the spring ball jump near max height. Place the first bomb after the spring ball jump; just above the water line. Press pause just after placing the bomb, to disable Spring Ball (a 'spring fling', to reset fall speed). Place the second bomb soon after regaining control, while the game is fading back in. Requires: "HiJump" "h_canMaxHeightSpringBallJump" "canSpringFling" "canBombJumpWaterEscape" "canJumpIntoIBJ" |
|
From: 5
Bottom Middle Junction
To: 6
East Cactus Alley Junction (Right of Morph Tunnel)
Requires: "canSuitlessMaridia"
"HiJump"
{
"spikeHits": 1
}
{
"or": [
"canWalljump",
"canSpaceJumpWaterEscape",
"canSpringBallJumpMidAir",
{
"and": [
"canJumpIntoIBJ",
"h_canUseSpringBall"
]
},
{
"and": [
"canIBJ",
"canBombJumpWaterEscape"
]
},
{
"spikeHits": 1
}
]
}
|
|
From: 5
Bottom Middle Junction
To: 6
East Cactus Alley Junction (Right of Morph Tunnel)
This can be done by turning off Gravity and HiJump to jump over both spike pits. Requires: "canSuitlessMaridia"
"canSpringBallJumpMidAir"
{
"spikeHits": 1
}
{
"or": [
"canTrickySpringBallJump",
{
"and": [
"canWalljump",
"canSpaceJumpWaterBounce"
]
},
{
"and": [
"canJumpIntoIBJ",
"h_canUseSpringBall"
]
},
{
"and": [
"canIBJ",
"canBombJumpWaterEscape"
]
},
{
"spikeHits": 1
}
]
}
|
|
From: 6
East Cactus Alley Junction (Right of Morph Tunnel)
To: 5
Bottom Middle Junction
Requires: "canSuitlessMaridia"
{
"or": [
{
"spikeHits": 1
},
"canSpringBallJumpMidAir",
{
"and": [
"HiJump",
{
"or": [
"canWalljump",
"h_canCrouchJumpDownGrab",
"canSpaceJumpWaterEscape"
]
}
]
},
{
"and": [
"canIBJ",
"canBombJumpWaterEscape"
]
}
]
}
{
"or": [
{
"spikeHits": 1
},
"HiJump"
]
}
|
|
From: 1
Top Sand Entrance
To: 3
Top Left Item
Notable: true Reach the left side item using a single bomb explosion barely reach it. Use HiJump to reach the water line and then use a Bomb Jump Water Escape motion to Bomb jump out of the water. Do not Morph until fully out of the water to place the Bomb with the correct height. And do not place the Bomb at the max possible height, but a little lower where it will bounce Samus higher. Requires: "canSuitlessMaridia" "HiJump" "canPlayInSand" "h_canCrouchJumpDownGrab" "canBombJumpWaterEscape" |
|
Requires: "canSuitlessMaridia"
"HiJump"
{
"or": [
"canPlayInSand",
{
"and": [
"canPrepareForNextRoom",
"h_canUseSpringBall"
]
}
]
}
{
"or": [
{
"and": [
{
"or": [
"canWalljump",
"canSpaceJumpWaterEscape"
]
},
{
"or": [
"h_canCrouchJumpDownGrab",
"canSunkenTileWideWallClimb"
]
}
]
},
"canSpringBallJumpMidAir",
{
"and": [
"h_canCrouchJumpDownGrab",
"canBombJumpWaterEscape",
"canIBJ"
]
}
]
}
|
|
From: 7
Below Morph Tunnel Junction
To: 5
Morph Tunnel Junction
Notable: true Jump off of the crumble blocks consecutively while placing a bomb on the water line and convert that into an IBJ to climb the West Sand Hole maze. Requires: "canSuitlessMaridia" "canJumpIntoIBJ" "canBombJumpWaterEscape" "canCrumbleJump" |
|
From: 5
Junction Above Grapple Block
To: 2
East Leg Right Door
Notable: true Wait the water tide to reach its peak, then crouch jump into a spring ball jump into an IBJ. Perform the spring ball jump near max height. Place the first bomb between about 4 and 6 frames after the spring ball jump; ideally it should be just above the water line. Press pause between about 5 and 10 frames after placing the bomb, to disable Spring Ball (a 'spring fling', to reset fall speed). Place the second bomb soon after regaining control, while the game is fading back in. When close to the top, perform a spring ball jump to reach the ledge; release jump as soon as Samus is high enough to clear the ledge, in order to avoid taking a Menu hit. Requires: "HiJump" "h_canMaxHeightSpringBallJump" "canSpringFling" "canBombJumpWaterEscape" "canJumpIntoIBJ" "canDoubleBombJump" |
