can10PowerBombCrystalFlash (Expert)
Setting up a Crystal Flash with only a 10 Power Bomb capacity, by picking up a Power Bomb in between placing the first Power Bomb and activating the Crystal Flash.
Dependencies: canCrystalFlash
Strats ()
|
From: 2
Middle Right Door
To: 2
Middle Right Door
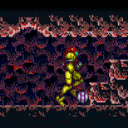
Lay a Power Bomb on the floor to destroy the Power Bomb blocks. Go up and to either the left or right ledge with the Beetoms, and lay another Power Bomb. Both Beetoms should latch onto Samus. Do a small jump straight up to avoid being bounced by the Power Bomb explosion. Stand and collect two Power Bomb drops, one from each Beetom, then remorph in time to press the Crystal Flash inputs. Requires: {
"resetRoom": {
"nodes": [
2
],
"mustStayPut": false
}
}
{
"enemyDamage": {
"enemy": "Beetom",
"type": "contact",
"hits": 2
}
}
"h_can10PowerBombCrystalFlash"
|
|
Requires: {
"resetRoom": {
"nodes": [
1,
2
],
"mustStayPut": false
}
}
{
"or": [
{
"obstaclesCleared": [
"A"
]
},
{
"enemyDamage": {
"enemy": "Beetom",
"type": "contact",
"hits": 1
}
}
]
}
"h_can10PowerBombCrystalFlash"
|
|
From: 2
Missile Refill
To: 2
Missile Refill
In quick succession, place a Power Bomb, refill at the refill station, then morph and Crystal Flash. Requires: "h_useMissileRefillAllAmmoCrystalFlash" |
|
From: 3
Missile Refill
To: 3
Missile Refill
In quick succession, place a Power Bomb, refill at the refill station, then morph and Crystal Flash. Requires: "h_useMissileRefillAllAmmoCrystalFlash" |
|
Requires: {
"or": [
"canPrepareForNextRoom",
{
"enemyDamage": {
"enemy": "Beetom",
"type": "contact",
"hits": 2
}
}
]
}
{
"resetRoom": {
"nodes": [
1
],
"mustStayPut": false
}
}
"h_can10PowerBombCrystalFlash"
|
|
From: 1
Left Door
To: 5
Bottom Right Junction
Notable: true 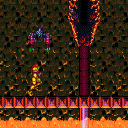
Normalized movement through the room can be used to manipulate the Sm. Dessgeegas and do this strat reliably without heat protection. The following is one way to do this; other approaches may also be possible. Before entering the room, damage down to between 127 and 159 energy, and unequip Speed Booster if it is collected. Position one pixel away from the door in the previous room. Hold angle-down (and optionally dash), enter the door transition, then hold shot while continuing to hold forward, angle-down, and dash. The shot block will be destroyed by the buffered shot. Continue holding right and dash to run under both Sm. Dessgeegas. After running under the second one, stop for a moment to prevent it from scrolling off camera. Morph, roll all the way against the right wall and quickly lay a Power Bomb. Move slightly to the left to avoid being bounced by the Power Bomb explosion. As the Sm. Dessgeega approaches, roll under it to the left to avoid being hit. Roll back to the right to collect its Power Bomb drop (which should be a ground level) and return to where the Power Bomb was laid, in time to perform the Crystal Flash inputs. Entrance condition: {
"comeInRunning": {
"minTiles": 0,
"maxTiles": 0.0625,
"speedBooster": false
}
}
Requires: "canPrepareForNextRoom"
{
"heatFrames": 570
}
"h_can10PowerBombCrystalFlash"
|
|
From: 2
Right Door
To: 5
Bottom Right Junction
Notable: true
A normalized entrance to the room can be used to manipulate the Sm. Dessgeegas and do this strat reliably without heat protection. The following is one way to do this; other approaches may also be possible. Before entering the room, damage down to between 90 and 125 energy. Position one pixel away from the door in the previous room. Enter the door transition (with or without holding dash), then hold dash and left until falling off the platform. Turn around and hold right, landing in the corner. Morph and lay a Power Bomb. Move slightly to the left to avoid being bounced by the Power Bomb explosion. As the Sm. Dessgeega approaches, roll under it to the left to avoid being hit. Roll back to the right to collect its Power Bomb drop (which should be a ground level) and return to where the Power Bomb was laid, in time to perform the Crystal Flash inputs. Entrance condition: {
"comeInRunning": {
"minTiles": 0,
"maxTiles": 0.0625,
"speedBooster": "any"
}
}
Requires: "canPrepareForNextRoom"
{
"heatFrames": 420
}
"h_can10PowerBombCrystalFlash"
|
|
Lay a Power Bomb, collect a Power Bomb from a Beetom drop, then return in time to press the Crystal Flash inputs. This can be done either by laying the Power Bomb in a corner against a door or Speed blocks, or by not moving horizontally when collecting the drop. There is a safe way to do this without taking Beetom damage: If entering from the left door, lay a Power Bomb when the first Beetom comes on screen, run through the drops before they appear, place a Power Bomb in the corner against the Speed blocks, pick up two Power Bomb drops, and return in time to press the Crystal Flash inputs. If entering from the right door, waste a Power Bomb if you are full, use Speed Booster to run part way through the Speed blocks and spawn Power Bomb drops, and then continue in the same way. Requires: {
"or": [
{
"resetRoom": {
"nodes": [
1
],
"mustStayPut": false
}
},
{
"and": [
"SpeedBooster",
{
"resetRoom": {
"nodes": [
2
],
"mustStayPut": false
}
}
]
}
]
}
"h_can10PowerBombCrystalFlash"
|
|
Lay a Power Bomb immediately after killing the Viola, in order to get a Power Bomb drop even if full on Power Bombs. Jump straight up to collect the drop, then remorph and hold the Crystal Flash inputs. Requires: {
"heatFrames": 260
}
"h_can10PowerBombCrystalFlash"
{
"heatFrames": 80
}
|
|
From: 3
Bottom Left Door
To: 3
Bottom Left Door
Lay a Power Bomb immediately after killing the Viola, in order to get a Power Bomb drop even if full on Power Bombs. Jump straight up to collect the drop, then remorph and hold the Crystal Flash inputs. Requires: {
"heatFrames": 240
}
"h_can10PowerBombCrystalFlash"
{
"heatFrames": 70
}
|
|
Lay a Power Bomb immediately after killing the Viola, in order to get a Power Bomb drop even if full on Power Bombs. Jump straight up to collect the drop, then remorph and hold the Crystal Flash inputs. Requires: {
"heatFrames": 270
}
"h_can10PowerBombCrystalFlash"
{
"heatFrames": 90
}
|
|
From: 5
Bottom Junction
To: 5
Bottom Junction
Lay a Power Bomb immediately after killing the Viola, in order to get a Power Bomb drop even if full on Power Bombs. Jump straight up to collect the drop, then remorph and hold the Crystal Flash inputs. Requires: {
"obstaclesNotCleared": [
"A"
]
}
{
"heatFrames": 185
}
"h_can10PowerBombCrystalFlash"
{
"heatFrames": 30
}
|
|
From: 2
Missile Refill
To: 2
Missile Refill
In quick succession, place a Power Bomb, refill at the refill station, then morph and Crystal Flash. Requires: "h_useMissileRefillAllAmmoCrystalFlash" |
|
From: 2
Missile Refill
To: 2
Missile Refill
In quick succession, place a Power Bomb, refill at the refill station, then morph and Crystal Flash. Requires: "h_useMissileRefillAllAmmoCrystalFlash" |