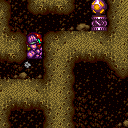
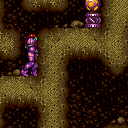
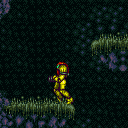
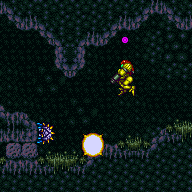
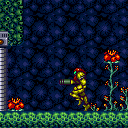
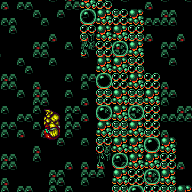
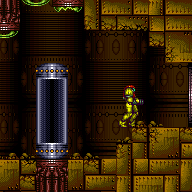
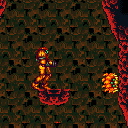
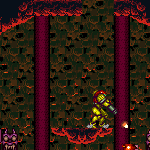
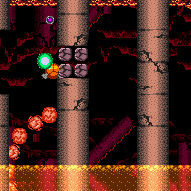
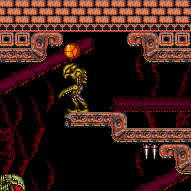
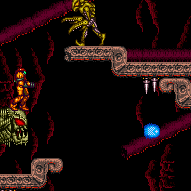
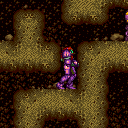
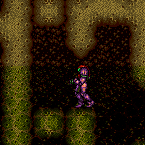
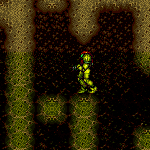
canWallJumpInstantMorph (Hard)
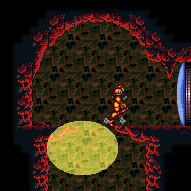
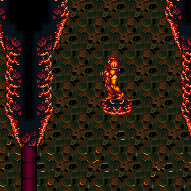
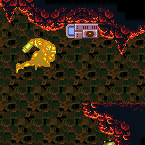
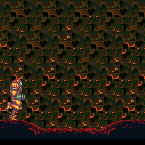
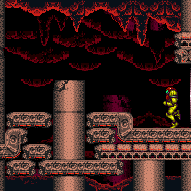
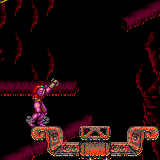
The ability to mid-air morph immediately out of a wall jump. After the wall jump, continue holding jump in order to only need to press down a single time to morph. This is typically used in places where the morph neededs to be done quickly in order to have relatively precise positioning.
Dependencies: canTrivialMidAirMorph, canMidAirMorph
Strats ()
From: 4
Top Junction (Right of Spikes)
To: 1
Top Left Door
Requires: "canLongCeilingBombJump"
"canJumpIntoIBJ"
{
"or": [
{
"and": [
"h_useSpringBall",
{
"noBlueSuit": {}
}
]
},
{
"and": [
"canPreciseWallJump",
"canWallJumpInstantMorph"
]
}
]
} |
|
Requires: {
"notable": "Alcatraz Escape"
}
"canPreciseWallJump"
"canWallJumpInstantMorph"
{
"or": [
"HiJump",
"canConsecutiveWallJump"
]
} |
|
Requires: "h_ZebesIsAwake"
{
"cycleFrames": 1860
}
{
"or": [
{
"resetRoom": {
"nodes": [
3,
4,
6,
7
]
}
},
{
"and": [
{
"resetRoom": {
"nodes": [
1
]
}
},
{
"cycleFrames": 420
},
{
"or": [
"ScrewAttack",
"h_useMorphBombs",
{
"and": [
{
"getBlueSpeed": {
"usedTiles": 25,
"steepUpTiles": 3,
"steepDownTiles": 3,
"openEnd": 1
}
},
"canCarefulJump",
"h_blueJump"
]
}
]
}
]
},
{
"and": [
{
"resetRoom": {
"nodes": [
2
]
}
},
{
"cycleFrames": 240
},
"Morph"
]
},
{
"and": [
"Morph",
{
"resetRoom": {
"nodes": [
5
]
}
},
{
"cycleFrames": 420
},
{
"or": [
"h_bombThings",
{
"and": [
"SpaceJump",
"canMidAirMorph",
"canCarefulJump"
]
},
{
"and": [
{
"notable": "Alcatraz Escape"
},
"canPreciseWallJump",
"canConsecutiveWallJump",
"canWallJumpInstantMorph"
]
},
{
"and": [
"canTrickySpringBallJump",
"canTrickyJump"
]
},
{
"and": [
"HiJump",
"canTrickyDashJump",
"canMidAirMorph"
]
}
]
}
]
}
]
}Resets obstacles: R-Mode Farm cycle drops: 11 Geemer (blue) Dev note: A two-way farming strat could be added, e.g. if it is possible to reset the room at both the top-right and the bottom. |
|
Requires: {
"or": [
"h_usePowerBomb",
{
"obstaclesCleared": [
"C"
]
}
]
}
"h_useMorphBombs"
{
"or": [
{
"and": [
"SpaceJump",
"canMidAirMorph"
]
},
"canLongIBJ",
{
"and": [
"canConsecutiveWallJump",
"canWallJumpInstantMorph"
]
}
]
}Clears obstacles: A, B, C |
|
Requires: "h_blueGateGlitch" Clears obstacles: B |
|
Open the gate (Wave Beam or gate glitch) and clear the Small Sidehoppers for a runway. Use respawning Geegas for energy. Entrance condition: {
"comeInWithRMode": {}
}Requires: {
"or": [
"Wave",
"h_blueGateGlitch",
{
"and": [
{
"notable": "Grapple Gate Glitch"
},
"canPreciseGrapple",
"h_speedJump",
"canTrickyJump"
]
}
]
}
{
"refill": [
"Energy"
]
}
{
"canShineCharge": {
"usedTiles": 30,
"openEnd": 0
}
}
{
"autoReserveTrigger": {}
}
"canRModeSparkInterrupt"Clears obstacles: B |
From: 2
Left Side - Top Middle Door
To: 7
Top Right Door
Entrance condition: {
"comeInRunning": {
"speedBooster": "no",
"minTiles": 2.4375
}
}Requires: "canTrickyJump"
"canConsecutiveWallJump"
"canPreciseWallJump"
{
"or": [
"canTrickyWallJump",
"ScrewAttack",
"canWallJumpWithCharge",
{
"and": [
"canWallJumpInstantMorph",
{
"enemyDamage": {
"enemy": "Cacatac",
"type": "spike",
"hits": 1
}
}
]
}
]
} |
From: 2
Left Side - Top Middle Door
To: 7
Top Right Door
Entrance condition: {
"comeInRunning": {
"speedBooster": "no",
"minTiles": 4
}
}Requires: "canCarefulJump"
"canConsecutiveWallJump"
{
"or": [
"canTrickyWallJump",
"ScrewAttack",
"canWallJumpWithCharge",
{
"and": [
"canWallJumpInstantMorph",
{
"enemyDamage": {
"enemy": "Cacatac",
"type": "spike",
"hits": 1
}
}
]
}
]
} |
From: 2
Left Side - Top Middle Door
To: 7
Top Right Door
Entrance condition: {
"comeInRunning": {
"speedBooster": "any",
"minTiles": 5
}
}Requires: "canCarefulJump"
"canConsecutiveWallJump"
{
"or": [
"canTrickyWallJump",
"ScrewAttack",
"canWallJumpWithCharge",
{
"and": [
"canWallJumpInstantMorph",
{
"enemyDamage": {
"enemy": "Cacatac",
"type": "spike",
"hits": 1
}
}
]
}
]
} |
|
Unmorph after exiting the morph tunnel and get to the other side of the room. Killing the Dessgeegas can be done with no beam upgrades; Samus can jump over them while shooting the last few hits or retreat to the left. It is possible to kill a Sova on the door and pause abuse to grab its Energy drop on G-mode exit. Samus will likely need to wait at the door for about a minute for the global Sova gets there. Entrance condition: {
"comeInWithGMode": {
"mode": "any",
"morphed": true
}
}Requires: "h_artificialMorphMovement"
{
"or": [
"canTrickyJump",
"h_artificialMorphPowerBomb",
"h_hasBeamUpgrade",
{
"enemyKill": {
"enemies": [
[
"Sm. Dessgeega",
"Sm. Dessgeega"
]
],
"explicitWeapons": [
"Missile",
"Super",
"ScrewAttack"
]
}
},
{
"enemyDamage": {
"enemy": "Sm. Dessgeega",
"type": "contact",
"hits": 1
}
}
]
}
{
"or": [
"HiJump",
"SpaceJump",
"canSpringBallJumpMidAir",
"canIBJ",
"canTrickyDashJump",
{
"and": [
"canTrickyUseFrozenEnemies",
"canWallJump"
]
},
{
"and": [
{
"canShineCharge": {
"usedTiles": 43,
"openEnd": 0
}
},
{
"shinespark": {
"frames": 9,
"excessFrames": 5
}
}
]
},
{
"and": [
"canInsaneWallJump",
"canWallJumpInstantMorph",
"canUnmorphBombBoost",
"canDownGrab"
]
}
]
}
{
"or": [
{
"and": [
"h_heatedGModePauseAbuse",
"canBePatient"
]
},
"h_heatedGModeOpenDifferentDoor"
]
}Dev note: FIXME: Methods that require a Sova damage boost could be added |
|
Wait for the global Sova to begin climbing the wall below the door. Time a walljump into instant morph where Samus boosts off of the Sova with the right timing to bounce up to the door's ledge. The jump must be a fully delayed walljump. Normalizing the camera can help with timing the walljump. The damage boost can be attempted again when the Sova climbs down the left wall, or by knocking it off the wall with a Super Missile. Requires: {
"notable": "Sova Boost"
}
"canInsaneWallJump"
"canWallJumpInstantMorph"
"canNeutralDamageBoost"
"canCameraManip"
{
"heatFrames": 830
}
{
"enemyDamage": {
"enemy": "Sova",
"type": "contact",
"hits": 1
}
}
{
"heatFrames": 90
} |
From: 5
Bottom Right Junction
To: 2
Right Door
Use a fully delayed walljump to gain enough horizontal distance to place a bomb past the lip of the overhang. Unmorph to hover in the air above the bomb while it explodes. Ride the explosion into a down-grab to reach the ledge. Requires: "h_heatProof"
"canInsaneWallJump"
"canWallJumpInstantMorph"
"canUnmorphBombBoost"
"canDownGrab"
{
"heatFrames": 215
}Dev note: FIXME: this should probably have extra Power Bomb lenience. |
|
Charge a spark along the bottom of the room and use it to spark through the right side door. Requires opening the door and shutter first. Requires: "canShinechargeMovementComplex"
"HiJump"
{
"or": [
"SpaceJump",
"Grapple"
]
}
{
"or": [
{
"obstaclesCleared": [
"A"
]
},
"Wave",
{
"and": [
"h_heatedBlueGateGlitch",
{
"heatFrames": 60
}
]
}
]
}
{
"or": [
{
"and": [
"canTrickyDashJump",
"canWallJump"
]
},
"SpaceJump"
]
}
{
"canShineCharge": {
"usedTiles": 28,
"gentleUpTiles": 3,
"gentleDownTiles": 3,
"openEnd": 0
}
}
{
"heatFrames": 780
}
{
"shinespark": {
"frames": 57,
"excessFrames": 0
}
}Exit condition: {
"leaveWithSpark": {}
}Dev note: A hero shot variation of this strat might be possible, starting from a node to the left; if nothing else it could be done with a shortcharge on the 12-tile platform to the left. |
|
Requires: {
"heatFrames": 250
}
"h_heatedBlueGateGlitch"
{
"or": [
"canDash",
{
"heatFrames": 85
}
]
}Clears obstacles: A |
|
Requires: "Morph"
{
"heatFrames": 260
}
"h_heatedBlueGateGlitch"Clears obstacles: A |
From: 5
Middle Junction (Ledge Right of Morph Tunnel)
To: 2
Middle Left Door
Requires: "Morph"
{
"heatFrames": 150
}
"h_heatedBlueGateGlitch"
{
"or": [
"canDash",
{
"heatFrames": 65
}
]
}Clears obstacles: A |
From: 5
Middle Junction (Ledge Right of Morph Tunnel)
To: 2
Middle Left Door
Requires: "canDash"
"Morph"
{
"heatFrames": 150
}
"h_heatedBlueGateGlitch"Exit condition: {
"leaveWithRunway": {
"length": 11,
"openEnd": 0,
"gentleDownTiles": 4
}
}Unlocks doors: {"types":["missiles"],"requires":[{"heatFrames":90}]}
{"types":["super"],"requires":[]}
{"types":["powerbomb"],"requires":[{"heatFrames":110}]} |
|
Requires: "h_heatProof"
{
"or": [
{
"and": [
"h_shinechargeMaxRunway",
{
"obstaclesNotCleared": [
"A"
]
}
]
},
{
"canShineCharge": {
"usedTiles": 14,
"openEnd": 1
}
}
]
}
{
"or": [
{
"and": [
"canComplexCarryFlashSuit",
"can4HighMidAirMorph"
]
},
"canWallJumpInstantMorph"
]
}
{
"spikeHits": 1
}
"h_spikeSuitSpikeHitLeniency"
"canSpikeSuit"
{
"shinespark": {
"frames": 1,
"excessFrames": 1
}
}Clears obstacles: A |
|
Shortcharging and stopping between the crumbles should allow for 3 attemps before the room needs to be reset or a shorter shortcharge is the only option. Requires: "h_SpeedBoosterHallNoRisingLava"
"h_heatProof"
{
"obstaclesNotCleared": [
"A"
]
}
{
"canShineCharge": {
"usedTiles": 17,
"openEnd": 1
}
}
{
"or": [
{
"and": [
"canComplexCarryFlashSuit",
"can4HighMidAirMorph"
]
},
"canWallJumpInstantMorph"
]
}
{
"spikeHits": 1
}
"h_spikeSuitSpikeHitLeniency"
"canSpikeSuit"
{
"shinespark": {
"frames": 1,
"excessFrames": 1
}
}Clears obstacles: A |
From: 5
Bottom Floating Platform Junction
To: 5
Bottom Floating Platform Junction
Requires: {
"heatFrames": 135
}
"h_heatedBlueGateGlitch"Clears obstacles: A |
From: 5
Bottom Floating Platform Junction
To: 5
Bottom Floating Platform Junction
Farm before, during, and after the gate glitch in order to open the gate without wasting ammo or Energy. Requires: {
"notable": "Gate Glitch With Farming"
}
{
"heatFrames": 300
}
"h_gateGlitch"
{
"or": [
{
"ammo": {
"type": "Missile",
"count": 1
}
},
{
"ammo": {
"type": "Super",
"count": 1
}
}
]
}
{
"or": [
"h_heatResistant",
"canTrickyJump",
{
"resourceCapacity": [
{
"type": "RegularEnergy",
"count": 199
}
]
}
]
}Clears obstacles: A Dev note: There is still some leniency built in, so that perfect execution is not required, but Samus ends without losing resources. Without leniency, this can be done with about 235 heatFrames. |
|
Build up 34 tiles worth of run speed and jump into the door on the last frame. Hold angle up through the transition but also aim down to duck below the ceiling until Samus is past it. Fire the Super Missile frame perfectly to open the gate. Entrance condition: {
"comeInRunning": {
"speedBooster": "yes",
"minTiles": 34
}
}Requires: {
"notable": "High Speed Gate Glitch"
}
"h_speedJump"
"h_heatedGreenGateGlitch"
{
"ammo": {
"type": "Super",
"count": 1
}
}
"canInsaneJump"
{
"noFlashSuit": {}
}Clears obstacles: A Dev note: 1 extra tile is added so that you can jump into the door, simplifying the inputs a bit. |
|
Requires: {
"or": [
"h_greenGateGlitch",
{
"obstaclesCleared": [
"A"
]
}
]
}Clears obstacles: A |
|
Requires: {
"or": [
"h_heatedGreenGateGlitch",
{
"obstaclesCleared": [
"A"
]
}
]
}
{
"enemyDamage": {
"enemy": "Ripper 2 (red)",
"type": "contact",
"hits": 2
}
}Exit condition: {
"leaveWithRunway": {
"length": 29,
"openEnd": 1
}
} |
|
You can Crystal Flash first, then open the gate, dodge the bottom most rippers that come across the platform, and pick up their Super drops when they hit the light orb. Alternatively, open the gate first, farm the bottom two Rippers with Power Bombs or Screw Attack to get your Supers back and Crystal Flash afterwards. The runway is now clear to shinecharge. Alternatively, you can farm with Screw Attack or Power Bombs. Kill the bottom two Rippers first, then the one bouncing between platforms. Keep the third Ripper from the top alive for the best interrupt. With high reserve energy, take the interrupt close to the right door and with the Ripper moving right - it will not come back in time to hit you again. Once you have blue suit, you cannot kill any more Rippers with Screw Attack, but you are still invulnerable to contact hits. Entrance condition: {
"comeInWithRMode": {}
}Requires: "h_heatedGreenGateGlitch"
{
"or": [
{
"and": [
{
"or": [
{
"resourceAvailable": [
{
"type": "Super",
"count": 10
}
]
},
{
"and": [
{
"resourceAvailable": [
{
"type": "Super",
"count": 8
}
]
},
{
"resourceAvailable": [
{
"type": "Energy",
"count": 51
}
]
},
{
"or": [
"ScrewAttack",
{
"enemyKill": {
"enemies": [
[
"Ripper 2 (red)",
"Ripper 2 (red)"
]
],
"explicitWeapons": [
"PowerBomb"
]
}
}
]
},
{
"heatFrames": 600
},
{
"partialRefill": {
"type": "Super",
"limit": 10
}
}
]
}
]
},
"h_heatedCrystalFlashForReserveEnergy"
]
},
{
"and": [
{
"or": [
"ScrewAttack",
{
"enemyKill": {
"enemies": [
[
"Ripper 2 (red)",
"Ripper 2 (red)"
],
[
"Ripper 2 (red)"
]
],
"explicitWeapons": [
"PowerBomb"
]
}
}
]
},
"h_heatProof",
"h_RModeCanRefillReserves",
{
"resourceMissingAtMost": [
{
"type": "Super",
"count": 2
}
]
},
{
"partialRefill": {
"type": "ReserveEnergy",
"limit": 60
}
}
]
},
{
"and": [
{
"or": [
"ScrewAttack",
{
"enemyKill": {
"enemies": [
[
"Ripper 2 (red)"
]
],
"explicitWeapons": [
"PowerBomb"
]
}
}
]
},
"h_heatProof",
"h_RModeCanRefillReserves",
{
"resourceMissingAtMost": [
{
"type": "Super",
"count": 4
}
]
},
{
"partialRefill": {
"type": "ReserveEnergy",
"limit": 20
}
}
]
}
]
}
{
"canShineCharge": {
"usedTiles": 28,
"openEnd": 0
}
}
{
"autoReserveTrigger": {}
}
{
"or": [
{
"and": [
"h_heatProof",
{
"autoReserveTrigger": {}
},
"canRModeSparkInterrupt"
]
},
"h_heatTriggerRModeSparkInterrupt"
]
}Clears obstacles: A, B |
|
Requires: {
"or": [
"h_heatedGreenGateGlitch",
{
"obstaclesCleared": [
"A"
]
}
]
}
{
"heatFrames": 50
}
{
"or": [
"canDash",
{
"heatFrames": 15
}
]
}Clears obstacles: A Dev note: FIXME: A strat could be added that runs into the room and shoots directly at the gate, instead of stopping in front of it. |
|
Cross the room with Bombs and minimal damage. Some acid damage is expected, but any mistakes greatly increases the time spent in acid. Entrance condition: {
"comeInRunning": {
"speedBooster": "any",
"minTiles": 1
}
}Requires: {
"notable": "Bombs"
}
"h_useMorphBombs"
"canWallJumpInstantMorph"
"canInsaneJump"
"canResetFallSpeed"
"canUnmorphBombBoost"
"canSuitlessLavaDive"
{
"heatFrames": 1320
}
{
"acidFrames": 128
}Unlocks doors: {"types":["missiles","super"],"requires":[]}
{"types":["powerbomb"],"requires":[{"heatFrames":50},{"acidFrames":50}]} |
|
Place the PBs next to the pillars in order to only use 2. Minimize acid by unmorphing high to land back on the jump spot or walljumping before placing the bomb. Entrance condition: {
"comeInNormally": {}
}Requires: {
"notable": "Two Power Bombs"
}
"canDash"
"canMidAirMorph"
"canCarefulJump"
{
"ammo": {
"type": "PowerBomb",
"count": 2
}
}
{
"or": [
{
"and": [
"canCarefulJump",
"canResetFallSpeed",
{
"heatFrames": 660
}
]
},
{
"and": [
"canWallJump",
{
"heatFrames": 660
},
{
"or": [
"canWallJumpInstantMorph",
{
"acidFrames": 30
}
]
}
]
},
{
"and": [
"Gravity",
{
"heatFrames": 660
},
{
"acidFrames": 30
}
]
},
{
"and": [
"canTrickyJump",
"canSuitlessLavaDive",
{
"heatFrames": 720
},
{
"acidFrames": 52
}
]
}
]
}
{
"or": [
"canTrickyJump",
{
"and": [
"Gravity",
{
"heatFrames": 180
},
{
"acidFrames": 56
}
]
},
{
"and": [
"canSuitlessLavaDive",
{
"heatFrames": 240
},
{
"acidFrames": 96
}
]
}
]
}
{
"or": [
"h_heatResistant",
"canPauseAbuse",
{
"resourceCapacity": [
{
"type": "RegularEnergy",
"count": 149
}
]
}
]
}Unlocks doors: {"types":["missiles"],"requires":[{"heatFrames":15},{"acidFrames":15}]}
{"types":["super"],"requires":[]}
{"types":["powerbomb"],"requires":[{"heatFrames":30},{"acidFrames":30}]}Dev note: With Reserves only, canPauseAbuse is used as a proxy for pause abuse or optimal reserve management and character movement. |
|
Cross the room with Bombs and minimal damage. Some acid damage is expected, but any mistakes greatly increases the time spent in acid. Entrance condition: {
"comeInRunning": {
"speedBooster": "any",
"minTiles": 3
}
}Requires: {
"notable": "Bombs"
}
"canWallJumpInstantMorph"
"canInsaneJump"
"canResetFallSpeed"
"canUnmorphBombBoost"
"canHBJ"
"canSuitlessLavaDive"
{
"heatFrames": 1320
}
{
"acidFrames": 128
}Unlocks doors: {"types":["missiles","super"],"requires":[]}
{"types":["powerbomb"],"requires":[{"heatFrames":50},{"acidFrames":50}]} |
|
Place the PBs next to the pillars in order to only use 2. Avoid acid during the first Power Bomb by walljumping before placing the bomb. Avoiding acid damage at the last jump is tricky but possible. Entrance condition: {
"comeInNormally": {}
}Requires: {
"notable": "Two Power Bombs"
}
"canDash"
"canMidAirMorph"
{
"ammo": {
"type": "PowerBomb",
"count": 2
}
}
"canCarefulJump"
{
"or": [
{
"and": [
"canWallJumpInstantMorph",
{
"heatFrames": 690
}
]
},
{
"and": [
"canWallJump",
{
"heatFrames": 660
},
{
"acidFrames": 36
}
]
},
{
"and": [
"canSuitlessLavaDive",
{
"heatFrames": 840
},
{
"acidFrames": 84
}
]
},
{
"and": [
"Gravity",
{
"heatFrames": 660
},
{
"acidFrames": 24
}
]
}
]
}
{
"or": [
"canInsaneJump",
{
"and": [
"canTrickyJump",
"canLateralMidAirMorph",
{
"heatFrames": 10
},
{
"acidFrames": 10
}
]
},
{
"and": [
"canPreciseWallJump",
{
"heatFrames": 50
},
{
"acidFrames": 32
}
]
},
{
"and": [
"Gravity",
{
"heatFrames": 20
},
{
"acidFrames": 20
}
]
},
{
"and": [
"canSuitlessLavaDive",
{
"heatFrames": 50
},
{
"acidFrames": 50
}
]
}
]
}
{
"or": [
"h_heatResistant",
"canPauseAbuse",
{
"resourceCapacity": [
{
"type": "RegularEnergy",
"count": 149
}
]
}
]
}Unlocks doors: {"types":["missiles"],"requires":[{"heatFrames":30},{"acidFrames":20}]}
{"types":["super"],"requires":[]}
{"types":["powerbomb"],"requires":[{"heatFrames":75},{"acidFrames":58}]}Dev note: With Reserves only, canPauseAbuse is used as a proxy for pause abuse or optimal reserve management and character movement. |
From: 2
Bottom Left Door
To: 4
Junction Above Bomb Blocks
Deal an exact amount of damage to a wall pirate to freeze it while breaking the bomb blocks with a power bomb without taking damage. Wait briefly on the left side of the center platform, then jump and shoot 4 missiles at the top pirate. Walljump up the left wall such that the lower pirates are on screen long enough to jump accross to the left. Place a Bomb on the left wall to hit the top pirate when it jumps over, followed by a power bomb. Unmorph precisely below the middle pirate so both top pirates will jump back to the right, and begin charging Ice. Walljump up the left wall with charge held and freeze the top pirate when it jumps over and use it to reach the upper region. Requires: {
"notable": "New Low Ice Pirate Freeze"
}
"canTrickyUseFrozenEnemies"
"Charge"
"canPreciseWallJump"
"canResetFallSpeed"
"canWallJumpWithCharge"
"h_useMorphBombs"
"canWallJumpInstantMorph"
"canTrickyDodgeEnemies"
{
"ammo": {
"type": "Missile",
"count": 4
}
}
{
"ammo": {
"type": "PowerBomb",
"count": 1
}
}
{
"heatFrames": 900
}
{
"or": [
"h_heatResistant",
{
"and": [
"canInsaneJump",
"canPauseAbuse"
]
},
{
"resourceCapacity": [
{
"type": "RegularEnergy",
"count": 149
}
]
}
]
}Clears obstacles: A Dev note: With Reserves only, this strat requires much more precise movement and either pause abuse or optimal reserve management. |
From: 5
Junction Below Top Pirate
To: 1
Top Left Door
Requires: "canWallJumpInstantMorph"
"canTrickyJump"
"canInsaneWallJump"
{
"heatFrames": 290
} |
From: 5
Junction Below Top Pirate
To: 3
Top Right Door
Walljump using the base of the platform the pirate is walking on and then Morph over its head. Requires: "canInsaneWallJump"
"canWallJumpInstantMorph"
"canTrickyJump"
{
"heatFrames": 160
} |
From: 6
Bottom Platform Junction With Pirates Killed
To: 6
Bottom Platform Junction With Pirates Killed
Use a wall jump morph to break the leftmost set of bomb blocks on the bottom layer. Then use a delayed wall jump morph to bomb out the next bomb blocks above. Requires: "HiJump"
"canTrickyWallJump"
"canWallJumpInstantMorph"
"canTrickyJump"
"h_useMorphBombs"
{
"heatFrames": 520
}
{
"or": [
"canInsaneWallJump",
{
"heatFrames": 500
}
]
}Clears obstacles: A |
From: 4
Junction Above Bomb Block
To: 1
Top Left Door
Read the movements of the Kihunters and jump over or roll under them as appropriate. Changing platforms is the hardest part: jumping extra high and morphing works sometimes, other times jump short and roll under. Requires: {
"notable": "Dodge Going Up"
}
"canDash"
"canInsaneJump"
{
"or": [
{
"and": [
"canWallJumpInstantMorph",
"canPreciseWallJump"
]
},
{
"and": [
"canSpeedyJump",
"HiJump",
"canMidAirMorph"
]
}
]
}
{
"heatFrames": 540
}Clears obstacles: A, B |
From: 5
G-Mode Morph Junction (Above Bomb Block)
To: 1
Top Left Door
Dodge the Kihunters then shoot the shot blocks and escape. Requires: "h_heatedGMode"
{
"notable": "Dodge Going Up"
}
"h_navigateHeatRooms"
"canInsaneJump"
{
"or": [
{
"and": [
"canWallJumpInstantMorph",
"canPreciseWallJump"
]
},
{
"and": [
"canSpeedyJump",
"HiJump",
"canMidAirMorph"
]
}
]
}
{
"heatFrames": 220
} |
|
Requires: "Gravity"
{
  "or": [
    "h_greenGateGlitch",
    {
      "obstaclesCleared": [
        "A"
      ]
    }
  ]
}
Clears obstacles: A |
|
Requires: "Gravity"
{
"or": [
"canWallJumpInstantMorph",
{
"and": [
"SpaceJump",
"Morph",
{
"or": [
"canMidAirMorph",
"canDodgeWhileShooting",
{
"enemyDamage": {
"enemy": "Boulder",
"type": "contact",
"hits": 1
}
}
]
}
]
}
]
} |
|
Wall jump up the middle column and Morph into the hole to get to the item. This is easier in G-Mode because the crumbles above the tunnel will be air. Entrance condition: {
"comeInWithGMode": {
"mode": "any",
"morphed": false
},
"comesThroughToilet": "any"
}Requires: "canSuitlessMaridia" "HiJump" "canTrickyJump" "canConsecutiveWallJump" "canWallJumpInstantMorph" |
|
Requires: {
"or": [
{
"and": [
"h_fourTileJumpMorph",
"h_complexToCarryFlashSuit"
]
},
{
"and": [
"canPreciseWallJump",
"canWallJumpInstantMorph"
]
}
]
} |
|
Requires: "canMidAirMorph"
"Gravity"
{
"or": [
"canWallJumpInstantMorph",
"canCarefulJump"
]
} |
From: 7
Below Morph Tunnel Junction
To: 5
Morph Tunnel Junction
Requires: "canSuitlessMaridia"
"canMidAirMorph"
{
"or": [
{
"and": [
"HiJump",
"canPreciseWallJump",
"canWallJumpInstantMorph"
]
},
{
"and": [
"HiJump",
"canSpaceJumpWaterEscape"
]
},
{
"and": [
"canPreciseWallJump",
"canSpaceJumpWaterBounce"
]
}
]
} |
From: 2
Item
To: 1
Left Door
Wall jump until Samus is just below the water line and then morph and place a Bomb Use the brief moment during the Bomb explosion that knocks Samus upwards to setup a Springball jump to jump out of the water. Requires: "canSunkenTileWideWallClimb" "canUnderwaterBombIntoSpringBallJump" "canWallJumpInstantMorph" Dev note: FIXME: This can also be done with a double Spring Ball jump (using Bombs) without wall jumping, but it seems more difficult than Statues Room and West Cac Alley, because of the water tide. |
|
Wall jump up the right wall and either mid-air morph to fit through the gap below the top door. Alternatively use a mid-air wiggle to reduce the height of Samus' hitbox after the walljump, to be able to fit through the gap without morphing. Entrance condition: {
"comeInShinecharged": {}
}Requires: {
"shineChargeFrames": 140
}
"canWallJumpInstantMorph"
"canShinechargeMovementComplex"
{
"or": [
{
"or": [
"f_KilledMetroidRoom2",
{
"obstaclesCleared": [
"f_KilledMetroidRoom2"
]
}
]
},
"canMetroidAvoid"
]
}Exit condition: {
"leaveShinecharged": {}
}Unlocks doors: {"types":["super"],"requires":[]}
{"types":["missiles","powerbomb"],"requires":["never"]} |
From: 2
Bottom Right Door
To: 1
Top Right Door
Wall jump up the right wall and either mid-air morph to fit through the gap below the top door. Alternatively use a mid-air wiggle to reduce the height of Samus' hitbox after the wall jump, to be able to fit through the gap without morphing. Shoot the door open and spark out. Entrance condition: {
"comeInShinecharged": {}
}Requires: {
"shineChargeFrames": 110
}
"canWallJumpInstantMorph"
"canShinechargeMovementComplex"
{
"shinespark": {
"frames": 5,
"excessFrames": 0
}
}
{
"or": [
{
"or": [
"f_KilledMetroidRoom2",
{
"obstaclesCleared": [
"f_KilledMetroidRoom2"
]
}
]
},
"canMetroidAvoid"
]
}Exit condition: {
"leaveWithSpark": {}
}Unlocks doors: {"types":["super"],"requires":[]}
{"types":["missiles","powerbomb"],"requires":["never"]} |
From: 2
Bottom Right Door
To: 1
Top Right Door
Wall jump up the right wall and either mid-air morph to fit through the gap below the top door. Alternatively use a mid-air wiggle to reduce the height of Samus' hitbox after the walljump, to be able to fit through the gap without morphing. Entrance condition: {
"comeInShinecharging": {
"length": 2,
"openEnd": 0
}
}Requires: "canShinechargeMovementComplex"
"canWallJumpInstantMorph"
{
"or": [
"f_KilledMetroidRoom2",
{
"obstaclesCleared": [
"f_KilledMetroidRoom2"
]
}
]
}
{
"shineChargeFrames": 150
}Exit condition: {
"leaveShinecharged": {}
}Unlocks doors: {"types":["super"],"requires":[]}
{"types":["missiles","powerbomb"],"requires":["never"]}Dev note: FIXME: Add variations for tanking the Metroid damage (taking into account how they can block the shot to open the door) |
