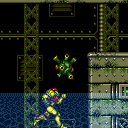
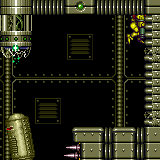
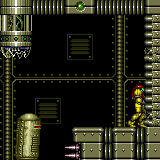
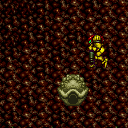
canUseEnemies (Implicit)
Using an enemy in a room to accomplish something that couldn't be done if it weren't there, e.g. when standing on or grappling from an enemy.
Dev note: Turning this off should greatly improve the logic for enemizer contexts.
Strats ()
From: 5
Lower Section - Bottom Right Door
To: 4
Lower Section - Top Right Door
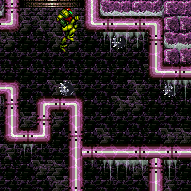
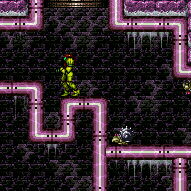
Grapple on the Ripper to get inside the wall under the door. Do a Crystal Flash to force a standup. X-Ray climb up to the door transition. Requires: {
"notable": "Grapple Clip Door Lock Skip"
}
{
"obstaclesNotCleared": [
"R-Mode"
]
}
"canUseEnemies"
"canGrappleClip"
"h_CrystalFlash"
"canXRayClimb"Bypasses door shell: true Dev note: TODO: There may be Bob strats to skip the Crystal Flash requirement. |
From: 12
Top Junction
To: 9
Top Hidden Item (Above Trippers)
Jump on the left platforms to get the middle Tripper on screen, luring it to the right. Get on the middle Tripper and use it to jump to the item. This requires a somewhat precise shot and jump, particularly if the top Tripper is in the way. The jump and shot can be easier and done at the apex of a single jump starting with a crouch. Freezing the Trippers can make this much easier. Requires: "canUseEnemies"
{
"or": [
{
"and": [
"canUseFrozenEnemies",
"canPreciseWallJump"
]
},
"canTrickyWallJump",
{
"and": [
"canCameraManip",
"canCarefulJump"
]
}
]
} |
From: 12
Top Junction
To: 9
Top Hidden Item (Above Trippers)
Requires: "canUseEnemies" "HiJump" |
|
Requires: "canUseEnemies" "canBeVeryPatient" |
|
Entrance condition: {
"comeInWithGMode": {
"mode": "direct",
"morphed": false
}
}Requires: "Morph"
{
"or": [
"SpaceJump",
{
"and": [
"canPreciseGrapple",
"canUseEnemies"
]
},
{
"and": [
"HiJump",
"canSpringBallJumpMidAir"
]
},
{
"and": [
"canDash",
"HiJump",
"canWallJump",
"canTrickyJump"
]
},
{
"and": [
"canWallJump",
"canUseIFrames",
{
"spikeHits": 1
},
"h_spikeJumpWithActiveEnemies"
]
},
{
"and": [
"h_IBJFromSpikes",
"h_spikeJumpWithActiveEnemies"
]
}
]
}
"h_heatedGModeOpenDifferentDoor" |
|
With Grapple, a running jump then single Grapple swing can be used before PLMs are overloaded, alternatively jump on the crumble blocks and Grapple the Ripper. Entrance condition: {
"comeInWithGMode": {
"mode": "indirect",
"morphed": false
}
}Requires: {
"or": [
"SpaceJump",
"canTrickySpringBallJump",
{
"and": [
"canWallJump",
{
"or": [
"canDash",
"HiJump",
{
"and": [
"canBlueSuitSpikeJump",
{
"spikeHits": 1
}
]
}
]
}
]
},
{
"and": [
"HiJump",
"canSpeedyJump"
]
},
{
"and": [
"canPreciseGrapple",
{
"or": [
"canDash",
"canUseEnemies",
"canInsaneJump"
]
}
]
}
]
}
"h_heatedGModeOpenDifferentDoor" |
|
Overload PLMs by shooting the gate, then go through the crumble blocks below and get to the item. Entrance condition: {
"comeInWithGMode": {
"mode": "direct",
"morphed": false
}
}Requires: "Morph"
{
"or": [
"SpaceJump",
{
"and": [
"canPreciseGrapple",
"canUseEnemies"
]
},
{
"and": [
"HiJump",
"canSpringBallJumpMidAir"
]
},
"canInsaneWallJump",
{
"and": [
"HiJump",
"canUseIFrames",
{
"noBlueSuit": {}
},
{
"enemyDamage": {
"enemy": "Ripper 2 (green)",
"type": "contact",
"hits": 1
}
},
{
"or": [
"canWallJump",
"canSpeedyJump"
]
}
]
},
"h_IBJFromSpikes"
]
}
{
"heatFrames": 0
} |
|
Wall jump up the left wall, perform a delayed wall jump on the Fune to reach the door. Entrance condition: {
"comeInJumping": {
"speedBooster": "any",
"minTiles": 0
}
}Requires: "canPrepareForNextRoom"
"canTrickyWallJump"
"canConsecutiveWallJump"
"canTrickyJump"
"canFastWallJumpClimb"
"canUseEnemies"
{
"heatFrames": 120
}
{
"or": [
"canDash",
{
"heatFrames": 5
}
]
}Dev note: This differs from the canPrepareForNextRoom option of the previous strat only in requiring an air entry. FIXME: canFastWallJumpClimb is for difficulty placement. |
|
Requires: "canTrickyWallJump"
"canConsecutiveWallJump"
"canTrickyJump"
"canUseEnemies"
{
"or": [
{
"heatFrames": 190
},
{
"and": [
"canPrepareForNextRoom",
{
"heatFrames": 135
}
]
}
]
}
{
"or": [
"canDash",
{
"heatFrames": 5
}
]
} |
|
Wall jump up the left wall and then on the moving platform (Kamer) while avoiding the Fune's fireball. The Kamers will temporarily move down if Samus is below them, so it is best to walk under the first Kamer before climbing the wall. It is possible to freeze or kill the Fune with a Super or Power Bomb to make things easier. Requires: {
"notable": "Walljump Climb Using the Kamer"
}
"canTrickyWallJump"
"canConsecutiveWallJump"
"canUseEnemies"
{
"or": [
{
"and": [
"canDodgeWhileShooting",
{
"heatFrames": 360
}
]
},
{
"and": [
"canTrickyJump",
{
"heatFrames": 240
}
]
},
{
"and": [
{
"or": [
"canUseFrozenEnemies",
{
"ammo": {
"type": "Super",
"count": 1
}
}
]
},
{
"heatFrames": 432
}
]
},
{
"and": [
{
"ammo": {
"type": "PowerBomb",
"count": 1
}
},
{
"heatFrames": 456
}
]
}
]
}
{
"or": [
"canDash",
{
"heatFrames": 20
}
]
} |
From: 2
Bottom Left Door
To: 1
Top Left Door
Wall jump up the left wall and then on the moving platform (Kamer) while avoiding the Fune's fireball. The Kamers will temporarily move down if Samus is below them, so it is best to walk under the first Kamer before climbing the wall. Requires: {
"notable": "Walljump Climb Using the Kamer"
}
"HiJump"
"canUseEnemies"
"canPreciseWallJump"
{
"or": [
{
"heatFrames": 360
},
{
"and": [
"canTrickyJump",
{
"heatFrames": 230
}
]
}
]
}
{
"or": [
"canDodgeWhileShooting",
{
"enemyDamage": {
"enemy": "Fune",
"type": "fireball",
"hits": 1
}
},
{
"and": [
"canUseFrozenEnemies",
{
"heatFrames": 70
}
]
},
{
"and": [
{
"ammo": {
"type": "Super",
"count": 1
}
},
{
"heatFrames": 70
}
]
},
{
"and": [
{
"ammo": {
"type": "PowerBomb",
"count": 1
}
},
{
"heatFrames": 90
}
]
}
]
}
{
"or": [
"canDash",
{
"heatFrames": 20
}
]
} |
From: 2
Bottom Left Door
To: 3
Right Door
Overload PLMs by shooting the gate, then go through the crumble blocks below and get to the door. The gate can be shot while precisely positioned from below without requiring any items. The positioning is precise and off camera; while facing left, position Samus front foot barely on the flat part after the slope. Entrance condition: {
"comeInWithGMode": {
"mode": "direct",
"morphed": false
}
}Requires: "Morph"
{
"or": [
"SpaceJump",
{
"and": [
"canPreciseGrapple",
{
"or": [
"canDash",
"canUseEnemies",
"canInsaneJump"
]
}
]
},
{
"and": [
"HiJump",
"canSpringBallJumpMidAir"
]
},
{
"and": [
"canDash",
"HiJump",
"canWallJump",
"canTrickyJump"
]
},
{
"and": [
"canWallJump",
"canUseIFrames",
{
"spikeHits": 1
},
"h_spikeJumpWithActiveEnemies"
]
},
{
"and": [
"h_IBJFromSpikes",
"h_spikeJumpWithActiveEnemies"
]
}
]
}
"h_heatedGModeOpenDifferentDoor" |
|
Wall jump up the left wall, perform a delayed wall jump on the Fune. Entrance condition: {
"comeInJumping": {
"speedBooster": "any",
"minTiles": 0
}
}Requires: "canPrepareForNextRoom"
"canTrickyWallJump"
"canConsecutiveWallJump"
"canTrickyJump"
"canUseEnemies"
"canPrepareForNextRoom"
{
"heatFrames": 300
}
{
"or": [
{
"noFlashSuit": {}
},
"canComplexCarryFlashSuit",
"Ice",
"Wave",
"Spazer",
"Plasma",
{
"heatFrames": 300
}
]
}
{
"or": [
"canDash",
{
"heatFrames": 50
}
]
}Dev note: This differs from the canPrepareForNextRoom option of the previous strat only in requiring an air entry. |
|
Wall jump up the left wall, perform a delayed wall jump on the Fune. Requires: "canTrickyWallJump"
"canConsecutiveWallJump"
"canTrickyJump"
"canUseEnemies"
"canPrepareForNextRoom"
{
"heatFrames": 315
}
{
"or": [
{
"noFlashSuit": {}
},
"canComplexCarryFlashSuit",
"Ice",
"Wave",
"Spazer",
"Plasma",
{
"heatFrames": 300
}
]
}
{
"or": [
"canDash",
{
"heatFrames": 50
}
]
} |
|
Overload PLMs by shooting the gate, then go through the crumble blocks below and get to the item. The gate can be shot while precisely positioned from below without requiring any items. The positioning is precise and off camera; while facing left, position Samus front foot barely on the flat part after the slope. Entrance condition: {
"comeInWithGMode": {
"mode": "direct",
"morphed": false
}
}Requires: "Morph"
{
"or": [
"SpaceJump",
{
"and": [
"canPreciseGrapple",
"canUseEnemies"
]
},
{
"and": [
"HiJump",
"canSpringBallJumpMidAir"
]
},
"canInsaneWallJump",
{
"and": [
"HiJump",
"canUseIFrames",
{
"noBlueSuit": {}
},
{
"enemyDamage": {
"enemy": "Ripper 2 (green)",
"type": "contact",
"hits": 1
}
},
{
"or": [
"canWallJump",
"canSpeedyJump"
]
}
]
},
"h_IBJFromSpikes"
]
}
{
"heatFrames": 0
} |
|
Jump onto the crumble blocks to make them solid, then use them as a platform to cross the room. With Grapple, a running jump then single Grapple swing can be used before PLMs are overloaded, alternatively jump on the crumble blocks and Grapple the Ripper. Entrance condition: {
"comeInWithGMode": {
"mode": "indirect",
"morphed": false
}
}Requires: {
"or": [
"SpaceJump",
{
"and": [
"canPreciseGrapple",
{
"or": [
"canDash",
"canUseEnemies",
"canInsaneJump"
]
}
]
},
"canInsaneWallJump",
{
"and": [
"HiJump",
"canWallJump"
]
},
{
"and": [
"HiJump",
"canSpeedyJump"
]
}
]
}
"h_heatedGModeOpenDifferentDoor"Dev note: This is only for strats that can't go to 7 - variants without Morph, or without a way to get back up after going down. |
From: 3
Right Door
To: 2
Bottom Left Door
Jump onto the crumble blocks to make them solid, then use them as a platform to cross the room. With Grapple, a running jump then single Grapple swing can be used before PLMs are overloaded, alternatively jump on the crumble blocks and Grapple the Ripper. Entrance condition: {
"comeInWithGMode": {
"mode": "indirect",
"morphed": false
}
}Requires: {
"or": [
"SpaceJump",
{
"and": [
"canPreciseGrapple",
{
"or": [
"canDash",
"canUseEnemies",
"canInsaneJump"
]
}
]
},
"canInsaneWallJump",
{
"and": [
"HiJump",
"canWallJump"
]
},
{
"and": [
"HiJump",
"canSpeedyJump"
]
}
]
}
"h_heatedGModeOpenDifferentDoor"Dev note: This is only for strats that can't go to 7 - variants without Morph. |
|
Entrance condition: {
"comeInWithGMode": {
"mode": "direct",
"morphed": false
}
}Requires: "canRemoteAcquire"
{
"or": [
"SpaceJump",
{
"and": [
"canPreciseGrapple",
"canUseEnemies"
]
},
"canSpringBallJumpMidAir",
"canInsaneWallJump",
{
"and": [
"HiJump",
"canWallJump"
]
},
{
"and": [
"HiJump",
"canSpeedyJump"
]
},
{
"and": [
"canStaggeredIBJ",
"canDoubleBombJump",
"canBombHorizontally"
]
},
{
"and": [
"h_IBJFromSpikes",
"h_IBJFromSpikes"
]
},
{
"and": [
"h_IBJFromSpikes",
"canCameraManip",
"canMoonwalk"
]
}
]
}
"h_heatedDirectGModeLeaveSameDoor"Collects items: 4 |
|
Jump onto the crumble blocks to make them solid, then use them as a platform to cross the room. With Grapple, a running jump then single Grapple swing can be used before PLMs are overloaded, alternatively jump on the crumble blocks and Grapple the Ripper. Entrance condition: {
"comeInWithGMode": {
"mode": "any",
"morphed": false
}
}Requires: {
"or": [
"SpaceJump",
{
"and": [
"canStaggeredIBJ",
"canDoubleBombJump",
"canBombHorizontally"
]
},
{
"and": [
"canDash",
{
"or": [
"canTrickySpringBallJump",
"canInsaneWallJump",
{
"and": [
"HiJump",
"canWallJump"
]
},
{
"and": [
"HiJump",
"canSpeedyJump"
]
},
"h_IBJFromSpikes"
]
}
]
},
{
"and": [
"canPreciseGrapple",
{
"or": [
"canDash",
"canUseEnemies",
"canInsaneJump"
]
}
]
}
]
}
{
"heatFrames": 0
}Dev note: FIXME: some more of these options may be possible with a blue suit, with greater difficulty. |
|
Jump onto the crumble blocks to make them solid, then use them as a platform to cross the room. With Grapple, a running jump then single Grapple swing can be used before PLMs are overloaded, alternatively jump on the crumble blocks and Grapple the Ripper. In indirect G-mode, stand where the gate will spawn and exit G-mode to open the gate. In direct G-mode, overload PLMs by shooting the gate then position Samus a few pixels away from the gate to where upward diagonal shots go through it. Crouch then shoot diagonally and quickly exit G-mode (3-7 frames later) to open the gate on G-mode exit. Entrance condition: {
"comeInWithGMode": {
"mode": "any",
"morphed": false
}
}Requires: "canComplexGMode"
"h_heatedGMode"
{
"or": [
"SpaceJump",
{
"and": [
"canStaggeredIBJ",
"canDoubleBombJump",
"canBombHorizontally"
]
},
{
"and": [
"canDash",
{
"or": [
"canTrickySpringBallJump",
"canInsaneWallJump",
{
"and": [
"HiJump",
"canWallJump"
]
},
{
"and": [
"HiJump",
"canSpeedyJump"
]
},
"h_IBJFromSpikes"
]
}
]
},
{
"and": [
"canPreciseGrapple",
{
"or": [
"canDash",
"canUseEnemies",
"canInsaneJump"
]
}
]
}
]
}
{
"heatFrames": 35
}Clears obstacles: A Dev note: The canComplexGMode is only used here to describe opening the gate in direct G-mode without gate glitching. However, the indirect variant still requires canHeatedGMode or Varia - with Varia, indirect strats can instead be used to go to the top left door and return. FIXME: some more of these options may be possible with a blue suit, with greater difficulty. |
From: 3
Right Door
To: 6
G-Mode, Remote Acquire Junction (Bottom Right)
Jump onto the crumble blocks to make them solid, then use them as a platform to get to the item. With Grapple, a running jump then single Grapple swing can be used before PLMs are overloaded, alternatively jump on the crumble blocks and Grapple the Ripper. Avoid touching all 6 crumbles, so Samus can use the item to overload PLMs and go through one of the crumbles to get to the left side of the room. If the item has already been obtained, Samus can shoot the gate many times to overload PLMs. Entrance condition: {
"comeInWithGMode": {
"mode": "direct",
"morphed": false
}
}Requires: "canRemoteAcquire"
{
"or": [
"SpaceJump",
"canCeilingBombJump",
{
"and": [
"canBombHorizontally",
"canIBJ",
"h_usePowerBomb"
]
},
{
"and": [
"canStaggeredIBJ",
"canDoubleBombJump",
"canBombHorizontally"
]
},
{
"and": [
"canPreciseGrapple",
"canUseEnemies"
]
},
{
"and": [
"canDash",
{
"or": [
"canTrickySpringBallJump",
"canInsaneWallJump",
{
"and": [
"HiJump",
"canWallJump"
]
},
{
"and": [
"HiJump",
"canSpeedyJump"
]
},
"h_IBJFromSpikes"
]
}
]
}
]
}
{
"heatFrames": 0
} |
From: 3
Right Door
To: 7
G-Mode Junction (Bottom Right)
Jump onto the crumble blocks to make them solid, then use them as a platform to cross the room. With Grapple, a running jump then single Grapple swing can be used before PLMs are overloaded, alternatively jump on the crumble blocks and Grapple the Ripper. Entrance condition: {
"comeInWithGMode": {
"mode": "indirect",
"morphed": false
}
}Requires: "Morph"
{
"or": [
"SpaceJump",
"canCeilingBombJump",
{
"and": [
"canStaggeredIBJ",
"canDoubleBombJump",
"canBombHorizontally"
]
},
{
"and": [
"canBombHorizontally",
"canIBJ",
"h_usePowerBomb"
]
},
{
"and": [
"canDash",
{
"or": [
"canTrickySpringBallJump",
"canInsaneWallJump",
{
"and": [
"HiJump",
"canWallJump"
]
},
{
"and": [
"HiJump",
"canSpeedyJump"
]
},
"h_IBJFromSpikes"
]
}
]
},
{
"and": [
"canPreciseGrapple",
{
"or": [
"canDash",
"canUseEnemies",
"canInsaneJump"
]
}
]
}
]
}
{
"heatFrames": 0
}Dev note: With Grapple, Morph isn't needed, but there's no reason to go there without Morph. |
|
Wall jump off of the Upper-Left Namihe and then Spring Ball jump up and out of the Lava. Pausing early in order to get more horizontal distance by equiping Spring Ball may help. Entrance condition: {
"comeInWithGMode": {
"mode": "any",
"morphed": false
}
}Requires: {
"notable": "HiJump"
}
"Gravity"
"canSpringwall"
"HiJump"
"canUseEnemies"
{
"lavaFrames": 390
}
{
"or": [
{
"and": [
"canDash",
{
"disableEquipment": "SpeedBooster"
}
]
},
{
"lavaFrames": 150
}
]
}
"h_heatedGModeOpenDifferentDoor"Dev note: This strat is not useful unless Samus has lava proof but not heat proof. Otherwise, the non-G-mode variant can be used. FIXME: These lava frames are lenient, they are what it would take without Gravity (the non-G-mode variant also doesnt account for Gravity). |
From: 2
Right Door
To: 3
Above Lava Junction
Bounceball into the Lava, unmorphing with good timing to sink faster and drift efficiently towards the bottom right Namihe. Wall jump at about eye height (4 pixel window) to gain enough height to reach the center portion of ceiling. While rising, wiggle to shrink Samus' hitbox. Some walljump positions will not need to wiggle, when wall jumping far away from the Namihe. Jumping, from the wall, around the next lowest overhang is very precise and taking any extra time to position will increase the amount of lava damage being taken. It may help to disable Hi-Jump for this part. Then wall jump again to exit the lava and reach the left ledge. Requires: {
"notable": "GT Max Suitless Right Side Climb"
}
"canSuitlessLavaDive"
"canUseEnemies"
"HiJump"
"canBounceBall"
"canMidairWiggle"
"canConsecutiveWallJump"
"canInsaneWallJump"
{
"gravitylessLavaFrames": 392
}
{
"heatFrames": 515
}Dev note: FIXME: a dashless version could be added. |
From: 4
Lava, Left Wall
To: 3
Above Lava Junction
Wall jump off of the lower half of the upper-left Namihe to cross to the right side wall. Continue wall jumping up from there, waiting for the above flame to pass if it is in the way. Requires: {
"notable": "HiJump"
}
"HiJump"
"canSuitlessLavaDive"
"canUseEnemies"
"canTrickyWallJump"
{
"heatFrames": 270
}
{
"gravitylessLavaFrames": 240
} |
|
Wall jump off of the upper-left Namihe and then Spring Ball jump up and out of the lava. Delay the pause until in position to perform the Spring Ball jump because lava physics will reduce Samus' horizontal momentum. It may help to also delay the Morph. Requires: {
"notable": "HiJump"
}
{
"or": [
"h_lavaProof",
"canSuitlessLavaDive"
]
}
"canSpringwall"
"HiJump"
"canUseEnemies"
{
"heatFrames": 195
}
{
"lavaFrames": 180
}Dev note: Works with or without Gravity This Springwall is easier than regular SpringWalls because the lava slows down the required inputs. |
From: 4
Lava, Left Wall
To: 3
Above Lava Junction
Enter the bottom-left Namihe by kagoing inside of it. Wait for a second hit to gain i-frames and then very quickly walljump up the spikes and across to the right side wall. Requires: {
"notable": "HiJumpless Nahime Morph Kago"
}
{
"noBlueSuit": {}
}
"canSuitlessLavaDive"
"canInsaneWallJump"
"canInsaneJump"
"canUseIFrames"
"canTrickyWallJump"
"canFastWallJumpClimb"
"canUseEnemies"
"canKago"
{
"heatFrames": 510
}
{
"gravitylessLavaFrames": 480
}
{
"enemyDamage": {
"enemy": "Namihe",
"type": "kago",
"hits": 2
}
} |
From: 4
Lava, Left Wall
To: 3
Above Lava Junction
Requires: {
"notable": "HiJumpless Suitless Double Springball Jump"
}
"canSuitlessLavaDive"
"canUseEnemies"
"canDoubleSpringBallJumpMidAir"
"canSpringwall"
"canPreciseWallJump"
{
"heatFrames": 270
}
{
"gravitylessLavaFrames": 240
} |
|
Use the bottom-most right-side Namihe to generate a flame and walk with it to the bottom-most left Namihe head. Use a turnaround animation as Samus is hit by the flame to cancel out knockback frames. While invulnerability frames are active, walljump up the spikes either 2 or 3 times and jump accross to catch the middle wall and climb from there. Requires: {
"notable": "HiJumpless Dive"
}
{
"noBlueSuit": {}
}
"canSuitlessLavaDive"
"canUseIFrames"
"canTrickyWallJump"
"canFastWallJumpClimb"
"canUseEnemies"
"canCameraManip"
{
"heatFrames": 600
}
{
"gravitylessLavaFrames": 500
}
{
"enemyDamage": {
"enemy": "Namihe",
"type": "fireball",
"hits": 1
}
} |
From: 5
Lava, Center Namihe
To: 3
Above Lava Junction
Use the bottom-most right-side Namihe to generate a flame and walk with it to the bottommost left Namihe head. Pause and use a turnaround animation as Samus is hit by the flame to cancel out knockback frames. Manually refill energy from reserves. While invulnerability frames are active, wall jump up the spikes either 2 or 3 times and jump accross to catch the middle wall and climb from there. Requires: {
"notable": "HiJumpless Dive"
}
{
"noBlueSuit": {}
}
"canSuitlessLavaDive"
"canUseIFrames"
"canTrickyWallJump"
"canFastWallJumpClimb"
"canUseEnemies"
"canCameraManip"
{
"heatFrames": 175
}
{
"gravitylessLavaFrames": 175
}
"h_pauseAbuseMinimalReserveRefill"
{
"heatFrames": 375
}
{
"gravitylessLavaFrames": 300
} |
|
Swing counter-clockwise around the left-most Ripper closely (pressing up to retract Grapple), positioned as far left as possible while avoiding getting caught on the stalactite. After swinging under the stalactite with high enough speed, hold down to extend Grapple to push Samus to the left slightly, then release Grapple while Samus is still nearly horizontal. Quickly morph and frame-perfectly pause to equip or unequip Spring Ball. If successful, Samus will continue gaining fall speed while on the ground morphed. Immediately roll left through the door, which should have been opened in advance. Requires: "canUseEnemies"
{
"or": [
{
"haveBlueSuit": {}
},
{
"enemyDamage": {
"enemy": "Ripper 2 (green)",
"type": "contact",
"hits": 2
}
}
]
}
"Morph"
"SpringBall"
"h_trickyToCarryFlashSuit"Exit condition: {
"leaveWithSuperSink": {}
} |
|
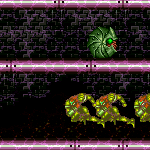
Carefully swing between the Rippers at the top of the room to the item. The last two swings are the hardest Morphing and unmorphing to reset Samus's fall speed can help give a bit more time to position the Rippers. It can help to Grapple the same Ripper again to get it in a better position. Position the third Ripper far to the right then fling to the fourth, which is far to the right and very close to the ceiling. Moving the fourth Ripper to the right a bit can also help in order to make the last fling less precise. Be careful not to fling directly into the ceiling, as it is easy to hit the uneven surface and fall. Requires: {
"notable": "Indiana Jones Grapple (First Try)"
}
"canUseEnemies"
"canPreciseGrapple"
"h_midAirShootUp"
{
"or": [
{
"and": [
"canInsaneJump",
"h_trickyToCarryFlashSuit"
]
},
{
"and": [
"canResetFallSpeed",
{
"enemyDamage": {
"enemy": "Ripper 2 (green)",
"type": "contact",
"hits": 2
}
}
]
}
]
} |
|
Carefully swing between the Rippers at the top of the room to the item. The last two swings are the hardest Morphing and unmorphing to reset Samus's fall speed can help give a bit more time to position the Rippers. It can help to Grapple the same Ripper again to get it in a better position. Position the third Ripper far to the right then fling to the fourth, which is far to the right and very close to the ceiling. Moving the fourth Ripper to the right a bit can also help in order to make the last fling less precise. Be careful not to fling directly into the ceiling, as it is easy to hit the uneven surface and fall. If Samus falls, it may be helpful to reset the room. Requires: {
"notable": "Indiana Jones Grapple (With Retries)"
}
"canUseEnemies"
"canPreciseGrapple"
"h_midAirShootUp"
{
"or": [
{
"and": [
"canInsaneJump",
"h_trickyToCarryFlashSuit"
]
},
{
"enemyDamage": {
"enemy": "Ripper 2 (green)",
"type": "contact",
"hits": 4
}
}
]
}
{
"or": [
{
"and": [
"HiJump",
"canSpringBallJumpMidAir"
]
},
{
"and": [
"canSpeedyJump",
"HiJump",
"canTrickyWallJump"
]
},
"h_trickySpringwall"
]
} |
|
Involves Grappling off several Rippers, where falling may lead to a soft lock. Morphing and unmorphing to reset Samus's fall speed can help give a bit more time to position the Rippers. It can help to Grapple the same Ripper again to get it in a better position. Positioning the first Ripper far to the left until the second is visible can help make this much easier. Requires: {
"notable": "Indiana Jones Grapple (First Try)"
}
"canUseEnemies"
"canPreciseGrapple"
"h_midAirShootUp"
{
"or": [
{
"and": [
"canInsaneJump",
"h_trickyToCarryFlashSuit"
]
},
{
"and": [
"canResetFallSpeed",
{
"enemyDamage": {
"enemy": "Ripper 2 (green)",
"type": "contact",
"hits": 1
}
}
]
}
]
}Dev note: In general, the return route is easier, but is only useful after doing the left to right strat first. |
|
Involves grappling off a Ripper 2. Requires: "canUseEnemies" "Grapple" "h_midAirShootUp" |
|
Involves grappling off a Ripper 2. Requires: "canUseEnemies" "Grapple" "h_midAirShootUp" |
From: 4
Firefleas Item
To: 5
Firefleas Bottom Left Platform Junction
Requires: {
"enemyDamage": {
"enemy": "Fireflea",
"type": "contact",
"hits": 1
}
}
"canUseEnemies"
"canDash"
"canUseIFrames" |
From: 5
Firefleas Bottom Left Platform Junction
To: 4
Firefleas Item
Requires: {
"enemyDamage": {
"enemy": "Fireflea",
"type": "contact",
"hits": 1
}
}
"canUseEnemies"
"canDash"
"canUseIFrames" |
|
Manipulate Ridley into a pogo pattern facing left. Morph and position near the center of the leftmost tile of the platform. When Ridley is descending above Samus and about to pound the ground with his tail, place a Power Bomb and immediately unmorph. If successful, Samus will get grabbed, triggering auto-reserves before the Power Bomb explodes. Ridley will fly away from the Power Bomb explosion, carrying Samus to the top right into the door transition. Requires: {
"notable": "Ridley Grab Door Lock Skip"
}
"canUseEnemies"
{
"heatFrames": 745
}
"h_usePowerBomb"
{
"autoReserveTrigger": {}
}
{
"enemyDamage": {
"enemy": "Ridley",
"type": "contact",
"hits": 2
}
}
{
"heatFrames": 310
}
{
"or": [
{
"and": [
{
"not": "f_DefeatedRidley"
},
"canRiskPermanentLossOfAccess"
]
},
"canWallJump",
"SpaceJump",
{
"and": [
"HiJump",
"canSpringBallJumpMidAir"
]
},
{
"and": [
"HiJump",
"canSpeedyJump",
"canTrickyJump"
]
},
"canJumpIntoIBJ"
]
}Bypasses door shell: true |
|
Ride the Spike Platform up and back down again to more easily position for using it as a runway. Requires: "canUseEnemies"
{
"heatFrames": 480
}Exit condition: {
"leaveWithRunway": {
"length": 8,
"openEnd": 0
}
}Unlocks doors: {"types":["ammo"],"requires":[]} |
From: 1
Bottom Left Door
To: 1
Bottom Left Door
Requires: "canUseEnemies"
"canTrickyJump"
{
"heatFrames": 120
}Exit condition: {
"leaveWithRunway": {
"length": 8,
"openEnd": 0
}
}Unlocks doors: {"types":["ammo"],"requires":[]} |
|
Requires: "canUseEnemies"
{
"or": [
{
"and": [
"canWallJump",
{
"heatFrames": 390
}
]
},
{
"and": [
"canConsecutiveWallJump",
"canCarefulJump",
{
"heatFrames": 330
}
]
},
{
"and": [
"HiJump",
{
"heatFrames": 320
}
]
},
{
"and": [
"h_crouchJumpDownGrab",
{
"heatFrames": 610
}
]
}
]
} |
|
Requires: "canDash"
"canUseEnemies"
{
"heatFrames": 430
}Exit condition: {
"leaveWithRunway": {
"length": 8,
"openEnd": 0
}
}Unlocks doors: {"types":["super","powerbomb"],"requires":[]}
{"types":["missiles"],"requires":["never"]}Dev note: FIXME: Assumes the Kzans are in their default positions |
From: 5
Junction Below Shot Block
To: 1
Bottom Left Door
Walk into a Spike and then Morph-Kago through the top Spike-Platform. Requires: "canKago"
"Morph"
"canUseEnemies"
{
"spikeHits": 1
}
{
"heatFrames": 250
}
"canDash"Exit condition: {
"leaveWithRunway": {
"length": 8,
"openEnd": 0
}
}Unlocks doors: {"types":["missiles"],"requires":[{"heatFrames":50}]}
{"types":["super"],"requires":[]}
{"types":["powerbomb"],"requires":[{"heatFrames":110}]}Dev note: About equivalent to waiting, if there is no form of damage reduction. |
|
Requires: {
"notable": "Bull Boost"
}
"canSuitlessMaridia"
"HiJump"
"canUseEnemies"
"h_midAirMorphDamageBoost"
"h_underwaterCrouchJump"
"Morph"
{
"enemyDamage": {
"enemy": "Bull",
"type": "contact",
"hits": 1
}
} |
|
Requires: "h_destroyBombWalls"
"f_DefeatedPhantoon"
{
"or": [
"canTrivialMidAirMorph",
"h_useSpringBall",
"h_bombThings",
{
"and": [
"Morph",
"canUseEnemies"
]
}
]
} |
From: 1
Left Door
To: 3
Hidden Right Item
Requires getting back on Mama Turtle while she is at the right. The safest way is to have a normalized fall speed with either a full height jump or falling from the ledge above. If suitless, walking off the right ledge when she hits the left wall can be a good indicator to help land on her safely. Shrinking Samus' hitbox after touching the turtles back will also usually help. While near the right wall, shoot the item and grab it. If the shot misses, carefully fall back down and safely land on Mama Turtle again. After grabbing the item, fall on her again to avoid taking a hit; jump to the left at the top of the ride to escape the water safely. Requires: "h_navigateUnderwater"
"canUseEnemies"
"canCarefulJump"
{
"or": [
"canTrickyDodgeEnemies",
{
"and": [
"Gravity",
"canTrickyJump"
]
},
{
"enemyDamage": {
"enemy": "Kame (Tatori)",
"type": "contact",
"hits": 1
}
},
"h_pauseAbuseMinimalReserveRefill"
]
}Clears obstacles: A Dev note: FIXME: Is it worth adding a suitless bootless strat that follows this and gets back to the left without another hit? |
|
Requires getting back on Mama Turtle while she is at the right. The safest way is to have a normalized fall speed with either a full height jump or falling from the ledge above. If suitless, walking off the right ledge when she hits the left wall can be a good indicator to help land on her safely. Shrinking Samus' hitbox after touching the turtles back will also usually help. Requires: "h_navigateUnderwater"
"canUseEnemies"
{
"or": [
"canTrickyDodgeEnemies",
{
"and": [
"Gravity",
"canTrickyJump"
]
},
{
"haveBlueSuit": {}
},
{
"enemyDamage": {
"enemy": "Kame (Tatori)",
"type": "contact",
"hits": 1
}
},
"h_pauseAbuseMinimalReserveRefill"
]
}Clears obstacles: A |
|
Ride Mama Turtle. To avoid getting hit, shoot one of her babies to wake her up, then quickly get on her back. Requires: {
"obstaclesNotCleared": [
"A"
]
}
"h_navigateUnderwater"
"canUseEnemies"
{
"or": [
"canCarefulJump",
{
"enemyDamage": {
"enemy": "Kame (Tatori)",
"type": "contact",
"hits": 1
}
}
]
}Clears obstacles: A |
|
Requires getting back on Mama Turtle while she is at the right. The safest way is to have a normalized fall speed with either a full height jump or falling from the ledge above. If suitless, walking off the right ledge when she hits the left wall can be a good indicator to help land on her safely. Shrinking Samus' hitbox after touching the turtles back will also usually help. At the top of the ride, jump to the top right ledge. Requires: "h_navigateUnderwater"
"canUseEnemies"
{
"or": [
"canTrickyDodgeEnemies",
{
"and": [
"Gravity",
"canTrickyJump"
]
},
{
"haveBlueSuit": {}
},
{
"enemyDamage": {
"enemy": "Kame (Tatori)",
"type": "contact",
"hits": 1
}
},
"h_pauseAbuseMinimalReserveRefill"
]
}Clears obstacles: A |
|
Requires: {
"or": [
"Gravity",
{
"obstaclesNotCleared": [
"A"
]
},
{
"enemyDamage": {
"enemy": "Kame (Tatori)",
"type": "contact",
"hits": 1
}
}
]
}
{
"or": [
"Gravity",
"HiJump",
"canSpringBallJumpMidAir",
"h_underwaterCrouchJumpDownGrab",
"canUseEnemies"
]
} |
|
Jump over or on to Mama Turtle. The easiest method is to jump over her by jumping on her babies, or to Morph under her. Requires: "canSuitlessMaridia"
"canTrickyJump"
{
"or": [
"canSpringBallJumpMidAir",
"h_underwaterCrouchJumpDownGrab",
"canUseEnemies"
]
} |
|
Entrance condition: {
"comeInWithGMode": {
"mode": "any",
"morphed": false
}
}Requires: "Morph"
"h_navigateUnderwater"
{
"or": [
"Gravity",
"HiJump",
{
"and": [
"Grapple",
"canUseEnemies"
]
},
{
"and": [
"canSpringBallJumpMidAir",
{
"or": [
"canTrickyJump",
"canSpringFling",
"canStationaryLateralMidAirMorph",
"canTrickyUseFrozenEnemies"
]
}
]
},
{
"and": [
"canTrickyUseFrozenEnemies",
"canTrickyJump"
]
}
]
} |
|
Note that it is possible to get up with Grapple alone by using the Powamps. Fling from the Powamp into the side of the top platform to align horizontally. Entrance condition: {
"comeInWithGMode": {
"mode": "direct",
"morphed": false
},
"comesThroughToilet": "any"
}Requires: "h_navigateUnderwater"
{
"or": [
{
"and": [
"Gravity",
{
"or": [
"HiJump",
"canSpringBallJumpMidAir",
"SpaceJump",
"canIBJ",
"canGravityJump"
]
}
]
},
{
"and": [
"canUseEnemies",
"canPreciseGrapple"
]
},
{
"and": [
"HiJump",
"canSpringBallJumpMidAir"
]
}
]
}Exit condition: {
"leaveWithGMode": {
"morphed": false
}
} |
|
There is a grappleable Powamp directly above each of the 3 peaks. Requires: "canSuitlessMaridia" "canUseEnemies" "Grapple" "h_midAirShootUp" |
|
There is a grappleable Powamp directly above each of the 3 peaks. If carrying a flash suit without Morph, Hi-Jump or Gravity can be used to attach to the center Powamp from the left. Requires: "h_navigateUnderwater"
"canUseEnemies"
"Grapple"
{
"or": [
"h_midAirShootUp",
"HiJump",
"Gravity"
]
} |
|
There is a grappleable Powamp directly above each of the 3 peaks. If carrying a flash suit without Morph, Hi-Jump or Gravity can be used to attach to the center Powamp from the left. Requires: "h_navigateUnderwater"
"canUseEnemies"
"Grapple"
{
"or": [
"h_midAirShootUp",
"HiJump",
"Gravity"
]
}Clears obstacles: B Dev note: This strat is only able to bring one crab up without dropping down to 2. Adding a strat to do that is not worth adding, because with grapple, you can bypass the strats that need A. |
|
There is a grappleable Powamp directly above each of the 3 peaks. If carrying a flash suit without Morph, Hi-Jump or Gravity can be used to attach to the center Powamp from the left. Requires: "h_navigateUnderwater"
"canUseEnemies"
"Grapple"
{
"or": [
"h_midAirShootUp",
"HiJump",
"Gravity"
]
} |
From: 10
Upper Right Ledge Junction
To: 4
Top Right Door
There is a grappleable Powamp directly above each of the 3 peaks. Requires: "canSuitlessMaridia" "canUseEnemies" "Grapple" |
|
Requires: "Gravity"
{
"or": [
"canWallJump",
"SpaceJump",
"canLongIBJ",
"canJumpIntoIBJ",
"canSpeedyJump",
"canSpringBallJumpMidAir",
"canUseEnemies"
]
}
{
"or": [
{
"obstaclesCleared": [
"A"
]
},
"h_usePowerBomb"
]
}Clears obstacles: A |
From: 2
Bottom Left Door
To: 1
Middle Left Door
Jump on the Snail when it is at a precise location, and then crouch jump through the ceiling and jump again, without moving between jumps. The Snail's positioning is very precise. Morph can be used to help get onto the Snail and get off without taking a hit if it is in the wrong location. Requires: {
"notable": "Precise Snail Clip With Gravity"
}
"Gravity"
"canUseEnemies"
"canCeilingClip"
{
"or": [
"Morph",
"canPreciseCeilingClip",
{
"enemyDamage": {
"enemy": "Yard",
"type": "contact",
"hits": 2
}
}
]
} |
|
Requires: "canUseEnemies"
{
"or": [
"Gravity",
{
"and": [
"canSuitlessMaridia",
"HiJump"
]
}
]
}
{
"or": [
{
"obstaclesCleared": [
"A"
]
},
"h_usePowerBomb"
]
}Clears obstacles: A Dev note: Spring Ball jumps without HiJump require less obvious snail positioning. |
From: 2
Bottom Left Door
To: 1
Middle Left Door
Jump on the Snail when it is at a precise location, and then crouch jump through the ceiling and jump again, without moving between jumps. The Snail's positioning is more lenient with Morph and an X-Ray Turn Around. X-Ray can also be useful for helping position the Snail. Requires: "Gravity" "canUseEnemies" "canXRayCeilingClip" |
|
Requires: "Gravity"
{
"or": [
"canWallJump",
"SpaceJump",
"canLongIBJ",
"canJumpIntoIBJ",
"canSpeedyJump",
"Grapple",
{
"and": [
"HiJump",
"canSpringBallJumpMidAir"
]
},
{
"and": [
"HiJump",
"canUseEnemies"
]
}
]
}Dev note: A very precise crouch-jump down-grab, or spring ball jumping to the snail is closer to canSnailClimb. |
|
Jump on the Snail when it is at a precise location, and then crouch jump through the ceiling and jump again, without moving between jumps. The Snail's positioning is very precise. Morph can be used to help get onto the Snail and get off without taking a hit if it is in the wrong location. Requires: {
"notable": "Precise Snail Clip With Gravity"
}
"Gravity"
"canUseEnemies"
"canCeilingClip"
{
"or": [
"Morph",
"canPreciseCeilingClip",
{
"enemyDamage": {
"enemy": "Yard",
"type": "contact",
"hits": 2
}
}
]
} |
|
Sparking up right from a snail can save some Energy. With very little Energy, spark up the center of the speed blocks to clear both sides, then snail clip through the last one. It may be helpful to turn around before sparking so the snail doesn't hit Samus. Requires: "canUseEnemies"
"h_storedSpark"
{
"or": [
{
"shinespark": {
"frames": 13,
"excessFrames": 4
}
},
{
"and": [
{
"shinespark": {
"frames": 13,
"excessFrames": 10
}
},
{
"or": [
"canHighPixelCeilingClip",
{
"and": [
"Gravity",
"canPreciseCeilingClip"
]
},
{
"and": [
"Gravity",
"canXRayCeilingClip"
]
}
]
}
]
}
]
} |
|
Jump on the Snail when it is at a precise location, and then crouch jump through the ceiling and jump again, without moving between jumps. The Snail's positioning is more lenient with Morph and an X-Ray Turn Around. X-Ray can also be useful for helping position the Snail. Requires: "Gravity" "canUseEnemies" "canXRayCeilingClip" |
|
Entrance condition: {
"comeInWithGMode": {
"mode": "direct",
"morphed": false
},
"comesThroughToilet": "any"
}Requires: {
"or": [
"Gravity",
"HiJump",
"canSpringBallJumpMidAir",
"canUseEnemies",
{
"and": [
"h_underwaterCrouchJump",
"canTrickyJump"
]
}
]
}Exit condition: {
"leaveWithGMode": {
"morphed": false
}
} |
|
It is easiest to use a single snail on the bottom of the ceiling to the right of the door. Use at least a small amount of momentum before jumping over towards the snail. Entrance condition: {
"comeInWithGMode": {
"mode": "direct",
"morphed": true
},
"comesThroughToilet": "any"
}Requires: "h_artificialMorphSpringBall" "canUseEnemies" "canTrickyJump" Exit condition: {
"leaveWithGMode": {
"morphed": true
}
} |
|
Involves waiting around for a snail to come along, in order to reach the door by jumping while standing on it. Requires: "canSuitlessMaridia" "canUseEnemies" |
From: 3
Bottom Right Door
To: 2
Bottom Left Door
Quickly shoot out the 3 shot blocks then horizontal spark breaking the speed blocks. Wait for the Oums to roll on their own to a place where they can be climbed. Do not stand on the Oums when they begin to attack. Entrance condition: {
"comeInShinecharged": {}
}Requires: {
"shineChargeFrames": 100
}
{
"notable": "Come in Shinecharged, Shinespark from the Bottom Right"
}
"Morph"
"canSuitlessMaridia"
"canUseEnemies"
"canHorizontalShinespark"
{
"shinespark": {
"frames": 91,
"excessFrames": 4
}
} |
Come in Shinecharged, Shinespark from the Bottom Right (Conserve Energy)
(Very Hard)
Halfie Climb Room
From: 3
Bottom Right Door
To: 2
Bottom Left Door
Quickly shoot out the 3 shot blocks then horizontal spark breaking the speed blocks. Jump forward to save some health before Shinesparking Wait for the Oums to roll on their own to a place where they can be climbed. Do not stand on the Oums when they begin to attack. Entrance condition: {
"comeInShinecharged": {}
}Requires: {
"shineChargeFrames": 125
}
{
"notable": "Come in Shinecharged, Shinespark from the Bottom Right"
}
"Morph"
"canSuitlessMaridia"
"canUseEnemies"
"canShinechargeMovementComplex"
{
"shinespark": {
"frames": 70,
"excessFrames": 4
}
} |
From: 3
Bottom Right Door
To: 2
Bottom Left Door
Use temporary blue to break the speed blocks. Use stationary lateral mid-air morphs to move quickly while chaining temporary blue, in order to reach the last speed blocks before the Oums. Climb on the Oums to reach the left side of the room. Do not stand on the Oums when they begin to attack. Entrance condition: {
"comeInBlueSpinning": {
"maxExtraRunSpeed": "$3.0",
"unusableTiles": 0
}
}Requires: "canLongChainTemporaryBlue" "canStationaryLateralMidAirMorph" "can4HighMidAirMorph" "canUseEnemies" Dev note: FIXME: This strat name is not accurate since it doesn't involve a shinespark; it's only this way because it shares the reusable notable. FIXME: Carrying a flash suit can be possible while chaining temporary blue underwater here; a speedball could also be possible to avoid the need for such a long chain. |
From: 3
Bottom Right Door
To: 2
Bottom Left Door
Use temporary blue to break the speed blocks. Use stationary lateral mid-air morphs to move quickly while chaining temporary blue, in order to reach the last speed blocks before the Oums. Climb on the Oums to reach the left side of the room. Do not stand on the Oums when they begin to attack. Entrance condition: {
"comeInWithTemporaryBlue": {}
}Requires: "canLongChainTemporaryBlue" "canStationaryLateralMidAirMorph" "can4HighMidAirMorph" "canUseEnemies" |
|
Requires: "Morph"
"canUseEnemies"
"h_storedSpark"
{
"shinespark": {
"frames": 4,
"excessFrames": 2
}
} |

