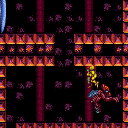
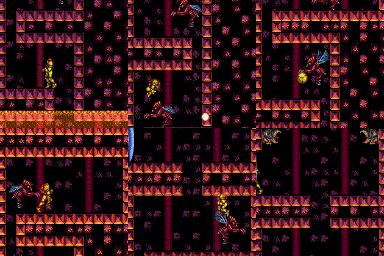
canWallJumpInstantMorph (Hard)
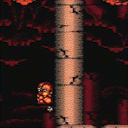
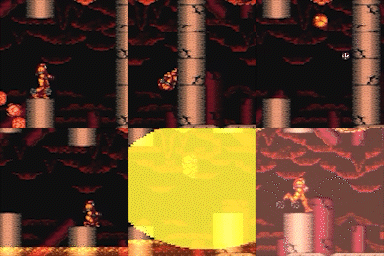
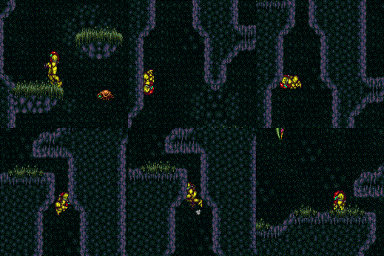
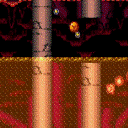
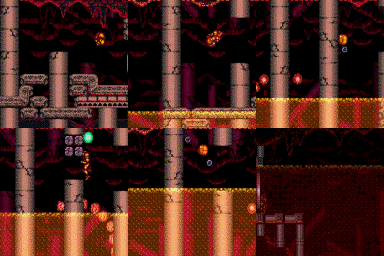
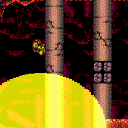
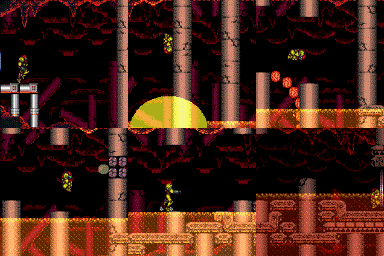
The ability to mid-air morph immediately out of a wall jump. After the wall jump, continue holding jump in order to only need to press down a single time to morph. This is typically used in places where the morph neededs to be done quickly in order to have relatively precise positioning.
Dependencies: canMidAirMorph
Strats ()
|
From: 4
Top Junction (Right of Spikes)
To: 1
Top Left Door
Requires: {
"or": [
"h_canDiagonalBombJump",
{
"and": [
"h_canCeilingBombJump",
"canPreciseWalljump",
"canWallJumpInstantMorph",
"canJumpIntoIBJ"
]
}
]
}
|
|
Notable: true Requires: "canPreciseWalljump"
"canWallJumpInstantMorph"
{
"or": [
"HiJump",
"canConsecutiveWalljump"
]
}
|
|
Placing the bomb against the bomb block at the top of the shaft can be somewhat tricky. Requires: {
"or": [
"h_canUsePowerBombs",
{
"obstaclesCleared": [
"C"
]
}
]
}
"h_canUseMorphBombs"
{
"or": [
"h_canFly",
{
"and": [
"canConsecutiveWalljump",
"canWallJumpInstantMorph"
]
}
]
}
Clears obstacles: A, B, C |
|
From: 1
Left Door
To: 2
Right Door
Notable: true Cross the Pillar Room with Bombs and minimal damage. Some acid damage is expected, but any mistakes greatly increases the time spent in acid. Entrance condition: {
"comeInRunning": {
"minTiles": 1,
"speedBooster": "any"
}
}
Requires: "h_canUseMorphBombs"
"canWallJumpInstantMorph"
"canInsaneJump"
"canResetFallSpeed"
"canUnmorphBombBoost"
"canSuitlessLavaDive"
{
"heatFrames": 1320
}
{
"acidFrames": 128
}
|
|
From: 1
Left Door
To: 2
Right Door
Notable: true Place the PBs next to the pillars in order to only use 2. Minimize acid by unmorphing high to land back on the jump spot or walljumping before placing the bomb. Requires: "Morph"
"canCarefulJump"
{
"ammo": {
"type": "PowerBomb",
"count": 2
}
}
{
"or": [
{
"and": [
"canCarefulJump",
"canResetFallSpeed",
{
"heatFrames": 660
}
]
},
{
"and": [
"canWalljump",
{
"heatFrames": 660
},
{
"or": [
"canWallJumpInstantMorph",
{
"acidFrames": 30
}
]
}
]
},
{
"and": [
"Gravity",
{
"heatFrames": 660
},
{
"acidFrames": 30
}
]
},
{
"and": [
"canTrickyJump",
"canSuitlessLavaDive",
{
"heatFrames": 720
},
{
"acidFrames": 52
}
]
}
]
}
{
"or": [
"canTrickyJump",
{
"and": [
"Gravity",
{
"heatFrames": 180
},
{
"acidFrames": 56
}
]
},
{
"and": [
"canSuitlessLavaDive",
{
"heatFrames": 240
},
{
"acidFrames": 96
}
]
}
]
}
{
"or": [
"h_heatResistant",
"canPauseAbuse",
{
"resourceCapacity": [
{
"type": "RegularEnergy",
"count": 149
}
]
}
]
}
|
|
From: 2
Right Door
To: 1
Left Door
Notable: true Cross the Pillar Room with Bombs and minimal damage. Some acid damage is expected, but any mistakes greatly increases the time spent in acid. Entrance condition: {
"comeInRunning": {
"minTiles": 3,
"speedBooster": "any"
}
}
Requires: "h_canUseMorphBombs"
"canWallJumpInstantMorph"
"canInsaneJump"
"canResetFallSpeed"
"canUnmorphBombBoost"
"canHBJ"
"canSuitlessLavaDive"
{
"heatFrames": 1320
}
{
"acidFrames": 128
}
|
|
From: 2
Right Door
To: 1
Left Door
Notable: true Place the PBs next to the pillars in order to only use 2. Avoid acid during the first Power Bomb by walljumping before placing the bomb. Avoiding acid damage at the last jump is tricky but possible. Requires: "Morph"
{
"ammo": {
"type": "PowerBomb",
"count": 2
}
}
"canCarefulJump"
{
"or": [
{
"and": [
"canWallJumpInstantMorph",
{
"heatFrames": 690
}
]
},
{
"and": [
"canWalljump",
{
"heatFrames": 660
},
{
"acidFrames": 36
}
]
},
{
"and": [
"canSuitlessLavaDive",
{
"heatFrames": 840
},
{
"acidFrames": 84
}
]
},
{
"and": [
"Gravity",
{
"heatFrames": 660
},
{
"acidFrames": 24
}
]
}
]
}
{
"or": [
"canInsaneJump",
{
"and": [
"canTrickyJump",
"canLateralMidAirMorph",
{
"heatFrames": 10
},
{
"acidFrames": 10
}
]
},
{
"and": [
"canPreciseWalljump",
{
"heatFrames": 50
},
{
"acidFrames": 32
}
]
},
{
"and": [
"Gravity",
{
"heatFrames": 20
},
{
"acidFrames": 20
}
]
},
{
"and": [
"canSuitlessLavaDive",
{
"heatFrames": 50
},
{
"acidFrames": 50
}
]
}
]
}
{
"or": [
"h_heatResistant",
"canPauseAbuse",
{
"resourceCapacity": [
{
"type": "RegularEnergy",
"count": 149
}
]
}
]
}
|
|
From: 5
Junction Below Top Pirate
To: 1
Top Left Door
Requires: "h_canNavigateHeatRooms"
"canWallJumpInstantMorph"
"canTrickyJump"
"canInsaneWalljump"
{
"heatFrames": 290
}
|
|
From: 5
Junction Below Top Pirate
To: 3
Top Right Door
Requires: "h_canNavigateHeatRooms"
"canInsaneWalljump"
"canWallJumpInstantMorph"
"canTrickyJump"
{
"heatFrames": 160
}
|
|
From: 6
Bottom Platform Junction With Pirates Killed
To: 4
Junction Above Bomb Blocks
Requires: "h_canNavigateHeatRooms"
"HiJump"
"canPreciseWalljump"
"canConsecutiveWalljump"
{
"heatFrames": 300
}
{
"or": [
{
"and": [
"h_canUsePowerBombs",
{
"heatFrames": 200
}
]
},
{
"and": [
"canDelayedWalljump",
"canWallJumpInstantMorph",
"h_canUseMorphBombs",
{
"heatFrames": 520
}
]
},
{
"obstaclesCleared": [
"A"
]
}
]
}
Clears obstacles: A |
|
From: 4
Junction Above Bomb Block
To: 1
Top Left Door
Notable: true Read the movements of the Kihunters and jump over or roll under them as appropriate. Changing platforms is the hardest part: jumping extra high and morphing works sometimes, other times jump short and roll under. Requires: "h_canNavigateHeatRooms"
"canTrickyJump"
{
"or": [
{
"and": [
"canWallJumpInstantMorph",
"canPreciseWalljump"
]
},
{
"and": [
"SpeedBooster",
"HiJump",
"canMidAirMorph"
]
}
]
}
{
"heatFrames": 540
}
Clears obstacles: A |
|
Requires: "Gravity"
"Morph"
{
"or": [
"SpaceJump",
"canWallJumpInstantMorph"
]
}
|
|
Jump and morph directly into the morph tunnel. Using a walljump can help make the jump safer. Requires: "Morph"
"Gravity"
{
"or": [
"canWallJumpInstantMorph",
"canCarefulJump"
]
}
|
|
From: 7
Below Morph Tunnel Junction
To: 5
Morph Tunnel Junction
Escape the water with either HiJump or SpaceJump, then carefully jump and morph into the tunnel. Requires: "canSuitlessMaridia"
"Morph"
{
"or": [
{
"and": [
"HiJump",
"canPreciseWalljump",
"canWallJumpInstantMorph"
]
},
{
"and": [
"HiJump",
"canSpaceJumpWaterEscape"
]
},
{
"and": [
"canPreciseWalljump",
"canSpaceJumpWaterBounce"
]
}
]
}
|
|
From: 2
Item
To: 1
Left Door
Wall jump until Samus is just below the water line and then morph and place a Bomb Use the brief moment during the Bomb explosion that knocks Samus upwards to setup a Springball jump to jump out of the water. Requires: "canSuitlessMaridia" "canSunkenTileWideWallClimb" "canUnderwaterBombIntoSpringBallJump" "canWallJumpInstantMorph" |
|
From: 2
Bottom Right Door (locked)
To: 1
Top Right Door
Wall jump up the right wall and either mid-air morph to fit through the gap below the top door. Alternatively use a mid-air wiggle to reduce the height of Samus' hitbox after the walljump, to be able to fit through the gap without morphing. Entrance condition: {
"comeInShinecharged": {
"framesRequired": 140
}
}
Requires: "canWallJumpInstantMorph"
"canShinechargeMovementComplex"
{
"or": [
"f_KilledMetroidRoom2",
"canMetroidAvoid"
]
}
Exit condition: {
"leaveShinecharged": {
"framesRemaining": "auto"
}
}
|
|
From: 2
Bottom Right Door (locked)
To: 1
Top Right Door
Wall jump up the right wall and either mid-air morph to fit through the gap below the top door. Alternatively use a mid-air wiggle to reduce the height of Samus' hitbox after the walljump, to be able to fit through the gap without morphing. Shoot the door open and spark out. Entrance condition: {
"comeInShinecharged": {
"framesRequired": 110
}
}
Requires: "canWallJumpInstantMorph"
"canShinechargeMovementComplex"
{
"shinespark": {
"frames": 5
}
}
{
"or": [
"f_KilledMetroidRoom2",
"canMetroidAvoid"
]
}
Exit condition: {
"leaveWithSpark": {}
}
|
|
From: 2
Bottom Right Door (locked)
To: 1
Top Right Door
Wall jump up the right wall and either mid-air morph to fit through the gap below the top door. Alternatively use a mid-air wiggle to reduce the height of Samus' hitbox after the walljump, to be able to fit through the gap without morphing. Entrance condition: {
"comeInShinecharging": {
"length": 2,
"openEnd": 0
}
}
Requires: "canShinechargeMovementComplex" "canWallJumpInstantMorph" "f_KilledMetroidRoom2" Exit condition: {
"leaveShinecharged": {
"framesRemaining": 30
}
}
|
