canPauseAbuse (Expert)


The ability to pause in order to avoid death while reaching 0 Energy. Energy must be obtained before the unpause fade-in finishes, either by picking up an Energy drop or refilling with Reserve Energy.
Dependencies: canManageReserves
Strats ()
|
From: 5
Alcatraz Door
To: 8
Central Junction
Notable: true 

Wait 3 minutes for a global Geemer to waddle over, or shoot a Super 20 to 30 seconds after entering the room to knock it off the ceiling and save a lot of time. Damage down until Samus is one Geemer hit away from running out of energy, and set reserves to manual. Crouch jump at a very precise time and mid-air morph to contact the Geemer at the peak of the jump, pressing pause to be in the fade-out while getting hit and reaching 0 energy. Set reserves to auto, unpause, and hold left. While reserves are auto-refilling, Samus' i-frames will run out, allowing Samus to be hit by the Geemer again and be boosted high enough to reach the ledge. The screen will be black, which can be fixed by pausing and unpausing again. Requires: "h_ZebesIsAwake"
"HiJump"
"Morph"
{
"or": [
"canBeVeryPatient",
{
"ammo": {
"type": "Super",
"count": 1
}
}
]
}
"canCrouchJump"
"canInsaneJump"
"canPauseAbuse"
"canNeutralDamageBoost"
{
"autoReserveTrigger": {
"minReserveEnergy": 85
}
}
{
"enemyDamage": {
"enemy": "Geemer (blue)",
"type": "contact",
"hits": 1
}
}
|
|
From: 5
Alcatraz Door
To: 8
Central Junction
Notable: true 

Enter with direct G-Mode artificial morph, and perform a Crystal Flash to refill reserve energy. Do this all the way to the left, to prevent the Geemer from being destroyed by the lingering light orb. Wait for a global Geemer to make the long trip along the map, or shoot a Super 20 to 30 seconds after entering the room to knock it off the ceiling and save a lot of time. Either way, after the Geemer comes down into Alcatraz, shoot a Super to knock it off the ledge to make it bypass the light orb. Damage down until one Geemer hit away from running out of energy. If Samus has at least one Energy Tank, it will take longer to damage down, in which case an additional Super can be used to knock the Geemer onto the floating platform, to allow unlimited time for damaging down. A final Super can be used to knock the Geemer off the floating platform. Set reserves to manual, stand next to the bomb blocks, and wait for the Geemer to approach. Just before taking a hit, press pause. During the fade-out, hold forward to land quickly after knockback. At a precise moment just before the pause hits, jump and aim down; the aim-down can be buffered before jumping, e.g. by rolling from forward to down through a diagonal input. Set reserves to auto, then unpause while continuing to hold jump. If successful, the forced stand-up will occur close to the ceiling and while Samus still has upward momentum, allowing Samus to clip through. Entrance condition: {
"comeInWithGMode": {
"mode": "direct",
"morphed": true
}
}
Requires: "h_ZebesIsAwake"
"canBeVeryPatient"
{
"ammo": {
"type": "Super",
"count": 3
}
}
"h_canArtificialMorphCrystalFlash"
"canPauseAbuse"
{
"autoReserveTrigger": {}
}
{
"enemyDamage": {
"enemy": "Geemer (blue)",
"type": "contact",
"hits": 1
}
}
|
|
Requires: {
"or": [
"canPauseAbuse",
{
"heatFrames": 60
}
]
}
{
"refill": [
"Energy",
"Missile",
"Super",
"PowerBomb"
]
}
|
|
Requires: {
"obstaclesNotCleared": [
"A"
]
}
{
  "or": [
    "canPauseAbuse",
    {
      "heatFrames": 50
    }
  ]
}
{
  "refill": [
    "Energy",
    "Missile",
    "Super",
    "PowerBomb"
  ]
}
|
|
When off-camera, the Gamets still spawn but cannot be destroyed with beams or other projectiles. Requires: {
"obstaclesCleared": [
"A"
]
}
"canOffScreenMovement"
{
"or": [
"ScrewAttack",
"h_canUseMorphBombs",
"Grapple"
]
}
{
  "or": [
    "canPauseAbuse",
    {
      "heatFrames": 50
    }
  ]
}
{
  "refill": [
    "Energy",
    "Missile",
    "Super",
    "PowerBomb"
  ]
}
|
|
Requires: {
"or": [
"canPauseAbuse",
{
"heatFrames": 50
}
]
}
{
"refill": [
"Energy",
"Missile",
"Super",
"PowerBomb"
]
}
|
|
From: 5
Bottom Floating Platform Junction
To: 5
Bottom Floating Platform Junction
Requires: {
"or": [
"canPauseAbuse",
{
"heatFrames": 50
}
]
}
{
"refill": [
"Energy",
"Missile",
"Super",
"PowerBomb"
]
}
|
|
From: 3
Left Farm Junction
To: 3
Left Farm Junction
Requires: "canPauseAbuse"
"Grapple"
"canBeVeryPatient"
{
"resetRoom": {
"nodes": [
1
],
"mustStayPut": false
}
}
{
"refill": [
"Energy",
"Super",
"PowerBomb"
]
}
|
|
From: 4
Right Farm Junction
To: 4
Right Farm Junction
Requires: "canPauseAbuse"
"Grapple"
"canBeVeryPatient"
{
"resetRoom": {
"nodes": [
1
],
"mustStayPut": false
}
}
{
"refill": [
"Energy",
"Super",
"PowerBomb"
]
}
|
|
From: 1
Left Door
To: 2
Right Door
Notable: true 
Place the PBs next to the pillars in order to only use 2. Minimize acid by unmorphing high to land back on the jump spot or walljumping before placing the bomb. Requires: "Morph"
"canCarefulJump"
{
"ammo": {
"type": "PowerBomb",
"count": 2
}
}
{
"or": [
{
"and": [
"canCarefulJump",
"canResetFallSpeed",
{
"heatFrames": 660
}
]
},
{
"and": [
"canWalljump",
{
"heatFrames": 660
},
{
"or": [
"canWallJumpInstantMorph",
{
"acidFrames": 30
}
]
}
]
},
{
"and": [
"Gravity",
{
"heatFrames": 660
},
{
"acidFrames": 30
}
]
},
{
"and": [
"canTrickyJump",
"canSuitlessLavaDive",
{
"heatFrames": 720
},
{
"acidFrames": 52
}
]
}
]
}
{
"or": [
"canTrickyJump",
{
"and": [
"Gravity",
{
"heatFrames": 180
},
{
"acidFrames": 56
}
]
},
{
"and": [
"canSuitlessLavaDive",
{
"heatFrames": 240
},
{
"acidFrames": 96
}
]
}
]
}
{
"or": [
"h_heatResistant",
"canPauseAbuse",
{
"resourceCapacity": [
{
"type": "RegularEnergy",
"count": 149
}
]
}
]
}
|
|
The power bombs can be placed pretty far from the next pillar in line. PB1 - Above the mound of dirt on the ground. PB2 - On pillar 2 (not on the Puromi Fire Snake). PB3 - Near pillar 5. Requires: "canCarefulJump"
"Morph"
{
"ammo": {
"type": "PowerBomb",
"count": 3
}
}
{
"or": [
"canTrickyJump",
{
"enemyDamage": {
"enemy": "Puromi",
"type": "contact",
"hits": 1
}
}
]
}
{
"heatFrames": 670
}
{
"or": [
"canTrickyJump",
{
"and": [
"Gravity",
{
"heatFrames": 180
},
{
"acidFrames": 56
}
]
},
{
"and": [
"canSuitlessLavaDive",
{
"heatFrames": 240
},
{
"acidFrames": 96
}
]
}
]
}
{
"or": [
"h_heatResistant",
"canPauseAbuse",
{
"resourceCapacity": [
{
"type": "RegularEnergy",
"count": 149
}
]
}
]
}
|
|
From: 2
Right Door
To: 1
Left Door
Notable: true
Place the PBs next to the pillars in order to only use 2. Avoid acid during the first Power Bomb by walljumping before placing the bomb. Avoiding acid damage at the last jump is tricky but possible. Requires: "Morph"
{
"ammo": {
"type": "PowerBomb",
"count": 2
}
}
"canCarefulJump"
{
"or": [
{
"and": [
"canWallJumpInstantMorph",
{
"heatFrames": 690
}
]
},
{
"and": [
"canWalljump",
{
"heatFrames": 660
},
{
"acidFrames": 36
}
]
},
{
"and": [
"canSuitlessLavaDive",
{
"heatFrames": 840
},
{
"acidFrames": 84
}
]
},
{
"and": [
"Gravity",
{
"heatFrames": 660
},
{
"acidFrames": 24
}
]
}
]
}
{
"or": [
"canInsaneJump",
{
"and": [
"canTrickyJump",
"canLateralMidAirMorph",
{
"heatFrames": 10
},
{
"acidFrames": 10
}
]
},
{
"and": [
"canPreciseWalljump",
{
"heatFrames": 50
},
{
"acidFrames": 32
}
]
},
{
"and": [
"Gravity",
{
"heatFrames": 20
},
{
"acidFrames": 20
}
]
},
{
"and": [
"canSuitlessLavaDive",
{
"heatFrames": 50
},
{
"acidFrames": 50
}
]
}
]
}
{
"or": [
"h_heatResistant",
"canPauseAbuse",
{
"resourceCapacity": [
{
"type": "RegularEnergy",
"count": 149
}
]
}
]
}
|
|
The power bombs can be placed far from the next pillar in line. PB1 - Near the broken pillar. PB2 - On the 2nd full pillar. PB3 - On the 4th full pillar. Wait for the Puromis to avoid damage but wait too long and the acid will cover the door. Requires: "Morph"
"canCarefulJump"
{
"ammo": {
"type": "PowerBomb",
"count": 3
}
}
{
"or": [
{
"and": [
"canSuitlessLavaDive",
{
"heatFrames": 840
},
{
"acidFrames": 206
}
]
},
{
"and": [
"Gravity",
{
"heatFrames": 810
},
{
"acidFrames": 55
}
]
}
]
}
{
"or": [
"h_heatResistant",
"canPauseAbuse",
{
"resourceCapacity": [
{
"type": "RegularEnergy",
"count": 149
}
]
}
]
}
|
|
From: 2
Bottom Left Door
To: 4
Junction Above Bomb Blocks
Use ScrewAttack to remove the left wall pirate and walljump high enough to place a power bomb to destroy the bomb blocks Then walljump up again to reach the upper region. Requires: "h_canNavigateHeatRooms"
"h_canUsePowerBombs"
"canPreciseWalljump"
"canConsecutiveWalljump"
"HiJump"
"ScrewAttack"
{
"heatFrames": 330
}
{
"or": [
"h_heatResistant",
"canPauseAbuse",
{
"resourceCapacity": [
{
"type": "RegularEnergy",
"count": 149
}
]
}
]
}
Clears obstacles: A |
|
From: 2
Bottom Left Door
To: 4
Junction Above Bomb Blocks
Notable: true 
Avoid the bottom pirates and jump high enough to break the bomb blocks with a power bomb. During the explosion, climb the right wall passing through any pirates and use a movement item to reach the top. Requires: "h_canNavigateHeatRooms"
"canPreciseWalljump"
"canHitbox"
"h_canUsePowerBombs"
"canTrickyJump"
{
"or": [
"canSpringwall",
"HiJump",
"SpaceJump"
]
}
{
"heatFrames": 530
}
{
"or": [
"h_heatResistant",
"canPauseAbuse",
{
"resourceCapacity": [
{
"type": "RegularEnergy",
"count": 149
}
]
}
]
}
Clears obstacles: A |
|
From: 2
Bottom Left Door
To: 4
Junction Above Bomb Blocks
Notable: true 
Deal an exact amount of damage to a wall pirate to freeze it while breaking the bomb blocks with a power bomb without taking damage. Quickly move to the right side and walljump up to the right height to power bomb out the bomb blocks, double hitting the top wall pirate. Wait for the full power bomb effect to end and wall jump once on the right wall and hit top pirate with 1 missile and 1 super. Jump and shoot the top pirate with a charge+ice shot. Hold a charge and walljump up the left wall and freeze the top pirate when it jumps across. Use the pirate to jump to the higher area. Requires: "h_canNavigateHeatRooms"
"canTrickyUseFrozenEnemies"
"Charge"
"canPreciseWalljump"
"canWalljumpWithCharge"
"Morph"
{
"ammo": {
"type": "Missile",
"count": 1
}
}
{
"ammo": {
"type": "Super",
"count": 1
}
}
{
"ammo": {
"type": "PowerBomb",
"count": 1
}
}
{
"heatFrames": 870
}
{
"or": [
"h_heatResistant",
{
"and": [
"canInsaneJump",
"canPauseAbuse"
]
},
{
"resourceCapacity": [
{
"type": "RegularEnergy",
"count": 149
}
]
}
]
}
Clears obstacles: A |
|
From: 2
Bottom Left Door
To: 4
Junction Above Bomb Blocks
Notable: true 
Deal an exact amount of damage to a wall pirate to freeze it while breaking the bomb blocks with a power bomb without taking damage. Wait briefly on the left side of the center platform, then jump and shoot 4 missiles at the top pirate. Walljump up the left wall such that the lower pirates are on screen long enough to jump accross to the left. Place a Bomb on the left wall to hit the top pirate when it jumps over, followed by a power bomb. Unmorph precisely below the middle pirate so both top pirates will jump back to the right, and begin charging Ice. Walljump up the left wall with charge held and freeze the top pirate when it jumps over and use it to reach the upper region. Requires: "h_canNavigateHeatRooms"
"canTrickyUseFrozenEnemies"
"Charge"
"canPreciseWalljump"
"canResetFallSpeed"
"canWalljumpWithCharge"
"h_canUseMorphBombs"
{
"ammo": {
"type": "Missile",
"count": 4
}
}
{
"ammo": {
"type": "PowerBomb",
"count": 1
}
}
{
"heatFrames": 900
}
{
"or": [
"h_heatResistant",
{
"and": [
"canInsaneJump",
"canPauseAbuse"
]
},
{
"resourceCapacity": [
{
"type": "RegularEnergy",
"count": 149
}
]
}
]
}
Clears obstacles: A |
|
From: 2
Bottom Left Door
To: 4
Junction Above Bomb Blocks
Notable: true 
Jump with some run speed to place the power bomb high enough to break the bomb blocks. During the explosion, jump through the left wall pirate and precisely walljump to reach the upper area. Requires: "h_canNavigateHeatRooms"
"HiJump"
"SpeedBooster"
"canPreciseWalljump"
"canCarefulJump"
"h_canUsePowerBombs"
"canHitbox"
{
"heatFrames": 420
}
{
"or": [
"h_heatResistant",
"canPauseAbuse",
{
"resourceCapacity": [
{
"type": "RegularEnergy",
"count": 149
}
]
}
]
}
Clears obstacles: A |
|
From: 2
Bottom Left Door
To: 4
Junction Above Bomb Blocks
Notable: true 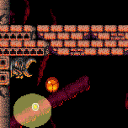
Ignore the Yellow Pirates by walljumping up the left side to start a diagonal bomb jump from the wall, including a power bomb to clear the bomb blocks. Two quick walljumps upon entering the room can position Samus to get the left pirate to jump to the right and jump over the right pirate's lazer attack. Jump up the left wall and begin bomb jumping starting with a power bomb. Requires: "h_canNavigateHeatRooms"
"canFastWalljumpClimb"
"canWallJumpBombBoost"
"h_canDiagonalBombJump"
"h_canUsePowerBombs"
{
"heatFrames": 930
}
{
"or": [
"h_heatResistant",
{
"and": [
"canInsaneJump",
"canPauseAbuse"
]
},
{
"resourceCapacity": [
{
"type": "RegularEnergy",
"count": 149
}
]
}
]
}
Clears obstacles: A |
|
From: 2
Bottom Left Door
To: 6
Bottom Platform Junction With Pirates Killed
Jump morph from the center platform to place the first Power Bomb Place two more on the platform itself to kill the bottom pirates Use a fourth to break the bomb blocks while also killing the last pirate. Requires: "h_canNavigateHeatRooms"
{
"or": [
"canSpringBallJumpMidAir",
"SpaceJump",
"canWalljump",
"h_canIBJ",
{
"and": [
"SpeedBooster",
"HiJump"
]
}
]
}
{
"enemyKill": {
"enemies": [
[
"Yellow Space Pirate (wall)",
"Yellow Space Pirate (wall)",
"Yellow Space Pirate (wall)"
]
],
"explicitWeapons": [
"PowerBombPeriphery"
]
}
}
{
"heatFrames": 790
}
{
"or": [
"h_heatResistant",
"canPauseAbuse",
{
"resourceCapacity": [
{
"type": "RegularEnergy",
"count": 149
}
]
}
]
}
Clears obstacles: A |