canMoonwalk (Very Hard)
This is an option that can be turned on in the special setting mode after selecting a save file. It is required for some tech.
Strats ()
|
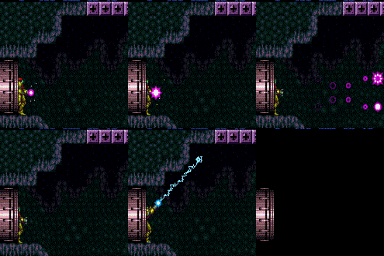
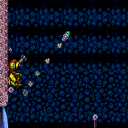
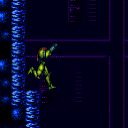
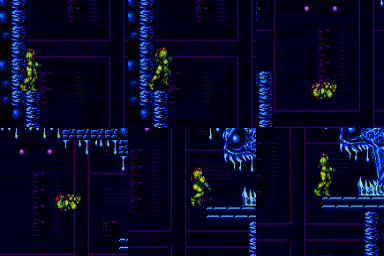
Notable: true Hold angle-up, jump, bonk the ceiling, and use Grapple just before landing. Moonwalk into the transition on the same frame that the Grapple Beam reaches the Grapple block. Continue holding Grapple through the door transition to initiate a teleport in the next room. Requires: "canMoonwalk" "canInsaneJump" Exit condition: {
"leaveWithGrappleTeleport": {
"blockPositions": [
[
7,
2
]
]
}
}
|
|
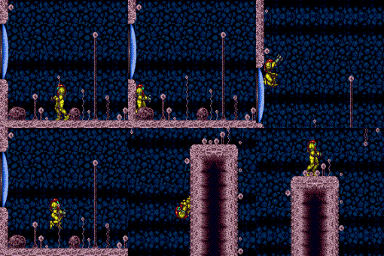
Stand on the farthest pixel into the door possible using moonwalk, X-Ray, or morphball turn around. Run towards the water and jump on the last possible frame. Perform the CWJ off of the item pedestal to cross to the other side. Requires: "canCWJ"
"canDisableEquipment"
{
"doorUnlockedAtNode": 1
}
{
"or": [
"canMoonwalk",
"Morph",
"canXRayTurnaround"
]
}
{
"obstaclesNotCleared": [
"A"
]
}
|
|
It's not even necessary to jump through the door, the in-room doorsill gives enough running room to make it up. Requires: {
"doorUnlockedAtNode": 2
}
"canPreciseWalljump"
"canCarefulJump"
{
  "or": [
    "canTrickyJump",
    "canMoonwalk",
    "canXRayTurnaround",
    "Morph"
  ]
}
|
|
In direct g-mode, the door will not close, and the in-room doorsill gives enough running room to make it up to the invisible ledge. Entrance condition: {
"comeInWithGMode": {
"mode": "direct",
"morphed": false
}
}
Requires: "canPreciseWalljump"
"canCarefulJump"
{
"or": [
"canTrickyJump",
"canMoonwalk",
"canXRayTurnaround",
"Morph"
]
}
|
|
Run then do a very small spin jump to clip into the left side of the first gate. While inside the gate, back up to get the maximum run distance using either Moonwalk or X-Ray Turnaround and repeat for the next gate. It is also possible to clip into the gates by aiming down while in the spin jump. A down-back is also possible for clipping into the first gate, but it is generally harder. Requires: {
"obstaclesNotCleared": [
"A"
]
}
"canCrouchGateClip"
{
"or": [
"canXRayTurnaround",
"canMoonwalk"
]
}
Clears obstacles: A |
|
The only way the Wavers will get to the door is if the right crumble blocks are all broken. This assumes that Samus comes from the left with Speed, a mockball, or a crouch gate clip. After the crumbles are broken, shoot the ceiling block and wait by the door for the Waver to come. Note that if Samus takes more than 35 seconds after entering the room, before shooting the ceiling, the Waver will not come down. Requires: {
"obstaclesNotCleared": [
"A"
]
}
{
"or": [
"SpeedBooster",
"canMockball",
{
"and": [
"canCrouchGateClip",
{
"or": [
"canXRayTurnaround",
"canMoonwalk"
]
}
]
}
]
}
Exit condition: {
"leaveWithGModeSetup": {}
}
Unlocks doors: {"types":["ammo"],"requires":[]}
|
|
From: 1
Left Door
To: 1
Left Door
Notable: true Jump straight up and shoot with the correct timing. This strat involves shooting a Super diagonally from the correct height while flush against the left wall. Its acceleration will cause it to clip into the blue gate off-screen. Requires: {
"obstaclesCleared": [
"A"
]
}
{
"or": [
"canTrickyJump",
"h_canBackIntoCorner"
]
}
"HiJump"
"canOffScreenSuperShot"
Clears obstacles: B |
|
From: 1
Left Door
To: 1
Left Door
Notable: true Use a stationary spinjump, or spinjump against the wall and turn around without moving; and shoot with the same correct timing. This strat involves shooting a Super diagonally from the correct height while flush against the left wall. Its acceleration will cause it to clip into the blue gate off-screen. Requires: {
"obstaclesCleared": [
"A"
]
}
{
"or": [
"canTrickyJump",
"h_canBackIntoCorner"
]
}
"canStationarySpinJump"
"SpaceJump"
"canOffScreenSuperShot"
Clears obstacles: B |
|
From: 4
Frozen Hopper Junction
To: 4
Frozen Hopper Junction
Notable: true This strat involves shooting a Super diagonally from the correct height while flush against the left wall. Its acceleration will cause it to clip into the blue gate off-screen. Jump straight up and shoot with the correct timing. Taking damage can be used to align against the wall. Requires: {
"obstaclesNotCleared": [
"A"
]
}
{
"or": [
"h_canBackIntoCorner",
{
"enemyDamage": {
"enemy": "Sm. Sidehopper",
"type": "contact",
"hits": 1
}
},
"canTrickyJump"
]
}
"HiJump"
"canOffScreenSuperShot"
Clears obstacles: B |
|
From: 4
Frozen Hopper Junction
To: 4
Frozen Hopper Junction
Notable: true Freeze a small hopper to the side and kill the remaining Side Hoppers. Stand against the left wall (damage knockback will align Samus with the wall) and shoot up to freeze the hopper. Jump up to land on it, aligned with the wall. Alternatively, Jump and shoot down to freeze the hopper as a way to avoid damage. Fire a Super just above the door shell to hit the Gate. This strat involves shooting a Super diagonally from the correct height while flush against the left wall. Its acceleration will cause it to clip into the blue gate off-screen. Requires: {
"obstaclesNotCleared": [
"A"
]
}
"canTrickyUseFrozenEnemies"
"h_canBackIntoCorner"
"canOffScreenSuperShot"
{
"enemyDamage": {
"enemy": "Sm. Sidehopper",
"type": "contact",
"hits": 1
}
}
Clears obstacles: B |
|
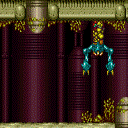
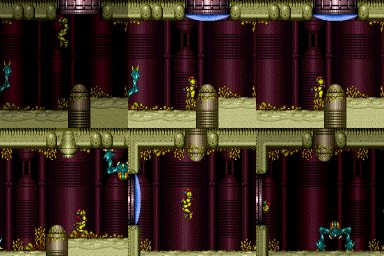
Moonwalk into the transition on the same frame that the Grapple Beam reaches the Grapple block. Continue holding Grapple through the door transition to initiate a teleport in the next room. Requires: "canMoonwalk" Exit condition: {
"leaveWithGrappleTeleport": {
"blockPositions": [
[
5,
3
]
]
}
}
|
|
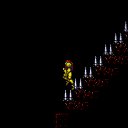
Run and jump from the safe stair to just reach the door ledge. To avoid walljumping, use a full speed jump or jump from on top of the spikes (stairs or floor). Requires: "HiJump"
"SpeedBooster"
{
"or": [
{
"and": [
"canWalljump",
{
"or": [
"canTrickyJump",
{
"spikeHits": 1
}
]
}
]
},
{
"and": [
"canTrickyDashJump",
"h_canBackIntoCorner",
"canInsaneJump"
]
},
{
"and": [
"canTrickyDashJump",
{
"spikeHits": 1
}
]
}
]
}
|
|
From: 4
Small Ledge Below Left Door
To: 1
Left Door
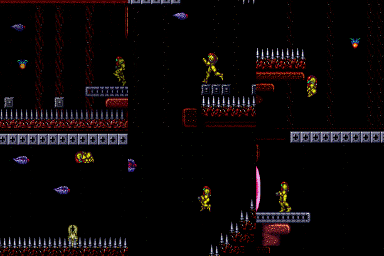
Notable: true Jump to the door leading to X-Ray either by jumping from spikes or with a very precise jump. Cross the room by Jumping atop the spikes. Taking enemy damage can be used to reduce some spike damage. The final jump can either be made by jumping from the bottommost spike stair or from the safe stair. Setup run speed atop the spike stair by holding forward to be pushed backward. The safe stair jump is much harder, but can be made without every pixel of runway. Requires: "HiJump"
"canTrickyJump"
{
"or": [
{
"and": [
"canInsaneWalljump",
"canInsaneJump",
"h_canBackIntoCorner"
]
},
{
"and": [
{
"spikeHits": 1
},
"canHorizontalDamageBoost",
"canPreciseWalljump",
"canIframeSpikeJump"
]
}
]
}
|
|
From: 4
Junction (Right Pit)
To: 3
Right Door
Notable: true Back up against the wall of the single-tile ledge. Run forward, perform a single arm pump, and jump on the last possible frame. Aim down just before reaching the platform. The arm pump can be performed by pressing shot, or by pressing an angle button (but not releasing it until after the jump). Requires: "h_canBackIntoCorner" "canInsaneJump" "canDownGrab" |
|
From: 2
Right Door
To: 3
Top Door
Requires: "h_canBackIntoCorner"
{
"heatFrames": 100
}
Exit condition: {
"leaveWithPlatformBelow": {
"height": 9,
"leftPosition": -2,
"rightPosition": 6
}
}
Unlocks doors: {"types":["missiles"],"requires":[{"heatFrames":50}]}
{"types":["super"],"requires":[]}
{"types":["powerbomb"],"requires":[{"heatFrames":110}]}
|
|
Notable: true Enter through the far left side of the door. Wait for the top hopper to move right to start running. Run under the right Hopper and jump over the left Hopper to avoid all damage. Jump when Samus reaches the leftmost lump in the ground to avoid the left hopper. It helps to keep the camera scrolled to the right. Entrance condition: {
"comeInNormally": {},
"comesThroughToilet": "no"
}
Requires: "canTrickyJump"
{
"or": [
"canPrepareForNextRoom",
{
"and": [
"canCameraManip",
"canMoonwalk",
"canInsaneJump"
]
}
]
}
Unlocks doors: {"types":["super"],"requires":[]}
{"types":["missiles","powerbomb"],"requires":[{"enemyDamage":{"enemy":"Blue Sidehopper","type":"contact","hits":1}}]}
|
|
Notable: true Try to scroll the camera to the right to keep the left Hopper off-camera for longer. Wait for the top hopper to move right to start running. Run under the right Hopper and jump over the left Hopper to avoid all damage. Jump when Samus reaches the leftmost lump in the ground to avoid the left hopper. Entrance condition: {
"comeInNormally": {},
"comesThroughToilet": "any"
}
Requires: "canCameraManip" "canMoonwalk" "canInsaneJump" Unlocks doors: {"types":["super"],"requires":[]}
{"types":["missiles","powerbomb"],"requires":[{"enemyDamage":{"enemy":"Blue Sidehopper","type":"contact","hits":1}}]}
|
