canCrumbleJump (Very Hard)
The ability to jump off of a crumble block while it crumbles. A straight jump may employ the small amount of jump buffering the game offers, but a spinjump can only use the time before the crumble block breaks.
Strats ()
|
From: 3
Item
To: 4
Top Left Junction
Notable: true 
Gain a shinecharge by running right-to-left, either using the short runway (with unbroken Super block) or an extended runway by taking a spike hit. Then spin jump, hit the ceiling, aim down, break the Super block, and turn around to quick drop through the crumble block. During the item message box, buffer the inputs to turn around to the right and jump. Once under the crumble block (the left part of it), press up while still holding jump, to immediately activate the spark and make it up in time. Requires: {
"or": [
{
"canShineCharge": {
"usedTiles": 16,
"openEnd": 0
}
},
{
"and": [
{
"canShineCharge": {
"usedTiles": 23,
"openEnd": 0
}
},
{
"spikeHits": 1
},
"canIframeSpikeJump"
]
}
]
}
"canShinechargeMovementComplex"
"canQuickCrumbleEscape"
{
"or": [
{
"shinespark": {
"frames": 19,
"excessFrames": 7
}
},
{
"and": [
{
"shinespark": {
"frames": 19,
"excessFrames": 15
}
},
"canCrumbleJump"
]
}
]
}
{
"obstaclesCleared": [
"A",
"B"
]
}
|
|
From: 3
Item
To: 4
Top Left Junction
Notable: true 
Perform a quick-drop through the Crumble block, and grab the item. During the item message box, buffer the inputs to turn around to the right and jump. Break spin just before you would hit the respawning crumble block, in order to clip up through it. Then perform a crumble jump to make it out. Requires: "canQuickCrumbleEscape"
"HiJump"
"canCrumbleJump"
{
"obstaclesCleared": [
"A",
"B"
]
}
|
|
Notable: true 
Jump into the spike pit, hitting the Ripper to avoid spike damage. Climb the left wall while avoiding falling onto the spikes or through the crumble blocks. The ledge is the same size of that in writg. Requires: "h_heatProof"
"canInsaneWalljump"
{
"or": [
"canIframeSpikeJump",
"canCrumbleJump"
]
}
{
"enemyDamage": {
"enemy": "Ripper 2 (green)",
"type": "contact",
"hits": 1
}
}
|
|
From: 1
Top Right Door
To: 3
Hidden Item
Shoot the shot block, then crumble jump on the middle platform. Requires: "canCrumbleJump"
{
"heatFrames": 150
}
|
|
From: 1
Top Right Door
To: 3
Hidden Item
Shoot the shot block, then crumble spin jump on the middle platform. Requires: "canCrumbleJump"
"canTrickyJump"
{
"heatFrames": 150
}
Clears obstacles: A |
|
From: 2
Bottom Right Door
To: 1
Top Right Door
Do 9 successive crumble jumps up the platforms. Requires: "canCrumbleJump"
"canTrickyJump"
{
"heatFrames": 800
}
|
|
From: 2
Bottom Right Door
To: 1
Top Right Door
Walljump up the right then do one crumble jump on the top middle platform. Requires: "canCrumbleJump"
"canConsecutiveWalljump"
{
"heatFrames": 600
}
|
|
From: 2
Bottom Right Door
To: 2
Bottom Right Door
To minimize heat frames, briefly wait for the Sova to be on the top right of the platform before knocking it off to shorten its path to the door. Requires: "h_canFrozenEnemyRunway"
{
"heatFrames": 360
}
{
"or": [
"canCrumbleJump",
"HiJump",
"canWalljump"
]
}
Exit condition: {
"leaveWithRunway": {
"length": 2,
"openEnd": 1
}
}
|
|
Requires: "h_heatProof"
{
"or": [
"canCrumbleJump",
"h_canUseSpringBall"
]
}
{
"resetRoom": {
"nodes": [
1,
2
],
"mustStayPut": false
}
}
{
"refill": [
"Energy",
"Missile",
"Super"
]
}
|
|
From: 3
Hidden Item
To: 1
Top Right Door
Requires: "canCrumbleJump"
{
"heatFrames": 200
}
|
|
From: 6
Top Left Door Spawn At Junction (Above Crumble Blocks)
To: 1
Top Left Door
Requires: "canCrumbleJump" |
|
Notable: true 
Jump on the crumble blocks before they break to reach the item, at the risk on falling through. Requires: "h_canNavigateHeatRooms"
"canCrumbleJump"
{
"heatFrames": 80
}
|
|
From: 3
Top Left Item
To: 1
Left Door
Notable: true
It takes a short hop to avoid hitting the ceiling to do this with only one crumble jump. Requires: "h_canNavigateHeatRooms"
"canCrumbleJump"
{
"heatFrames": 100
}
|
|
From: 2
Top Right Door
To: 4
Junction Below Bomb Blocks
Notable: true 
Carry Temporary Blue through the top door of Mickey Mouse to break the left side of the bomb blocks. There is a small frame window where Samus can soft unmorph on the crumble blocks and jump again while retaining temporary blue. Entrance condition: {
"comeInWithTemporaryBlue": {}
}
Requires: "h_canNavigateHeatRooms"
{
"obstaclesNotCleared": [
"A"
]
}
"canPrepareForNextRoom"
"canChainTemporaryBlue"
"canInsaneJump"
"canCrumbleJump"
{
"heatFrames": 300
}
Clears obstacles: B |
|
From: 4
Junction Below Bomb Blocks
To: 2
Top Right Door
Requires one jump off a crumble block Requires: {
"obstaclesCleared": [
"A"
]
}
"HiJump"
"canCrumbleJump"
{
"heatFrames": 180
}
|
|
From: 4
Junction Below Bomb Blocks
To: 2
Top Right Door
Jump and mid-air morph off a crumble block to begin the IBJ. Use double bomb jumps to make it up quickly before the shot block respawns. Requires: {
"obstaclesCleared": [
"A"
]
}
"canCrumbleJump"
"h_canJumpIntoIBJ"
"canDoubleBombJump"
{
"heatFrames": 360
}
|
|
From: 4
Junction Below Bomb Blocks
To: 2
Top Right Door
Notable: true 
Spinjump off a crumble block with just a tiny amount of run speed. That gives just enough height to be able to walljump out. Requires: {
"obstaclesCleared": [
"A"
]
}
"canCrumbleJump"
"canTrickyDashJump"
"canPreciseWalljump"
"canInsaneJump"
{
"heatFrames": 180
}
|
|
From: 4
Junction Below Bomb Blocks
To: 2
Top Right Door
This is possible by jumping on the crumble blocks into a mid-air spring ball jump, or by avoiding them. The crumbles can be avoided by starting with either an air ball, a 3 tile high mid-air morph, or a low spring wall. These are generally safer, as bouncing on the crumble blocks with Spring Ball is trivial. Requires: {
"obstaclesCleared": [
"A"
]
}
"canTrickySpringBallJump"
{
"heatFrames": 250
}
{
"or": [
{
"and": [
"can4HighMidAirMorph",
"canSpringFling"
]
},
"canLateralMidAirMorph",
"canCrumbleJump",
{
"and": [
"h_canTrickySpringwall",
"canPreciseWalljump"
]
}
]
}
|
|
From: 9
Junction Below Crumble Blocks, Set Up to Clip
To: 2
Top Right Door
Notable: true 
Ice Clip through the crumble blocks using a Multiviola from the bottom of the room and then Crumble Jump to clip through the bomb blocks. The ice clip can be setup by standing in a corner and firing forward when the Multiviola hits Samus, if it is moving downwards towards Samus. The Crumble Jump is done by aiming down (not immediately) after jumping, then changing Samus' hitbox once above the crumble blocks, and jumping again. Requires: "h_heatProof"
"canPreciseCeilingClip"
"canTrickyUseFrozenEnemies"
"canPartialFloorClip"
"canTrickyJump"
"canCrumbleJump"
{
"enemyDamage": {
"enemy": "Multiviola",
"type": "contact",
"hits": 1
}
}
{
"or": [
"h_canCrouchJumpDownGrab",
"canWalljump",
"canSpringBallJumpMidAir",
"HiJump",
"SpaceJump",
"h_canJumpIntoIBJ"
]
}
|
|
From: 7
Below Morph Tunnel Junction
To: 5
Morph Tunnel Junction
Notable: true 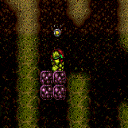
Jump off of the crumble blocks consecutively while placing a bomb on the water line and convert that into an IBJ to climb the West Sand Hole maze. Requires: "canSuitlessMaridia" "h_canJumpIntoIBJ" "canBombJumpWaterEscape" "canCrumbleJump" |