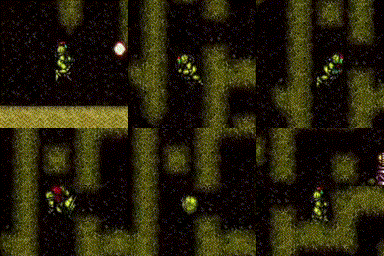
can3HighWallMidAirMorph (Expert)
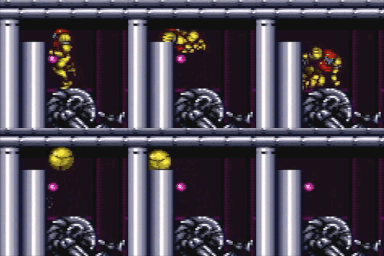
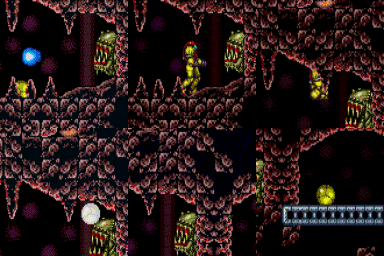
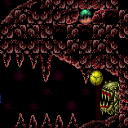
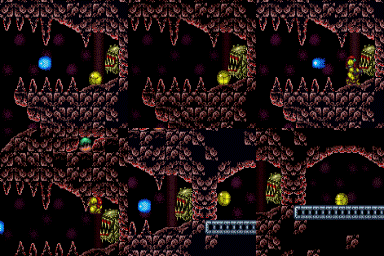
Getting up into a morph passage from a 3-tile-high space by mid-air morphing off of a wall jump. This is easier from an opposite wall. After the wall jump, continue holding jump in order to only need to press down a single time to morph.
Dependencies: canMidAirMorph, canWallJumpInstantMorph, canPreciseWalljump, canDisableEquipment
Strats ()
|
Overload PLMs using the scroll block at the top of the stairs immediately in front of the bomb blocks. Reach the bottom and pass through the bomb blocks while still in G-mode. Entrance condition: {
"comeInWithGMode": {
"mode": "any",
"morphed": true
}
}
Requires: {
"or": [
"h_canArtificialMorphSpringBall",
"h_canArtificialMorphBombs",
{
"and": [
"Morph",
"h_canFourTileJumpMorph"
]
}
]
}
|
|
Overload PLMs using the scroll block at the top of the stairs immediately in front of the bomb blocks. Fall down to the lower bomb blocks while still in G-mode Morph. Entrance condition: {
"comeInWithGMode": {
"mode": "any",
"morphed": true
}
}
Requires: {
"or": [
"h_canArtificialMorphSpringBall",
"h_canArtificialMorphBombs",
{
"and": [
"Morph",
"h_canFourTileJumpMorph"
]
}
]
}
|
|
Overload PLMs using the scroll block at the top of the stairs next to the bomb blocks. Entrance condition: {
"comeInWithGMode": {
"mode": "any",
"morphed": true
}
}
Requires: {
"or": [
"h_canArtificialMorphSpringBall",
"h_canArtificialMorphBombs",
{
"and": [
"Morph",
"h_canFourTileJumpMorph"
]
}
]
}
|
|
Overload PLMs using the scroll block at the top of the stairs next to the bomb blocks. Fall down and pass through bomb wall at the bottom while still in G-mode. Entrance condition: {
"comeInWithGMode": {
"mode": "any",
"morphed": true
}
}
Requires: {
"or": [
"h_canArtificialMorphSpringBall",
"h_canArtificialMorphBombs",
{
"and": [
"Morph",
"h_canFourTileJumpMorph"
]
}
]
}
|
|
Entrance condition: {
"comeInWithGMode": {
"mode": "any",
"morphed": true
}
}
Requires: {
"or": [
"h_canArtificialMorphSpringBall",
"h_canArtificialMorphBombs",
{
"and": [
"Morph",
"h_canFourTileJumpMorph"
]
}
]
}
|
|
Requires: "h_canDestroyBombWalls" "h_canThreeTileJumpMorph" |
|
Notable: true A particularly precise springwall. Aim the walljump at the bottom of the second sloped wall fixture, where it looks like you cant jump off of. Optimize pause timing, use an instant morph, and get a max height springball jump. A delayed wall jump helps. Requires: "HiJump" "h_canTrickySpringwall" "canPreciseWalljump" "can3HighWallMidAirMorph" |
|
From: 5
Golden Torizo (locked)
To: 4
Hidden Right Item
Walljump up to reach the left ledge below the bomb blocks then perform an instant morph to place a bomb. Walljump up a second time and again instant morph off that left ledge to enter the 1 tile hole created by the bomb. Requires: "h_canNavigateHeatRooms"
"h_canUseMorphBombs"
"can3HighWallMidAirMorph"
"canConsecutiveWalljump"
{
"heatFrames": 1100
}
|
|
From: 2
Bottom Left Door
To: 6
Junction Behind Fune
Notable: true A well-done mid-air morph can get up and over the Fune using the boost from a projectile hit. It's best to hit the flame as soon as it spawns. It's a 2.5 tile high mid air morph. It can be performed similar to how a 2 or 3 tile high morph is performed. Requires: "h_canFourTileJumpMorph"
"canNeutralDamageBoost"
"canTrickyJump"
{
"enemyDamage": {
"enemy": "Fune",
"type": "fireball",
"hits": 3
}
}
|
|
From: 2
Bottom Left Door
To: 6
Junction Behind Fune
Notable: true A paricularly precise mid-air morph can get up and over the Fune without damage. Stand a half tile away from the Fune when jump morphing for a higher ceiling. It's a 2.5 tile high mid air morph. It can be performed similar to how a 2 or 3 tile high morph is performed. Requires: "h_canFourTileJumpMorph" "canTrickyJump" |
|
From: 1
Top Sand Entrance
To: 4
Right Item
Notable: true Walljump up and instant morph with exact timing and positioning so as to enter the Power Bomb location through the maze's exit. Requires: "canSuitlessMaridia" "canConsecutiveWalljump" "canPlayInSand" "HiJump" "canInsaneWalljump" "can3HighWallMidAirMorph" |
|
Requires: "h_canThreeTileJumpMorph" |
|
From: 5
Morph Tunnel Junction
To: 6
Junction Between Items
Requires: "h_canFourTileJumpMorph" |
|
Requires: "h_canThreeTileJumpMorph" |
|
From: 2
Right Door
To: 3
Junction Left of Morph Tunnel
Requires: "h_canThreeTileJumpMorph"
{
"obstaclesCleared": [
"A"
]
}
|
