canWallIceClip (Extreme)
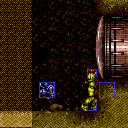
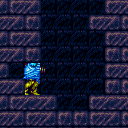
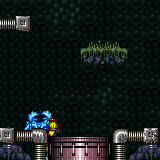
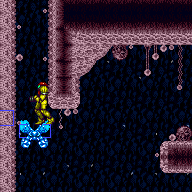
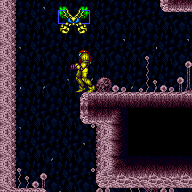
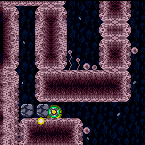
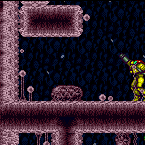
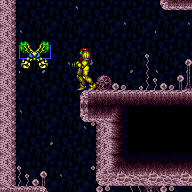
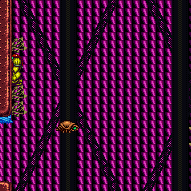
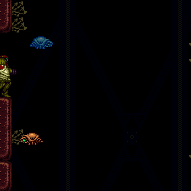
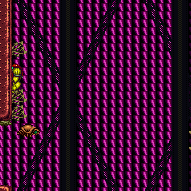
Collision will prioritize frozen enemies before walls which allows Samus to clip 1 pixel into a wall if an enemy is there. This can be used to get Samus into position to X-Ray Climb. Additionally, enemies that fly through walls may be repeatedly frozen to advance 1 pixel at a time to eventually push Samus through a wall or touch a door transition.
Dependencies: canTrivialUseFrozenEnemies, canUseFrozenEnemies, canTrickyUseFrozenEnemies, canUseEnemies
Strats ()
|
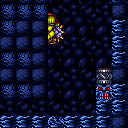
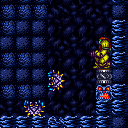
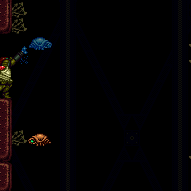
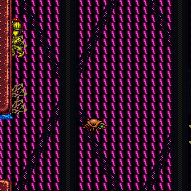
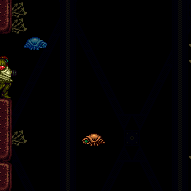
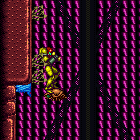
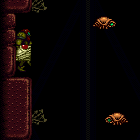
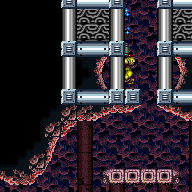
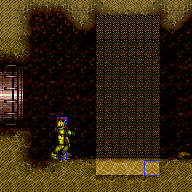
Shoot out only the lower 2 shot blocks on the side Samus will be climbing. Grab a Beetom and use Morph or a tunnel crawl to pixel align the Beetom 1 pixel deep into the wall (2 or 3 pixels can also work). If morphed, use X-Ray stand up. Shoot to the right (horizontally or diagonally down) to freeze the Beetom. Continue refreezing during the next steps. Grab the other Beetom and stand close, but not too close, to the first. Do a small jump, but not too low, and do an aim-up shot the frame before Samus lands. This second Beetom needs to be exactly 1 pixel below the first. Refreeze the first before testing the positioning. Jump onto the second Beetom, and run into the wall to clip into it (walking can also work if the Beetom is not too deep). X-Ray climb up 2.5 screens and then fire upwards to clear shot blocks. Continue climbing and finish by walking away from the crumble blocks. For freezing the second Beetom, only certain jump heights will work. Otherwise the Beetom will skip over the correct position and may be frozen too low (2 pixels below the other Beetom). From a standing position, holding jump for 5, 8, 9, or 12 frames will work; with a crouch jump, holding jump for 5, 6, or 10 frames will work. It is recommended to use a crouch jump, aiming for a 5 or 6 frame jump. Requires: {
"noBlueSuit": {}
}
{
"notable": "Beetom X-Ray Climb"
}
{
"enemyDamage": {
"enemy": "Beetom",
"type": "contact",
"hits": 6
}
}
{
"or": [
"Morph",
{
"and": [
"canTunnelCrawl",
{
"enemyDamage": {
"enemy": "Beetom",
"type": "contact",
"hits": 3
}
}
]
}
]
}
"canWallIceClip"
"canLongXRayClimb"
"canBeVeryPatient"Resets obstacles: A Dev note: 2 hits are assumed to position the two Beetoms (plus 3 more if tunnel crawling), then 1 hit for each failed clip attempt, with 4 failed attempts. With Ice, Samus would be able to slowly farm the Green Pirates. One could descend through 8 visiting one of 5 or 6 and X-Ray climb back up to the top door using the non visited node. |
From: 3
Bottom Door
To: 3
Bottom Door
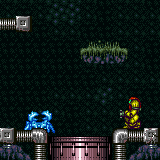
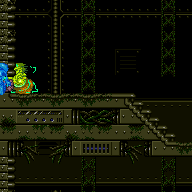
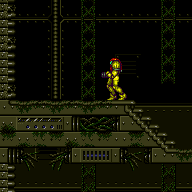
Run from the ledge into the open doorway while hitting the frozen crab and the door transition simultaneously, just as the crab thaws and touches Samus during the transition. Note that this requires a precise freeze (2 pixel window), a small pixel starting window (approximately 2 pixel window), precise thaw timing, and a 50% success rate due to collision oscillation. The positioning of the crab is where its hitbox is one or two pixels away from the edge of the door frame, so that Samus can clip into the wall and stand as she touches the transition. Requires: "canWallIceClip"
"canDownwardGModeSetup"
{
"ammo": {
"type": "Super",
"count": 1
}
}Exit condition: {
"leaveWithGModeSetup": {}
} |
From: 4
Right Item
To: 2
Top Left Door
Keep the two Geemers on screen while moving to the right side of the room. Freeze the second Geemer as it exits the Morph Tunnel, with the Crumble block. Use a Super Missile to knock the first Geemer down and freeze it at the pixel perfect height. Become stuck in the wall after using Grapple to kill the frozen Geemer as it walks through Samus, firing to the left. This re-enables XRay climbing. Requires: {
"notable": "Geemer Ice Stuck XRay Climb"
}
"h_ZebesIsAwake"
"canWallIceClip"
"canLongXRayClimb"
"Grapple"
{
"ammo": {
"type": "Super",
"count": 1
}
}
{
"enemyDamage": {
"enemy": "Geemer (blue)",
"type": "contact",
"hits": 1
}
}Dev note: FIXME: The Reo can be used to avoid spending a Super, but it's chaotic. |
From: 4
Bottom Right Door
To: 2
Top Right Door
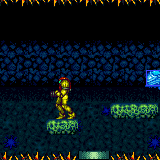
Freeze a Zebbo inside the wall above the right side of the spikeway, close to the ceiling thorns. Face right, equip X-Ray, move at least a few pixels away from the wall, and jump straight up into the ceiling thorns. If successful, Samus will be knocked back into the wall and end up standing inside it. Use X-Ray immediately to prevent additional thorn hits. If Samus is high enough to be touching the thorns, then i-frames will continue to be refreshed once per second. While X-Ray climbing, be careful to only release X-Ray soon after i-frames are refreshed. Crouch before pressing X-Ray again. Requires: {
"notable": "Wall Ice Clip X-Ray Climb"
}
"canWallIceClip"
{
"thornHits": 1
}
"canXRayClimb"
"canUseIFrames"
"canNeutralDamageBoost"Dev note: Standing at least 3 pixels away from the wall ensures that knockback pushes Samus fully up against the ceiling; there is also no problem with standing further right, even hanging off the ledge: as long as Samus is still in range to take damage from the thorns above, they will be able to knock Samus into the wall. It is possible to freeze the Zeebo lower, but if Samus is too low, it will be necessary to take 3 thorn hits. It is also possible to get stuck inside the wall by taking knockback from a floor thorn, or by using a frozen Beetom as a platform. However those methods are not any easier, more damage will be taken, and the climb will be longer. If Samus begins climbing at a level below the ceiling thorns, then as Samus approaches the thorns, X-Ray will need to only be released while turning to the right, in order to prevent the thorn hits from knocking Samus out of the wall. |
From: 13
Central Junction
To: 4
Left Side - Door Behind Power Bomb Blocks
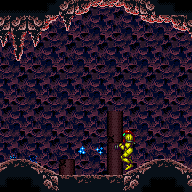
Freeze a Zeb inside the left wall of the room, below the Power Bomb block wall. Run into the wall to clip into it, then X-Ray climb. Walking into the wall is also possible but is more precise and may require several tries. Requires: {
"notable": "Wall Ice Clip X-Ray Climb"
}
"canWallIceClip"
{
"or": [
"canDash",
"canInsaneJump"
]
}
"canXRayClimb" |
From: 13
Central Junction
To: 4
Left Side - Door Behind Power Bomb Blocks
Freeze a Zeb inside of the crumble blocks below the entrance to the Power Bomb room and use it to get stuck inside the crumble blocks, breaking them. Repeatedly freeze a left facing Zeb from the enemy spawner lower in the room. Freeze it close to the right side of the crumble block so that Samus will attach to the enemy when rolling into it. Finally, jump with Bombs or SpringBall to break the crumble block. Requires: {
"notable": "Wall Ice Clip the Mission Impossible Crumble Blocks"
}
"canWallIceClip"
"Wave"
{
"or": [
"h_useSpringBall",
{
"and": [
"canMidAirMorph",
"h_useMorphBombs"
]
}
]
}Clears obstacles: C |
From: 13
Central Junction
To: 5
Left Side - Door Blocked by Crumble Blocks
Freeze a Zeb inside the left wall of the room, and use it to clip into the wall and X-Ray climb. Note that jumping directly against the wall to clip into it will put Samus into a forced crouch, unable to use X-Ray. Samus may either 1) perform a Crystal Flash to stand up, 2) use neutral knockback from a Reo to put Samus standing inside the wall, or 3) use the frozen Reo as a platform to walk or run and clip into the wall. To manipulate the Reo into a suitable position, lure it to the left and crouch at the edge of the platform; jump as needed to bring it back on camera when it goes off; it should perform 4 big swoops down to the left, 2 small swoops (hitting the overhang above), then 5 more big swoops, after which it will enter a slow hover moving directly towards Samus. Freeze the Reo when its left side is approximately flush with the ledge, or up to about a tile to the right. After X-Ray climbing a little over half a screen, it is possible to aim up and shoot the door (if it is blue) and listen for if it opens, to test if you are high enough to safely jump up. Alternatively, the sound of the crumble blocks breaking will indicate when Samus' feet are level with the bottom of the door. Requires: {
"notable": "Wall Ice Clip X-Ray Climb"
}
"canWallIceClip"
{
"or": [
{
"and": [
"canDash",
"h_CrystalFlash"
]
},
{
"and": [
"canNeutralDamageBoost",
{
"enemyDamage": {
"enemy": "Reo",
"type": "contact",
"hits": 1
}
}
]
},
{
"and": [
{
"or": [
"canWallJump",
"SpaceJump",
"canInsaneJump"
]
},
"canTrickyDodgeEnemies",
"canTrickyUseFrozenEnemies"
]
}
]
}
"canXRayClimb"Dev note: The Zeb moves 2 pixels per frame, and there are 3 positions where it can be frozen inside the wall using Ice beam alone, namely 2 pixels, 4 pixels, or 6 pixels deep inside the wall. For the method that uses the frozen Reo as a platform, only the 2-pixel-deep position will work; by moonwalking back inside the 2-tile space, it will work 100% reliably as long as the Zeb is frozen in that exact spot. For the method that jumps directly into the wall (with a Crystal Flash), either 2 or 4 pixels can work, or 6 with SpeedBooster; it will work more reliably the less deeply the Zeb is frozen inside the wall. Likewise, with the Reo knockback method either 2 or 4 pixels can work, though it is more reliable in the 2-pixel position; it helps to take the knockback a few pixels away from the wall, as it takes a few frames for the horizontal speed of the knockback to reach its maximum. The trick can work with Samus facing either toward or away from the wall when taking knockback; facing away makes it easier to quickly kill the Reo afterward to avoid taking a second hit. |
From: 1
Top Left Door
To: 2
Middle Left Door (Behind Power Bomb Blocks)
Get grabbed by the Beetom and carry it to the 4-tile high gap one screen above the bottom-left door. Position Samus one pixel to the right of being against the wall. Jump and freeze the Beetom mid-air in as high a position as possible, such that Samus can get on top of it, morph, and barely have enough space to unmorph. Use X-Ray to stand up, turn around just before the Beetom thaws, then freeze it as high as possible. A Flatley jump may help with freezing the Beetom in a high enough position but is not required. Use a Ripper to get knocked back onto the frozen Beetom. This will clip Samus into the wall, making it possible to X-Ray climb. X-Ray climb up 2 screens. Requires: {
"notable": "Frozen Beetom X-Ray Climb with Morph"
}
{
"noBlueSuit": {}
}
{
"enemyDamage": {
"enemy": "Beetom",
"type": "contact",
"hits": 1
}
}
"Morph"
"canXRayStandUp"
{
"enemyDamage": {
"enemy": "Ripper",
"type": "contact",
"hits": 1
}
}
"canWallIceClip"
"canLongXRayClimb" |
From: 1
Top Left Door
To: 2
Middle Left Door (Behind Power Bomb Blocks)
Gain R-mode while entering the room. Use the respawning bugs to refill reserve energy. Get grabbed by the Beetom and carry it to the 4-tile high gap one screen above the bottom-left door. Position Samus one pixel to the right of being against the wall. Jump and aim down, reaching the ceiling at the same time that reserves are triggered. This will force Samus to stand up, briefly clipping into the wall above. Immediately freeze the Beetom inside the wall, by buffering a shot during the reserve trigger. Use a Ripper to get knocked back onto the frozen Beetom. This will clip Samus one pixel left into the wall, making it possible to X-ray climb. X-ray climb up 2 screens. Entrance condition: {
"comeInWithRMode": {}
}Requires: {
"notable": "R-Mode Frozen Beetom X-Ray Climb"
}
{
"noBlueSuit": {}
}
{
"refill": [
"ReserveEnergy"
]
}
{
"autoReserveTrigger": {}
}
{
"enemyDamage": {
"enemy": "Beetom",
"type": "contact",
"hits": 1
}
}
{
"enemyDamage": {
"enemy": "Ripper",
"type": "contact",
"hits": 1
}
}
"canWallIceClip"
"canLongXRayClimb" |
From: 3
Bottom Left Door
To: 2
Middle Left Door (Behind Power Bomb Blocks)
Gain R-mode while entering the room. Use the respawning bugs to refill reserve energy. Get grabbed by the Beetom and carry it to the 4-tile high gap one screen above the bottom-left door. Position Samus one pixel to the right of being against the wall. Jump and aim down, reaching the ceiling at the same time that reserves are triggered. This will force Samus to stand up, briefly clipping into the wall above. Immediately freeze the Beetom inside the wall, by buffering a shot during the reserve trigger. Use a Ripper to get knocked back onto the frozen Beetom. This will clip Samus one pixel left into the wall, making it possible to X-ray climb. X-ray climb up 2 screens. Entrance condition: {
"comeInWithRMode": {}
}Requires: {
"notable": "R-Mode Frozen Beetom X-Ray Climb"
}
{
"noBlueSuit": {}
}
{
"or": [
"canWallJump",
"HiJump",
"SpaceJump",
"canIBJ",
"canSpringBallJumpMidAir"
]
}
{
"refill": [
"Energy"
]
}
{
"autoReserveTrigger": {}
}
{
"enemyDamage": {
"enemy": "Beetom",
"type": "contact",
"hits": 1
}
}
{
"enemyDamage": {
"enemy": "Ripper",
"type": "contact",
"hits": 1
}
}
"canWallIceClip"
"canLongXRayClimb" |
From: 4
Bottom Right Door
To: 2
Middle Left Door (Behind Power Bomb Blocks)
Gain R-mode while entering the room. Use the respawning bugs to refill reserve energy. Get grabbed by the Beetom and carry it to the 4-tile high gap one screen above the bottom-left door. Position Samus one pixel to the right of being against the wall. Jump and aim down, reaching the ceiling at the same time that reserves are triggered. This will force Samus to stand up, briefly clipping into the wall above. Immediately freeze the Beetom inside the wall, by buffering a shot during the reserve trigger. Use a Ripper to get knocked back onto the frozen Beetom. This will clip Samus one pixel left into the wall, making it possible to X-ray climb. X-ray climb up 2 screens. Entrance condition: {
"comeInWithRMode": {}
}Requires: {
"notable": "R-Mode Frozen Beetom X-Ray Climb"
}
{
"noBlueSuit": {}
}
{
"or": [
"canWallJump",
"HiJump",
"SpaceJump",
"canIBJ",
"canSpringBallJumpMidAir"
]
}
{
"refill": [
"Energy"
]
}
{
"autoReserveTrigger": {}
}
{
"enemyDamage": {
"enemy": "Beetom",
"type": "contact",
"hits": 1
}
}
{
"enemyDamage": {
"enemy": "Ripper",
"type": "contact",
"hits": 1
}
}
"canWallIceClip"
"canLongXRayClimb" |
From: 5
Top Right Door
To: 2
Middle Left Door (Behind Power Bomb Blocks)
Gain R-mode while entering the room. Use the respawning bugs to refill reserve energy. Get grabbed by the Beetom and carry it to the 4-tile high gap one screen above the bottom-left door. Position Samus one pixel to the right of being against the wall. Jump and aim down, reaching the ceiling at the same time that reserves are triggered. This will force Samus to stand up, briefly clipping into the wall above. Immediately freeze the Beetom inside the wall, by buffering a shot during the reserve trigger. Use a Ripper to get knocked back onto the frozen Beetom. This will clip Samus one pixel left into the wall, making it possible to X-ray climb. X-ray climb up 2 screens. Entrance condition: {
"comeInWithRMode": {}
}Requires: {
"notable": "R-Mode Frozen Beetom X-Ray Climb"
}
{
"noBlueSuit": {}
}
{
"refill": [
"Energy"
]
}
{
"autoReserveTrigger": {}
}
{
"enemyDamage": {
"enemy": "Beetom",
"type": "contact",
"hits": 1
}
}
{
"enemyDamage": {
"enemy": "Ripper",
"type": "contact",
"hits": 1
}
}
"canWallIceClip"
"canLongXRayClimb" |
From: 7
Junction Below Power Bomb Blocks
To: 2
Middle Left Door
Bring a Mella on-camera while moonwalking, to set it up to move upward at the maximum rate (about 4 pixels per swoop). Guide it to a horizontal position inside the left wall below the Power Bomb blocks. When it is high enough, freeze it as it retreats from a near-vertical swoop. Get into position on the ledge below the Power Bomb blocks and wait for the Mella to thaw. Freeze the it inside the wall as it continues its retreat upward, by jumping and firing a downward shot. Run into the wall to clip into it. Crouch and destroy the Mella by shooting up (by holding angle up and angle down) Then X-Ray climb above the Power Bomb blocks. Requires: {
"notable": "Mella Wall Ice Clip X-Ray Climb"
}
"canManipulateMellas"
"canWallIceClip"
"canXRayClimb" |
From: 2
Bottom Door
To: 2
Bottom Door
Run from the ledge into the open doorway while hitting the frozen Viola and the door transition simultaneously, just as the Viola thaws and touches Samus during the transition. Note that this requires a precise freeze (2 pixel window), a small pixel starting window (approximately 1 pixel window), precise thaw timing, and a 50% success rate due to collision oscillation. The positioning of the Viola is where its hitbox is one or two pixels away from the edge of the door frame, so that Samus can clip into the wall and stand as she touches the transition. Requires: "canWallIceClip"
"canDownwardGModeSetup"
{
"ammo": {
"type": "Super",
"count": 1
}
}Exit condition: {
"leaveWithGModeSetup": {}
} |
|
Run from the ledge into the open doorway while hitting the frozen Atomic and the door transition simultaneously, just as the Atomic thaws and touches Samus during the transition. Note that this requires a precise freeze (3 pixel window), precise thaw timing, and a 50% success rate due to collision oscillation. The starting position of Samus is a bit more lenient than other downward G-mode setups, as Samus can have higher run speed when hitting the Atomic than in most other rooms. One normalized setup to get into a usable position is to run into the right pillar, turn around, then run back. Requires: "f_DefeatedPhantoon" "canDash" "canWallIceClip" "canDownwardGModeSetup" Exit condition: {
"leaveWithGModeSetup": {}
}Dev note: This can not work with a Covern, as it only moves vertically and can't hit Samus in the transition. |
From: 3
Bottom Left Door
To: 7
Bottom Door
Run from the ledge into the open doorway while hitting the frozen Atomic and the door transition simultaneously, just as the Atomic thaws and touches Samus during the transition. Note that this requires a precise freeze (2 pixel window), a small pixel starting window (approximately 3 pixel window), precise thaw timing, and a 50% success rate due to collision oscillation. The positioning of the Atomic is where its hitbox is one or two pixels away from the edge of the door frame, so that Samus can clip into the wall and stand as she touches the transition. Requires: "f_DefeatedPhantoon" "canWallIceClip" "canDownwardGModeSetup" "Morph" Exit condition: {
"leaveWithGModeSetup": {}
}Unlocks doors: {"types":["ammo"],"requires":[]}Dev note: This can not work with a Covern, as it only moves vertically and can't hit Samus in the transition. |
|
Damage a Covern to prepare it to be frozen. Stand a few tiles away from the bomb block, and walk toward it as the Covern is about to reappear. If successful, the Covern will spawn inside the wall but close enough that Samus can clip into it. Freeze the Covern by pressing against the wall, then jumping and shooting down. Run into the wall with as much speed as possible to clip into it. Once Samus is clipped into the wall, perform a low turnaround spin jump to the right and immediately turn back to the left while still spinning, using Screw Attack to break the bomb block. If Phantoon is already dead, a moonfall with two frozen Atomics can instead be used to clip into the floor to be able to break the bomb block. Requires: {
"notable": "Covern Wall Ice Screw Clip"
}
{
"not": "f_DefeatedPhantoon"
}
{
"or": [
"canRiskPermanentLossOfAccess",
{
"and": [
{
"notable": "Atomic Ice Moonfall Screw Clip"
},
{
"enemyDamage": {
"enemy": "Atomic",
"type": "contact",
"hits": 1
}
}
]
}
]
}
"canDash"
"canMidairWiggle"
"canWallIceClip"
"ScrewAttack"
"Morph"Clears obstacles: C Dev note: FIXME: Dashing is probably not required, even if it makes it easier. |
|
Requires: {
"notable": "Door Lock Wall Ice Clip"
}
"h_navigateUnderwater"
"canWallIceClip"
"Wave"
{
"enemyDamage": {
"enemy": "Zoa",
"type": "contact",
"hits": 2
}
}Bypasses door shell: true Dev note: The drops will keep Samus at high energy, but 2 hits enemy damage were added as a worst-case scenario where the next-to-last Zoa you kill doesn't give you energy. |
From: 8
Standing on Top Left of Mother Brain Tank
To: 3
Mother Brain
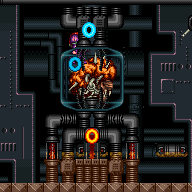
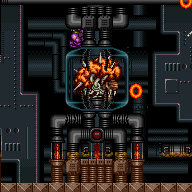
Perform a moondance while killing the Rinkas, carefully avoiding being hit by them. After 176 moonfalls, Samus will clip down into the tank. Samus will be unable to turn around and will be invulnerable to Rinka hits. Freeze a Rinka several pixels in front of Samus, to cause Samus to clip horizontally. This will work regardless of whether Samus is facing left or right. When Samus is close enough to the end, quickly turn around back and forth to wiggle out, to avoid taking too much damage from the invisible spikes in the air. Requires: {
"notable": "Moondance Clip"
}
"Wave"
"canTrickyDodgeEnemies"
"canMoondance"
"canWallIceClip"
{
"spikeHits": 1
}
{
"or": [
{
"noBlueSuit": {}
},
{
"spikeHits": 2
}
]
} |
