canWallIceClip (Extreme)
Collision will prioritize frozen enemies before walls which allows Samus to clip 1 pixel into a wall if an enemy is there. This can be used to get Samus into position to X-Ray Climb. Additionally, enemies that fly through walls may be repeatedly frozen to advance 1 pixel at a time to eventually push Samus through a wall or touch a door transition.
Dependencies: canUseEnemies, canUseFrozenEnemies, canTrickyUseFrozenEnemies
Strats ()
|
From: 9
Junction Below Items
To: 1
Top Right Door
Notable: true 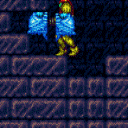
Shoot out only the lower 2 shot blocks on the side Samus will be climbing. Grab a Beetom and use Morph to pixel align the Beetom with the edge of the wall. While facing right. Xray stand up for height and shoot to freeze. Angle down shot to be safe. Continue refreezing during the next steps. Grab the other Beetom and stand close, but not too close, to the first. Do a small jump, but not too low, and do an angle down shot the frame before Samus lands. This second beetom needs to be exactly 1 pixel below the first. Refreeze the first before testing the positioning. Jump onto your beetom, walk into the wall, and start xray Climbing. Climb up 2.5 screens and then fire upwards to clear shot blocks. Continue climbing and finish by walking away from the crumble blocks. Requires: "canXRayClimb"
"Morph"
"canWallIceClip"
"canBeVeryPatient"
{
"enemyDamage": {
"enemy": "Beetom",
"hits": 25,
"type": "contact"
}
}
{
"or": [
{
"resetRoom": {
"nodes": [
1,
2,
3,
4
],
"nodesToAvoid": [
5
]
}
},
{
"resetRoom": {
"nodes": [
1,
2,
3,
4
],
"nodesToAvoid": [
6
]
}
}
]
}
|
|
From: 3
Bottom Door
To: 3
Bottom Door
Run from the ledge into the open doorway while hitting the frozen Crab as it thaws and the door transition simultaneously. Note that this requires a pixel perfect freeze, a small pixel starting window, and has tight timing. It then has a 50% success rate due to collision oscillation. Requires: "canWallIceClip"
"canDownwardGModeSetup"
{
"ammo": {
"type": "Super",
"count": 1
}
}
Exit condition: {
"leaveWithGModeSetup": {}
}
|
|
Blue Brinstar Energy Tank Room - Geemer Ice Stuck XRay Climb (Insane)
Blue Brinstar Energy Tank Room
From: 4
Right Item
To: 2
Top Left Door
Notable: true 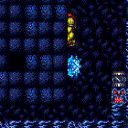
Keep the two Geemers on screen while moving to the right side of the room. Freeze the second Geemer as it exits the Morph Tunnel, with the Crumble block. Use a Super Missile to knock the first Geemer down and freeze it at the pixel perfect height. Become stuck in the wall after using Grapple to kill the frozen Geemer as it walks through Samus, firing to the left. This re-enables XRay climbing. Requires: "canWallIceClip"
"canXRayClimb"
"Grapple"
{
"ammo": {
"type": "Super",
"count": 1
}
}
{
"enemyDamage": {
"enemy": "Geemer (blue)",
"type": "contact",
"hits": 1
}
}
|
|
From: 13
Central Junction
To: 4
Left Side - Middle Doorway (Behind the Power Bomb Blocks)
Notable: true 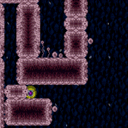
Freeze a Zeb inside of the crumble blocks below the entrance to the Power Bomb room and use it to get stuck inside the crumble blocks, breaking them. Repeatedly freeze a left facing Zeb from the enemy spawner lower in the room. Freeze it close to the right side of the crumble block so that Samus will attach to the enemy when rolling into it. Finally, jump with Bombs or SpringBall to break the crumble block. Requires: "canWallIceClip"
"Wave"
{
"or": [
"h_canUseSpringBall",
"h_canUseMorphBombs"
]
}
Clears obstacles: C |
|
From: 1
Top Left Door
To: 2
Middle Left Door (Behind Power Bomb Blocks)
Notable: true 
Gain R-mode while entering the room. Use the respawning bugs to refill reserve energy. Get grabbed by the Beetom and carry it to the 4-tile high gap one screen above the bottom-left door. Position Samus one pixel to the right of being against the wall. Jump and aim down, reaching the ceiling at the same time that reserves are triggered. This will force Samus to stand up, briefly clipping into the wall above. Immediately freeze the Beetom inside the wall, by buffering a shot during the reserve trigger. Use a Ripper to get knocked back onto the frozen Beetom. This will clip Samus one pixel left into the wall, making it possible to X-ray climb. X-ray climb up 2 screens. Entrance condition: {
"comeInWithRMode": {}
}
Requires: {
"enemyDamage": {
"enemy": "Beetom",
"type": "contact",
"hits": 1
}
}
{
"enemyDamage": {
"enemy": "Ripper",
"type": "contact",
"hits": 1
}
}
"canWallIceClip"
"canXRayClimb"
|
|
From: 3
Bottom Left Door
To: 2
Middle Left Door (Behind Power Bomb Blocks)
Notable: true
Gain R-mode while entering the room. Use the respawning bugs to refill reserve energy. Get grabbed by the Beetom and carry it to the 4-tile high gap one screen above the bottom-left door. Position Samus one pixel to the right of being against the wall. Jump and aim down, reaching the ceiling at the same time that reserves are triggered. This will force Samus to stand up, briefly clipping into the wall above. Immediately freeze the Beetom inside the wall, by buffering a shot during the reserve trigger. Use a Ripper to get knocked back onto the frozen Beetom. This will clip Samus one pixel left into the wall, making it possible to X-ray climb. X-ray climb up 2 screens. Entrance condition: {
"comeInWithRMode": {}
}
Requires: {
"or": [
"canWalljump",
"HiJump",
"h_canFly",
"canSpringBallJumpMidAir"
]
}
{
  "enemyDamage": {
    "enemy": "Beetom",
    "type": "contact",
    "hits": 1
  }
}
{
  "enemyDamage": {
    "enemy": "Ripper",
    "type": "contact",
    "hits": 1
  }
}
"canWallIceClip"
"canXRayClimb"
|
|
From: 4
Bottom Right Door
To: 2
Middle Left Door (Behind Power Bomb Blocks)
Notable: true
Gain R-mode while entering the room. Use the respawning bugs to refill reserve energy. Get grabbed by the Beetom and carry it to the 4-tile high gap one screen above the bottom-left door. Position Samus one pixel to the right of being against the wall. Jump and aim down, reaching the ceiling at the same time that reserves are triggered. This will force Samus to stand up, briefly clipping into the wall above. Immediately freeze the Beetom inside the wall, by buffering a shot during the reserve trigger. Use a Ripper to get knocked back onto the frozen Beetom. This will clip Samus one pixel left into the wall, making it possible to X-ray climb. X-ray climb up 2 screens. Entrance condition: {
"comeInWithRMode": {}
}
Requires: {
"or": [
"canWalljump",
"HiJump",
"h_canFly",
"canSpringBallJumpMidAir"
]
}
{
  "enemyDamage": {
    "enemy": "Beetom",
    "type": "contact",
    "hits": 1
  }
}
{
  "enemyDamage": {
    "enemy": "Ripper",
    "type": "contact",
    "hits": 1
  }
}
"canWallIceClip"
"canXRayClimb"
|
|
From: 5
Top Right Door
To: 2
Middle Left Door (Behind Power Bomb Blocks)
Notable: true
Gain R-mode while entering the room. Use the respawning bugs to refill reserve energy. Get grabbed by the Beetom and carry it to the 4-tile high gap one screen above the bottom-left door. Position Samus one pixel to the right of being against the wall. Jump and aim down, reaching the ceiling at the same time that reserves are triggered. This will force Samus to stand up, briefly clipping into the wall above. Immediately freeze the Beetom inside the wall, by buffering a shot during the reserve trigger. Use a Ripper to get knocked back onto the frozen Beetom. This will clip Samus one pixel left into the wall, making it possible to X-ray climb. X-ray climb up 2 screens. Entrance condition: {
"comeInWithRMode": {}
}
Requires: {
"enemyDamage": {
"enemy": "Beetom",
"type": "contact",
"hits": 1
}
}
{
"enemyDamage": {
"enemy": "Ripper",
"type": "contact",
"hits": 1
}
}
"canWallIceClip"
"canXRayClimb"
|
|
Notable: true 

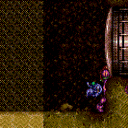
Repeatedly freeze the Zoas to slowly push Samus into the wall and through the locked doorway. Requires: "h_canNavigateUnderwater"
"canWallIceClip"
"Wave"
{
"enemyDamage": {
"enemy": "Zoa",
"type": "contact",
"hits": 2
}
}
Bypasses door shell: true |