canStaggeredIBJ (Expert)
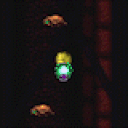
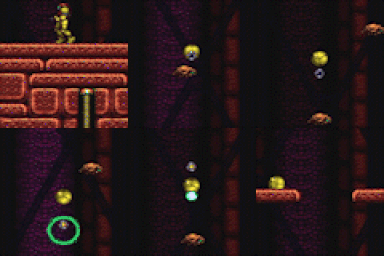
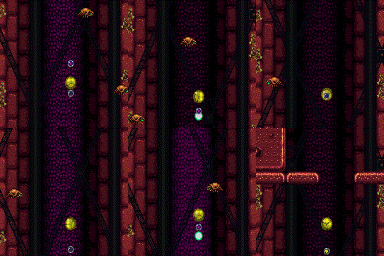
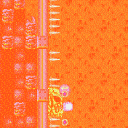
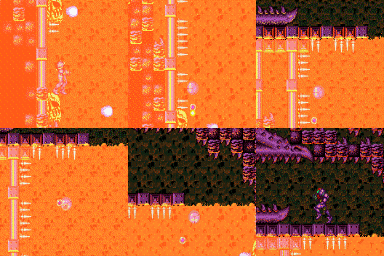
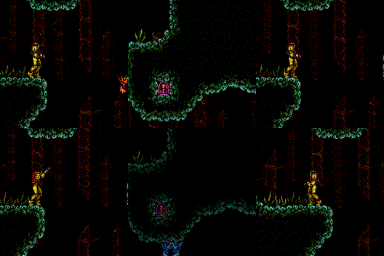
The ability to change the bomb placement timing in order control the speed with which you gain height. This is typically used to avoid an enemy moving in Samus' path above.
Dependencies: canIBJ
Strats ()
|
From: 3
Bottom Left Door
To: 6
Junction (Above Bottom Rippers)
Notable: true Requires switching between single and double IBJs. While Doubles are not techincally necessary, they make the strat more bearable. Exit G-Mode before the Power Bomb explodes in order to break the wall. With an extra Power Bomb, it may be worthwhile to use it to kill some of the Rippers. Entrance condition: {
"comeInWithGMode": {
"mode": "any",
"morphed": true
}
}
Requires: "h_canArtificialMorphDoubleBombJump" "h_canArtificialMorphStaggeredIBJ" "h_canArtificialMorphPowerBomb" Clears obstacles: A |
|
From: 4
Bottom Right Door
To: 6
Junction (Above Bottom Rippers)
Notable: true Requires switching between single and double IBJs. While Doubles are not techincally necessary, they make the strat more bearable. Exit G-Mode before the Power Bomb explodes in order to break the wall. With an extra Power Bomb, it may be worthwhile to use it to kill some of the Rippers. Entrance condition: {
"comeInWithGMode": {
"mode": "any",
"morphed": true
}
}
Requires: "h_canArtificialMorphDoubleBombJump" "h_canArtificialMorphStaggeredIBJ" "h_canArtificialMorphPowerBomb" Clears obstacles: A |
|
From: 7
Junction (Bottom Rippers)
To: 6
Junction (Above Bottom Rippers)
Notable: true Requires switching between single and double IBJs. While Doubles are not techincally necessary, they make the strat more bearable. Requires: "h_canDoubleBombJump" "h_canStaggeredIBJ" |
|
From: 9
Junction (Top Rippers)
To: 9
Junction (Top Rippers)
To kill the Rippers with a single Power Bomb without breaking the ledge, place the bomb just above the second Ripper. Requires: "h_canUsePowerBombs"
"canCarefulJump"
{
"or": [
"canWalljump",
"canSpringBallJumpMidAir",
"SpaceJump",
{
"and": [
"HiJump",
"canTrickyDashJump"
]
},
{
"and": [
"h_canJumpIntoIBJ",
{
"or": [
"canStaggeredIBJ",
"canDoubleBombJump"
]
}
]
}
]
}
Clears obstacles: B |
|
From: 4
Lava, Left Wall
To: 3
Above Lava Junction
Notable: true Begin on top of the lower left Namihe Jump into a double IBJ with such timing that Samus passes above the fired flame and such a way that there is no horizontal speed. A forward jump with run not held will work. Begin diagonal bomb jumping once past the start of the 2nd spike group from the top. Requires: "h_heatProof"
"Gravity"
{
"or": [
"h_lavaProof",
"canSuitlessLavaDive"
]
}
"h_canJumpIntoIBJ"
"h_canDoubleBombJump"
"h_canDiagonalBombJump"
"h_canStaggeredIBJ"
"canInsaneJump"
{
"heatFrames": 1560
}
{
"lavaFrames": 1520
}
|
|
Kill the Sova on the bottom-right platform, then IBJ right next to the left of the platform. Samus can align with the left side of the platform by jumping into it. Changing the IBJ speed may be necessary to get past the second Sova. Requires: "h_canIBJ"
"h_canStaggeredIBJ"
{
"heatFrames": 4000
}
|
|
IBJ against the left-most wall. Changing the IBJ speed may be necessary to get past the Sova. Requires: "h_canIBJ"
"h_canStaggeredIBJ"
{
"heatFrames": 4000
}
|
|
From: 6
Bottom Platform Junction With Pirates Killed
To: 4
Junction Above Bomb Blocks
Requires: "h_canNavigateHeatRooms"
"h_canIBJ"
{
"or": [
{
"and": [
"canJumpIntoIBJ",
{
"heatFrames": 1460
}
]
},
{
"and": [
"canDoubleBombJump",
{
"heatFrames": 1000
}
]
},
{
"and": [
"canJumpIntoIBJ",
"canDoubleBombJump",
{
"heatFrames": 800
}
]
},
{
"heatFrames": 2000
}
]
}
{
"or": [
"h_canUsePowerBombs",
{
"and": [
"h_canBombAboveIBJ",
"canStaggeredIBJ",
{
"heatFrames": 180
}
]
},
{
"and": [
"h_heatProof",
"canBePatient"
]
},
{
"obstaclesCleared": [
"A"
]
}
]
}
Clears obstacles: A |
|
From: 1
Bottom Door
To: 6
Speed Blocked Item
Notable: true This is a long climb, and getting around the fish under the missiles can be tricky or slow. Place bombs against the speed blocks until they are overloaded. Afterwards, freeze a crab on the edge of the speed blocks, such that Samus can jump inside and stand on the crab. Exit G-Mode and rotate to obtain the item, then kill the crab with Wave Beam to fall back down. Entrance condition: {
"comeInWithGMode": {
"mode": "any",
"morphed": true
},
"comesThroughToilet": "any"
}
Requires: "h_canArtificialMorphIBJ"
"Gravity"
"canTrickyUseFrozenEnemies"
"Wave"
{
"or": [
"h_canArtificialMorphJumpIntoIBJ",
{
"and": [
"h_canArtificialMorphSpringBall",
"HiJump"
]
},
{
"and": [
"h_canArtificialMorphSpringBall",
"canGravityJump"
]
},
"canDoubleBombJump",
"canStaggeredIBJ",
"canBeVeryPatient",
{
"enemyKill": {
"enemies": [
[
"Skultera"
]
],
"explicitWeapons": [
"PowerBomb"
]
}
}
]
}
{
"or": [
"h_canArtificialMorphSpringBall",
"h_canArtificialMorphCeilingBombJump",
"canBeVeryPatient"
]
}
|
|
From: 1
Bottom Door
To: 6
Speed Blocked Item
Notable: true This is a long climb, and getting around the fish under the missiles can be tricky or slow. Overloading the PLMs can be done with as few as 2 PBs if they are placed precisely. Place them two ledges above the item - to the left of the morph tunnel item. It is important that they are placed on either of the flat tiles, not the sloped tile on the right. Afterwards, freeze a crab on the edge of the speed blocks, such that Samus can jump inside and stand on the crab. Exit G-Mode and rotate to obtain the item, then kill the crab with Wave Beam to fall back down. Entrance condition: {
"comeInWithGMode": {
"mode": "direct",
"morphed": true
},
"comesThroughToilet": "no"
}
Requires: "h_canArtificialMorphIBJ"
"Gravity"
"canTrickyUseFrozenEnemies"
"Wave"
{
"or": [
"h_canArtificialMorphJumpIntoIBJ",
"canDoubleBombJump",
"canStaggeredIBJ",
"canBeVeryPatient",
{
"enemyKill": {
"enemies": [
[
"Skultera"
]
],
"explicitWeapons": [
"PowerBomb"
]
}
}
]
}
{
"ammo": {
"type": "PowerBomb",
"count": 2
}
}
|
|
From: 2
Bottom Right Door
To: 6
Speed Blocked Item
Notable: true This is a long climb, and getting around the fish under the missiles can be tricky or slow. Place bombs against the speed blocks until they are overloaded. Afterwards, freeze a crab on the edge of the speed blocks, such that Samus can jump inside and stand on the crab. Exit G-Mode and rotate to obtain the item, then kill the crab with Wave Beam to fall back down. Entrance condition: {
"comeInWithGMode": {
"mode": "any",
"morphed": true
}
}
Requires: "h_canArtificialMorphIBJ"
"Gravity"
"canTrickyUseFrozenEnemies"
"Wave"
{
"or": [
"h_canArtificialMorphJumpIntoIBJ",
{
"and": [
"h_canArtificialMorphSpringBall",
"HiJump"
]
},
{
"and": [
"h_canArtificialMorphSpringBall",
"canGravityJump"
]
},
"canDoubleBombJump",
"canStaggeredIBJ",
"canBeVeryPatient",
{
"enemyKill": {
"enemies": [
[
"Skultera"
]
],
"explicitWeapons": [
"PowerBomb"
]
}
}
]
}
{
"or": [
"h_canArtificialMorphSpringBall",
"h_canArtificialMorphCeilingBombJump",
"canBeVeryPatient"
]
}
|
|
From: 2
Bottom Right Door
To: 6
Speed Blocked Item
Notable: true This is a long climb, and getting around the fish under the missiles can be tricky or slow. Overloading the PLMs can be done with as few as 2 PBs if they are placed precisely. Place them two ledges above the item - to the left of the morph tunnel item. It is important that they are placed on either of the flat tiles, not the sloped tile on the right. Afterwards, freeze a crab on the edge of the speed blocks, such that Samus can jump inside and stand on the crab. Exit G-Mode and rotate to obtain the item, then kill the crab with Wave Beam to fall back down. Entrance condition: {
"comeInWithGMode": {
"mode": "direct",
"morphed": true
}
}
Requires: "h_canArtificialMorphIBJ"
"Gravity"
"canTrickyUseFrozenEnemies"
"Wave"
{
"or": [
"h_canArtificialMorphJumpIntoIBJ",
"h_canArtificialMorphDoubleBombJump",
"h_canArtificialMorphStaggeredIBJ",
"canBeVeryPatient",
{
"enemyKill": {
"enemies": [
[
"Skultera"
]
],
"explicitWeapons": [
"PowerBomb"
]
}
}
]
}
"h_canArtificialMorphPowerBomb"
"h_canArtificialMorphPowerBomb"
|
|
This is a long climb, and getting around the fish under the missiles can be tricky or slow. Entrance condition: {
"comeInWithGMode": {
"mode": "any",
"morphed": true
}
}
Requires: "h_canArtificialMorphIBJ"
"Gravity"
{
"or": [
"h_canArtificialMorphJumpIntoIBJ",
"h_canArtificialMorphDoubleBombJump",
"h_canArtificialMorphStaggeredIBJ",
"canBeVeryPatient"
]
}
|
|
From: 3
Middle Right Door
To: 6
Speed Blocked Item
Notable: true This is a long climb, and getting around the fish under the missiles can be tricky or slow. Place bombs against the speed blocks until they are overloaded. Afterwards, freeze a crab on the edge of the speed blocks, such that Samus can jump inside and stand on the crab. Exit G-Mode and rotate to obtain the item, then kill the crab with Wave Beam to fall back down. Entrance condition: {
"comeInWithGMode": {
"mode": "any",
"morphed": true
}
}
Requires: "h_canArtificialMorphIBJ"
"Gravity"
"canTrickyUseFrozenEnemies"
"Wave"
{
"or": [
"h_canArtificialMorphJumpIntoIBJ",
{
"and": [
"h_canArtificialMorphSpringBall",
"HiJump"
]
},
{
"and": [
"h_canArtificialMorphSpringBall",
"canGravityJump"
]
},
"h_canArtificialMorphDoubleBombJump",
"h_canArtificialMorphStaggeredIBJ",
"canBeVeryPatient",
{
"enemyKill": {
"enemies": [
[
"Skultera"
]
],
"explicitWeapons": [
"PowerBomb"
]
}
}
]
}
{
"or": [
"h_canArtificialMorphSpringBall",
"h_canArtificialMorphCeilingBombJump",
"canBeVeryPatient"
]
}
|
|
From: 3
Middle Right Door
To: 6
Speed Blocked Item
Notable: true This is a long climb, and getting around the fish under the missiles can be tricky or slow. Overloading the PLMs can be done with as few as 2 PBs if they are placed precisely. Place them two ledges above the item - to the left of the morph tunnel item. It is important that they are placed on either of the flat tiles, not the sloped tile on the right. Afterwards, freeze a crab on the edge of the speed blocks, such that Samus can jump inside and stand on the crab. Exit G-Mode and rotate to obtain the item, then kill the crab with Wave Beam to fall back down. Entrance condition: {
"comeInWithGMode": {
"mode": "direct",
"morphed": true
}
}
Requires: "h_canArtificialMorphIBJ"
"Gravity"
"canTrickyUseFrozenEnemies"
"Wave"
{
"or": [
"h_canArtificialMorphJumpIntoIBJ",
"h_canArtificialMorphDoubleBombJump",
"h_canArtificialMorphStaggeredIBJ",
"canBeVeryPatient",
{
"enemyKill": {
"enemies": [
[
"Skultera"
]
],
"explicitWeapons": [
"PowerBomb"
]
}
}
]
}
"h_canArtificialMorphPowerBomb"
"h_canArtificialMorphPowerBomb"
|
|
IBJ up the climb. This is a lot easier with PBs or Spring Ball to help kill the enemies. With PBs, use one on entry to deal with the Puyos, then IBJ up the right side and use another to kill the middle Choot. Otherwise, Kill the Puyos then the bottom Choot with Bombs, falling off when necessary, then climb the left side of the room. Entrance condition: {
"comeInWithGMode": {
"mode": "any",
"morphed": true
}
}
Requires: "h_canArtificialMorphIBJ"
{
"or": [
"h_canArtificialMorphSpringBall",
{
"and": [
"h_canArtificialMorphPowerBomb",
"h_canArtificialMorphPowerBomb"
]
},
{
"and": [
"h_canArtificialMorphStaggeredIBJ",
"canBeVeryPatient"
]
}
]
}
|
|
From: 1
Bottom Left Door
To: 4
G-Mode Junction (Top by Elevator)
It is possible to kill the Rippers with a single Power Bomb by placing it at least 2 tiles above the lowest Ripper inside the narrow section of the shaft. Entrance condition: {
"comeInWithGMode": {
"mode": "any",
"morphed": false
}
}
Requires: {
"or": [
{
"and": [
{
"enemyKill": {
"enemies": [
[
"Ripper",
"Ripper",
"Ripper"
]
]
}
},
{
"or": [
"canWalljump",
"SpaceJump"
]
}
]
},
{
"and": [
"h_canIBJ",
{
"ammo": {
"type": "Super",
"count": 3
}
}
]
},
{
"and": [
"h_canIBJ",
"h_canUsePowerBombs",
{
"or": [
"h_canUsePowerBombs",
"canStaggeredIBJ"
]
}
]
}
]
}
|
|
From: 1
Bottom Left Door
To: 4
G-Mode Junction (Top by Elevator)
The Rippers can be killed with three Power Bombs, or one carefully placed Power Bomb, Gravity, and a careful dodge of the top-most Ripper. With a single Power Bomb, IBJ from the water to avoid the first Ripper, then place the Power Bomb at least two tiles above the next. This can be achieved with a Staggered IBJ. Then climb the right side of the shaft and similarly dodge the top Ripper. Entrance condition: {
"comeInWithGMode": {
"mode": "any",
"morphed": true
}
}
Requires: "h_canArtificialMorphIBJ"
{
"or": [
"Gravity",
"h_canArtificialMorphPowerBomb",
{
"enemyDamage": {
"enemy": "Ripper",
"type": "contact",
"hits": 1
}
}
]
}
"h_canArtificialMorphPowerBomb"
{
"or": [
"h_canArtificialMorphStaggeredIBJ",
"h_canArtificialMorphPowerBomb",
{
"enemyDamage": {
"enemy": "Ripper",
"type": "contact",
"hits": 1
}
}
]
}
|
|
From: 1
Bottom Left Door
To: 4
G-Mode Junction (Top by Elevator)
The Rippers can be killed with two Power Bombs, or one carefully placed Power Bomb and a careful dodge of the top-most Ripper. With a single Power Bomb, use Spring Ball to avoid the first Ripper, then place the Power Bomb at least two tiles above the next. This can be achieved with a Staggered IBJ or a Spring Ball Bomb Boost. Then climb the right side of the shaft and dodge the top Ripper. Entrance condition: {
"comeInWithGMode": {
"mode": "any",
"morphed": true
}
}
Requires: "h_canArtificialMorphIBJ"
"h_canArtificialMorphSpringBallBombJump"
"h_canArtificialMorphPowerBomb"
{
"or": [
"h_canArtificialMorphStaggeredIBJ",
"h_canArtificialMorphPowerBomb",
{
"enemyDamage": {
"enemy": "Ripper",
"type": "contact",
"hits": 1
}
}
]
}
|
|
From: 2
Right Door
To: 4
G-Mode Junction (Top by Elevator)
It is possible to kill the Rippers with a single Power Bomb by placing it at least 2 tiles above the lowest Ripper inside the narrow section of the shaft. Entrance condition: {
"comeInWithGMode": {
"mode": "any",
"morphed": false
}
}
Requires: {
"or": [
{
"and": [
{
"enemyKill": {
"enemies": [
[
"Ripper",
"Ripper",
"Ripper"
]
]
}
},
{
"or": [
"canWalljump",
"SpaceJump"
]
}
]
},
{
"and": [
"h_canIBJ",
{
"ammo": {
"type": "Super",
"count": 3
}
}
]
},
{
"and": [
"h_canIBJ",
"h_canUsePowerBombs",
{
"or": [
"h_canUsePowerBombs",
"canStaggeredIBJ"
]
}
]
}
]
}
|
|
From: 2
Right Door
To: 4
G-Mode Junction (Top by Elevator)
The Rippers can be killed with two Power Bombs, or one carefully placed Power Bomb and a careful dodge of the top-most Ripper. With a single Power Bomb, place it at least two tiles above the first Ripper. This can be achieved with a Staggered IBJ or a Spring Ball Bomb Boost. Then climb the right side of the shaft and dodge the top Ripper. Entrance condition: {
"comeInWithGMode": {
"mode": "any",
"morphed": true
}
}
Requires: "h_canArtificialMorphIBJ"
"h_canArtificialMorphPowerBomb"
{
"or": [
"h_canArtificialMorphStaggeredIBJ",
"h_canArtificialMorphPowerBomb",
{
"enemyDamage": {
"enemy": "Ripper",
"type": "contact",
"hits": 1
}
}
]
}
|
