canMoondance (Insane)
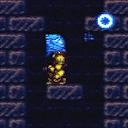
The ability to perform moonfalls a substantial number of times (176) in a row in order to sink through a solid floor. Moondancing requires becoming partially trapped so that the moonfall ends in a crouch state where pressing forward returns Samus to a stand without losing the built up vertical speed. Samus can become trapped inside of solid tiles or frozen enemies for the purposes of moondancing. This tech assumes the enemy can be frozen again without it being killed and without a frame perfect refreeze. The moondance speed value setup area does not necessarily need to be the same as where the clip is performed. But the speed will be reset if Samus falls, jumps, stands up with the Up button, or takes damage. In some situations it is important to stop one moonfall before clipping into the floor, at 175 moonfalls. The solid floor can be many tiles below Samus in which case it may also be necessary to change Samus' hitbox while falling. After 175 moonfalls, Samus' stored vertical speed is $FFE6.F400, while after 176, it is $FFE6.D800.
Dependencies: canMoonfall, canMoonwalk, canBePatient
Strats ()
|
From: 9
Junction Below Items
To: 2
Middle Right Door
Notable: true 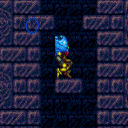
Pick up a Beetom and bring it up to the centered platform below the crumble blocks. Freeze it at about head height where Samus can move around inside its sprite, and use it to Moondance. Refreeze the Beetom regularly to keep it in place. Once the clip begins, hold down to shrink Samus' hitbox so that she can fall through the Solid tile next to the power bomb block. The shot block needs to be cleared in advance. Requires: "canMoondance"
"canTrickyUseFrozenEnemies"
{
"enemyDamage": {
"enemy": "Beetom",
"type": "contact",
"hits": 4
}
}
|
|
From: 9
Junction Below Items
To: 2
Middle Right Door
Requires: {
"or": [
"Morph",
{
"obstaclesCleared": [
"A"
]
}
]
}
"canMoondance"
"canTrickyUseFrozenEnemies"
{
  "enemyDamage": {
    "enemy": "Beetom",
    "type": "contact",
    "hits": 4
  }
}
Exit condition: {
"leaveWithStoredFallSpeed": {
"fallSpeedInTiles": 1
}
}
Unlocks doors: {"types":["ammo"],"requires":[]}
|
|
From: 9
Junction Below Items
To: 3
Bottom Left Door
Requires: {
"or": [
"Morph",
{
"obstaclesCleared": [
"A"
]
}
]
}
"canMoondance"
"canTrickyUseFrozenEnemies"
{
"enemyDamage": {
"enemy": "Beetom",
"type": "contact",
"hits": 10
}
}
Exit condition: {
"leaveWithStoredFallSpeed": {
"fallSpeedInTiles": 1
}
}
Unlocks doors: {"types":["ammo"],"requires":[]}
|
|
From: 9
Junction Below Items
To: 4
Bottom Right Door
Requires: {
"or": [
"Morph",
{
"obstaclesCleared": [
"A"
]
}
]
}
"canMoondance"
"canTrickyUseFrozenEnemies"
{
"enemyDamage": {
"enemy": "Beetom",
"type": "contact",
"hits": 10
}
}
Exit condition: {
"leaveWithStoredFallSpeed": {
"fallSpeedInTiles": 1
}
}
Unlocks doors: {"types":["ammo"],"requires":[]}
|
|
From: 4
Bottom Right Door
To: 4
Bottom Right Door
Freeze a Beetom at head height where Samus can Spinjump into it and begin Moondancing. Requires: {
"obstaclesNotCleared": [
"A"
]
}
"canMoondance"
"canTrickyUseFrozenEnemies"
{
  "enemyDamage": {
    "enemy": "Beetom",
    "type": "contact",
    "hits": 2
  }
}
Exit condition: {
"leaveWithStoredFallSpeed": {
"fallSpeedInTiles": 1
}
}
|
|
From: 6
Junction (Right of Tunnel)
To: 3
Bottom Left Door
Freeze a Beetom at head height where Samus can Spinjump into it and begin Moondancing. The Beetom can be left at the door if farming for health is needed. Requires: {
"obstaclesNotCleared": [
"A"
]
}
"Morph"
"canMoondance"
"canTrickyUseFrozenEnemies"
{
"enemyDamage": {
"enemy": "Beetom",
"type": "contact",
"hits": 2
}
}
Exit condition: {
"leaveWithStoredFallSpeed": {
"fallSpeedInTiles": 1
}
}
Unlocks doors: {"types":["ammo"],"requires":[]}
|
|
Freeze a Beetom at head height where Samus can Spinjump into it and begin Moondancing. Requires: "canMoondance"
"canTrickyUseFrozenEnemies"
{
"enemyDamage": {
"enemy": "Beetom",
"type": "contact",
"hits": 2
}
}
{
"or": [
{
"enemyDamage": {
"enemy": "Beetom",
"type": "contact",
"hits": 4
}
},
{
"ammo": {
"type": "Missile",
"count": 1
}
},
{
"ammo": {
"type": "Super",
"count": 1
}
}
]
}
Exit condition: {
"leaveWithStoredFallSpeed": {
"fallSpeedInTiles": 1
}
}
|
|
Break exactly the bottom-right and top-right Bomb Blocks and Unmorph while on the top block hole, to begin the Moondance. Clear a path to the left in advance, as well as all enemies. Requires: {
"obstaclesNotCleared": [
"A"
]
}
"h_canUseMorphBombs"
"canMoondance"
Exit condition: {
"leaveWithStoredFallSpeed": {
"fallSpeedInTiles": 1
}
}
|
|
Break exactly the lower-middle-right and top-right Bomb Blocks, leaving the upper-middle-right and bottommost Blocks intact. Clear all enemies before starting. Unmorph while on the top block to begin the Moondance. Wiggle out to the left and use SpeedBooster to run through to the right side door. Requires: {
"obstaclesNotCleared": [
"A"
]
}
"h_canUseMorphBombs"
"canMoondance"
"SpeedBooster"
Exit condition: {
"leaveWithStoredFallSpeed": {
"fallSpeedInTiles": 1
}
}
Unlocks doors: {"types":["ammo"],"requires":[]}
|
|
Freeze one of the Metarees at a height where Samus can become stuck and then use it to Moondance. Stop after 175 Moonfalls, before Samus clips into the ground. Requires: "canMoondance"
"canTrickyUseFrozenEnemies"
{
"obstaclesCleared": [
"A"
]
}
Exit condition: {
"leaveWithStoredFallSpeed": {
"fallSpeedInTiles": 1
}
}
Unlocks doors: {"types":["ammo"],"requires":[]}
|
|
Freeze one of the Metarees at a height where Samus can become stuck and then use it to Moondance. After exactly 175 Moonfalls, before Samus clips into the ground, walk over to the Speed Blocks to perform the clip. Requires: "canMoondance" "canTrickyUseFrozenEnemies" |
|
Freeze one of the Metarees at a height where Samus can become stuck and then use it to Moondance. Stop after exactly 175 Moonfalls, before Samus clips into the ground. Requires: "canMoondance" "canTrickyUseFrozenEnemies" Exit condition: {
"leaveWithStoredFallSpeed": {
"fallSpeedInTiles": 1
}
}
|
|
Bring the Beetom close to the door and begin Moondancing. Stop after exactly 175 moonfalls, so as not to fall through the floor. Requires: {
"obstaclesNotCleared": [
"A"
]
}
"canMoondance"
"canTrickyUseFrozenEnemies"
{
"enemyDamage": {
"enemy": "Beetom",
"type": "contact",
"hits": 4
}
}
Exit condition: {
"leaveWithStoredFallSpeed": {
"fallSpeedInTiles": 1
}
}
|
|
From: 1
Top Left Door
To: 2
Middle Left Door (Behind Power Bomb Blocks)
Break the Power Bomb Blocks without killing the Beetom Freeze a Beetom at head height where Samus can Spinjump into it and begin Moondancing. If needed, the Beetom can be left at the door while Samus moves to the farm bugs. Requires: {
"obstaclesNotCleared": [
"A"
]
}
"h_canUsePowerBombs"
"canMoondance"
"canTrickyUseFrozenEnemies"
{
"enemyDamage": {
"enemy": "Beetom",
"type": "contact",
"hits": 2
}
}
Exit condition: {
"leaveWithStoredFallSpeed": {
"fallSpeedInTiles": 1
}
}
Unlocks doors: {"types":["missiles","super"],"requires":[]}
{"types":["powerbomb"],"requires":[],"useImplicitRequires":false}
|
|
Freeze a Beetom at head height where Samus can Spinjump into it and begin Moondancing. If needed, the Beetom can be left at the door while Samus moves to the farm bugs. Requires: {
"obstaclesNotCleared": [
"A"
]
}
"canMoondance"
"canTrickyUseFrozenEnemies"
{
"enemyDamage": {
"enemy": "Beetom",
"type": "contact",
"hits": 2
}
}
Exit condition: {
"leaveWithStoredFallSpeed": {
"fallSpeedInTiles": 1
}
}
Unlocks doors: {"types":["missiles","super"],"requires":[]}
{
"types": [
"powerbomb"
],
"requires": [
{
"or": [
"canWalljump",
"h_canFly",
"canSpringBallJumpMidAir",
{
"and": [
"HiJump",
"SpeedBooster"
]
}
]
}
],
"note": [
"Using a Power Bomb here requires leaving the Beetom above and going back for it.",
"The Power Bomb will destroy the nearby Rippers, which is why there are additional requirements to get back up."
]
}
|
|
Freeze a Beetom at head height where Samus can Spinjump into it and begin Moondancing. If needed, the Beetom can be left at the door while Samus moves to the farm bugs. Requires: {
"obstaclesNotCleared": [
"A"
]
}
"canMoondance"
"canTrickyUseFrozenEnemies"
{
"enemyDamage": {
"enemy": "Beetom",
"type": "contact",
"hits": 6
}
}
Exit condition: {
"leaveWithStoredFallSpeed": {
"fallSpeedInTiles": 1
}
}
Unlocks doors: {"types":["missiles","super"],"requires":[]}
{
"types": [
"powerbomb"
],
"requires": [
{
"or": [
"canWalljump",
"h_canFly",
"canSpringBallJumpMidAir",
{
"and": [
"HiJump",
"SpeedBooster"
]
}
]
}
],
"note": [
"Using a Power Bomb here requires leaving the Beetom above and going back for it.",
"The Power Bomb will destroy the nearby Rippers, which is why there are additional requirements to get back up."
]
}
|
|
Freeze a Beetom at head height where Samus can Spinjump into it and begin Moondancing. If needed, the Beetom can be left at the door while Samus moves to the farm bugs. Requires: {
"obstaclesNotCleared": [
"A"
]
}
{
"or": [
"HiJump",
"SpaceJump",
"canWalljump"
]
}
"canMoondance"
"canTrickyUseFrozenEnemies"
{
"enemyDamage": {
"enemy": "Beetom",
"type": "contact",
"hits": 6
}
}
Exit condition: {
"leaveWithStoredFallSpeed": {
"fallSpeedInTiles": 1
}
}
Unlocks doors: {"types":["ammo"],"requires":[]}
|
|
From: 1
Left Door
To: 1
Left Door
Notable: true 
Use SpeedBooster to construct a structure for Moondancing that has 1 chest height block and 1 head height block to the right of it and no other Speed blocks. Crystal Flash below the lower block, exactly pixel aligned with its right side, to standup and then begin Moondancing. After Samus sinks through the bottom tile, it is possible to use Grapple to return to a crouch and wiggle right and then Turn-Around Aim Cancel to escape to the right. Without Grapple, count to 174 Moonfalls and delicately Moonfall so as to remain crouched and then wiggle to the right. Finally, use SpeedBooster if needed to break the remaining Speed blocks and reach the door. Requires: "h_canCrystalFlash" "canTrickyJump" "canTurnaroundAimCancel" "canTemporaryBlue" "canMoondance" "canSpeedball" Exit condition: {
"leaveWithStoredFallSpeed": {
"fallSpeedInTiles": 1
}
}
|
|
Freeze a Beetom at head height where Samus can Spinjump into it and begin Moondancing. Requires: "canMoondance"
"canTrickyUseFrozenEnemies"
{
"enemyDamage": {
"enemy": "Beetom",
"type": "contact",
"hits": 2
}
}
Exit condition: {
"leaveWithStoredFallSpeed": {
"fallSpeedInTiles": 1
}
}
|
|
From: 1
Left Door
To: 2
Right Door
Notable: true
Use SpeedBooster to construct a structure for Moondancing that has 1 chest height block and 1 head height block to the right of it and no other Speed blocks. Crystal Flash below the lower block, exactly pixel aligned with its right side, to standup and then begin Moondancing. After Samus sinks through the bottom tile, it is possible to use Grapple to return to a crouch and wiggle right and then Turn-Around Aim Cancel to escape to the right. Without Grapple, count to 174 Moonfalls and delicately Moonfall so as to remain crouched and then wiggle to the right. Finally, use SpeedBooster if needed to break the remaining Speed blocks and reach the door. Requires: "h_canCrystalFlash" "canTrickyJump" "canTurnaroundAimCancel" "canTemporaryBlue" "canMoondance" "canSpeedball" Exit condition: {
"leaveWithStoredFallSpeed": {
"fallSpeedInTiles": 1
}
}
Unlocks doors: {"types":["ammo"],"requires":[]}
|
|
Freeze a Beetom at head height where Samus can Spinjump into it and begin Moondancing. Requires: "canMoondance"
"canTrickyUseFrozenEnemies"
"SpeedBooster"
{
"enemyDamage": {
"enemy": "Beetom",
"type": "contact",
"hits": 2
}
}
Exit condition: {
"leaveWithStoredFallSpeed": {
"fallSpeedInTiles": 1
}
}
Unlocks doors: {"types":["ammo"],"requires":[]}
|
|
From: 2
Right Door
To: 2
Right Door
Notable: true .png)
.gif)
Fire wide Wave beam shots into the ceiling until it is possible to walk through the Speed blocks. Let a Beetom attach to Samus and then return to the right. Freeze the Beetom at head height where Samus can Spinjump into it and begin Moondancing. Requires: "canMoondance"
"canTrickyUseFrozenEnemies"
{
"enemyDamage": {
"enemy": "Beetom",
"type": "contact",
"hits": 2
}
}
"Wave"
{
"or": [
"Spazer",
"Plasma"
]
}
Exit condition: {
"leaveWithStoredFallSpeed": {
"fallSpeedInTiles": 1
}
}
|
|
From: 2
Far Left Door
To: 2
Far Left Door
Notable: true 
Use SpeedBooster to construct a structure for Moondancing that has 1 chest height block and 1 head height block to the right of it and no other Speed blocks. Crystal Flash below the lower block, exactly pixel aligned with its right side, to standup and then begin Moondancing. After Samus sinks through the bottom tile, it is possible to use Grapple to return to a crouch and wiggle right and then Turn-Around Aim Cancel to escape to the right. Without Grapple, count to 174 Moonfalls and delicately Moonfall so as to remain crouched and then wiggle to the right. Finally, use SpeedBooster if needed to break the remaining Speed blocks and reach the door. Requires: "h_heatProof" "SpeedBooster" "h_canCrystalFlash" "canTrickyJump" "canTurnaroundAimCancel" "canTemporaryBlue" "canMoondance" "canSpeedball" Exit condition: {
"leaveWithStoredFallSpeed": {
"fallSpeedInTiles": 1
}
}
|
|
From: 1
Top Left Door
To: 1
Top Left Door
Notable: true 
Use SpeedBooster to construct a structure for Moondancing that has 1 chest height block and 1 head height block to the right of it and no other Speed blocks. Crystal Flash below the lower block, exactly pixel aligned with its right side, to standup and then begin Moondancing. After Samus sinks through the bottom tile, it is possible to use Grapple to return to a crouch and wiggle right and then Turn-Around Aim Cancel to escape to the right. Without Grapple, count to 174 Moonfalls and delicately Moonfall so as to remain crouched and then wiggle to the right. Finally, shortcharge to break the remaining Speed blocks and reach the door. Requires: "h_canCrystalFlash"
"canTrickyJump"
"canTurnaroundAimCancel"
"canTemporaryBlue"
"canSpeedball"
"canMoondance"
{
"canShineCharge": {
"openEnd": 0,
"usedTiles": 16,
"steepDownTiles": 4
}
}
Exit condition: {
"leaveWithStoredFallSpeed": {
"fallSpeedInTiles": 1
}
}
|
|
From: 1
Top Left Door
To: 5
Top Right Item
Notable: true
Use SpeedBooster to construct a structure for Moondancing that has 1 chest height block and 1 head height block to the right of it and no other Speed blocks. Crystal Flash below the lower block, exactly pixel aligned with its right side, to standup and then begin Moondancing. After Samus sinks through the bottom tile, it is possible to use Grapple to return to a crouch and wiggle right and then Turn-Around Aim Cancel to escape to the right. Without Grapple, count to 174 Moonfalls and delicately Moonfall so as to remain crouched and then wiggle to the right. The Camera will not follow Samus after clipping. Requires: "h_canCrystalFlash"
"canTrickyJump"
"canTurnaroundAimCancel"
"canTemporaryBlue"
"canMoondance"
"canSpeedball"
{
"canShineCharge": {
"openEnd": 0,
"usedTiles": 16,
"steepDownTiles": 4
}
}
Clears obstacles: B |