canFlatleyJump (Very Hard)
Positioning Samus at the very edge of a platform, facing away, then turning around and jumping to initiate the jump from a position that is off the platform (and slightly below it). Sometimes referred to as a corner jump.
Dependencies: canTurnaroundSpinJump, canTrickyJump, canCarefulJump
Strats ()
|
From: 3
Junction (Left side Pit)
To: 2
Right Door
Notable: true 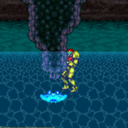
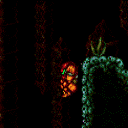
Freeze the right-most ramp Choot in a way where Samus can climb on top of it and use Space Jump to escape the water. Use a turn around to avoid knockback when making contact with the Choot to better time the use of Ice. Freeze the Choot as far to the right (on its lowest swoop), but this method is less precise than the alternatives. If Samus is inside the Choot when it is frozen, she can continuing moving freely. Jump on top either in spinjump or in Morph Ball Use XRay to standup, clipping partially into the above slope. Use a flately jump to fall out of the wall while still keeping enough height to spacejump on top of the water and escape. Requires: {
"enemyDamage": {
"enemy": "Choot",
"type": "contact",
"hits": 1
}
}
"canTrickyUseFrozenEnemies"
"Morph"
"canXRayStandUp"
"canSpaceJumpWaterBounce"
"canFlatleyJump"
"canHitbox"
|
|
From: 1
Top Left Door
To: 9
Junction (Top Rippers)
Notable: true 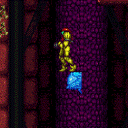
Freeze the Beetom and use it as a platform to climb the room without wall jumps. This can be done with well-timed Flatley jumps on top of the frozen Beetom, by turning around and spin jumping just as it unfreezes. This can be made easier (at the cost of some additional Beetom hits) with a pause-buffer method: Press pause, and begin a turn-around just before the pause hits; unequip Ice to immediately unfreeze the Beetom; unpause and press jump quickly after control resumes, but without buffering the input. For the top two jumps, it is possible to reduce the risk of damage by freezing the Beetom against the wall: in case of a failure due to an early (e.g. buffered) jump, the Beetom may stay stuck wiggling in the wall, and then it can be refrozen without needing to take damage to reposition it. Requires: "canTrickyUseFrozenEnemies"
"canFlatleyJump"
{
"or": [
{
"enemyDamage": {
"enemy": "Beetom",
"type": "contact",
"hits": 9
}
},
{
"and": [
"canInsaneJump",
{
"enemyDamage": {
"enemy": "Beetom",
"type": "contact",
"hits": 4
}
}
]
},
{
"and": [
"canBeVeryPatient",
{
"enemyDamage": {
"enemy": "Beetom",
"type": "contact",
"hits": 1
}
},
{
"refill": [
"Energy"
]
}
]
}
]
}
|
|
From: 1
Bottom Left Door
To: 5
Platform Junction Near Top Left Door
Notable: true 
This underwater walljump is very long. Some jump assistance, cross room jump, or a flatley jump from the door frame is needed to get to the first overhang. Requires: "canUnderwaterWalljump"
{
"or": [
"canUseFrozenEnemies",
"canSpringBallJumpMidAir",
{
"and": [
"canFlatleyJump",
{
"doorUnlockedAtNode": 1
}
]
}
]
}
Unlocks doors: {"nodeId":1,"types":["ammo"],"requires":[]}
|
|
From: 5
Platform Junction Near Top Left Door
To: 4
Top Left Door
Notable: true 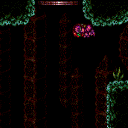
Jump towards the door with HiJump equipped. A Flatley style jump can position Samus over the edge of the ledge, closer to the door. Turning around while facing down, just before touching the ceiling, is another way to move Samus a few pixels closer to the door. Requires: "canSuitlessMaridia"
"HiJump"
"canTrickyJump"
{
"or": [
"canFlatleyJump",
"canMomentumConservingTurnaround"
]
}
|
|
From: 7
Lower Hills Junction
To: 10
Upper Right Ledge Junction
Notable: true 
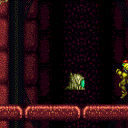
Climb the bottom right wall of Mt. Everest with Ice and HiJump while also luring a crab to the next platform to be used to ascend the next wall. The trickiest part of the climb is getting past the final overhang. This can be done with an underwater wall jump if the crab is low, a precise crouch jump and down grab if it is higher, or a flatley jump off of the crab if it is higher still. Two crabs makes it significantly easier to lure one to the top - simply let one go ahead of Samus. For a faster setup, one crab may be used by perform the final jump as it is unfreezing so it starts moving upward. Then go to the lower ground a bit to the right, jump and aim down to lower the camera to lure the crab. Note: The hardest part of this climb is the pixel precision when jumping around a ledge. Too many pixels: left is a fall, right you clip through the crab, low you miss the jump and fall, high is a bonk or crab clip. Requires: "canSuitlessMaridia"
"canCrazyCrabClimb"
"HiJump"
"canTrickyJump"
"canCameraManip"
{
"or": [
"canUnderwaterWalljump",
"h_canCrouchJumpDownGrab",
"canFlatleyJump",
"canInsaneJump"
]
}
Clears obstacles: A, B |
|
From: 10
Upper Right Ledge Junction
To: 4
Top Right Door
Start the jump from the higher ground to the left, specifically the right side of the second highest region. Requires: "canSuitlessMaridia" "HiJump" "canTrickySpringBallJump" "canFlatleyJump" |
|
Requires: "canSuitlessMaridia" "canFlatleyJump" "HiJump" |
|
From: 4
West Leg Sand
To: 5
Junction Above Grapple Block
Notable: true 
Use a flatley turnaround jump to get Samus inside the gap during a spinjump. Samus must jump from the left side platform. Requires: "Grapple" "canSuitlessMaridia" "HiJump" "canFlatleyJump" "canSunkenTileWideWallClimb" |
|
Using movement tricks to reduce fall speed even slightly can avoid touching the sand. A Flatley style turnaround over the grapple block hole reduces fall speed some, but also needs a down back or a tiny jump. Requires: "canSuitlessMaridia"
{
"or": [
{
"and": [
"canFlatleyJump",
{
"or": [
"canTrickyJump",
"canDownBack"
]
}
]
},
"canWalljump",
"canResetFallSpeed"
]
}
|