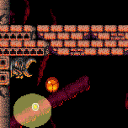
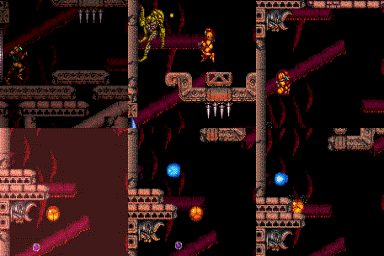
canDiagonalBombJump (Extreme)
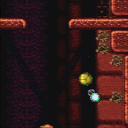
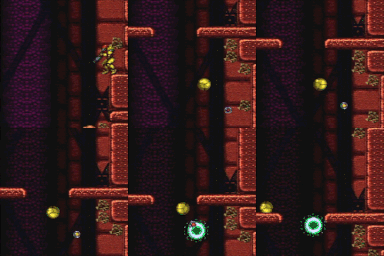
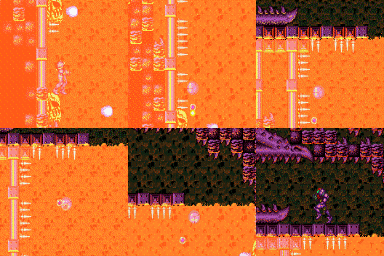
The ability to IBJ with backspin which results in an IBJ with diagonal movement.
Dependencies: canIBJ
Strats ()
|
Entrance condition: {
"comeInWithGMode": {
"mode": "direct",
"morphed": true
}
}
Requires: {
"or": [
"h_canArtificialMorphDiagonalBombJump",
"h_canArtificialMorphCeilingBombJump"
]
}
Clears obstacles: C |
|
Entrance condition: {
"comeInWithGMode": {
"mode": "any",
"morphed": true
}
}
Requires: {
"or": [
"h_canArtificialMorphDiagonalBombJump",
"h_canArtificialMorphCeilingBombJump",
{
"and": [
"h_canArtificialMorphSpringBall",
{
"spikeHits": 3
},
{
"or": [
"h_canArtificialMorphBombHorizontally",
{
"spikeHits": 1
}
]
}
]
},
{
"and": [
"h_canArtificialMorphIBJ",
{
"spikeHits": 10
},
{
"or": [
"h_canArtificialMorphBombHorizontally",
{
"spikeHits": 2
}
]
}
]
}
]
}
|
|
From: 1
Top Left Door
To: 4
Top Junction (Right of Spikes)
Requires: {
"or": [
"h_canDiagonalBombJump",
"h_canCeilingBombJump"
]
}
|
|
From: 1
Top Left Door
To: 5
Bottom Junction (Right of Boyons)
Entrance condition: {
"comeInWithGMode": {
"mode": "any",
"morphed": true
}
}
Requires: "h_canArtificialMorphBombs"
{
"or": [
{
"and": [
"h_canArtificialMorphSpringBall",
{
"spikeHits": 3
},
{
"or": [
"h_canArtificialMorphBombHorizontally",
{
"spikeHits": 1
}
]
}
]
},
{
"and": [
"Morph",
{
"or": [
"SpaceJump",
{
"and": [
{
"spikeHits": 1
},
{
"or": [
"canIframeSpikeJump",
{
"spikeHits": 1
}
]
}
]
}
]
}
]
},
{
"and": [
"h_canArtificialMorphIBJ",
{
"spikeHits": 10
},
{
"or": [
"h_canArtificialMorphBombHorizontally",
{
"spikeHits": 2
}
]
}
]
},
"h_canArtificialMorphDiagonalBombJump",
"h_canArtificialMorphCeilingBombJump"
]
}
|
|
From: 4
Top Junction (Right of Spikes)
To: 1
Top Left Door
Requires: {
"or": [
"h_canDiagonalBombJump",
{
"and": [
"h_canCeilingBombJump",
"canPreciseWalljump",
"canWallJumpInstantMorph",
"canJumpIntoIBJ"
]
}
]
}
|
|
From: 4
Top Junction (Right of Spikes)
To: 1
Top Left Door
Requires: {
"obstaclesCleared": [
"C"
]
}
"h_canArtificialMorphDiagonalBombJump"
|
|
From: 4
Lower Section - Top Right Door
To: 15
G-Mode Morph Junction (By Left Door)
Entrance condition: {
"comeInWithGMode": {
"mode": "any",
"morphed": true
}
}
Requires: {
"or": [
"Morph",
{
"and": [
"Gravity",
"h_canArtificialMorphIBJ"
]
},
{
"and": [
"h_canArtificialMorphSpringBall",
{
"or": [
"Gravity",
"HiJump",
"canCarefulJump"
]
}
]
},
"h_canArtificialMorphHBJ",
"h_canArtificialMorphDiagonalBombJump"
]
}
|
|
From: 4
Lower Section - Top Right Door
To: 17
G-Mode Morph Junction Direct (By Left Door)
Entrance condition: {
"comeInWithGMode": {
"mode": "direct",
"morphed": true
}
}
Requires: {
"or": [
"Morph",
{
"and": [
"Gravity",
"h_canArtificialMorphIBJ"
]
},
{
"and": [
"h_canArtificialMorphSpringBall",
{
"or": [
"Gravity",
"HiJump",
"canCarefulJump"
]
}
]
},
"h_canArtificialMorphHBJ",
"h_canArtificialMorphDiagonalBombJump"
]
}
|
|
From: 5
Lower Section - Bottom Right Door
To: 15
G-Mode Morph Junction (By Left Door)
Entrance condition: {
"comeInWithGMode": {
"mode": "any",
"morphed": true
}
}
Requires: {
"or": [
"Morph",
{
"and": [
"Gravity",
"h_canArtificialMorphIBJ"
]
},
{
"and": [
"h_canArtificialMorphSpringBall",
{
"or": [
"Gravity",
"HiJump",
"canCarefulJump"
]
}
]
},
"h_canArtificialMorphHBJ",
"h_canArtificialMorphDiagonalBombJump"
]
}
|
|
From: 5
Lower Section - Bottom Right Door
To: 17
G-Mode Morph Junction Direct (By Left Door)
Entrance condition: {
"comeInWithGMode": {
"mode": "direct",
"morphed": true
}
}
Requires: {
"or": [
"Morph",
{
"and": [
"Gravity",
"h_canArtificialMorphIBJ"
]
},
{
"and": [
"h_canArtificialMorphSpringBall",
{
"or": [
"Gravity",
"HiJump",
"canCarefulJump"
]
}
]
},
"h_canArtificialMorphHBJ",
"h_canArtificialMorphDiagonalBombJump"
]
}
|
|
From: 7
Junction (Bottom Rippers)
To: 6
Junction (Above Bottom Rippers)
Requires: "canWalljump" "h_canDiagonalBombJump" |
|
From: 4
Lava, Left Wall
To: 3
Above Lava Junction
Notable: true Begin on top of the lower left Namihe Jump into a double IBJ with such timing that Samus passes above the fired flame and such a way that there is no horizontal speed. A forward jump with run not held will work. Begin diagonal bomb jumping once past the start of the 2nd spike group from the top. Requires: "h_heatProof"
"Gravity"
{
"or": [
"h_lavaProof",
"canSuitlessLavaDive"
]
}
"h_canJumpIntoIBJ"
"h_canDoubleBombJump"
"h_canDiagonalBombJump"
"h_canStaggeredIBJ"
"canInsaneJump"
{
"heatFrames": 1560
}
{
"lavaFrames": 1520
}
|
|
From: 2
Bottom Left Door
To: 4
Junction Above Bomb Blocks
Notable: true Ignore the Yellow Pirates by walljumping up the left side to start a diagonal bomb jump from the wall, including a power bomb to clear the bomb blocks. Two quick walljumps upon entering the room can position Samus to get the left pirate to jump to the right and jump over the right pirate's lazer attack. Jump up the left wall and begin bomb jumping starting with a power bomb. Requires: "h_canNavigateHeatRooms"
"canFastWalljumpClimb"
"canWallJumpBombBoost"
"h_canDiagonalBombJump"
"h_canUsePowerBombs"
{
"heatFrames": 930
}
{
"or": [
"h_heatResistant",
{
"and": [
"canInsaneJump",
"canPauseAbuse"
]
},
{
"resourceCapacity": [
{
"type": "RegularEnergy",
"count": 149
}
]
}
]
}
Clears obstacles: A |
|
From: 1
Left Door
To: 4
Top Right Ledge Junction
Hug the right wall after killing the first Cacatac in order to avoid its invisible, stationary projectiles. After getting to the small island platform, diagonal IBJ up while avoiding the top Cacatac. Alternatively HBJ to the next platform and Spring Ball from the right edge of this platform into an IBJ above the spikes. Entrance condition: {
"comeInWithGMode": {
"mode": "any",
"morphed": true
}
}
Requires: "Gravity"
{
"or": [
"h_canArtificialMorphDiagonalBombJump",
{
"and": [
"h_canArtificialMorphHBJ",
"h_canArtificialMorphJumpIntoIBJ"
]
}
]
}
|
|
Requires: "Gravity"
{
"or": [
"SpaceJump",
"canWalljump",
"h_IBJFromSpikes",
{
"and": [
"h_canIBJ",
"h_canHBJ"
]
},
"h_canDiagonalBombJump"
]
}
|
|
Requires: "Gravity"
{
"or": [
"SpaceJump",
"canWalljump",
"canSpringBallJumpMidAir",
"h_canDiagonalBombJump",
"h_IBJFromSpikes"
]
}
|
|
From: 3
Junction (Get Past Metroids, Left to Right)
To: 2
Right Door
Bomb Jump between the two floating platforms. Requires: {
"or": [
{
"obstaclesCleared": [
"A"
]
},
{
"and": [
"canCameraManip",
"canMetroidAvoid"
]
}
]
}
{
"or": [
{
"and": [
"h_canHBJ",
"canResetFallSpeed"
]
},
{
"and": [
{
"obstaclesCleared": [
"A"
]
},
"h_canDiagonalBombJump"
]
},
"h_canCeilingBombJump"
]
}
|
|
From: 4
Junction (Get Past Metroids, Right to Left)
To: 1
Left Door (locked)
Bomb Jump between the two floating platforms. Requires: {
"obstaclesCleared": [
"A"
]
}
{
"or": [
"h_canCeilingBombJump",
"h_canDiagonalBombJump"
]
}
|
