canChainTemporaryBlue (Expert)

The ability to move while maintaining Temporary Blue. This can be done by jumping, releasing angle, then doing a mid-air morph on the descent, using mockball inputs. Afterwards, hold angle again while soft unmorphing and continue to hold angle after landing. Hold forward the entire time while morphed after the mockball inputs to prevent losing Temporary Blue. It is possible to use this alongside canXRayTurnaround to change directions during a Temporary Blue chain.
Dependencies: canMidAirMorph, canLateralMidAirMorph, canTemporaryBlue
Strats ()
|
Climb Temporary Blue Chain Through Bomb Blocks Without XRay (Bottom Left to Bottom, Cross-Room) (Extreme)
Climb
From: 2
Bottom Left Door
To: 4
Middle Right Door
Notable: true 
A Temporary Blue Chain with movement assists to climb up and destroy the bomb blocks blocking the bottom morph tunnel. Entrance condition: {
"comeInShinecharging": {
"length": 14,
"openEnd": 0
}
}
Requires: "canChainTemporaryBlue"
{
"or": [
"HiJump",
"canTrickySpringBallJump"
]
}
"canTrickyJump"
Clears obstacles: A |
|
From: 6
Main Junction
To: 3
Top Right Door
Notable: true
A long Temporary Blue Chain with x-ray turnarounds to climb up and destroy the bomb blocks blocking the top morph tunnel. Requires: "canChainTemporaryBlue"
"canXRayTurnaround"
"canTrickyJump"
"canBePatient"
{
"canShineCharge": {
"usedTiles": 27.5,
"openEnd": 0
}
}
{
"obstaclesCleared": [
"A"
]
}
|
|
From: 6
Main Junction
To: 4
Middle Right Door
Notable: true
A Temporary Blue Chain with x-ray turnarounds to climb up and destroy the bomb blocks blocking the bottom morph tunnel. Requires: "canChainTemporaryBlue"
"canXRayTurnaround"
"canTrickyJump"
{
"canShineCharge": {
"usedTiles": 27.5,
"openEnd": 0
}
}
{
"obstaclesCleared": [
"A"
]
}
|
|
Climb Temporary Blue Chain Through Bomb Blocks Without XRay (Bottom Left to Bottom, In-Room) (Extreme)
Climb
From: 6
Main Junction
To: 4
Middle Right Door
Notable: true
A Temporary Blue Chain with movement assists to climb up and destroy the bomb blocks blocking the bottom morph tunnel. Requires: "canChainTemporaryBlue"
{
"or": [
"HiJump",
"canTrickySpringBallJump"
]
}
"canTrickyJump"
{
"obstaclesCleared": [
"A"
]
}
{
"or": [
{
"canShineCharge": {
"usedTiles": 18,
"openEnd": 0
}
},
{
"and": [
{
"canShineCharge": {
"usedTiles": 19,
"openEnd": 0
}
},
{
"doorUnlockedAtNode": 2
}
]
}
]
}
|
|
From: 1
Top Left Door
To: 6
Top Junction with Temporary Blue (Right of Morph Tunnel)
Notable: true 
Using only the short runway and spike pit, use one or more SpeedKeeps to Speedball towards the Super Missile item location. This requires either a very short shortcharge, or a second SpeedKeep in the spikes which also resets Samus' run speed with a crouch jump before spike I-Frames expire. Requires: "canSpeedKeep"
"canSlowShortCharge"
{
"doorUnlockedAtNode": 1
}
{
"or": [
{
"and": [
"canChainTemporaryBlue",
{
"canShineCharge": {
"usedTiles": 13,
"openEnd": 1
}
},
{
"spikeHits": 1
}
]
},
{
"and": [
{
"canShineCharge": {
"usedTiles": 14,
"openEnd": 1
}
},
{
"spikeHits": 2
}
]
},
{
"and": [
"canChainTemporaryBlue",
{
"spikeHits": 3
}
]
}
]
}
"canSpeedball"
|
|
From: 1
Top Left Door
To: 6
Top Junction with Temporary Blue (Right of Morph Tunnel)
Bounce into the spikes and use a SpeedKeep to run on spikes to setup for a speedball towards the item. A DamageBoost SpeedKeep could be used instead of a Spike SpeedKeep with enough runspeed. Entrance condition: {
"comeInRunning": {
"speedBooster": true,
"minTiles": 4
}
}
Requires: "canSpeedKeep"
"canCarefulJump"
{
"canShineCharge": {
"usedTiles": 21,
"openEnd": 2
}
}
{
"spikeHits": 1
}
{
"or": [
{
"spikeHits": 1
},
"canChainTemporaryBlue"
]
}
"canSpeedball"
|
|
From: 1
Top Left Door
To: 6
Top Junction with Temporary Blue (Right of Morph Tunnel)
Use Springball on the spikes to cross the room with a Speedball. It helps to not be at full run speed when bouncing through the spike pit, but is still possible with very tight jumps. Then bounce into the Morph tunnel and use Springball to bounce all of the way through. Unmorphing before the Morph tunnel to better control the bounce can help. Entrance condition: {
"comeInShinecharging": {
"length": 3,
"openEnd": 1
}
}
Requires: "canSpeedball"
"canTemporaryBlue"
"canCarefulJump"
"canSpringBallBounce"
{
"or": [
"canTrickyDashJump",
"canChainTemporaryBlue"
]
}
{
"spikeHits": 1
}
|
|
From: 6
Top Junction with Temporary Blue (Right of Morph Tunnel)
To: 3
Item
Unmorph on the leftmost edge of the Speed blocks and jump across. Landing on the right side Speedblock, and the solid tile, gives enough time to run to the item and fall before the block respawns. Or jump fully over the Speed blocks and turn around using X-Ray after collecting the item. Requires: "canChainTemporaryBlue"
{
"or": [
"canTrickyJump",
"canXRayTurnaround"
]
}
Clears obstacles: B |
|
Bring temporary blue from the right side door all the way to the missile location using Springball, SpaceJump, or Morph-UnMorphs. Entrance condition: {
"comeInShinecharging": {
"length": 1,
"openEnd": 1
}
}
Requires: "canTemporaryBlue"
"canInsaneJump"
{
"or": [
"canChainTemporaryBlue",
{
"and": [
"canSpeedball",
"canSpringBallBounce",
"canSlowShortCharge"
]
},
{
"and": [
"canBlueSpaceJump",
"canMockball",
"canSlowShortCharge"
]
}
]
}
|
|
From: 2
Right Door
To: 4
Middle Junction (Left of Morph Tunnel)
A quick jump morph from the top of the slope will bounce into the tunnel and avoid acid damage. Entrance condition: {
"comeInShinecharging": {
"length": 4,
"openEnd": 0
}
}
Requires: "canTemporaryBlue"
"canLateralMidAirMorph"
{
"or": [
"canChainTemporaryBlue",
"can4HighMidAirMorph"
]
}
|
|
From: 2
Right Door
To: 4
Middle Junction (Left of Morph Tunnel)
Entrance condition: {
"comeInShinecharging": {
"length": 9,
"openEnd": 0
}
}
Requires: "canXRayTurnaround"
"canChainTemporaryBlue"
{
"acidFrames": 27
}
|
|
From: 7
Right Side - Bottom Middle Door (Behind the Super Block)
To: 13
Central Junction
Position Samus next to the Super block, while keeping the speed effect with a Temporary Blue Chain, and break it. Then bounce into the morph tunnel, while keeping speed, and continuing all the way through with SpringBall Avoiding the Temporary Blue Chain is possible, but harder. Entrance condition: {
"comeInShinecharging": {
"length": 7,
"openEnd": 0
}
}
Requires: "canChainTemporaryBlue"
"canSpringBallBounce"
{
"ammo": {
"type": "Super",
"count": 1
}
}
Clears obstacles: F |
|
Requires: {
"canShineCharge": {
"usedTiles": 24,
"openEnd": 1
}
}
"canChainTemporaryBlue"
"canXRayTurnaround"
Clears obstacles: D |
|
From: 13
Central Junction
To: 1
Left Side - Top Door
Build a ShineCharge on the below platform and bring it up to the morph tunnel by chaining Temporary Blue. Aim to bounce into the tunnel opening and use springball to bounce the rest of the way while blue. Requires: "canChainTemporaryBlue"
"canSpringBallBounce"
{
"or": [
{
"and": [
"canXRayTurnaround",
{
"canShineCharge": {
"usedTiles": 25,
"openEnd": 0
}
}
]
},
{
"canShineCharge": {
"usedTiles": 21,
"openEnd": 0
}
}
]
}
Clears obstacles: A |
|
From: 2
Top Right Door
To: 4
Junction Below Bomb Blocks
Notable: true 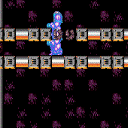
Carry Temporary Blue through the top door of Mickey Mouse to break the left side of the bomb blocks. There is a small frame window where Samus can soft unmorph on the crumble blocks and jump again while retaining temporary blue. Entrance condition: {
"comeInWithTemporaryBlue": {}
}
Requires: "h_canNavigateHeatRooms"
{
"obstaclesNotCleared": [
"A"
]
}
"canPrepareForNextRoom"
"canChainTemporaryBlue"
"canInsaneJump"
"canCrumbleJump"
{
"heatFrames": 300
}
Clears obstacles: B |
|
From: 2
Top Right Door
To: 4
Junction Below Bomb Blocks
Carry Temporary Blue through the top door of Mickey Mouse to break the left side of the bomb blocks. Morph while falling through the shot block to bounce on the crumble blocks towards the morph tunnel. Then unmorph near the wall to fall straight down with temporary blue, if needed. Entrance condition: {
"comeInWithTemporaryBlue": {}
}
Requires: "h_canNavigateHeatRooms"
{
"obstaclesNotCleared": [
"A"
]
}
"canPrepareForNextRoom"
"canChainTemporaryBlue"
"h_canUseSpringBall"
{
"heatFrames": 300
}
Clears obstacles: B |
|
From: 7
Junction Left of Morph Tunnel
To: 6
Junction Left of Power Bomb Blocks
Requires: {
"obstaclesCleared": [
"C",
"D"
]
}
{
"canShineCharge": {
"usedTiles": 20,
"openEnd": 1,
"steepDownTiles": 4
}
}
"canCarefulJump"
"canChainTemporaryBlue"
{
"heatFrames": 240
}
Clears obstacles: B |
|
From: 5
Middle Right Door
To: 8
Item
Shinecharging up the stairs gives a longer effective runway than shinecharging down them. Bounce down the stairs to make movement simpler. A frozen Atomic (or Covern) can be used for more runway. Requires: "canChainTemporaryBlue"
"canXRayTurnaround"
{
"or": [
{
"and": [
"can4HighMidAirMorph",
{
"doorUnlockedAtNode": 5
},
{
"canShineCharge": {
"usedTiles": 11,
"openEnd": 2,
"steepUpTiles": 7
}
}
]
},
{
"and": [
"f_DefeatedPhantoon",
"h_canFrozenEnemyRunway",
"can4HighMidAirMorph",
{
"doorUnlockedAtNode": 5
},
{
"canShineCharge": {
"usedTiles": 13,
"openEnd": 1,
"steepUpTiles": 7
}
}
]
},
{
"canShineCharge": {
"usedTiles": 10,
"openEnd": 2,
"steepUpTiles": 7
}
},
{
"and": [
"f_DefeatedPhantoon",
"h_canFrozenEnemyRunway",
{
"canShineCharge": {
"usedTiles": 12,
"openEnd": 1,
"steepUpTiles": 7
}
}
]
}
]
}
Clears obstacles: C |
|
From: 8
Item
To: 3
Bottom Left Door
Neutral bounce into the Morph tunnel, and SpringBall bounce to continue all the way through. Requires: "Morph"
"canChainTemporaryBlue"
"canXRayTurnaround"
"canSpringBallBounce"
{
"canShineCharge": {
"usedTiles": 16,
"openEnd": 1,
"steepDownTiles": 4
}
}
Clears obstacles: C |
|
From: 8
Item
To: 3
Bottom Left Door
Run towards the conveyor to more easily build the ShineCharge, and for an easier bounce into the morph tunnel. Neutral bounce into the Morph tunnel, and SpringBall bounce to continue all the way through. Requires: "f_DefeatedPhantoon"
"canXRayTurnaround"
"canSpringBallBounce"
{
"or": [
"HiJump",
"canChainTemporaryBlue"
]
}
{
"canShineCharge": {
"usedTiles": 20,
"openEnd": 1,
"steepDownTiles": 4
}
}
Clears obstacles: C |
|
Bring a Shinecharge from the top door to the speed blocks below the Missile item location. Be especially mindfull of the aquatic life during the descent. Line up directly below the speed blocks when jumping up. Entrance condition: {
"comeInShinecharging": {
"length": 14,
"steepDownTiles": 2,
"openEnd": 0
}
}
Requires: "Gravity" "canChainTemporaryBlue" "canXRayTurnaround" |
|
From: 4
Top Right Door
To: 6
Speed Blocked Item
Bring a Shinecharge from the top door to the speed blocks below the Missile item location. Be especially mindfull of the aquatic life during the descent. Line up directly below the speed blocks when jumping up, especially if using a SpringBall jump. Entrance condition: {
"comeInRunning": {
"speedBooster": true,
"minTiles": 1.4375
}
}
Requires: "canChainTemporaryBlue"
"canXRayTurnaround"
"canStutterWaterShineCharge"
{
"or": [
"Gravity",
{
"and": [
"canSuitlessMaridia",
"HiJump"
]
},
{
"and": [
"canSuitlessMaridia",
"canSpringBallJumpMidAir"
]
}
]
}
|
|
From: 3
Bottom Right Door
To: 2
Bottom Left Door
Notable: true 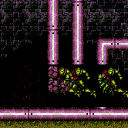
Jump into the room and shoot out at least the bottom shotblock. Jumping into the top of the door frame at low speeds lines up the shot well. Speedball through and unmorph on top of the first set of speedblocks. Reposition with a Chain Temporary Blue closer to the remaining speed blocks. Jump into the rest of the Speed Blocks clearing a path for the Oums. Wait for the Oums to roll on their own to a place where they can be climbed. Do not stand on the Oums when they begin to attack. Entrance condition: {
"comeInSpeedballing": {
"runway": {
"length": 0,
"openEnd": 0
}
}
}
Requires: "canSpeedball" "canCrossRoomJumpIntoWater" "canUseEnemies" "canChainTemporaryBlue" "canSlowShortCharge" |