canDiagonalBombJump (Extreme+)

The ability to IBJ with backspin which results in an IBJ with diagonal movement. This also includes the ability to HBJ at the top of an IBJ.
Dependencies: canIBJ
Dev note: This does not include low incline diagonal bomb jumps, at less than around 45 degrees. Those are significantly harder.
Strats ()
From: 4
Lower Section - Top Right Door
To: 15
G-Mode Morph Junction (By Left Door)
Entrance condition: {
"comeInWithGMode": {
"mode": "any",
"morphed": true
}
}Requires: {
"or": [
"Morph",
{
"and": [
"Gravity",
"h_artificialMorphIBJ"
]
},
"h_artificialMorphSpringBall",
"h_artificialMorphHBJ",
"h_artificialMorphDiagonalBombJump"
]
} |
From: 4
Lower Section - Top Right Door
To: 17
G-Mode Morph Junction Direct (By Left Door)
Entrance condition: {
"comeInWithGMode": {
"mode": "direct",
"morphed": true
}
}Requires: {
"or": [
"Morph",
{
"and": [
"Gravity",
"h_artificialMorphIBJ"
]
},
"h_artificialMorphSpringBall",
"h_artificialMorphHBJ",
"h_artificialMorphDiagonalBombJump"
]
}Clears obstacles: R-Mode |
From: 5
Lower Section - Bottom Right Door
To: 15
G-Mode Morph Junction (By Left Door)
Entrance condition: {
"comeInWithGMode": {
"mode": "any",
"morphed": true
}
}Requires: {
"or": [
"Morph",
{
"and": [
"Gravity",
"h_artificialMorphIBJ"
]
},
"h_artificialMorphSpringBall",
"h_artificialMorphHBJ",
"h_artificialMorphDiagonalBombJump"
]
} |
From: 5
Lower Section - Bottom Right Door
To: 17
G-Mode Morph Junction Direct (By Left Door)
Entrance condition: {
"comeInWithGMode": {
"mode": "direct",
"morphed": true
}
}Requires: {
"or": [
"Morph",
{
"and": [
"Gravity",
"h_artificialMorphIBJ"
]
},
"h_artificialMorphSpringBall",
"h_artificialMorphHBJ",
"h_artificialMorphDiagonalBombJump"
]
}Clears obstacles: R-Mode |
From: 4
Small Ledge Below Left Door
To: 1
Left Door


Perform an HBJ at the top of an IBJ. This is basically a very short diagonal bomb jump. Requires: {
"or": [
"canLongIBJ",
"canJumpIntoIBJ"
]
}
"canDiagonalBombJump" |
From: 7
Junction (Bottom of Room)
To: 6
Junction (Above Bottom Rippers)
Requires: "canWallJump" "canDiagonalBombJump" |
|
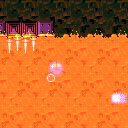
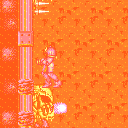
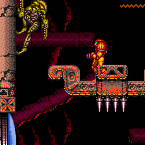
Begin on top of the lower left Namihe Jump into a double IBJ with such timing that Samus passes above the fired flame and such a way that there is no horizontal speed. A forward jump with run not held will work. Begin diagonal bomb jumping once past the start of the 2nd spike group from the top. Requires: {
"notable": "Diagonal Bomb Jump"
}
"h_heatProof"
"Gravity"
{
"or": [
"h_lavaProof",
"canSuitlessLavaDive"
]
}
"canJumpIntoIBJ"
"canLongIBJ"
"canDoubleBombJump"
"canDiagonalBombJump"
"canStaggeredIBJ"
"canInsaneJump"
{
"heatFrames": 1560
}
{
"lavaFrames": 1520
}Dev note: heatProof because each attempt at this strat costs so many heat frames and its hard enough already. |
|
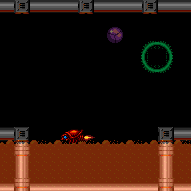
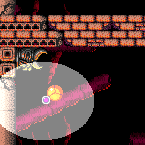
Getting across the lava while artificially morphed requires an HBJ or Bomb boosting out and freezing a Boyon below. Entrance condition: {
"comeInWithGMode": {
"mode": "any",
"morphed": true
}
}Requires: {
"or": [
{
"and": [
"h_artificialMorphMovement",
"h_lavaProof"
]
},
{
"and": [
"Morph",
"canTrickyUseFrozenEnemies"
]
},
{
"and": [
"h_artificialMorphIBJ",
"h_artificialMorphBombHorizontally",
"canTrickyUseFrozenEnemies"
]
},
{
"and": [
"canInsaneJump",
{
"or": [
"h_artificialMorphHBJ",
"h_artificialMorphDiagonalBombJump"
]
}
]
}
]
}
"h_heatedGModeOpenDifferentDoor"Dev note: FIXME: It is also possible with a rolling speed bomb boost down back. |
From: 1
Left Door
To: 6
G-Mode Morph Junction (At Speed Blocks)
Perform a long diagonal bomb jump from the left door to the solid platforms above the acid. Entrance condition: {
"comeInWithGMode": {
"mode": "any",
"morphed": true
}
}Requires: {
"notable": "G-Mode Morph Long Diagonal Bomb Jump"
}
"h_artificialMorphDiagonalBombJump"
"h_artificialMorphLongIBJ" |
From: 1
Left Door
To: 7
Direct G-Mode Morph Junction (At Speed Blocks)
Perform a long diagonal bomb jump from the left door to the solid platforms above the acid. Entrance condition: {
"comeInWithGMode": {
"mode": "direct",
"morphed": true
}
}Requires: {
"notable": "G-Mode Morph Long Diagonal Bomb Jump"
}
"h_artificialMorphDiagonalBombJump"
"h_artificialMorphLongIBJ" |
From: 6
G-Mode Morph Junction (At Speed Blocks)
To: 1
Left Door
Cross the room with a long diagonal bomb jump from the solid platforms above the acid. Requires: "canGMode"
{
  "notable": "G-Mode Morph Long Diagonal Bomb Jump"
}
"h_artificialMorphDiagonalBombJump"
"h_artificialMorphLongIBJ" |
From: 7
Direct G-Mode Morph Junction (At Speed Blocks)
To: 1
Left Door
Touch the item then cross the room with a long diagonal bomb jump from the solid platforms above the acid. Requires: "canRemoteAcquire"
{
  "notable": "G-Mode Morph Long Diagonal Bomb Jump"
}
"h_artificialMorphDiagonalBombJump"
"h_artificialMorphLongIBJ"Collects items: 3 |
From: 2
Bottom Left Door
To: 4
Junction Above Bomb Blocks
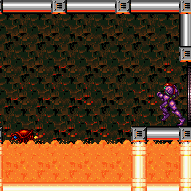
Ignore the Yellow Pirates by walljumping up the left side to start a diagonal bomb jump from the wall. Requires: {
"haveBlueSuit": {}
}
"canWallJumpBombBoost"
"canDiagonalBombJump"
{
"heatFrames": 700
}
{
"or": [
"h_heatResistant",
{
"and": [
"canInsaneJump",
"canPauseAbuse"
]
},
{
"resourceCapacity": [
{
"type": "RegularEnergy",
"count": 149
}
]
}
]
}Clears obstacles: A Dev note: With Reserves only, this strat requires much more precise movement and either pause abuse or optimal reserve management. |
From: 2
Bottom Left Door
To: 4
Junction Above Bomb Blocks
Ignore the Yellow Pirates by walljumping up the left side to start a diagonal bomb jump from the wall, including a power bomb to clear the bomb blocks. Two quick walljumps upon entering the room can position Samus to get the left pirate to jump to the right and jump over the right pirate's lazer attack. Jump up the left wall and begin bomb jumping starting with a power bomb. Requires: {
"notable": "Power Bomb Diagonal Bomb Jump"
}
"canFastWallJumpClimb"
"canWallJumpBombBoost"
"canDiagonalBombJump"
"h_usePowerBomb"
{
"heatFrames": 930
}
{
"or": [
"h_heatResistant",
{
"and": [
"canInsaneJump",
"canPauseAbuse"
]
},
{
"resourceCapacity": [
{
"type": "RegularEnergy",
"count": 149
}
]
}
]
}Clears obstacles: A Dev note: There is a very similar strat using an HBJ that is a little faster but more precise and overall harder. With Reserves only, this strat requires much more precise movement and either pause abuse or optimal reserve management. |
From: 1
Left Door
To: 4
Top Right Ledge Junction
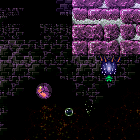
Hug the right wall after killing the first Cacatac in order to avoid its invisible, stationary projectiles. After getting to the small island platform, diagonal IBJ up while avoiding the top Cacatac. Alternatively HBJ to the next platform and Spring Ball from the right edge of this platform into an IBJ above the spikes. Entrance condition: {
"comeInWithGMode": {
"mode": "any",
"morphed": true
}
}Requires: "Gravity"
{
"or": [
"h_artificialMorphDiagonalBombJump",
{
"and": [
"h_artificialMorphHBJ",
"h_artificialMorphJumpIntoIBJ"
]
}
]
} |
|
This requires multiple HBJ to get over spike pits. The first one, by the right door, must be started at the top of an IBJ. Entrance condition: {
"comeInWithGMode": {
"mode": "any",
"morphed": true
}
}Requires: {
"notable": "G-Mode Morph, IBJ, HBJ"
}
"Gravity"
{
"or": [
"h_artificialMorphLongIBJ",
"h_artificialMorphJumpIntoIBJ"
]
}
"h_artificialMorphDiagonalBombJump"
"h_artificialMorphHBJ" |
|
Requires: {
"resetRoom": {
"nodes": [
2
]
}
}
{
"or": [
{
"and": [
"Gravity",
{
"or": [
{
"and": [
"canWallJump",
{
"cycleFrames": 740
}
]
},
{
"and": [
"SpaceJump",
{
"cycleFrames": 790
}
]
},
{
"and": [
"HiJump",
"canTrickyDashJump",
{
"cycleFrames": 795
}
]
},
{
"and": [
"canSpringBallJumpMidAir",
{
"or": [
"HiJump",
"canSpringFling"
]
},
{
"cycleFrames": 920
},
"h_doubleEquipmentScreenCycleFrames"
]
},
{
"and": [
"canDiagonalBombJump",
{
"cycleFrames": 1380
}
]
}
]
}
]
},
{
"and": [
"canSuitlessMaridia",
{
"or": [
{
"and": [
"HiJump",
"canSpaceJumpWaterBounce",
"canWallJump",
{
"cycleFrames": 810
}
]
},
{
"and": [
"HiJump",
"canSpaceJumpWaterEscape",
{
"cycleFrames": 850
}
]
},
{
"and": [
"HiJump",
"h_underwaterMaxHeightSpringBallJump",
"canTrickyJump",
"canStationaryLateralMidAirMorph",
{
"cycleFrames": 1070
},
"h_doubleEquipmentScreenCycleFrames"
]
}
]
}
]
}
]
}Resets obstacles: R-Mode Farm cycle drops: 2 Cacatac |
|
Perform an HBJ at the top of an IBJ. This is basically a very short diagonal bomb jump. Requires: "Gravity"
"canDiagonalBombJump"
{
"or": [
"canLongIBJ",
"canJumpIntoIBJ"
]
} |
|
Requires: "Gravity"
{
"or": [
"SpaceJump",
"canWallJump",
"canSpringBallJumpMidAir",
"canDiagonalBombJump",
"h_IBJFromSpikes"
]
} |
|

Bomb Jump between the two floating platforms. Requires: "canDash"
{
"or": [
{
"obstaclesCleared": [
"A"
]
},
{
"and": [
"canCameraManip",
"canMetroidAvoid"
]
}
]
}
{
"or": [
{
"and": [
"canHBJ",
"canResetFallSpeed"
]
},
{
"and": [
{
"obstaclesCleared": [
"A"
]
},
"canDiagonalBombJump"
]
},
"canCeilingBombJump"
]
} |
|

Bomb Jump between the two floating platforms. Requires: {
"obstaclesCleared": [
"A",
"B"
]
}
{
"or": [
"canCeilingBombJump",
"canDiagonalBombJump"
]
} |