canCeilingClip (Hard)
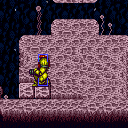
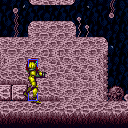
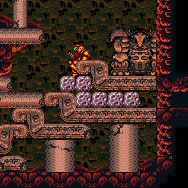
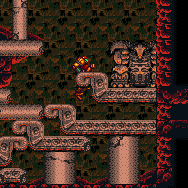
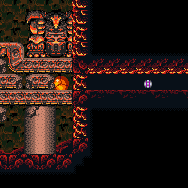
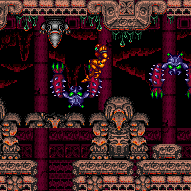
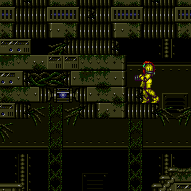
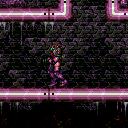
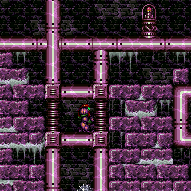
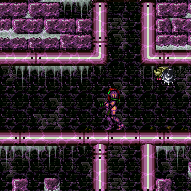
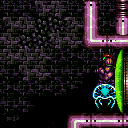
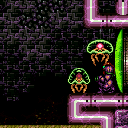
Basic variant of jumping into a two block high space and performing the actions needed to clip up through a one-tile-thick ceiling.
Strats ()
From: 9
Left Side - Bottom Door
To: 11
Middle Item
Go into the morph tunnel below the Charge Beam location and Crystal Flash to force a standup and jump through. Samus is now unable to use X-Ray. Without Morph, be careful not to overload PLMs using the camera scroll blocks on the path upward. Then partially floor clip into the left side of the bomb block, and jump to clip through and escape. To exit G-Mode, damage down until the reserves trigger, which can be done most quickly using the Sidehoppers. Entrance condition: {
"comeInWithGMode": {
"mode": "any",
"morphed": true
}
}Requires: "canComplexGMode"
{
"or": [
"h_artificialMorphIBJ",
"Morph",
{
"and": [
"h_artificialMorphSpringBall",
{
"or": [
"HiJump",
{
"and": [
"h_artificialMorphSpringBallBombJump",
"h_additionalBomb",
"h_additionalBomb",
"h_additionalBomb"
]
}
]
}
]
}
]
}
"h_artificialMorphCrystalFlash"
{
"or": [
"Morph",
{
"and": [
"canInsaneJump",
"canTwoTileSqueeze",
"canPartialFloorClip",
"canCeilingClip"
]
}
]
}
"canBePatient"
{
"autoReserveTrigger": {}
}Dev note: This assumes Samus has many Energy Tanks, which will take a while to empty. |
From: 9
Left Side - Bottom Door
To: 13
Central Junction
Farm the Zeb pipe just above the 'main' left door. Shinecharge on the ledge below, then hop back up and get interrupted by a Zeb. Entrance condition: {
"comeInWithRMode": {}
}Requires: "Morph"
"h_usePowerBomb"
{
"or": [
"canTwoTileSqueeze",
{
"and": [
"Morph",
"canXRayStandUp"
]
}
]
}
"canPartialFloorClip"
"canCeilingClip"
{
"refill": [
"Energy"
]
}
{
"canShineCharge": {
"usedTiles": 25,
"openEnd": 1
}
}
{
"autoReserveTrigger": {
"maxReserveEnergy": 95
}
}
"canRModeSparkInterrupt"Clears obstacles: E |
From: 9
Left Side - Bottom Door
To: 13
Central Junction
Go into the Morph Tunnel below the Charge Beam location and Crystal Flash to force a standup and jump through. Samus is now unable to use X-Ray. Without Morph, be careful not to overload PLMs using the camera scroll blocks on the path upward. Partially floor clip into the left side of the bomb block and jump to clip through and escape. Go to the 'main' left door's runway and shinecharge. Do not kill any Zebs during the ascent as they will not respawn until G-Mode ends. Shinecharge and jump to the Zeb pipe above the runway to interrupt. G-Mode will end and the Zeb pipe can be farmed to refill if needed. Entrance condition: {
"comeInWithGMode": {
"mode": "direct",
"morphed": true
}
}Requires: "canComplexGMode"
{
"or": [
"h_artificialMorphIBJ",
"Morph",
{
"and": [
"h_artificialMorphSpringBall",
{
"or": [
"HiJump",
{
"and": [
"h_artificialMorphSpringBallBombJump",
"h_additionalBomb",
"h_additionalBomb",
"h_additionalBomb"
]
}
]
}
]
}
]
}
"h_artificialMorphCrystalFlash"
{
"or": [
"Morph",
{
"and": [
"canInsaneJump",
"canTwoTileSqueeze",
"canPartialFloorClip",
"canCeilingClip"
]
}
]
}
{
"canShineCharge": {
"usedTiles": 25,
"openEnd": 1
}
}
{
"autoReserveTrigger": {
"maxReserveEnergy": 95
}
}
"canRModeSparkInterrupt"
{
"partialRefill": {
"type": "Energy",
"limit": 50
}
}Clears obstacles: E |
|
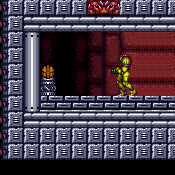
Partially floor clip into the left side of the bomb block above the charge beam location. Then jump to clip through the above tile. Requires: {
"obstaclesNotCleared": [
"D"
]
}
{
"or": [
"canTwoTileSqueeze",
{
"and": [
"Morph",
"canXRayStandUp"
]
}
]
}
"canPartialFloorClip"
"canCeilingClip" |
|
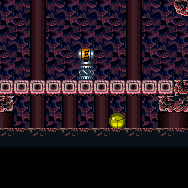
Perform the crystal flash all the way to the left, against the crumble blocks to prevent the elevator on the right from blocking you in. Simply jump after performing the crystal flash to jump through the floor. Requires: {
"notable": "Crystal Flash Clip"
}
{
"obstaclesNotCleared": [
"R-Mode"
]
}
"h_CrystalFlash"
"canCeilingClip" |
|
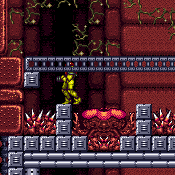
Use the Solid Blocks next to the Samus Eater to clip up through the Power Bomb Blocks. Carefully jump around the thorns, use HiJump to jump over them, or walk through them using i-frames. Requires: "canCeilingClip"
"canPartialFloorClip"
{
"or": [
{
"and": [
"canCarefulJump",
"HiJump",
"canTwoTileSqueeze",
{
"or": [
"canTrickyJump",
{
"thornHits": 1
}
]
}
]
},
{
"and": [
"canNeutralDamageBoost",
"canUseIFrames",
{
"thornHits": 1
}
]
},
{
"and": [
"canPreciseWallJump",
"canTwoTileSqueeze"
]
}
]
} |
|
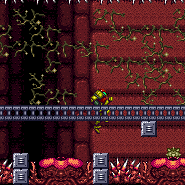
Use the Solid Blocks next to the Samus Eater to clip up through the Power Bomb Blocks. The thorns do not cover the entire blocks above. Jump barely only onto the corner to avoid the damage. Carefully jump around the thorns, tunnel crawl slightly to avoid touching the thorns when partial floor clipping. Morph and x-ray can be used instead to setup the clip much easier. Requires: "canTrickyJump"
{
"or": [
"canXRayCeilingClip",
"canTunnelCrawl"
]
}
"canPartialFloorClip"
"canCeilingClip" |
From: 5
Junction Below Right Item
To: 3
Top Right Item
Requires: "Morph" "canXRayStandUp" "canPartialFloorClip" "canCeilingClip" |
From: 3
Bottom Right Door
To: 4
Top Door
Use a Super to knock a Viola off of the middle platforms and ride it up the right wall by freezing it. Once it reaches the top door, use another Super to knock it off again, and freeze it mid-air pixel perfectly. Use a flash suit or blue suit from a crouched position to spark vertically and clip past the door shell. Requires: {
"or": [
"canConsecutiveWallJump",
"SpaceJump",
"canLongIBJ",
"canBePatient"
]
}
{
"ammo": {
"type": "Super",
"count": 2
}
}
"h_storedSparkIceClip"
{
"shinespark": {
"frames": 2,
"excessFrames": 1
}
}Exit condition: {
"leaveWithSpark": {}
}Bypasses door shell: true |
From: 2
Right Vertical Door
To: 5
Spring Ball Maze Junction (Past the Bomb Blocks)
Perform the Crystal Flash all the way against the left wall of the accessible tunnel, then jump through the ceiling. Requires: {
"notable": "Crystal Flash Clip"
}
{
"heatFrames": 100
}
"h_heatedCrystalFlash"
"canCeilingClip"
{
"or": [
"canTrivialMidAirMorph",
"h_useSpringBall"
]
}
{
"heatFrames": 175
}Clears obstacles: B Dev note: After the CF, a midair morph can be avoided with a single bomb, but midair morph is expected for this level. The heat frames are based on reaching the entrance of the last morph tunnel. FIXME: in the room diagram, draw node 5 using a smaller box to more precisely indicate this location. |
From: 2
Right Vertical Door
To: 7
Junction By Lower Alcoons (Left of Spike Pits)
Crystal Flash against the left edge of the tunnel, then jump through the ceiling. You cannot use Power Bombs or X-Ray after the Crystal Flash clip. Kill the Alcoon to clear the runway then drop into the lower left Alcoon to interrupt. Entrance condition: {
"comeInWithRMode": {},
"comesThroughToilet": "no"
}Requires: {
"notable": "Crystal Flash Clip"
}
{
"heatFrames": 100
}
"h_heatedCrystalFlashForReserveEnergy"
"canCeilingClip"
"canTrivialMidAirMorph"
{
"heatFrames": 240
}
{
"or": [
{
"enemyKill": {
"enemies": [
[
"Alcoon"
]
],
"explicitWeapons": [
"Missile",
"Super",
"Charge+Plasma",
"Wave+Plasma"
]
}
},
{
"heatFrames": 200
}
]
}
{
"canShineCharge": {
"usedTiles": 27,
"gentleUpTiles": 2,
"openEnd": 0
}
}
{
"or": [
"canDownBack",
"canTrickyJump"
]
}
{
"heatFrames": 120
}
{
"autoReserveTrigger": {
"maxReserveEnergy": 95
}
}
"canRModeSparkInterrupt"Clears obstacles: A, B |
|
Overload PLMs by rolling through the camera scroll block just right of the bomb blocks, then roll through the morph tunnel and use a bomb boost or Spring Ball to escape the tunnel and get to the door. Without a way to boost out of the tunnel, exit G-mode and use a two-turn X-Ray climb, then ceiling clip by jumping out of the tunnel. Note that the Kihunter is global, and will hit Samus. Without any way to know where the Kihunter will be, a contact hit is expected without Screw Attack or blue suit. Entrance condition: {
"comeInWithGMode": {
"mode": "any",
"morphed": true
},
"comesThroughToilet": "any"
}Requires: "h_artificialMorphMovement"
"canOffScreenMovement"
{
"or": [
"h_artificialMorphBombThings",
"h_artificialMorphSpringBall",
{
"and": [
"canXRayClimb",
"canCeilingClip",
{
"heatFrames": 450
},
{
"or": [
"canTrickyGMode",
{
"heatFrames": 200
}
]
}
]
}
]
}
{
"or": [
"ScrewAttack",
{
"haveBlueSuit": {}
},
{
"enemyDamage": {
"enemy": "Kihunter (red)",
"type": "contact",
"hits": 1
}
}
]
}
"h_heatedGModeOffCameraDoor"Exit condition: {
"leaveNormally": {}
}Unlocks doors: {"types":["missiles"],"requires":[{"heatFrames":50}]}
{"types":["super"],"requires":[]}
{"types":["powerbomb"],"requires":[{"heatFrames":110}]}Dev note: It is also possible, but not expected, to kill the Kihunter by the door and use its drop to get out of the room. Because this is blind and there doesn't appear to be a way to fix the camera, it is not expected to climb higher in the room. FIXME: These door unlock heat frames could be lowered, but it depends on if the Kihunter is alive, and if Samus had to exit G-mode to get out of the tunnel. FIXME: It is possible to pause abuse a drop from the Kihunter. |
From: 6
Inside Morph Tunnel (Right of Left Bomb Blocks)
To: 7
Middle Right Door With Bottom Kihunter Cleared
Requires: {
"haveBlueSuit": {}
}
"Morph"
{
"heatFrames": 260
}
{
"or": [
"h_useSpringBall",
{
"and": [
"h_bombThings",
{
"heatFrames": 60
}
]
},
{
"and": [
"canXRayStandUp",
"canPartialFloorClip",
"canCeilingClip",
{
"heatFrames": 50
}
]
}
]
} |
From: 6
Inside Morph Tunnel (Right of Left Bomb Blocks)
To: 7
Middle Right Door With Bottom Kihunter Cleared
Wait for the bomb blocks to reappear. Two crouches worth of height are needed before jumping through the rest of the blocks. Watch for the Kihunter to move right before jumping up to get a safe predictable swoop. Requires: "h_usePowerBomb"
"canXRayClimb"
"canCeilingClip"
"canDash"
{
"or": [
"ScrewAttack",
{
"and": [
"canTrickyJump",
{
"heatFrames": 90
}
]
},
{
"enemyDamage": {
"enemy": "Kihunter (red)",
"type": "contact",
"hits": 1
}
}
]
}
{
"heatFrames": 810
}Dev note: This requires Power Bombs because it saves neither energy nor ammo using Bombs. |
From: 6
Inside Morph Tunnel (Right of Left Bomb Blocks)
To: 7
Middle Right Door With Bottom Kihunter Cleared
Use X-Ray to stand up. Jump to clip into the floor. Then another jump to clip through the ceiling block. Watch for the Kihunter to move right before jumping up to get a safe predictable swoop. Requires: "h_usePowerBomb"
"canXRayStandUp"
"canPartialFloorClip"
"canCeilingClip"
"canDash"
{
"or": [
"ScrewAttack",
{
"and": [
"canTrickyJump",
{
"heatFrames": 90
}
]
},
"canInsaneJump",
{
"enemyDamage": {
"enemy": "Kihunter (red)",
"type": "contact",
"hits": 1
}
}
]
}
{
"heatFrames": 380
}Dev note: This requires Power Bombs because it saves neither energy nor ammo using Bombs. It's slower than Spring Ball mainly because X-Ray scope won't activate during the Power Bomb explosion. |
From: 5
Junction Below Shot Block
To: 7
Junction Left of Morph Tunnel
Break the Power Bomb statue leaving 1 row of blocks. Partially clip beneath the Power Bomb blocks and the sold tiles beneath. Wait for a Dessgeega to jump over head and jump into it. The left ceiling Dessgeega works better. Aim down after jumping in order to fully boost over the solid statue. Damage boost to the right and use i-frames to run through all of the enemies. Requires: {
"notable": "HiJumpless Statue Clip Damage Boost"
}
{
"obstaclesNotCleared": [
"A"
]
}
"h_usePowerBomb"
"canTrickyJump"
"canPartialFloorClip"
"canCeilingClip"
"canHorizontalDamageBoost"
"canUseIFrames"
{
"enemyDamage": {
"enemy": "Dessgeega",
"type": "contact",
"hits": 1
}
}
{
"heatFrames": 225
}Dev note: FIXME: A blue suit version of this clip could be added? |
From: 5
Junction Below Shot Block
To: 7
Junction Left of Morph Tunnel
Break the Power Bomb statue leaving 1 row of blocks. Partially clip beneath the Power Bomb blocks and the sold tiles beneath. Wait for a Dessgeega to jump over head and jump into it. The left ceiling Dessgeega works better. Damage boost to the right and use i-frames to run through all of the enemies. Requires: {
"notable": "Statue Clip Damage Boost"
}
{
"obstaclesNotCleared": [
"A"
]
}
"h_usePowerBomb"
"HiJump"
"canPartialFloorClip"
"canCeilingClip"
"canHorizontalDamageBoost"
"canUseIFrames"
{
"enemyDamage": {
"enemy": "Dessgeega",
"type": "contact",
"hits": 1
}
}
{
"heatFrames": 225
} |
From: 5
Junction Below Shot Block
To: 8
Junction Below Top Right Door
Break the Power Bomb statue leaving 1 row of blocks. Partially clip beneath the Power Bomb blocks and the sold tiles beneath. Wait for a Dessgeega to jump over head and jump into it. The left ceiling Dessgeega works better. Aim down after jumping in order to fully boost over the solid statue. Damage boost to the right and use i-frames to run through all of the enemies. Begin shortcharging while running through the Dessgeegas for a speedball. It may help to end the damage boost early, but then it becomes more difficult to stutter for the shortcharge. Requires: {
"notable": "HiJumpless Statue Clip Damage Boost"
}
{
"obstaclesNotCleared": [
"A"
]
}
"h_usePowerBomb"
"canPartialFloorClip"
"canCeilingClip"
"canTrickyJump"
"canHorizontalDamageBoost"
"canUseIFrames"
{
"getBlueSpeed": {
"usedTiles": 16,
"openEnd": 1
}
}
"canSpeedball"
{
"enemyDamage": {
"enemy": "Dessgeega",
"type": "contact",
"hits": 1
}
}
{
"heatFrames": 390
}
{
"or": [
"h_useSpringBall",
{
"hibashiHits": 1
}
]
} |
From: 5
Junction Below Shot Block
To: 8
Junction Below Top Right Door
Break the Power Bomb statue leaving 1 row of blocks. Partially clip beneath the Power Bomb blocks and the sold tiles beneath. Wait for a Dessgeega to jump over head and jump into it. The left ceiling Dessgeega works better. Damage boost to the right and use i-frames to run through all of the enemies. Begin shortcharging while running through the Dessgeegas for a speedball. It may help to end the damage boost early, but then it becomes more difficult to stutter for the shortcharge. Requires: {
"notable": "Statue Clip Damage Boost"
}
{
"obstaclesNotCleared": [
"A"
]
}
"h_usePowerBomb"
"HiJump"
"canPartialFloorClip"
"canCeilingClip"
"canHorizontalDamageBoost"
"canUseIFrames"
{
"getBlueSpeed": {
"usedTiles": 16,
"openEnd": 1
}
}
"canSpeedball"
{
"enemyDamage": {
"enemy": "Dessgeega",
"type": "contact",
"hits": 1
}
}
{
"heatFrames": 390
}
{
"or": [
"h_useSpringBall",
{
"hibashiHits": 1
}
]
} |
From: 2
Item (Behind the Bomb Wall)
To: 1
Left Door
Crystal flash to force a standup then spin jump up then morph to bypass the dead robot. Use Coverns to damage down if necessary. Note that if the Covern spawns on Samus while crystal flashing, it will deal large amounts of damage. To avoid this, it is recommended to kill the Covern and leave its drop, then quickly get in the morph tunnel and CF. Requires: {
"obstaclesNotCleared": [
"R-Mode"
]
}
{
"notable": "Crystal Flash Clip"
}
{
"or": [
"canTrivialMidAirMorph",
"h_useSpringBall",
"h_bombThings"
]
}
"h_CrystalFlash"
"canCeilingClip"Dev note: If Phantoon is alive, 'Base' can be used instead. Note that this strat is useless in vanilla, as the item only spawns if Phantoon has been killed. |
From: 2
Item (Behind the Bomb Wall)
To: 1
Left Door
In R-Mode, kill the Coverns until there is Energy in Samus's Reserves. Get into the Morph tunnel and go to the far left. Wait for Coverns to damage Samus down until Reserves trigger, forcing a stand up and enabling her to escape. Note that it is required to break the bomb block above the Morph tunnel as well, in order to clip out. Requires: {
"notable": "R-Mode Standup Clip"
}
{
"obstaclesCleared": [
"R-Mode"
]
}
"canRModeStandupClip"
"canCeilingClip"
{
"or": [
{
"and": [
{
"disableEquipment": "ETank"
},
{
"or": [
"canBePatient",
{
"resourceAvailable": [
{
"type": "Energy",
"count": 80
}
]
}
]
}
]
},
"canBeExtremelyPatient"
]
}
{
"partialRefill": {
"type": "ReserveEnergy",
"limit": 20
}
}
{
"or": [
"canTrivialMidAirMorph",
"h_useSpringBall",
"h_bombThings"
]
}
{
"autoReserveTrigger": {}
}Resets obstacles: R-Mode Dev note: If Phantoon is alive, 'Base' can be used instead. Note that this strat is useless in vanilla, as the item only spawns if Phantoon has been killed. |
From: 7
Bottom Door
To: 3
Bottom Left Door
Use the Covern to partial ceiling clip so your beam can reach the shot block of the ceiling at the end of the Morph tunnel to the left. It is possible to mid-air morph to get into the morph tunnel with nothing, from the Covern, the ground, or the stairs below. Requires: {
"notable": "Partial Covern Ice Clip"
}
"canTrickyUseFrozenEnemies"
"canCeilingClip"
{
"not": "f_DefeatedPhantoon"
}
"canRiskPermanentLossOfAccess"
{
"or": [
{
"and": [
"canCarefulJump",
"canMidAirMorph",
"canDisableEquipment"
]
},
"h_useSpringBall"
]
}Clears obstacles: B |
|
Lure a crab to the top door. Use a Super to knock it off and freeze it frame-perfectly below the door. Use a flash suit or blue suit from a crouched position to spark vertically and clip past the door shell. Requires: "canBeVeryPatient"
{
"or": [
{
"and": [
"Gravity",
"SpaceJump"
]
},
{
"and": [
"Gravity",
"HiJump",
"canPreciseGrapple"
]
},
{
"and": [
"HiJump",
"canPreciseGrapple",
"canSpringBallJumpMidAir"
]
},
{
"and": [
"HiJump",
"canGravityJump"
]
}
]
}
{
"ammo": {
"type": "Super",
"count": 1
}
}
"h_storedSparkIceClip"
{
"shinespark": {
"frames": 2,
"excessFrames": 1
}
}Exit condition: {
"leaveWithSpark": {}
}Bypasses door shell: true |
From: 2
Bottom Left Door
To: 1
Middle Left Door
Jump on the Snail when it is at a precise location, and then crouch jump through the ceiling and jump again, without moving between jumps. The Snail's positioning is very precise. Morph can be used to help get onto the Snail and get off without taking a hit if it is in the wrong location. Requires: {
"notable": "Precise Snail Clip With Gravity"
}
"Gravity"
"canUseEnemies"
"canCeilingClip"
{
"or": [
"Morph",
"canPreciseCeilingClip",
{
"enemyDamage": {
"enemy": "Yard",
"type": "contact",
"hits": 2
}
}
]
} |
|
Jump on the Snail when it is at a precise location, and then crouch jump through the ceiling and jump again, without moving between jumps. The Snail's positioning is very precise. Morph can be used to help get onto the Snail and get off without taking a hit if it is in the wrong location. Requires: {
"notable": "Precise Snail Clip With Gravity"
}
"Gravity"
"canUseEnemies"
"canCeilingClip"
{
"or": [
"Morph",
"canPreciseCeilingClip",
{
"enemyDamage": {
"enemy": "Yard",
"type": "contact",
"hits": 2
}
}
]
} |
From: 2
Right Door
To: 1
Bottom Left Door
Use the middle section of pipes as a platform to reach the top level, above the Mochtroid. A crouch jump and down grab is enough if the jump begins on the rightmost 75% of the rightmost pixel. Getting into this position can be made easier with a morph turnaround: Spin jump out, turn left then quickly break spin (i.e. with a shot or angle button), morph and press against the upper left wall, then briefly tap left on the descent to land on the edge. Then perform a morph turnaround by pressing right for a very short time to face right without moving. Unmorph and jump to the right by pressing right immediately after jumping (on the same frame or up to 5 frames later), and down grab on the upper right ledge. With the Mochtroid, crouch under the crumble blocks to the left. Holding both angle buttons to aim upward, freeze the Mochtroid while it is on Samus. Jump onto the Mochtroid by quickly pressing down after jumping. When on it, press up to stand then jump through the ceiling. Requires: {
"notable": "Mochtroid Ice Clip"
}
"canCeilingClip"
"canUseFrozenEnemies"
"canMorphTurnaround"
"h_underwaterCrouchJumpDownGrab"
{
"or": [
"canTrickyJump",
{
"enemyDamage": {
"enemy": "Mochtroid",
"type": "contact",
"hits": 1
}
}
]
} |
From: 2
Right Door
To: 1
Bottom Left Door
Use the middle section of pipes as a platform to reach the top level, above the Mochtroid. A crouch jump and down grab is enough if the jump begins on the rightmost 75% of the rightmost pixel. Getting into this position can be done by moonwalking to a certain pixel and then turning around to the right to end on the right-most pixel. With random subpixels, Samus will fall off 25% of the time when turning around to the right. If Samus starts on the correct pixel and does not fall off when turning around, then she is guaranteed to be on subpixels that will work for the jump. Crouch jump, pressing right immediately after jumping (on the same frame or up to 5 frames later), then down grab on the upper right ledge. Alternatively, moonwalking onto the correct pixel one frame at a time, stopping as soon as it is reached, can guarantee that Samus will not fall when turning around. With the Mochtroid, crouch under the crumble blocks. Holding both angle buttons to aim upward, freeze the Mochtroid while it is on Samus. Jump onto the Mochtroid by quickly pressing down after jumping. When on it, press up to stand then jump through the ceiling. Requires: {
"notable": "Mochtroid Ice Clip"
}
"canCeilingClip"
"canUseFrozenEnemies"
"canTrickyJump"
"h_underwaterCrouchJumpDownGrab" |
From: 2
Bottom Right Door
To: 2
Bottom Right Door
Crouch and freeze a Mochtroid to clip into the space behind the grapple blocks. Jump and tap grapple while aiming diagonally to be pushed into the wall just the right amount. Samus should be one tile below the grapple blocks and fully in the wall. Too short a tap and the next grapple will not work, too long and Samus will be stuck in the wall. Grapple diagonally again to be pushed into the transition. Requires: {
"notable": "Frozen Mochtroid Grapple Clip Door Lock Skip"
}
{
"or": [
{
"and": [
"Gravity",
"canUseFrozenEnemies",
"canCrouchJump",
"canCeilingClip"
]
},
{
"and": [
"h_XRayMorphIceClip",
"h_complexToCarryBlueSuit"
]
},
{
"and": [
"h_highPixelIceClip",
"h_trickyToCarryBlueSuit"
]
}
]
}
"canGrappleClip"Bypasses door shell: true Dev note: The 2-3 pixel window is trivial to get by crouching, the high pixel clip is easier here than normal, as no precise down grab is needed. The canCrouchJump is not a h_underwaterCrouchJump, because Gravity is required. |


