canDownwardGModeSetup (Insane)

Ability to setup R-mode or G-mode through a downward door or sand transition. Samus needs to be in a standing or walking position with no vertical speed on the first frame in the next room, while taking damage through the transition.
There are three known ways to enter a downward transition where X-Ray is usable on entry: 1) Clip into the floor next to the transition, then move forward to touch the transition. 2) Freeze an enemy on the ground above and near the transition, typically with 1-2 pixels of air horizontally between the enemy and the transition, run and fall over the doorframe and hit the opposite wall to wall ice clip Samus into the wall to force a stand up, which will expand her hitbox to touch the transition. 3) Crouch in quicksand and press forward to stand up to expand Samus' hitbox and touch the transition on the first frame the hitbox expands.
Strats ()
From: 7
Bottom Left Vertical Door
To: 7
Bottom Left Vertical Door
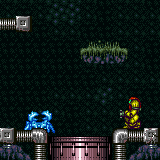
Freeze a Geemer on the bottom of the overhang just below the door to Final Missile Bombway. Freeze a second Geemer on the top left of its platform and setup a moonfall between them. Fall off the Geemers and clip into the tile left of the door. Press up to get out of crouch and lose the stored vertical speed (so that X-Ray works). Then turn-around, open the door, and go into the door transition as the third Geemer hits you. Falling off the frozen Geemers requires relatively high precision: This setup is a 4 frame window, not too far left, so you can get to the door transition, not too far right such that you enter the transition when falling. Requires: {
"notable": "Downward G-Mode Setup with Ice"
}
"h_ZebesIsAwake"
"canEnemyStuckMoonfall"
"canFreeFallClip"
"canTrickyUseFrozenEnemies"
"canDownwardGModeSetup"Exit condition: {
"leaveWithGModeSetup": {}
} |
From: 3
Bottom Door
To: 3
Bottom Door
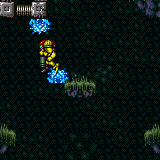
Run from the ledge into the open doorway while hitting the frozen crab and the door transition simultaneously, just as the crab thaws and touches Samus during the transition. Note that this requires a precise freeze (2 pixel window), a small pixel starting window (approximately 2 pixel window), precise thaw timing, and a 50% success rate due to collision oscillation. The positioning of the crab is where its hitbox is one or two pixels away from the edge of the door frame, so that Samus can clip into the wall and stand as she touches the transition. Requires: "canWallIceClip"
"canDownwardGModeSetup"
{
"ammo": {
"type": "Super",
"count": 1
}
}Exit condition: {
"leaveWithGModeSetup": {}
} |
From: 2
Bottom Door
To: 2
Bottom Door


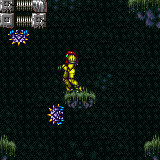
Run from the ledge into the open doorway while hitting the frozen Viola and the door transition simultaneously, just as the Viola thaws and touches Samus during the transition. Note that this requires a precise freeze (2 pixel window), a small pixel starting window (approximately 1 pixel window), precise thaw timing, and a 50% success rate due to collision oscillation. The positioning of the Viola is where its hitbox is one or two pixels away from the edge of the door frame, so that Samus can clip into the wall and stand as she touches the transition. Requires: "canWallIceClip"
"canDownwardGModeSetup"
{
"ammo": {
"type": "Super",
"count": 1
}
}Exit condition: {
"leaveWithGModeSetup": {}
} |
|


Run from the ledge into the open doorway while hitting the frozen Atomic and the door transition simultaneously, just as the Atomic thaws and touches Samus during the transition. Note that this requires a precise freeze (3 pixel window), precise thaw timing, and a 50% success rate due to collision oscillation. The starting position of Samus is a bit more lenient than other downward G-mode setups, as Samus can have higher run speed when hitting the Atomic than in most other rooms. One normalized setup to get into a usable position is to run into the right pillar, turn around, then run back. Requires: "f_DefeatedPhantoon" "canDash" "canWallIceClip" "canDownwardGModeSetup" Exit condition: {
"leaveWithGModeSetup": {}
}Dev note: This can not work with a Covern, as it only moves vertically and can't hit Samus in the transition. |
From: 3
Bottom Left Door
To: 7
Bottom Door


Run from the ledge into the open doorway while hitting the frozen Atomic and the door transition simultaneously, just as the Atomic thaws and touches Samus during the transition. Note that this requires a precise freeze (2 pixel window), a small pixel starting window (approximately 3 pixel window), precise thaw timing, and a 50% success rate due to collision oscillation. The positioning of the Atomic is where its hitbox is one or two pixels away from the edge of the door frame, so that Samus can clip into the wall and stand as she touches the transition. Requires: "f_DefeatedPhantoon" "canWallIceClip" "canDownwardGModeSetup" "Morph" Exit condition: {
"leaveWithGModeSetup": {}
}Unlocks doors: {"types":["ammo"],"requires":[]}Dev note: This can not work with a Covern, as it only moves vertically and can't hit Samus in the transition. |
|
Time a Yard's movement with entering the sand. Crouch in the sand and press forward when near the transition to stand up and touch the transition on the first frame of standing. If it is important to touch the transition near the middle of the sand, shoot a Yard so that it will move faster and quickly get into position. Requires: "h_navigateUnderwater"
{
"noBlueSuit": {}
}
"canPlayInSand"
"canDownwardGModeSetup"Exit condition: {
"leaveWithGModeSetup": {}
} |
From: 1
Left Door
To: 2
Left Sand Pit


Reach the sand while luring a Puyo just off camera to where moonwalking on the partially submerged platform can lure the Puyo. Crouch in the sand and press forward when near the transition to stand up and touch the transition on the first frame of standing. Requires: "h_navigateUnderwater"
{
"noBlueSuit": {}
}
"canPlayInSand"
"canMoonwalk"
"canCameraManip"
"canDownwardGModeSetup"
"canOffScreenMovement"
"canTrickyGMode"Exit condition: {
"leaveWithGModeSetup": {}
} |
From: 1
Left Door
To: 3
Right Sand Pit


Reach the sand while luring a Puyo just off camera to where moonwalking on the partially submerged platform can lure the Puyo. Quickly move to the right section before the Puyo hits Samus. Crouch in the sand and press forward when near the transition to stand up and touch the transition on the first frame of standing. Requires: "h_navigateUnderwater"
{
"noBlueSuit": {}
}
"canPlayInSand"
"canMoonwalk"
"canCameraManip"
"canDownwardGModeSetup"
"canOffScreenMovement"
"canTrickyGMode"Exit condition: {
"leaveWithGModeSetup": {}
} |
|


Kill, freeze, or dodge the Yapping Maws. Kill the Zoa and wait for its drop to disappear. Just before it disappears, move into the sand and crouch. Press forward when near the transition to stand up and touch the transition on the first frame of standing. If the drop is an ammo drop, Samus can collect the drop and not have to wait for it to respawn. To do this, sink slightly into the sand before collecting the drop, then crouch and stand up to touch the transition and get hit by the Zoa. Note that if the Yapping Maw grabs Samus after touching the transition, the G-mode setup can still work. Requires: "h_navigateUnderwater"
"canPlayInSand"
"canDownwardGModeSetup"
{
"or": [
"Ice",
{
"ammo": {
"type": "Super",
"count": 1
}
},
{
"obstaclesCleared": [
"A"
]
},
{
"obstaclesCleared": [
"B"
]
},
"canTrickyGMode",
{
"and": [
"canInsaneJump",
{
"or": [
"Gravity",
"HiJump",
"canWallJump",
{
"and": [
"h_underwaterCrouchJumpDownGrab",
{
"doorUnlockedAtNode": 1
}
]
},
{
"and": [
"h_underwaterCrouchJumpDownGrab",
{
"doorUnlockedAtNode": 3
}
]
}
]
}
]
}
]
}Exit condition: {
"leaveWithGModeSetup": {}
}Unlocks doors: {"nodeId":1,"types":["super"],"requires":["canTrickyJump"]}
{"nodeId":1,"types":["missiles","powerbomb"],"requires":["never"]}
{"nodeId":3,"types":["super"],"requires":["canTrickyJump"]}
{"nodeId":3,"types":["missiles","powerbomb"],"requires":["never"]} |