canXRayCancelShinecharge (Expert+)

Using X-Ray to cancel a shinecharge to avoid having to wait for the 180-frame shinecharge timer to expire. This allows moving more quickly after gaining temporary blue.
Strats ()
From: 1
Bottom Left Door
To: 3
Hidden Ceiling Item
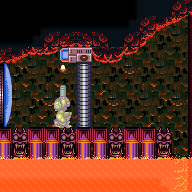
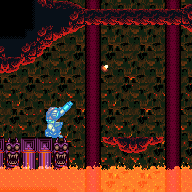
While carrying a blue suit, take damage from the Reo after mid-air morphing, to get a boost from it. It helps to crouch jump, using X-Ray to cancel the shinecharge if needed. A standing jump can also work, but with more precision. It is best to unmorph as soon as possible after taking damage, while Samus still has knockback. A slightly later unmorph, after knockback expires, can also work but depends on collision oscillation. Requires: {
"haveBlueSuit": {}
}
{
"notable": "Ceiling Damage Boost"
}
"h_ZebesIsAwake"
{
"tech": "canNeutralDamageBoost"
}
"canMidAirMorph"
"canTrickyDodgeEnemies"
{
"or": [
{
"and": [
"h_blueSuitXRayCancelShinecharge",
"canCrouchJump"
]
},
"canInsaneJump"
]
}
{
"enemyDamage": {
"enemy": "Reo",
"type": "contact",
"hits": 1
}
}Dev note: Technically a blue suit would not be required for this strat, so the `haveBlueSuit` requirement could be dropped, but without a blue suit there would be no reason to do it this way, and the name would be misleading. |
From: 1
Right Door
To: 1
Right Door

Land in the far left side of the Samus Eater while moving forward to the right. Continue holding dash, forward, and angle-up or angle-down to gain a shinecharge while running in place inside the Samus Eater. The down press for the shinecharge must be precisely timed to occur after the Samus Eater releases Samus but before running into the wall (~2-frame window). Then use X-Ray to cancel the shinecharge frames, in order to jump out with temporary blue before the Samus Eater begins another cycle. If the down press for the shinecharge occurs too early, Samus will end up in an aim-down pose before landing and will not be able to gain temporary blue. Requires: "canSamusEaterStandUp"
{
"samusEaterCycles": 1
}
{
"or": [
"canShinechargeMovementTricky",
{
"samusEaterCycles": 2
}
]
}
"h_shinechargeMaxRunway"
"canXRayCancelShinecharge"
"canChainTemporaryBlue"Exit condition: {
"leaveWithTemporaryBlue": {}
} |
|

Land in the far right side of the Samus Eater while moving forward to the left. Continue holding dash, forward, and angle-up or angle-down to gain a shinecharge while running in place inside the Samus Eater. The down press for the shinecharge must be precisely timed to occur after the Samus Eater releases Samus but before running into the wall (~2-frame window). Then use X-Ray to cancel the shinecharge frames, in order to jump out with temporary blue before the Samus Eater begins another cycle. If the down press for the shinecharge occurs too early, Samus will end up in an aim-down pose before landing and will not be able to gain temporary blue. In order to prevent Zebbos from interfering, spawn a drop and leave it uncollected in an out-of-the-way place. Requires: "canSamusEaterStandUp"
{
"samusEaterCycles": 1
}
"h_shinechargeMaxRunway"
"canXRayCancelShinecharge"
"canChainTemporaryBlue"Exit condition: {
"leaveWithTemporaryBlue": {}
} |
|

Use the Samus Eater second-closest to the right door, jumping into its far left side while moving forward to the right. Continue holding dash, forward, and angle-up or angle-down to gain a shinecharge while running in place inside the Samus Eater. The down press for the shinecharge must be precisely timed to occur after the Samus Eater releases Samus but before running into the wall (~2-frame window). Then use X-Ray to cancel the shinecharge frames, in order to jump out with temporary blue before the Samus Eater begins another cycle. If the down press for the shinecharge occurs too early, Samus will end up in an aim-down pose before landing and will not be able to gain temporary blue. In order to prevent Zebbos from interfering, spawn a drop and leave it uncollected in an out-of-the-way place. Requires: "canSamusEaterStandUp"
{
"samusEaterCycles": 1
}
"h_shinechargeMaxRunway"
"canXRayCancelShinecharge"
"canLongChainTemporaryBlue"Exit condition: {
"leaveWithTemporaryBlue": {}
} |
From: 1
Bottom Left Door
To: 2
Top Right Door
Entrance condition: {
"comeInShinecharging": {
"length": 2,
"openEnd": 1
}
}Requires: "canLongChainTemporaryBlue"
"HiJump"
{
"or": [
{
"heatFrames": 570
},
{
"and": [
"canXRayCancelShinecharge",
{
"heatFrames": 420
}
]
}
]
}Exit condition: {
"leaveWithTemporaryBlue": {}
}Unlocks doors: {"types":["super","powerbomb"],"requires":[]}
{"types":["missiles"],"requires":[{"heatFrames":50}]} |
From: 2
Top Right Door
To: 1
Bottom Left Door


Entrance condition: {
"comeInShinecharging": {
"length": 3,
"openEnd": 1
}
}Requires: "canLongChainTemporaryBlue"
{
"or": [
{
"heatFrames": 550
},
{
"and": [
"canXRayCancelShinecharge",
{
"heatFrames": 380
}
]
}
]
}Exit condition: {
"leaveWithTemporaryBlue": {}
}Unlocks doors: {"types":["super","powerbomb"],"requires":[]}
{"types":["missiles"],"requires":[{"heatFrames":50}]} |
From: 1
Left Side - Top Door
To: 2
Left Side - Top Middle Door
Use X-ray to cancel the shinecharge, in order to quickly destroy the Waver before taking a hit. Alternatively, run, jump, or slide off the edge, using a pause buffer to morph. Or if enough runway is available, simply avoid using the last tile to stay out of the way of the Waver. Entrance condition: {
"comeInShinecharging": {
"length": 3,
"openEnd": 1
}
}Requires: "canLongChainTemporaryBlue" "canXRayTurnaround" "canXRayCancelShinecharge" Exit condition: {
"leaveWithTemporaryBlue": {}
}Unlocks doors: {"types":["ammo"],"requires":[]} |
From: 1
Left Side - Top Door
To: 3
Left Side - Bottom Middle Door

Use X-ray to cancel the shinecharge, in order to quickly destroy the Waver before taking a hit. Alternatively, run, jump, or slide off the edge, using a pause buffer to morph. Or if enough runway is available, simply avoid using the last tile to stay out of the way of the Waver. Entrance condition: {
"comeInShinecharging": {
"length": 3,
"openEnd": 1
}
}Requires: "canLongChainTemporaryBlue" "canXRayTurnaround" "canXRayCancelShinecharge" Exit condition: {
"leaveWithTemporaryBlue": {}
}Unlocks doors: {"types":["ammo"],"requires":[]} |
From: 1
Left Side - Top Door
To: 4
Left Side - Bottom Door

Use X-ray to cancel the shinecharge, in order to quickly destroy the Waver before taking a hit. Alternatively, run, jump, or slide off the edge, using a pause buffer to morph. Or if enough runway is available, simply avoid using the last tile to stay out of the way of the Waver. Lay the Power Bomb low enough to kill the Sova. Descend during the Power Bomb explosion, to take advantage of the more lenient timing provided by the lag. Entrance condition: {
"comeInShinecharging": {
"length": 3,
"openEnd": 1
}
}Requires: "canLongChainTemporaryBlue"
"canXRayTurnaround"
"canXRayCancelShinecharge"
{
"ammo": {
"type": "PowerBomb",
"count": 1
}
}Exit condition: {
"leaveWithTemporaryBlue": {}
}Unlocks doors: {"types":["ammo"],"requires":[]} |
From: 1
Left Side - Top Door
To: 5
Bottom Door


Use X-ray to cancel the shinecharge, in order to quickly destroy the Waver before taking a hit. Alternatively, run, jump, or slide off the edge, using a pause buffer to morph. Or if enough runway is available, simply avoid using the last tile to stay out of the way of the Waver. Lay the Power Bomb low enough to kill the Sova. Descend during the Power Bomb explosion, to take advantage of the more lenient timing provided by the lag. Entrance condition: {
"comeInShinecharging": {
"length": 3,
"openEnd": 1
}
}Requires: "canLongChainTemporaryBlue"
"canXRayTurnaround"
"canXRayCancelShinecharge"
{
"ammo": {
"type": "PowerBomb",
"count": 1
}
}Exit condition: {
"leaveWithTemporaryBlue": {
"direction": "any"
}
}Unlocks doors: {"types":["ammo"],"requires":[]} |
From: 7
Top Right Door
To: 6
Middle Right Door
Entrance condition: {
"comeInShinecharging": {
"length": 2.5,
"openEnd": 0
}
}Requires: "canXRayCancelShinecharge" "canChainTemporaryBlue" "canXRayTurnaround" Exit condition: {
"leaveWithTemporaryBlue": {}
}Unlocks doors: {"types":["ammo"],"requires":[]} |
From: 2
Right Door
To: 1
Left Door
Carefully planned movement is needed to avoid damage from the Gerutas, and to avoid bonking on the overhangs. Entrance condition: {
"comeInShinecharging": {
"length": 3,
"openEnd": 0
}
}Requires: "HiJump"
"canLongChainTemporaryBlue"
{
"heatFrames": 955
}
{
"or": [
"canXRayCancelShinecharge",
{
"heatFrames": 150
}
]
}Exit condition: {
"leaveWithTemporaryBlue": {}
}Unlocks doors: {"types":["super","powerbomb"],"requires":[]}
{"types":["missiles"],"requires":[{"heatFrames":50}]} |
From: 1
Top Left Door
To: 2
Bottom Left Door
Entrance condition: {
"comeInShinecharging": {
"length": 3,
"openEnd": 0
}
}Requires: "canChainTemporaryBlue"
{
"or": [
"canXRayCancelShinecharge",
{
"heatFrames": 160
}
]
}
"canXRayTurnaround"
{
"heatFrames": 350
}Exit condition: {
"leaveWithTemporaryBlue": {}
}Unlocks doors: {"types":["super","powerbomb"],"requires":[]}
{"types":["missiles"],"requires":[{"heatFrames":50}]} |
From: 2
Bottom Left Door
To: 1
Top Left Door
Entrance condition: {
"comeInGettingBlueSpeed": {
"length": 0,
"openEnd": 1
}
}Requires: "HiJump"
"canSpringBallJumpMidAir"
{
"canShineCharge": {
"usedTiles": 19,
"gentleUpTiles": 2,
"gentleDownTiles": 2,
"openEnd": 1
}
}
"canPauseRemorphTemporaryBlue"
{
"heatFrames": 550
}
{
"or": [
"canXRayCancelShinecharge",
{
"heatFrames": 160
}
]
}Exit condition: {
"leaveWithTemporaryBlue": {}
}Unlocks doors: {"types":["super","powerbomb"],"requires":[]}
{"types":["missiles"],"requires":[{"heatFrames":50}]} |
From: 2
Bottom Left Door
To: 2
Bottom Left Door
Requires: {
"canShineCharge": {
"usedTiles": 28,
"gentleUpTiles": 3,
"gentleDownTiles": 3,
"openEnd": 0
}
}
{
"heatFrames": 320
}
{
"or": [
"canXRayCancelShinecharge",
{
"heatFrames": 160
}
]
}Exit condition: {
"leaveWithTemporaryBlue": {}
} |
From: 1
Left Door
To: 2
Right Door
Use angle-down shots to kill the Geruta from the left of the morph tunnel. Entrance condition: {
"comeInShinecharging": {
"length": 2,
"openEnd": 1
}
}Requires: "canLongChainTemporaryBlue"
"canTrickySpringBallBounce"
{
"heatFrames": 865
}
{
"or": [
"canXRayCancelShinecharge",
{
"heatFrames": 160
}
]
}Exit condition: {
"leaveWithTemporaryBlue": {}
}Unlocks doors: {"types":["super","powerbomb"],"requires":[]}
{"types":["missiles"],"requires":[{"heatFrames":50}]} |
From: 2
Right Door
To: 1
Left Door

Entrance condition: {
"comeInShinecharging": {
"length": 2,
"openEnd": 0
}
}Requires: "canLongChainTemporaryBlue"
"canTrickySpringBallBounce"
{
"heatFrames": 650
}
{
"or": [
"canXRayCancelShinecharge",
{
"heatFrames": 190
}
]
}Exit condition: {
"leaveWithTemporaryBlue": {}
}Unlocks doors: {"types":["super","powerbomb"],"requires":[]}
{"types":["missiles"],"requires":[{"heatFrames":50}]} |
From: 1
Top Left Door
To: 4
Top Right Door
Entrance condition: {
"comeInShinecharging": {
"length": 3,
"openEnd": 0
}
}Requires: "canChainTemporaryBlue"
{
"heatFrames": 310
}
{
"or": [
"canXRayCancelShinecharge",
{
"heatFrames": 160
}
]
}Exit condition: {
"leaveWithTemporaryBlue": {}
}Unlocks doors: {"types":["super","powerbomb"],"requires":[]}
{"types":["missiles"],"requires":[{"heatFrames":50}]} |
From: 2
Middle Left Door
To: 1
Top Left Door
Entrance condition: {
"comeInShinecharging": {
"length": 4,
"openEnd": 1,
"gentleUpTiles": 2
}
}Requires: "canLongChainTemporaryBlue"
{
"heatFrames": 900
}
{
"or": [
"canXRayCancelShinecharge",
{
"heatFrames": 160
}
]
}
"canTrickySpringBallBounce"
"canXRayTurnaround"Exit condition: {
"leaveWithTemporaryBlue": {}
}Unlocks doors: {"types":["super","powerbomb"],"requires":[]}
{"types":["missiles"],"requires":[{"heatFrames":50}]} |
From: 2
Middle Left Door
To: 4
Top Right Door
Entrance condition: {
"comeInShinecharging": {
"length": 4,
"openEnd": 1,
"gentleUpTiles": 2
}
}Requires: "canLongChainTemporaryBlue"
{
"heatFrames": 860
}
{
"or": [
"canXRayCancelShinecharge",
{
"heatFrames": 160
}
]
}
"canTrickySpringBallBounce"
"canXRayTurnaround"Exit condition: {
"leaveWithTemporaryBlue": {}
}Unlocks doors: {"types":["super","powerbomb"],"requires":[]}
{"types":["missiles"],"requires":[{"heatFrames":50}]} |
From: 4
Top Right Door
To: 1
Top Left Door
Entrance condition: {
"comeInShinecharging": {
"length": 3,
"openEnd": 0
}
}Requires: "canChainTemporaryBlue"
{
"heatFrames": 310
}
{
"or": [
"canXRayCancelShinecharge",
{
"heatFrames": 160
}
]
}Exit condition: {
"leaveWithTemporaryBlue": {}
}Unlocks doors: {"types":["super","powerbomb"],"requires":[]}
{"types":["missiles"],"requires":[{"heatFrames":50}]} |
|
Requires: {
"canShineCharge": {
"usedTiles": 16,
"openEnd": 0
}
}
{
"heatFrames": 250
}
{
"or": [
"canXRayCancelShinecharge",
{
"heatFrames": 160
}
]
}Exit condition: {
"leaveWithTemporaryBlue": {}
} |
From: 2
Right Door
To: 3
Top Door
Entrance condition: {
"comeInShinecharging": {
"length": 13,
"openEnd": 0
}
}Requires: "canXRayTurnaround"
"canXRayCancelShinecharge"
"canChainTemporaryBlue"
{
"heatFrames": 240
}Exit condition: {
"leaveWithTemporaryBlue": {
"direction": "any"
}
}Unlocks doors: {"types":["super","powerbomb"],"requires":[]}
{"types":["missiles"],"requires":[{"heatFrames":50}]} |
From: 2
Right Door
To: 3
Top Door
Gain the shinecharge below the right edge of the door above to avoid bringing the Dragon on-camera. Entrance condition: {
"comeInShinecharging": {
"length": 5,
"openEnd": 0
}
}Requires: {
"or": [
{
"heatFrames": 245
},
{
"and": [
{
"heatFrames": 85
},
"canXRayCancelShinecharge"
]
}
]
}Exit condition: {
"leaveWithTemporaryBlue": {
"direction": "left"
}
}Unlocks doors: {"types":["super","powerbomb"],"requires":[]}
{"types":["missiles"],"requires":[{"heatFrames":50}]} |
From: 1
Left Door
To: 2
Right Door
Entrance condition: {
"comeInShinecharging": {
"length": 11,
"openEnd": 1
}
}Requires: {
"heatFrames": 120
}
{
"or": [
"canXRayCancelShinecharge",
{
"heatFrames": 160
}
]
}Exit condition: {
"leaveWithTemporaryBlue": {}
}Unlocks doors: {"types":["super","powerbomb"],"requires":[]}
{"types":["missiles"],"requires":[{"heatFrames":50}]} |
From: 2
Right Door
To: 1
Left Door
Entrance condition: {
"comeInShinecharging": {
"length": 11,
"openEnd": 1
}
}Requires: {
"heatFrames": 120
}
{
"or": [
"canXRayCancelShinecharge",
{
"heatFrames": 160
}
]
}Exit condition: {
"leaveWithTemporaryBlue": {}
}Unlocks doors: {"types":["super","powerbomb"],"requires":[]}
{"types":["missiles"],"requires":[{"heatFrames":50}]} |
From: 2
Top Right Door
To: 1
Top Door


Entrance condition: {
"comeInShinecharging": {
"length": 3,
"openEnd": 0
}
}Requires: "canChainTemporaryBlue"
"canXRayTurnaround"
{
"heatFrames": 360
}
{
"or": [
"canXRayCancelShinecharge",
{
"heatFrames": 160
}
]
}Exit condition: {
"leaveWithTemporaryBlue": {
"direction": "any"
}
}Unlocks doors: {"types":["super","powerbomb"],"requires":[]}
{"types":["missiles"],"requires":[{"heatFrames":50}]} |
From: 2
Top Right Door
To: 3
Bottom Right Door

Entrance condition: {
"comeInShinecharging": {
"length": 3,
"openEnd": 0
}
}Requires: "canChainTemporaryBlue"
"canXRayTurnaround"
{
"heatFrames": 290
}
{
"or": [
"canXRayCancelShinecharge",
{
"heatFrames": 160
}
]
}Exit condition: {
"leaveWithTemporaryBlue": {}
}Unlocks doors: {"types":["super","powerbomb"],"requires":[]}
{"types":["missiles"],"requires":[{"heatFrames":50}]} |
From: 3
Bottom Right Door
To: 1
Top Door


Entrance condition: {
"comeInShinecharging": {
"length": 11,
"openEnd": 1
}
}Requires: "canLongChainTemporaryBlue"
"canXRayTurnaround"
{
"heatFrames": 710
}
{
"or": [
"canXRayCancelShinecharge",
{
"heatFrames": 160
}
]
}Exit condition: {
"leaveWithTemporaryBlue": {
"direction": "any"
}
}Unlocks doors: {"types":["super","powerbomb"],"requires":[]}
{"types":["missiles"],"requires":[{"heatFrames":50}]} |
From: 3
Bottom Right Door
To: 1
Top Door
Entrance condition: {
"comeInShinecharging": {
"length": 8,
"openEnd": 1
}
}Requires: "canLongChainTemporaryBlue"
"canXRayTurnaround"
{
"heatFrames": 590
}
{
"or": [
"canXRayCancelShinecharge",
{
"heatFrames": 160
}
]
}Exit condition: {
"leaveWithTemporaryBlue": {
"direction": "any"
}
}Unlocks doors: {"types":["super","powerbomb"],"requires":[]}
{"types":["missiles"],"requires":[{"heatFrames":50}]} |
From: 3
Bottom Right Door
To: 2
Top Right Door

Entrance condition: {
"comeInShinecharging": {
"length": 11,
"openEnd": 1
}
}Requires: "canChainTemporaryBlue"
"canXRayTurnaround"
{
"heatFrames": 490
}
{
"or": [
"canXRayCancelShinecharge",
{
"heatFrames": 160
}
]
}Exit condition: {
"leaveWithTemporaryBlue": {}
}Unlocks doors: {"types":["super","powerbomb"],"requires":[]}
{"types":["missiles"],"requires":[{"heatFrames":50}]} |
From: 3
Bottom Right Door
To: 2
Top Right Door

Entrance condition: {
"comeInShinecharging": {
"length": 8,
"openEnd": 1
}
}Requires: "canChainTemporaryBlue"
"canXRayTurnaround"
{
"heatFrames": 390
}
{
"or": [
"canXRayCancelShinecharge",
{
"heatFrames": 160
}
]
}Exit condition: {
"leaveWithTemporaryBlue": {}
}Unlocks doors: {"types":["super","powerbomb"],"requires":[]}
{"types":["missiles"],"requires":[{"heatFrames":50}]} |
From: 1
Left Shaft - Top Left Door
To: 2
Left Shaft - Bottom Right Door
Entrance condition: {
"comeInShinecharging": {
"length": 7,
"openEnd": 0
}
}Requires: "canXRayCancelShinecharge"
"canXRayTurnaround"
"canLongChainTemporaryBlue"
{
"heatFrames": 1380
}Exit condition: {
"leaveWithTemporaryBlue": {}
}Unlocks doors: {"types":["super","powerbomb"],"requires":[]}
{"types":["missiles"],"requires":[{"heatFrames":50}]} |
From: 1
Left Shaft - Top Left Door
To: 3
Left Shaft - Middle Right Door


Entrance condition: {
"comeInShinecharging": {
"length": 7,
"openEnd": 0
}
}Requires: "canXRayCancelShinecharge"
"canXRayTurnaround"
"canLongChainTemporaryBlue"
{
"heatFrames": 830
}Exit condition: {
"leaveWithTemporaryBlue": {}
}Unlocks doors: {"types":["super","powerbomb"],"requires":[]}
{"types":["missiles"],"requires":[{"heatFrames":50}]} |
From: 1
Left Shaft - Top Left Door
To: 4
Left Shaft - Top Right Door

Entrance condition: {
"comeInShinecharging": {
"length": 7,
"openEnd": 0
}
}Requires: "canXRayCancelShinecharge"
"canXRayTurnaround"
"canLongChainTemporaryBlue"
{
"heatFrames": 505
}Exit condition: {
"leaveWithTemporaryBlue": {}
}Unlocks doors: {"types":["super","powerbomb"],"requires":[]}
{"types":["missiles"],"requires":[{"heatFrames":50}]} |
From: 3
Left Shaft - Middle Right Door
To: 2
Left Shaft - Bottom Right Door
Entrance condition: {
"comeInShinecharging": {
"length": 3,
"openEnd": 0
}
}Requires: "canXRayCancelShinecharge"
"canXRayTurnaround"
"canLongChainTemporaryBlue"
{
"heatFrames": 610
}Exit condition: {
"leaveWithTemporaryBlue": {}
}Unlocks doors: {"types":["super","powerbomb"],"requires":[]}
{"types":["missiles"],"requires":[{"heatFrames":50}]} |
From: 3
Left Shaft - Middle Right Door
To: 7
Left Shaft - Middle Junction
Requires: {
"or": [
{
"and": [
"canWallJump",
{
"heatFrames": 120
}
]
},
{
"and": [
"HiJump",
{
"heatFrames": 110
}
]
},
{
"and": [
"h_heatedCrouchJumpDownGrab",
{
"heatFrames": 150
}
]
},
{
"and": [
"SpaceJump",
{
"heatFrames": 155
}
]
},
{
"and": [
"canSpringBallJumpMidAir",
{
"heatFrames": 180
}
]
}
]
}
{
"or": [
"canDash",
{
"and": [
{
"haveBlueSuit": {}
},
{
"heatFrames": 45
}
]
}
]
} |
From: 4
Left Shaft - Top Right Door
To: 2
Left Shaft - Bottom Right Door
Entrance condition: {
"comeInShinecharging": {
"length": 3,
"openEnd": 0
}
}Requires: "canXRayCancelShinecharge"
"canXRayTurnaround"
"canLongChainTemporaryBlue"
{
"heatFrames": 945
}Exit condition: {
"leaveWithTemporaryBlue": {}
}Unlocks doors: {"types":["super","powerbomb"],"requires":[]}
{"types":["missiles"],"requires":[{"heatFrames":50}]} |
From: 4
Left Shaft - Top Right Door
To: 3
Left Shaft - Middle Right Door
Entrance condition: {
"comeInShinecharging": {
"length": 3,
"openEnd": 0
}
}Requires: "canXRayCancelShinecharge"
"canXRayTurnaround"
"canLongChainTemporaryBlue"
{
"heatFrames": 500
}Exit condition: {
"leaveWithTemporaryBlue": {}
}Unlocks doors: {"types":["super","powerbomb"],"requires":[]}
{"types":["missiles"],"requires":[{"heatFrames":50}]} |
From: 4
Left Shaft - Top Right Door
To: 4
Left Shaft - Top Right Door

Climb the room and open the top door, so that the Multiviola will reach the second door. Requires: "canComplexGMode"
{
"or": [
"canWallJump",
"HiJump",
"SpaceJump",
"h_heatedCrouchJumpDownGrab",
"Wave"
]
}
{
"heatFrames": 950
}Exit condition: {
"leaveWithGModeSetup": {}
} |
|
Requires: {
"or": [
{
"and": [
"canWallJump",
{
"heatFrames": 130
}
]
},
{
"and": [
"HiJump",
{
"heatFrames": 115
}
]
},
{
"and": [
"h_heatedCrouchJumpDownGrab",
{
"heatFrames": 150
}
]
},
{
"and": [
"SpaceJump",
{
"heatFrames": 155
}
]
},
{
"and": [
"canSpringBallJumpMidAir",
{
"heatFrames": 180
}
]
}
]
}
{
"or": [
"canDash",
{
"and": [
{
"haveBlueSuit": {}
},
{
"heatFrames": 40
}
]
}
]
} |
|
Requires: {
"or": [
{
"and": [
"canWallJump",
{
"heatFrames": 100
}
]
},
{
"and": [
"canWallJump",
"ScrewAttack",
{
"heatFrames": 85
}
]
},
{
"and": [
"HiJump",
{
"heatFrames": 95
}
]
},
{
"and": [
"HiJump",
"ScrewAttack",
{
"heatFrames": 75
}
]
},
{
"and": [
"HiJump",
"Plasma",
{
"heatFrames": 70
}
]
},
{
"and": [
"h_heatedCrouchJumpDownGrab",
{
"heatFrames": 100
}
]
},
{
"and": [
"SpaceJump",
{
"heatFrames": 115
}
]
},
{
"and": [
"canSpringBallJumpMidAir",
{
"heatFrames": 120
}
]
}
]
}
{
"or": [
"canDash",
{
"heatFrames": 30
}
]
}Unlocks doors: {"types":["missiles"],"requires":[{"heatFrames":30}]}
{"types":["powerbomb"],"requires":[{"heatFrames":70}]}Dev note: The heat frames account for bad scenarios of where the Multiviola may be (entering from node 4), which is why Screw Attack can be helpful. |
From: 6
Left Shaft - Top Junction
To: 1
Left Shaft - Top Left Door
Requires: "canDash"
{
"or": [
{
"and": [
"canWallJump",
{
"heatFrames": 80
}
]
},
{
"and": [
"canWallJump",
"ScrewAttack",
{
"heatFrames": 60
}
]
},
{
"and": [
"HiJump",
{
"heatFrames": 80
}
]
},
{
"and": [
"HiJump",
"ScrewAttack",
{
"heatFrames": 60
}
]
},
{
"and": [
"h_heatedCrouchJumpDownGrab",
{
"heatFrames": 80
}
]
},
{
"and": [
"SpaceJump",
{
"heatFrames": 80
}
]
},
{
"and": [
"canSpringBallJumpMidAir",
{
"heatFrames": 90
}
]
}
]
}Exit condition: {
"leaveWithRunway": {
"length": 8,
"openEnd": 1
}
}Unlocks doors: {"types":["missiles"],"requires":[{"heatFrames":50}]}
{"types":["super"],"requires":[]}
{"types":["powerbomb"],"requires":[{"heatFrames":70}]} |
|
Requires: {
"or": [
{
"and": [
"canWallJump",
{
"heatFrames": 75
}
]
},
{
"and": [
"HiJump",
{
"heatFrames": 60
}
]
},
{
"and": [
"h_heatedCrouchJumpDownGrab",
{
"heatFrames": 110
}
]
},
{
"and": [
"SpaceJump",
{
"heatFrames": 95
}
]
},
{
"and": [
"canSpringBallJumpMidAir",
{
"heatFrames": 120
}
]
}
]
} |
From: 7
Left Shaft - Middle Junction
To: 4
Left Shaft - Top Right Door
Requires: "canDash"
{
"or": [
{
"and": [
"canWallJump",
{
"heatFrames": 55
}
]
},
{
"and": [
"HiJump",
{
"heatFrames": 40
}
]
},
{
"and": [
"h_heatedCrouchJumpDownGrab",
{
"heatFrames": 90
}
]
},
{
"and": [
"SpaceJump",
{
"heatFrames": 75
}
]
},
{
"and": [
"canSpringBallJumpMidAir",
{
"heatFrames": 100
}
]
}
]
}Exit condition: {
"leaveWithRunway": {
"length": 4,
"openEnd": 1
}
}Unlocks doors: {"types":["missiles"],"requires":[{"heatFrames":50}]}
{"types":["super"],"requires":[]}
{"types":["powerbomb"],"requires":[{"heatFrames":110}]} |
|
Requires: {
"or": [
{
"and": [
"canWallJump",
{
"heatFrames": 150
}
]
},
{
"and": [
"HiJump",
{
"heatFrames": 110
}
]
},
{
"and": [
"h_heatedCrouchJumpDownGrab",
"h_heatedCrouchJumpDownGrab",
{
"heatFrames": 270
}
]
},
{
"and": [
"h_heatedCrouchJumpDownGrab",
"h_heatedCrouchJumpDownGrab",
{
"enemyKill": {
"enemies": [
[
"Multiviola"
]
],
"explicitWeapons": [
"Missile",
"Super",
"Wave",
"Plasma"
]
}
},
{
"heatFrames": 200
}
]
},
{
"and": [
"SpaceJump",
{
"heatFrames": 205
}
]
}
]
}
{
"or": [
"canDash",
{
"and": [
{
"haveBlueSuit": {}
},
{
"heatFrames": 40
}
]
}
]
} |
From: 8
Left Shaft - Bottom Junction
To: 3
Left Shaft - Middle Right Door
Requires: {
"or": [
"canDodgeWhileShooting",
"Wave",
"Spazer",
"Plasma",
"ScrewAttack",
{
"ammo": {
"type": "Missile",
"count": 1
}
},
{
"ammo": {
"type": "Super",
"count": 1
}
},
{
"enemyDamage": {
"enemy": "Alcoon",
"type": "fireball",
"hits": 1
}
}
]
}
{
"or": [
{
"and": [
"canWallJump",
{
"heatFrames": 85
}
]
},
{
"and": [
"canWallJump",
"ScrewAttack",
{
"heatFrames": 65
}
]
},
{
"and": [
"HiJump",
{
"heatFrames": 75
}
]
},
{
"and": [
"HiJump",
"ScrewAttack",
{
"heatFrames": 55
}
]
},
{
"and": [
"h_heatedCrouchJumpDownGrab",
{
"heatFrames": 80
},
{
"or": [
{
"noBlueSuit": {}
},
"canXRayCancelShinecharge",
"canMidAirMorph",
{
"heatFrames": 60
}
]
}
]
},
{
"and": [
"SpaceJump",
{
"heatFrames": 100
}
]
},
{
"and": [
"canSpringBallJumpMidAir",
{
"heatFrames": 95
}
]
}
]
} |
From: 8
Left Shaft - Bottom Junction
To: 3
Left Shaft - Middle Right Door
Requires: "canDash"
{
"or": [
{
"and": [
"canWallJump",
{
"heatFrames": 65
}
]
},
{
"and": [
"canWallJump",
"ScrewAttack",
{
"heatFrames": 45
}
]
},
{
"and": [
"HiJump",
{
"heatFrames": 55
}
]
},
{
"and": [
"HiJump",
"ScrewAttack",
{
"heatFrames": 35
}
]
},
{
"and": [
"h_heatedCrouchJumpDownGrab",
{
"heatFrames": 60
}
]
},
{
"and": [
"SpaceJump",
{
"heatFrames": 80
}
]
},
{
"and": [
"canSpringBallJumpMidAir",
{
"heatFrames": 75
}
]
}
]
}Exit condition: {
"leaveWithRunway": {
"length": 4,
"openEnd": 1
}
}Unlocks doors: {"types":["missiles"],"requires":[{"heatFrames":50}]}
{"types":["super"],"requires":[]}
{"types":["powerbomb"],"requires":[{"heatFrames":110}]} |
|
Requires: {
"or": [
{
"and": [
"canWallJump",
{
"heatFrames": 160
}
]
},
{
"and": [
"canWallJump",
"ScrewAttack",
{
"heatFrames": 140
}
]
},
{
"and": [
"HiJump",
{
"heatFrames": 135
}
]
},
{
"and": [
"HiJump",
"ScrewAttack",
{
"heatFrames": 105
}
]
},
{
"and": [
"h_heatedCrouchJumpDownGrab",
"h_heatedCrouchJumpDownGrab",
{
"heatFrames": 195
},
{
"or": [
{
"noBlueSuit": {}
},
"canXRayCancelShinecharge",
"canMidAirMorph",
{
"heatFrames": 60
}
]
}
]
},
{
"and": [
"SpaceJump",
{
"heatFrames": 210
}
]
},
{
"and": [
"canSpringBallJumpMidAir",
{
"heatFrames": 280
}
]
}
]
}
{
"or": [
"canDash",
{
"and": [
{
"haveBlueSuit": {}
},
{
"heatFrames": 40
}
]
}
]
} |
From: 1
Top Left Door
To: 2
Bottom Left Door
Entrance condition: {
"comeInShinecharging": {
"length": 11,
"openEnd": 0
}
}Requires: "Wave"
{
"or": [
"canXRayCancelShinecharge",
{
"heatFrames": 160
}
]
}
"canXRayTurnaround"
"canLongChainTemporaryBlue"
{
"heatFrames": 560
}Exit condition: {
"leaveWithTemporaryBlue": {}
}Unlocks doors: {"types":["super","powerbomb"],"requires":[]}
{"types":["missiles"],"requires":[{"heatFrames":50}]} |
From: 2
Bottom Left Door
To: 1
Top Left Door
Entrance condition: {
"comeInShinecharging": {
"length": 4,
"openEnd": 0
}
}Requires: {
"or": [
"canXRayCancelShinecharge",
{
"heatFrames": 160
}
]
}
"canLongChainTemporaryBlue"
"canXRayTurnaround"
{
"or": [
{
"and": [
"HiJump",
{
"heatFrames": 690
}
]
},
{
"and": [
"canTrickySpringBallJump",
{
"heatFrames": 745
}
]
}
]
}Exit condition: {
"leaveWithTemporaryBlue": {}
}Unlocks doors: {"types":["super","powerbomb"],"requires":[]}
{"types":["missiles"],"requires":[{"heatFrames":50}]} |
From: 2
Bottom Left Door
To: 3
Top Right Door
Entrance condition: {
"comeInShinecharging": {
"length": 4,
"openEnd": 0
}
}Requires: {
"or": [
"canXRayCancelShinecharge",
{
"heatFrames": 160
}
]
}
"canLongChainTemporaryBlue"
{
"or": [
{
"and": [
"HiJump",
{
"heatFrames": 680
}
]
},
{
"and": [
"canTrickySpringBallJump",
"canXRayTurnaround",
{
"heatFrames": 775
}
]
}
]
}Exit condition: {
"leaveWithTemporaryBlue": {}
}Unlocks doors: {"types":["super","powerbomb"],"requires":[]}
{"types":["missiles"],"requires":[{"heatFrames":50}]} |
From: 3
Top Right Door
To: 2
Bottom Left Door
Entrance condition: {
"comeInShinecharging": {
"length": 11,
"openEnd": 0
}
}Requires: "Wave"
{
"or": [
"canXRayCancelShinecharge",
{
"heatFrames": 160
}
]
}
"canLongChainTemporaryBlue"
{
"heatFrames": 460
}Exit condition: {
"leaveWithTemporaryBlue": {}
}Unlocks doors: {"types":["super","powerbomb"],"requires":[]}
{"types":["missiles"],"requires":[{"heatFrames":50}]} |
|
Use the platform at the top-right of the room to gain temporary blue, then chain it through the door. Requires: {
"heatFrames": 1180
}
{
"canShineCharge": {
"usedTiles": 15,
"openEnd": 2
}
}
"canLongChainTemporaryBlue"
"canXRayTurnaround"
{
"or": [
"canXRayCancelShinecharge",
{
"heatFrames": 160
}
]
}Exit condition: {
"leaveWithTemporaryBlue": {}
} |
From: 1
Top Right Door
To: 2
Bottom Right Door
Entrance condition: {
"comeInShinecharging": {
"length": 1,
"openEnd": 0
}
}Requires: "canChainTemporaryBlue"
"canXRayTurnaround"
{
"heatFrames": 375
}
{
"or": [
"canXRayCancelShinecharge",
{
"heatFrames": 160
}
]
}Exit condition: {
"leaveWithTemporaryBlue": {}
}Unlocks doors: {"types":["super"],"requires":[]}
{"types":["powerbomb"],"requires":["canInsaneJump"]}
{"types":["missiles"],"requires":[{"heatFrames":50}]} |
From: 3
Bottom Right Door
To: 4
Top Right Door

Crouch jump then down grab starting from the moving platform. A very fast crouch jump is necessary in order to not have lowered the platform too low. Requires: "h_crouchJumpDownGrab"
"canTrickyJump"
{
"or": [
{
"noBlueSuit": {}
},
"canMidAirMorph",
"canXRayCancelShinecharge"
]
} |
|

This expects the more controlled Temporary Blue to fall though the blocks, not storing a shinecharge on the first breakable block. Entrance condition: {
"comeInShinecharging": {
"length": 11,
"openEnd": 0
}
}Requires: "canTemporaryBlue"
"canXRayTurnaround"
{
"heatFrames": 160
}
{
"or": [
"canXRayCancelShinecharge",
{
"heatFrames": 160
}
]
}Clears obstacles: A, B Dev note: A significant amount of heat frames are implicit in the entrance condition. |
|
This expects the more controlled Temporary Blue to fall though the blocks, not storing a shinecharge on the first breakable block. Entrance condition: {
"comeInShinecharging": {
"length": 3,
"openEnd": 0
}
}Requires: "canTemporaryBlue"
{
"heatFrames": 160
}
{
"or": [
"canXRayCancelShinecharge",
{
"heatFrames": 160
}
]
}Clears obstacles: A, B |
From: 4
Junction Above Bomb Block
To: 1
Top Left Door
Requires: {
"or": [
"canDash",
{
"heatFrames": 40
}
]
}
{
"or": [
{
"obstaclesCleared": [
"A"
]
},
{
"and": [
{
"haveBlueSuit": {}
},
{
"heatFrames": 10
},
{
"or": [
"Wave",
{
"heatFrames": 30
}
]
}
]
}
]
}
{
"or": [
{
"and": [
"h_heatedCrouchJumpDownGrab",
{
"heatFrames": 340
}
]
},
{
"and": [
"canWallJump",
{
"heatFrames": 290
}
]
},
{
"and": [
"HiJump",
{
"heatFrames": 240
}
]
},
{
"and": [
"canSpringBallJumpMidAir",
{
"heatFrames": 450
}
]
},
{
"and": [
"SpaceJump",
{
"heatFrames": 380
}
]
},
{
"and": [
"canIBJ",
"h_heatProof"
]
},
{
"and": [
"canJumpIntoIBJ",
{
"heatFrames": 660
},
{
"or": [
{
"obstaclesCleared": [
"A"
]
},
{
"heatFrames": 380
}
]
}
]
},
{
"and": [
"canSpringBallBombJump",
"h_additionalBomb",
"h_additionalBomb",
{
"heatFrames": 560
}
]
}
]
}Clears obstacles: B |
|
Requires: "f_DefeatedPhantoon"
{
"or": [
{
"and": [
{
"resetRoom": {
"nodes": [
1
]
}
},
{
"cycleFrames": 1740
}
]
},
{
"and": [
{
"resetRoom": {
"nodes": [
2
]
}
},
{
"cycleFrames": 1200
}
]
},
{
"and": [
{
"resetRoom": {
"nodes": [
3
]
}
},
{
"cycleFrames": 1400
}
]
},
{
"and": [
{
"resetRoom": {
"nodes": [
4
]
}
},
{
"cycleFrames": 1050
}
]
},
{
"and": [
{
"resetRoom": {
"nodes": [
5
]
}
},
{
"cycleFrames": 1050
}
]
},
{
"and": [
{
"resetRoom": {
"nodes": [
6
]
}
},
{
"cycleFrames": 1830
},
"h_useMorphBombs"
]
},
{
"and": [
{
"resetRoom": {
"nodes": [
7
]
}
},
{
"cycleFrames": 2000
},
"Morph",
{
"or": [
"Wave",
"Bombs",
"Spazer"
]
},
{
"or": [
"Bombs",
"SpringBall",
{
"and": [
"canMidAirMorph",
"canCrouchJump"
]
}
]
}
]
}
]
}
{
"or": [
"ScrewAttack",
{
"haveBlueSuit": {}
},
"Plasma",
{
"and": [
"Wave",
{
"cycleFrames": 60
}
]
},
{
"and": [
"Spazer",
{
"cycleFrames": 330
}
]
},
{
"and": [
"canDodgeWhileShooting",
{
"cycleFrames": 900
}
]
}
]
}
{
"or": [
"canDash",
{
"cycleFrames": 200
}
]
}
{
"or": [
"canWallJump",
"h_crouchJumpDownGrabCycleFrames",
"HiJump",
"SpaceJump",
{
"and": [
"canIBJ",
{
"cycleFrames": 750
}
]
},
{
"and": [
"canSpringBallJumpMidAir",
{
"cycleFrames": 30
},
"h_doubleEquipmentScreenCycleFrames"
]
}
]
}Resets obstacles: A, B, C, R-Mode Farm cycle drops: 4 Atomic |
From: 4
Top Right Door
To: 4
Top Right Door
There is additional movement expected to represent reaching the Atomics who appear when the power is on. Requires: {
"not": "f_DefeatedPhantoon"
}
{
"or": [
{
"and": [
{
"resetRoom": {
"nodes": [
1,
2,
3,
4,
5
]
}
},
{
"cycleFrames": 2000
}
]
},
{
"and": [
{
"resetRoom": {
"nodes": [
6
]
}
},
{
"cycleFrames": 2000
},
"h_useMorphBombs"
]
},
{
"and": [
{
"resetRoom": {
"nodes": [
7
]
}
},
{
"cycleFrames": 2000
},
"Morph",
{
"or": [
"Wave",
"Bombs",
"Spazer"
]
},
{
"or": [
"Bombs",
"SpringBall",
{
"and": [
"canMidAirMorph",
"canCrouchJump"
]
}
]
}
]
}
]
}
{
"or": [
"ScrewAttack",
{
"haveBlueSuit": {}
},
"Plasma",
{
"and": [
"Wave",
{
"cycleFrames": 60
}
]
},
{
"and": [
"Spazer",
{
"cycleFrames": 150
}
]
},
{
"and": [
"Ice",
"canDodgeWhileShooting",
{
"cycleFrames": 240
}
]
}
]
}
{
"or": [
"canDash",
{
"cycleFrames": 200
}
]
}
{
"or": [
"canWallJump",
"h_crouchJumpDownGrabCycleFrames",
"HiJump",
"SpaceJump",
{
"and": [
"canIBJ",
{
"cycleFrames": 750
}
]
},
{
"and": [
"canSpringBallJumpMidAir",
{
"cycleFrames": 30
},
"h_doubleEquipmentScreenCycleFrames"
]
}
]
}Resets obstacles: A, B, C, R-Mode Farm cycle drops: 4 Custom Covern (Atomic) Dev note: This is Covern farm with a reduced drop chance so as to be applicable while powered off without breaking the powered on state. Cycle frames represent the slower of killing 4 atomics or killing 4 coverns. These Coverns have reduced Power Bomb and Super drop chance. |
From: 2
Bottom Left Door
To: 1
Top Left Doorway

Perform a gravity jump and use Spring Ball to bounce through the top of the hole. Use a pause buffer to remorph, also taking the opportunity to equip Gravity again. Then chain temporary blue into the next room. Entrance condition: {
"comeInShinecharging": {
"length": 1,
"openEnd": 0
}
}Requires: "canXRayCancelShinecharge" "canXRayTurnaround" "canGravityJump" "canSpringBallBounce" "canPauseRemorphTemporaryBlue" Exit condition: {
"leaveWithTemporaryBlue": {}
}Unlocks doors: {"types":["ammo"],"requires":[]} |
From: 2
Bottom Left Door
To: 4
Top Right Doorway
Gain a shinecharge while entering, and either kill the crab before it touches Samus, or use X-Ray to cancel the shinecharge. Perform a gravity jump and use Spring Ball to bounce through the top of the hole. Use a pause buffer to remorph, also taking the opportunity to equip Gravity again. Then chain temporary blue into the next room. Entrance condition: {
"comeInShinecharging": {
"length": 1,
"openEnd": 0
}
}Requires: {
"or": [
"canXRayCancelShinecharge",
{
"enemyKill": {
"enemies": [
[
"Sciser"
]
],
"explicitWeapons": [
"Missile",
"Super",
"Grapple",
"Wave",
"Spazer",
"Plasma",
"Ice Shield"
]
}
}
]
}
"canGravityJump"
"canSpringBallBounce"
"canPauseRemorphTemporaryBlue"Exit condition: {
"leaveWithTemporaryBlue": {}
}Unlocks doors: {"types":["ammo"],"requires":[]} |
From: 2
Bottom Left Door
To: 2
Bottom Left Door

Start with low run speed by positioning exactly 2 pixels from the door. Use X-Ray to cancel the shinecharge early, to avoid getting hit by the angry snail. Entrance condition: {
"comeInRunning": {
"speedBooster": "yes",
"minTiles": 0.4375
}
}Requires: "canWaterShineCharge" "canXRayCancelShinecharge" "canXRayTurnaround" "canLongChainTemporaryBlue" Exit condition: {
"leaveWithTemporaryBlue": {}
}Unlocks doors: {"types":["ammo"],"requires":[]}Dev note: This can also be done with a stutter shinecharge, which can shorten the temp blue chain, but not by enough to remove the need for the canLongChainTemporaryBlue requirement. |
From: 3
Left Door, Shinecharged
To: 2
Right Door
Use X-Ray to cancel the shinecharge, in order to turnaround quickly enough to jump over the crab. Requires: {
"shineChargeFrames": 0
}
"h_getBlueSpeedMaxRunway"
"canXRayCancelShinecharge"
"canXRayTurnaround"
"canChainTemporaryBlue"Exit condition: {
"leaveWithTemporaryBlue": {}
}Unlocks doors: {"types":["ammo"],"requires":[]}Dev note: The `h_getBlueSpeedMaxRunway` requirement is to satisfy the tests, since we don't have a way to represent that the temporary blue originates from the startsWithShineCharge. |