canHBJ (Expert)
A Horizontal Bomb Jump (HBJ) uses three bombs to execute. Place a bomb to get boosted horizontally; place a second bomb immediately as Samus is propelled. Place a third bomb, mid-air, as far horizontally as possible while still being able to return and get propelled by the second and then third bombs.
Dependencies: canBombHorizontally
Strats ()
|
Entrance condition: {
"comeInWithGMode": {
"mode": "any",
"morphed": true
}
}
Requires: {
"or": [
"h_canArtificialMorphCeilingBombJump",
"h_canArtificialMorphHBJ"
]
}
|
|
Requires: "h_canHBJ"
{
"obstaclesNotCleared": [
"A"
]
}
|
|
From: 4
Lower Section - Top Right Door
To: 15
G-Mode Morph Junction (By Left Door)
Entrance condition: {
"comeInWithGMode": {
"mode": "any",
"morphed": true
}
}
Requires: {
"or": [
"Morph",
{
"and": [
"Gravity",
"h_canArtificialMorphIBJ"
]
},
{
"and": [
"h_canArtificialMorphSpringBall",
{
"or": [
"Gravity",
"HiJump",
"canCarefulJump"
]
}
]
},
"h_canArtificialMorphHBJ",
"h_canArtificialMorphDiagonalBombJump"
]
}
|
|
From: 4
Lower Section - Top Right Door
To: 17
G-Mode Morph Junction Direct (By Left Door)
Entrance condition: {
"comeInWithGMode": {
"mode": "direct",
"morphed": true
}
}
Requires: {
"or": [
"Morph",
{
"and": [
"Gravity",
"h_canArtificialMorphIBJ"
]
},
{
"and": [
"h_canArtificialMorphSpringBall",
{
"or": [
"Gravity",
"HiJump",
"canCarefulJump"
]
}
]
},
"h_canArtificialMorphHBJ",
"h_canArtificialMorphDiagonalBombJump"
]
}
|
|
From: 5
Lower Section - Bottom Right Door
To: 15
G-Mode Morph Junction (By Left Door)
Entrance condition: {
"comeInWithGMode": {
"mode": "any",
"morphed": true
}
}
Requires: {
"or": [
"Morph",
{
"and": [
"Gravity",
"h_canArtificialMorphIBJ"
]
},
{
"and": [
"h_canArtificialMorphSpringBall",
{
"or": [
"Gravity",
"HiJump",
"canCarefulJump"
]
}
]
},
"h_canArtificialMorphHBJ",
"h_canArtificialMorphDiagonalBombJump"
]
}
|
|
From: 5
Lower Section - Bottom Right Door
To: 17
G-Mode Morph Junction Direct (By Left Door)
Entrance condition: {
"comeInWithGMode": {
"mode": "direct",
"morphed": true
}
}
Requires: {
"or": [
"Morph",
{
"and": [
"Gravity",
"h_canArtificialMorphIBJ"
]
},
{
"and": [
"h_canArtificialMorphSpringBall",
{
"or": [
"Gravity",
"HiJump",
"canCarefulJump"
]
}
]
},
"h_canArtificialMorphHBJ",
"h_canArtificialMorphDiagonalBombJump"
]
}
|
|
From: 7
Junction (Bottom Rippers)
To: 6
Junction (Above Bottom Rippers)
Notable: true 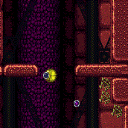

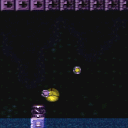
Starting on the right ledge at the bottom of Red Tower, wall jump just below the middle plant, just above the top ripper. Place two bombs out of the wall jump landing on the first bomb and getting boosted by both. While rising, place two more bombs for a second HBJ. Colliding with the side of the ledge after the third bomb can help. Requires: "canWallJumpBombBoost" "h_canHBJ" |
|
From: 2
Right Door
To: 1
Left Door
Notable: true 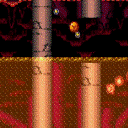
Cross the Pillar Room with Bombs and minimal damage. Some acid damage is expected, but any mistakes greatly increases the time spent in acid. Entrance condition: {
"comeInRunning": {
"minTiles": 3,
"speedBooster": "any"
}
}
Requires: "h_canUseMorphBombs"
"canWallJumpInstantMorph"
"canInsaneJump"
"canResetFallSpeed"
"canUnmorphBombBoost"
"canHBJ"
"canSuitlessLavaDive"
{
"heatFrames": 1320
}
{
"acidFrames": 128
}
|
|
From: 1
Left Door
To: 4
Top Right Ledge Junction
Hug the right wall after killing the first Cacatac in order to avoid its invisible, stationary projectiles. After getting to the small island platform, diagonal IBJ up while avoiding the top Cacatac. Alternatively HBJ to the next platform and Spring Ball from the right edge of this platform into an IBJ above the spikes. Entrance condition: {
"comeInWithGMode": {
"mode": "any",
"morphed": true
}
}
Requires: "Gravity"
{
"or": [
"h_canArtificialMorphDiagonalBombJump",
{
"and": [
"h_canArtificialMorphHBJ",
"h_canArtificialMorphJumpIntoIBJ"
]
}
]
}
|
|
From: 2
Right Door
To: 1
Left Door
Notable: true 
This requires multiple HBJ to get over spike pits. The first one, by the right door, must be started at the top of an IBJ. Entrance condition: {
"comeInWithGMode": {
"mode": "any",
"morphed": true
}
}
Requires: "Gravity" "h_canArtificialMorphIBJ" "h_canArtificialMorphHBJ" |
|
Requires: "Gravity"
{
"or": [
"SpaceJump",
"canWalljump",
"h_IBJFromSpikes",
{
"and": [
"h_canIBJ",
"h_canHBJ"
]
},
"h_canDiagonalBombJump"
]
}
|
|
From: 5
Bottom Middle Junction
To: 6
East Cactus Alley Junction (Right of Morph Tunnel)
Requires: "Gravity"
{
"or": [
"SpaceJump",
"h_canHBJ",
"h_canResetFallSpeed",
{
"enemyDamage": {
"enemy": "Cacatac",
"hits": 1,
"type": "spike"
}
}
]
}
{
"or": [
"SpaceJump",
"canWalljump",
"HiJump",
"h_canIBJ",
"h_canHBJ",
"h_canSpringBallBombJump",
{
"spikeHits": 1
}
]
}
|
|
From: 6
East Cactus Alley Junction (Right of Morph Tunnel)
To: 5
Bottom Middle Junction
Requires: "Gravity"
{
"or": [
"SpaceJump",
"h_canHBJ",
{
"spikeHits": 1
}
]
}
|
|
From: 3
Junction (Get Past Metroids, Left to Right)
To: 2
Right Door
Bomb Jump between the two floating platforms. Requires: {
"or": [
{
"obstaclesCleared": [
"A"
]
},
{
"and": [
"canCameraManip",
"canMetroidAvoid"
]
}
]
}
{
"or": [
{
"and": [
"h_canHBJ",
"canResetFallSpeed"
]
},
{
"and": [
{
"obstaclesCleared": [
"A"
]
},
"h_canDiagonalBombJump"
]
},
"h_canCeilingBombJump"
]
}
|