canExtendedMoondance (Insane)
Continue the moondance an additional 146 times to clip an additional tile into the floor when clipping. Every moonfall will clip Samus 1 tile into the ground and Grapple must be used to return to a standing position. A frozen enemy will need to be repositioned to a lower height at the point when Samus begins clipping into the floor with every moonfall. The final clip may involve clipping into a floor, and from there moonfall clipping again to sink through a total of up to 4 solid tiles. After 145 additional moonfalls, Samus' stored vertical speed is $FFD6.FC00, while after 146, it is $FFD6.E000.
Dependencies: canMoonfall, canBeVeryPatient, canMoonwalk, canBePatient, canMoondance
Strats ()
|
From: 9
Junction Below Items
To: 2
Middle Right Door
Requires: {
"or": [
"Morph",
{
"obstaclesCleared": [
"A"
]
}
]
}
"canExtendedMoondance"
"canTrickyUseFrozenEnemies"
{
"enemyDamage": {
"enemy": "Beetom",
"type": "contact",
"hits": 4
}
}
"h_ExtendedMoondanceBeetomLeniency"
Exit condition: {
"leaveWithStoredFallSpeed": {
"fallSpeedInTiles": 2
}
}
|
|
From: 9
Junction Below Items
To: 3
Bottom Left Door
Carefully Moondance where the floor is supported by more tiles. Requires: {
"or": [
"Morph",
{
"obstaclesCleared": [
"A"
]
}
]
}
"canExtendedMoondance"
"canTrickyUseFrozenEnemies"
{
"enemyDamage": {
"enemy": "Beetom",
"type": "contact",
"hits": 10
}
}
"h_ExtendedMoondanceBeetomLeniency"
Exit condition: {
"leaveWithStoredFallSpeed": {
"fallSpeedInTiles": 2
}
}
|
|
From: 9
Junction Below Items
To: 4
Bottom Right Door
Carefully Moondance where the floor is supported by more tiles. Requires: {
"or": [
"Morph",
{
"obstaclesCleared": [
"A"
]
}
]
}
"canExtendedMoondance"
"canTrickyUseFrozenEnemies"
{
"enemyDamage": {
"enemy": "Beetom",
"type": "contact",
"hits": 10
}
}
"h_ExtendedMoondanceBeetomLeniency"
Exit condition: {
"leaveWithStoredFallSpeed": {
"fallSpeedInTiles": 2
}
}
|
|
From: 4
Bottom Right Door
To: 4
Bottom Right Door
Freeze a Beetom at head height where Samus can Spinjump into it and begin Moondancing. After 195 moonfalls, reposition the Beetom to chest height, then continue dancing. Requires: {
"obstaclesNotCleared": [
"A"
]
}
"canExtendedMoondance"
"canTrickyUseFrozenEnemies"
{
  "enemyDamage": {
    "enemy": "Beetom",
    "type": "contact",
    "hits": 2
  }
}
"h_ExtendedMoondanceBeetomLeniency"
Exit condition: {
"leaveWithStoredFallSpeed": {
"fallSpeedInTiles": 2
}
}
|
|
From: 6
Junction (Right of Tunnel)
To: 3
Bottom Left Door
Freeze a Beetom at head height where Samus can Spinjump into it and begin Moondancing. After 195 moonfalls, reposition the Beetom to chest height, then continue dancing. The Beetom can be left at the door if farming for health is needed. Requires: {
"obstaclesNotCleared": [
"A"
]
}
"Morph"
"canExtendedMoondance"
"canTrickyUseFrozenEnemies"
{
"enemyDamage": {
"enemy": "Beetom",
"type": "contact",
"hits": 2
}
}
"h_ExtendedMoondanceBeetomLeniency"
Exit condition: {
"leaveWithStoredFallSpeed": {
"fallSpeedInTiles": 2
}
}
|
|
Freeze a Beetom at head height where Samus can Spinjump into it and begin Moondancing. After 195 moonfalls, reposition the Beetom to chest height, then continue dancing. Requires: "canExtendedMoondance"
"canTrickyUseFrozenEnemies"
{
"enemyDamage": {
"enemy": "Beetom",
"type": "contact",
"hits": 2
}
}
"h_ExtendedMoondanceBeetomLeniency"
{
"or": [
{
"enemyDamage": {
"enemy": "Beetom",
"type": "contact",
"hits": 8
}
},
{
"ammo": {
"type": "Missile",
"count": 1
}
},
{
"ammo": {
"type": "Super",
"count": 1
}
}
]
}
Exit condition: {
"leaveWithStoredFallSpeed": {
"fallSpeedInTiles": 2
}
}
|
|
From: 2
Right Door
To: 2
Right Door
Freeze a Beetom at head height where Samus can Spinjump into it and begin Moondancing. After 195 moonfalls, reposition the Beetom to chest height, then continue dancing. Requires: "canExtendedMoondance"
"canTrickyUseFrozenEnemies"
{
"enemyDamage": {
"enemy": "Beetom",
"type": "contact",
"hits": 2
}
}
"h_ExtendedMoondanceBeetomLeniency"
{
"or": [
{
"enemyDamage": {
"enemy": "Beetom",
"type": "contact",
"hits": 8
}
},
{
"ammo": {
"type": "Missile",
"count": 1
}
},
{
"ammo": {
"type": "Super",
"count": 1
}
}
]
}
Exit condition: {
"leaveWithStoredFallSpeed": {
"fallSpeedInTiles": 2
}
}
|
|
From: 1
Top Left Door
To: 1
Top Left Door
Notable: true 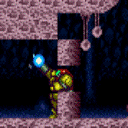
Break exactly the bottom-right and top-right Bomb Blocks and Unmorph while on the top block hole, to begin the Moondance. Clear a path to the left in advance, as well as all enemies. Moonfall a total of 321 times, stopping just before Samus clips two tiles into the ground. Requires: {
"obstaclesNotCleared": [
"A"
]
}
"h_canUseMorphBombs"
"canExtendedMoondance"
Exit condition: {
"leaveWithStoredFallSpeed": {
"fallSpeedInTiles": 2
}
}
|
|
Notable: true
Break exactly the lower-middle-right and top-right Bomb Blocks, leaving the upper-middle-right and bottommost Blocks intact. Clear all enemies before starting. Unmorph while on the top block to begin the Moondance. Exactly 145 moonfalls after clipping into the bottom block (321 total), wiggle out to the left. The next moonfall will clip Samus down two tiles. Re-enable Screw Attack and moonfall to break the right side blocks, then use Grapple again to become unstuck. Finally, moonfall through the Speed Blocks to clip down to the Dachora. Requires: {
"obstaclesNotCleared": [
"A"
]
}
"h_canUseMorphBombs"
"ScrewAttack"
"canExtendedMoondance"
"canDisableEquipment"
|
|
Notable: true
Break exactly the lower-middle-right and top-right Bomb Blocks, leaving the upper-middle-right and bottommost Blocks intact. Clear all enemies before starting. Unmorph while on the top block to begin the Moondance. Exactly 145 moonfalls after clipping into the bottom block (321 total), wiggle out to the left. The next moonfall will clip Samus down two tiles. Finally use Screw Attack or SpeedBooster to break the Bomb blocks and reach the right side door. Requires: {
"obstaclesNotCleared": [
"A"
]
}
"h_canUseMorphBombs"
{
"or": [
"SpeedBooster",
{
"and": [
"ScrewAttack",
"canDisableEquipment"
]
}
]
}
"canExtendedMoondance"
Exit condition: {
"leaveWithStoredFallSpeed": {
"fallSpeedInTiles": 2
}
}
|
|
From: 1
Top Left Door
To: 1
Top Left Door
Notable: true 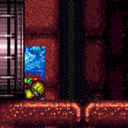
Bring the Beetom close to the door and begin Moondancing. Stop after exactly 175 moonfalls, so as not to fall through the floor. Freeze the Beetom inside the door frame and Moondance such that Samus does not fall through the floor and does not touch the door transition. Requires: {
"obstaclesNotCleared": [
"A"
]
}
"canExtendedMoondance"
"canTrickyUseFrozenEnemies"
{
"enemyDamage": {
"enemy": "Beetom",
"type": "contact",
"hits": 5
}
}
"h_ExtendedMoondanceBeetomLeniency"
Exit condition: {
"leaveWithStoredFallSpeed": {
"fallSpeedInTiles": 2
}
}
|
|
From: 1
Top Left Door
To: 2
Middle Left Door (Behind Power Bomb Blocks)
Break the Power Bomb Blocks without killing the Beetom Freeze a Beetom at head height where Samus can Spinjump into it and begin Moondancing. After 175 Moonfalls, reposition the Beetom to chest height. If needed, the Beetom can be left at the door while Samus moves to the farm bugs. Requires: {
"obstaclesNotCleared": [
"A"
]
}
"h_canUsePowerBombs"
"canExtendedMoondance"
"canTrickyUseFrozenEnemies"
{
"enemyDamage": {
"enemy": "Beetom",
"type": "contact",
"hits": 2
}
}
"h_ExtendedMoondanceBeetomLeniency"
Exit condition: {
"leaveWithStoredFallSpeed": {
"fallSpeedInTiles": 2
}
}
|
|
From: 1
Top Left Door
To: 2
Middle Left Door (Behind Power Bomb Blocks)
Collect the Beetom and freeze it above and left of the Power Bomb Blocks in a way that Samus will be able to Moondance. Moondance until Samus falls through two tiles, then Moonfall again to sink through the solid blocks and reach the door. Requires: {
"obstaclesNotCleared": [
"A"
]
}
"canExtendedMoondance"
"canTrickyUseFrozenEnemies"
{
"enemyDamage": {
"enemy": "Beetom",
"type": "contact",
"hits": 3
}
}
"h_ExtendedMoondanceBeetomLeniency"
|
|
Freeze a Beetom at head height where Samus can Spinjump into it and begin Moondancing. After 175 Moonfalls, reposition the Beetom to chest height. If needed, the Beetom can be left at the door while Samus moves to the farm bugs. Requires: {
"obstaclesNotCleared": [
"A"
]
}
"canExtendedMoondance"
"canTrickyUseFrozenEnemies"
{
"enemyDamage": {
"enemy": "Beetom",
"type": "contact",
"hits": 2
}
}
"h_ExtendedMoondanceBeetomLeniency"
Exit condition: {
"leaveWithStoredFallSpeed": {
"fallSpeedInTiles": 2
}
}
|
|
Freeze a Beetom at head height where Samus can Spinjump into it and begin Moondancing. After 175 Moonfalls, reposition the Beetom to chest height. If needed, the Beetom can be left at the door while Samus moves to the farm bugs. Requires: {
"obstaclesNotCleared": [
"A"
]
}
"canExtendedMoondance"
"canTrickyUseFrozenEnemies"
{
"enemyDamage": {
"enemy": "Beetom",
"type": "contact",
"hits": 6
}
}
"h_ExtendedMoondanceBeetomLeniency"
Exit condition: {
"leaveWithStoredFallSpeed": {
"fallSpeedInTiles": 2
}
}
|
|
Freeze a Beetom at head height where Samus can Spinjump into it and begin Moondancing. After 175 Moonfalls, reposition the Beetom to chest height. If needed, the Beetom can be left at the door while Samus moves to the farm bugs. Requires: {
"obstaclesNotCleared": [
"A"
]
}
{
"or": [
"HiJump",
"SpaceJump",
"canWalljump"
]
}
"canExtendedMoondance"
"canTrickyUseFrozenEnemies"
{
"enemyDamage": {
"enemy": "Beetom",
"type": "contact",
"hits": 6
}
}
"h_ExtendedMoondanceBeetomLeniency"
Exit condition: {
"leaveWithStoredFallSpeed": {
"fallSpeedInTiles": 2
}
}
|
|
From: 1
Left Door
To: 1
Left Door
Notable: true Use SpeedBooster to construct a structure for Moondancing that has 1 chest height block and 1 head height block to the right of it and no other Speed blocks. Crystal Flash below the lower block, exactly pixel aligned with its right side, to standup and then begin Moondancing. After Samus sinks through the floor tiles, use Grapple to return to a standing position and count an additional 145 moonfalls. Then use Grapple to return to a crouch and wiggle right and Turn-Around Aim Cancel to escape to the right. Finally, use SpeedBooster if needed to break the remaining Speed blocks and reach the door. Requires: "h_canCrystalFlash" "canTrickyJump" "canTurnaroundAimCancel" "canTemporaryBlue" "canExtendedMoondance" "canSpeedball" Exit condition: {
"leaveWithStoredFallSpeed": {
"fallSpeedInTiles": 2
}
}
|
|
Freeze a Beetom at head height where Samus can Spinjump into it and begin Moondancing. After 175 moonfalls, reposition the Beetom to chest height, then continue dancing. Requires: "canExtendedMoondance"
"canTrickyUseFrozenEnemies"
{
"enemyDamage": {
"enemy": "Beetom",
"type": "contact",
"hits": 2
}
}
"h_ExtendedMoondanceBeetomLeniency"
Exit condition: {
"leaveWithStoredFallSpeed": {
"fallSpeedInTiles": 2
}
}
|
|
From: 1
Left Door
To: 2
Right Door
Notable: true Use SpeedBooster to construct a structure for Moondancing that has 1 chest height block and 1 head height block to the right of it and no other Speed blocks. Crystal Flash below the lower block, exactly pixel aligned with its right side, to standup and then begin Moondancing. After Samus sinks through the floor tiles, use Grapple to return to a standing position and count an additional 145 moonfalls. Then use Grapple to return to a crouch and wiggle right and Turn-Around Aim Cancel to escape to the right. Finally, use SpeedBooster if needed to break the remaining Speed blocks and reach the door. Requires: "h_canCrystalFlash" "canTrickyJump" "canTurnaroundAimCancel" "canTemporaryBlue" "canExtendedMoondance" "canSpeedball" Exit condition: {
"leaveWithStoredFallSpeed": {
"fallSpeedInTiles": 2
}
}
|
|
Freeze a Beetom at head height where Samus can Spinjump into it and begin Moondancing. After 175 moonfalls, reposition the Beetom to chest height, then continue dancing. Requires: "canExtendedMoondance"
"canTrickyUseFrozenEnemies"
"SpeedBooster"
{
"enemyDamage": {
"enemy": "Beetom",
"type": "contact",
"hits": 2
}
}
"h_ExtendedMoondanceBeetomLeniency"
Exit condition: {
"leaveWithStoredFallSpeed": {
"fallSpeedInTiles": 2
}
}
|
|
From: 2
Right Door
To: 2
Right Door
Notable: true .png)
.gif)
Fire wide Wave beam shots into the ceiling until it is possible to walk through the Speed blocks. Let a Beetom attach to Samus and then return to the right. Freeze the Beetom at head height where Samus can Spinjump into it and begin Moondancing. After 175 moonfalls, reposition the Beetom to chest height, then continue dancing. Requires: "canExtendedMoondance"
"canTrickyUseFrozenEnemies"
{
"enemyDamage": {
"enemy": "Beetom",
"type": "contact",
"hits": 2
}
}
"h_ExtendedMoondanceBeetomLeniency"
"Wave"
{
"or": [
"Spazer",
"Plasma"
]
}
Exit condition: {
"leaveWithStoredFallSpeed": {
"fallSpeedInTiles": 2
}
}
|
|
From: 2
Far Left Door
To: 2
Far Left Door
Notable: true 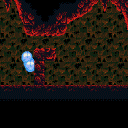
Use SpeedBooster to construct a structure for Moondancing that has 1 chest height block and 1 head height block to the right of it and no other Speed blocks. Crystal Flash below the lower block, exactly pixel aligned with its right side, to standup and then begin Moondancing. After Samus sinks through the floor tiles, use Grapple to return to a standing position and count an additional 145 moonfalls. Then use Grapple to return to a crouch and wiggle right and Turn-Around Aim Cancel to escape to the right. Finally, use SpeedBooster if needed to break the remaining Speed blocks and reach the door. Requires: "h_heatProof" "SpeedBooster" "h_canCrystalFlash" "canTrickyJump" "canTurnaroundAimCancel" "canTemporaryBlue" "canExtendedMoondance" "canSpeedball" Exit condition: {
"leaveWithStoredFallSpeed": {
"fallSpeedInTiles": 2
}
}
|
|
From: 1
Top Left Door
To: 1
Top Left Door
Notable: true 
Use SpeedBooster to construct a structure for Moondancing that has 1 chest height block and 1 head height block to the right of it and no other Speed blocks. Crystal Flash below the lower block, exactly pixel aligned with its right side, to standup and then begin Moondancing. After Samus sinks through the floor tiles, use Grapple to return to a standing position and count an additional 145 moonfalls. Then use Grapple to return to a crouch and wiggle right and Turn-Around Aim Cancel to escape to the right. Finally, shortcharge to break the remaining Speed blocks and reach the door. Requires: "h_canCrystalFlash"
"canTrickyJump"
"canTurnaroundAimCancel"
"canTemporaryBlue"
"canExtendedMoondance"
"canSpeedball"
"Grapple"
{
"canShineCharge": {
"openEnd": 0,
"usedTiles": 16,
"steepDownTiles": 4
}
}
Exit condition: {
"leaveWithStoredFallSpeed": {
"fallSpeedInTiles": 2
}
}
|