canAwakenZebes (Medium)
Understanding game behavior related to how the planet is awakened. The planet is awakened by unlocking any gray door locked by killing enemies in the room (not including bosses or minibosses). Pit Room, Baby Kraid Room, Metal Pirates Room, and Plasma Room are the places where this can be done in the randomizer. Awakening the planet causes enemies to spawn in Parlor, Climb, Morph Ball Room, Construction Zone, and Blue Brinstar Energy Tank Room. It also causes the item in the left side of Morph Ball Room and in The Final Missile to spawn. The item and enemies in Pit Room do not spawn until entering with Morph and Missiles collected, regardless of whether the planet is awake. If the quality-of-life option 'All items spawn from start' is enabled, as it is by default, then the items will already be spawned anyway, but awakening the planet can still matter because of its effects on enemies.
Strats ()
|
Requires: "h_ZebesIsAwake"
{
"resetRoom": {
"nodes": [
1,
5
],
"mustStayPut": false
}
}
{
"refill": [
"Energy",
"Missile"
]
}
|
|
From: 1
Top Left Door
To: 1
Top Left Door
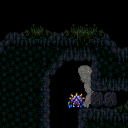
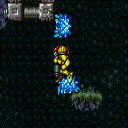
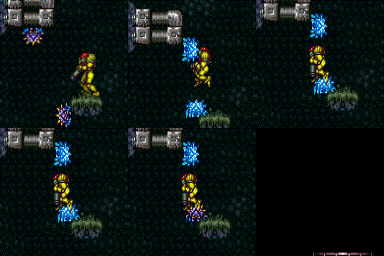
Destroy the bomb wall to open a path for the Geemer to hit Samus through the transition. If using a PB be careful not to kill the Geemer. Place the PB far left, next to the door, as the Geemer is leaving the flat part of the ceiling. Requires: "h_ZebesIsAwake" "h_canDestroyBombWalls" Exit condition: {
"leaveWithGModeSetup": {}
}
|
|
From: 1
Top Left Door
To: 1
Top Left Door
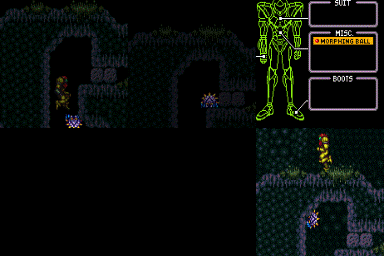
From the left, break the bomb blocks by shinesparking from the neighboring room. After the blocks respawn and the Geemer is near, destroy them again using blue speed from the right. This opens a path for the Geemer to hit Samus through the transition. Entrance condition: {
"comeInWithSpark": {}
}
Requires: "h_ZebesIsAwake"
{
"shinespark": {
"frames": 67,
"excessFrames": 42
}
}
"canCarefulJump"
{
"canShineCharge": {
"usedTiles": 25,
"steepUpTiles": 3,
"steepDownTiles": 3,
"openEnd": 1
}
}
Exit condition: {
"leaveWithGModeSetup": {}
}
|
|
From: 1
Top Left Door
To: 1
Top Left Door
From the left, break the bomb blocks with blue speed from the neighboring room. After the blocks respawn and the Geemer is near, destroy them again using blue speed from the right. This opens a path for the Geemer to hit Samus through the transition. Entrance condition: {
"comeInShinecharging": {
"length": 13,
"openEnd": 0,
"steepUpTiles": 2,
"steepDownTiles": 2
}
}
Requires: "h_ZebesIsAwake"
"canCarefulJump"
{
"canShineCharge": {
"usedTiles": 25,
"steepUpTiles": 3,
"steepDownTiles": 3,
"openEnd": 1
}
}
Exit condition: {
"leaveWithGModeSetup": {}
}
|
|
From: 1
Top Left Door
To: 5
Alcatraz Door
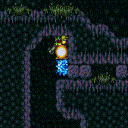
There are scroll PLMs one tile to the left of the bomb blocks which can be used to overload PLMs. The bomb blocks then become air and can be passed through. Use Bombs, SpringBall, or a Geemer damage boost to get across the gap without unmorphing. To survive a Geemer hit, you will need Varia or Gravity or to come in with more than 4 energy (e.g. by coming in with indirect G-mode after leaving with G-mode immobile). Entrance condition: {
"comeInWithGMode": {
"mode": "any",
"morphed": true
}
}
Requires: {
"or": [
"h_canArtificialMorphMovement",
"h_canArtificialMorphBombHorizontally",
{
"and": [
"canNeutralDamageBoost",
"h_ZebesIsAwake",
{
"enemyDamage": {
"enemy": "Geemer (blue)",
"type": "contact",
"hits": 1
}
}
]
}
]
}
|
|
Wait 75 seconds for a global Geemer. Requires: {
"enemyDamage": {
"enemy": "Geemer (blue)",
"type": "contact",
"hits": 1
}
}
"h_ZebesIsAwake"
|
|
From: 2
Middle Left Door
To: 2
Middle Left Door
Wait 75 seconds for a global Geemer, or use a Super to grab a closer one. Requires: "h_ZebesIsAwake" Exit condition: {
"leaveWithGModeSetup": {}
}
|
|
From: 3
Bottom Left Horizontal Door
To: 3
Bottom Left Horizontal Door
Wait 90 seconds for a global Geemer. Requires: {
"enemyDamage": {
"enemy": "Geemer (blue)",
"type": "contact",
"hits": 1
}
}
"h_ZebesIsAwake"
"canBePatient"
|
|
From: 3
Bottom Left Horizontal Door
To: 3
Bottom Left Horizontal Door
There is a Geemer just below the door that only moves while on camera. Requires: "h_ZebesIsAwake" Exit condition: {
"leaveWithGModeSetup": {}
}
|
|
From: 3
Bottom Left Horizontal Door
To: 3
Bottom Left Horizontal Door
There is a Geemer just below the door that only moves while on camera. Requires: "h_canFrozenEnemyRunway" "h_ZebesIsAwake" Exit condition: {
"leaveWithRunway": {
"length": 6,
"openEnd": 1,
"steepUpTiles": 1
}
}
|
|
Requires: {
"enemyDamage": {
"enemy": "Geemer (blue)",
"type": "contact",
"hits": 1
}
}
"h_ZebesIsAwake"
|
|
From: 4
Top Right Door
To: 4
Top Right Door
Requires: "h_ZebesIsAwake" Exit condition: {
"leaveWithGModeSetup": {}
}
|
|
From: 4
Top Right Door
To: 5
Alcatraz Door
There are scroll PLMs one tile to the right of the bomb blocks which can be used to overload PLMs, turning the bomb blocks to air. However, if Zebes is awake, two Geemers block the way. With a regular G-mode setup and no suits, a single Geemer hit would kill Samus. The Geemer hits can be avoided with Bombs or SpringBall. Alternatively, a Power Bomb, placed precisely and as early as possible, can be used to jump onto the ledge and go around to the left entrance to Alcatraz (necessary since the Power Bomb blast will render the bomb blocks solid, unable to be turned to air). A Geemer hit can also be tanked by having Varia or Gravity or by coming in with higher energy (e.g. with G-mode immobile). Entrance condition: {
"comeInWithGMode": {
"mode": "any",
"morphed": true
}
}
Requires: {
"or": [
"h_canArtificialMorphMovement",
"h_canArtificialMorphPowerBomb",
{
"enemyDamage": {
"enemy": "Geemer (blue)",
"type": "contact",
"hits": 1
}
},
"h_ZebesNotAwake"
]
}
|
|
It takes approximately 3.5 minutes for a global Geemer to reach this location. If using a Super, fire between 19 and 33 seconds after entering the room, then wait approximately 30 more seconds to be hit. Requires: {
"enemyDamage": {
"enemy": "Geemer (blue)",
"type": "contact",
"hits": 1
}
}
"h_ZebesIsAwake"
{
  "or": [
    "canBeVeryPatient",
    {
      "ammo": {
        "type": "Super",
        "count": 1
      }
    }
  ]
}
|
|
From: 5
Alcatraz Door
To: 5
Alcatraz Door
It takes approximately 3.5 minutes for a global Geemer to reach this location, but this can be reduced by using a Super between 19 and 33 seconds after entering the room, to make a Geemer fall and take a shorter path. Requires: "h_ZebesIsAwake"
{
"or": [
"canBeVeryPatient",
{
"ammo": {
"type": "Super",
"count": 1
}
}
]
}
Exit condition: {
"leaveWithGModeSetup": {}
}
|
|
From: 5
Alcatraz Door
To: 8
Central Junction
Notable: true Wait 3 minutes for a global Geemer to waddle over, or shoot a Super 20 to 30 seconds after entering the room to knock it off the ceiling and save a lot of time. Damage down until Samus is one Geemer hit away from running out of energy, and set reserves to manual. Crouch jump at a very precise time and mid-air morph to contact the Geemer at the peak of the jump, pressing pause to be in the fade-out while getting hit and reaching 0 energy. Set reserves to auto, unpause, and hold left. While reserves are auto-refilling, Samus' i-frames will run out, allowing Samus to be hit by the Geemer again and be boosted high enough to reach the ledge. The screen will be black, which can be fixed by pausing and unpausing again. Requires: "h_ZebesIsAwake"
"HiJump"
"Morph"
{
"or": [
"canBeVeryPatient",
{
"ammo": {
"type": "Super",
"count": 1
}
}
]
}
"canCrouchJump"
"canInsaneJump"
"canPauseAbuse"
"canNeutralDamageBoost"
{
"autoReserveTrigger": {
"minReserveEnergy": 85
}
}
{
"enemyDamage": {
"enemy": "Geemer (blue)",
"type": "contact",
"hits": 1
}
}
|
|
From: 5
Alcatraz Door
To: 8
Central Junction
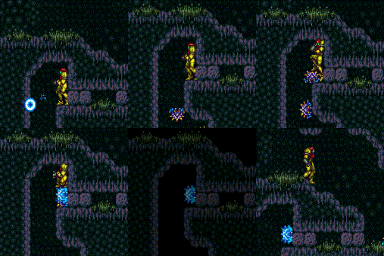
Notable: true Enter with direct G-Mode artificial morph, and perform a Crystal Flash to refill reserve energy. Do this all the way to the left, to prevent the Geemer from being destroyed by the lingering light orb. Wait for a global Geemer to make the long trip along the map, or shoot a Super 20 to 30 seconds after entering the room to knock it off the ceiling and save a lot of time. Either way, after the Geemer comes down into Alcatraz, shoot a Super to knock it off the ledge to make it bypass the light orb. Damage down until one Geemer hit away from running out of energy. If Samus has at least one Energy Tank, it will take longer to damage down, in which case an additional Super can be used to knock the Geemer onto the floating platform, to allow unlimited time for damaging down. A final Super can be used to knock the Geemer off the floating platform. Set reserves to manual, stand next to the bomb blocks, and wait for the Geemer to approach. Just before taking a hit, press pause. During the fade-out, hold forward to land quickly after knockback. At a precise moment just before the pause hits, jump and aim down; the aim-down can be buffered before jumping, e.g. by rolling from forward to down through a diagonal input. Set reserves to auto, then unpause while continuing to hold jump. If successful, the forced stand-up will occur close to the ceiling and while Samus still has upward momentum, allowing Samus to clip through. Entrance condition: {
"comeInWithGMode": {
"mode": "direct",
"morphed": true
}
}
Requires: "h_ZebesIsAwake"
"canBeVeryPatient"
{
"ammo": {
"type": "Super",
"count": 3
}
}
"h_canArtificialMorphCrystalFlash"
"canPauseAbuse"
{
"autoReserveTrigger": {}
}
{
"enemyDamage": {
"enemy": "Geemer (blue)",
"type": "contact",
"hits": 1
}
}
|
|
From: 5
Alcatraz Door
To: 8
Central Junction
Notable: true Wait for a global Geemer to make the long trip along the map, or shoot a Super 20 to 30 seconds after entering the room to knock it off the ceiling and save a lot of time. Freeze it just after it starts climbing the bomb blocks. Spin-jump above it, which will put Samus into a forced crouch where X-Ray cannot be used. Use Grapple to kill a a second Geemer, restoring the ability to use X-Ray. Use X-Ray to stand up, then jump up through the ceiling. Requires: "h_ZebesIsAwake"
"canBePatient"
{
"or": [
"canBeVeryPatient",
{
"ammo": {
"type": "Super",
"count": 1
}
}
]
}
"canPreciseCeilingClip"
"canTrickyUseFrozenEnemies"
"canUseGrapple"
"canXRayStandUp"
|
|
From: 5
Alcatraz Door
To: 8
Central Junction
Notable: true Wait for a global Geemer to make the long trip along the map, or shoot a Super 20 to 30 seconds after entering the room to knock it off the ceiling and save a lot of time. Hold right against the bomb blocks, take damage from the Geemer, jump, aim-down, and shoot the Geemer shortly before landing. Samus should end up standing on the ground with the Geemer frozen on the wall slightly above the ground (overlapping Samus' hitbox). Facing the bomb blocks and pressed against them, jump while holding down (but not crouched) and then press forward at a precise time to break the aim-down pose. If successful, Samus will clip up through the ceiling. This can be attempted several times before the Geemer thaws. Requires: "HiJump"
"h_ZebesIsAwake"
{
"or": [
"canBeVeryPatient",
{
"ammo": {
"type": "Super",
"count": 1
}
}
]
}
"canPreciseCeilingClip"
"canTrickyUseFrozenEnemies"
{
"enemyDamage": {
"enemy": "Geemer (blue)",
"type": "contact",
"hits": 1
}
}
"canInsaneJump"
|
|
From: 5
Alcatraz Door
To: 8
Central Junction
Wait 3 minutes for a global Geemer to waddle over, or shoot a Super 20 to 30 seconds after entering the room to knock it off the ceiling and save a lot of time. Freeze the Geemer as it turns onto the middle slope of the left wall to escape - it helps to freeze the geemer from below. Alternatively, use a Super to knock it off the wall and freeze it mid-air. Requires: "h_ZebesIsAwake"
"Morph"
"canTrickyUseFrozenEnemies"
{
"or": [
"canBeVeryPatient",
{
"ammo": {
"type": "Super",
"count": 1
}
}
]
}
{
"or": [
"canTrickyJump",
{
"and": [
"canCarefulJump",
{
"ammo": {
"type": "Super",
"count": 1
}
}
]
}
]
}
|
|
From: 6
Bottom Right Door (On the Left Shaft)
To: 6
Bottom Right Door (On the Left Shaft)
Wait 2 minutes for a global Geemer. Requires: {
"enemyDamage": {
"enemy": "Geemer (blue)",
"type": "contact",
"hits": 1
}
}
"h_ZebesIsAwake"
{
  "or": [
    "canBePatient",
    {
      "ammo": {
        "type": "Super",
        "count": 1
      }
    }
  ]
}
|
|
From: 6
Bottom Right Door (On the Left Shaft)
To: 6
Bottom Right Door (On the Left Shaft)
Wait 2 minutes for a global Geemer, or use a Super to grab a closer one. Requires: "h_ZebesIsAwake"
{
"or": [
"canBePatient",
{
"ammo": {
"type": "Super",
"count": 1
}
}
]
}
Exit condition: {
"leaveWithGModeSetup": {}
}
|
|
From: 6
Bottom Right Door (On the Left Shaft)
To: 6
Bottom Right Door (On the Left Shaft)
Wait 2 minutes for a global Geemer, or use a Super to grab a closer one. Requires: "h_canFrozenEnemyRunway"
"h_ZebesIsAwake"
{
"or": [
"canBePatient",
{
"ammo": {
"type": "Super",
"count": 1
}
}
]
}
Exit condition: {
"leaveWithRunway": {
"length": 5,
"openEnd": 1,
"steepUpTiles": 1
}
}
|
|
From: 7
Bottom Left Vertical Door
To: 7
Bottom Left Vertical Door
Line up with the far right or left side of doorframe in the room below, to be able to not fall back through after entry, as the door remains open. Be careful not to fall into the door while being hit by the Geemer. Requires: {
"enemyDamage": {
"enemy": "Geemer (blue)",
"type": "contact",
"hits": 1
}
}
"h_ZebesIsAwake"
{
"or": [
"canBePatient",
{
"ammo": {
"type": "Super",
"count": 1
}
}
]
}
|
|
From: 7
Bottom Left Vertical Door
To: 7
Bottom Left Vertical Door
Notable: true Freeze a Geemer on the bottom of the overhang just below the door to Final Missile Bombway. Freeze a second Geemer on the top left of its platform and setup a moonfall between them. Fall off the Geemers and clip into the tile left of the door. Press up to get out of crouch and lose the stored vertical speed (so that X-Ray works). Then turn-around, open the door, and go into the door transition as the third Geemer hits you. Falling off the frozen Geemers requires relatively high precision: This setup is a 4 frame window, not too far left, so you can get to the door transition, not too far right such that you enter the transition when falling. Requires: "h_ZebesIsAwake" "canEnemyStuckMoonfall" "canTrickyUseFrozenEnemies" "canDownwardGModeSetup" Exit condition: {
"leaveWithGModeSetup": {}
}
|
|
From: 7
Bottom Left Vertical Door
To: 7
Bottom Left Vertical Door
Use a Super to bring a Geemer down to the bottom floating platform. Freeze this Geemer along with a Geemer on the floor and use them to perform an enemy-stuck moonfall. After gaining sufficient speed, move toward the door and clip through the door shell. Falling with too much speed can cause Samus to go out of bounds. Requires: "h_ZebesIsAwake"
{
"ammo": {
"type": "Super",
"count": 1
}
}
"canEnemyStuckMoonfall"
"canTrickyUseFrozenEnemies"
Bypasses door shell: true |
|
From: 7
Bottom Left Vertical Door
To: 7
Bottom Left Vertical Door
Notable: true Freeze a Geemer on the right of the overhang just below the door to Final Missile Bombway. Freeze a second Geemer on the top left of its platform and setup a moonfall between them. Fall off the Geemers and clip past the floating platform below, past the door shell, and into the transition. This setup is highly precise; if you do not have the right speed you may land on the platform below or the door shell. Falling with too much speed can also cause Samus to go out of bounds. Requires: "h_ZebesIsAwake" "canEnemyStuckMoonfall" "canTrickyUseFrozenEnemies" Bypasses door shell: true |
|
From: 8
Central Junction
To: 1
Top Left Door
Place the Power Bomb below the bomb blocks as the Geemer is leaving the flat part of the ceiling to break it and let the Geemer through. This opens a path for the Geemer to hit Samus through the transition. Requires: "h_ZebesIsAwake" "h_canUsePowerBombs" Exit condition: {
"leaveWithGModeSetup": {}
}
|
|
From: 8
Central Junction
To: 1
Top Left Door
After the Geemer is near, destroy the bomb wall using blue speed from the right. This opens a path for the Geemer to hit Samus through the transition. Requires: "h_ZebesIsAwake"
"canCarefulJump"
{
"canShineCharge": {
"usedTiles": 25,
"steepUpTiles": 3,
"steepDownTiles": 3,
"openEnd": 1
}
}
Exit condition: {
"leaveWithGModeSetup": {}
}
|
|
Requires: "h_ZebesIsAwake"
{
"resetRoom": {
"nodes": [
3,
4,
6,
7
],
"mustStayPut": false
}
}
{
"refill": [
"Energy",
"Missile"
]
}
|
|
Item doesn't spawn unless Samus has Morph and Missiles, even if Zebes is awake. Requires: {
"or": [
{
"and": [
"Missile",
"Morph",
"canAwakenZebes"
]
},
"h_AllItemsSpawned"
]
}
|
|
Requires: {
"or": [
"h_ZebesIsAwake",
"h_AllItemsSpawned"
]
}
|
|
From: 1
Bottom Left Door
To: 1
Bottom Left Door
Requires: {
"enemyDamage": {
"enemy": "Geemer (blue)",
"type": "contact",
"hits": 1
}
}
"h_ZebesIsAwake"
|
|
From: 1
Bottom Left Door
To: 1
Bottom Left Door
Requires: "h_ZebesIsAwake" Exit condition: {
"leaveWithGModeSetup": {}
}
|
|
From: 1
Bottom Left Door
To: 1
Bottom Left Door
Requires: "h_ZebesIsAwake"
{
"resetRoom": {
"nodes": [
1
],
"mustStayPut": false
}
}
{
"refill": [
"Energy",
"Missile"
]
}
|
|
From: 1
Bottom Left Door
To: 3
Hidden Ceiling Item
Notable: true Have Samus shoot the shot block revealing the item and then quickly get hit by an enemy at the peak of her jump in order to reach the item. No directional inputs should be held while getting hit by the enemy in order to have a neutral boost and reach the item. This is traditionally done with the swooping Reo; after a few failed tries, it may help to reset the room to reposition it. The global Geemer may be easier to use, although it takes longer to get there; jump as it starts moving horizontally again while it is 3 tiles away from the item. Requires: "h_ZebesIsAwake"
"canNeutralDamageBoost"
{
"enemyDamage": {
"enemy": "Geemer (blue)",
"hits": 1,
"type": "contact"
}
}
|
|
From: 1
Bottom Left Door
To: 3
Hidden Ceiling Item
Requires: "h_ZebesIsAwake" "canUseFrozenEnemies" |
|
From: 1
Bottom Left Door
To: 5
G-Mode Morph Junction (Bottom)
Entrance condition: {
"comeInWithGMode": {
"mode": "any",
"morphed": true
}
}
Requires: "h_ZebesIsAwake"
{
"or": [
"h_canArtificialMorphSpringBall",
"h_canArtificialMorphBombThings",
{
"enemyDamage": {
"enemy": "Geemer (blue)",
"hits": 1,
"type": "contact"
}
}
]
}
|
|
From: 1
Bottom Left Door
To: 5
G-Mode Morph Junction (Bottom)
Notable: true The eye scanners are particularly annoying while in g-mode. They scan Samus with bright flashing lights which remain for a further distance. This is notable so a player can disable having to enter these flashing lights. If disabled, Samus will only require being in g-mode in this room if Zebes is awake. Entrance condition: {
"comeInWithGMode": {
"mode": "any",
"morphed": true
}
}
Requires: {
"or": [
"h_ZebesNotAwake",
"h_canArtificialMorphSpringBall",
"h_canArtificialMorphBombThings",
{
"enemyDamage": {
"enemy": "Geemer (blue)",
"hits": 1,
"type": "contact"
}
}
]
}
|
|
From: 1
Bottom Left Door
To: 6
G-Mode Morph Junction Direct (Bottom)
Entrance condition: {
"comeInWithGMode": {
"mode": "direct",
"morphed": true,
"mobility": "immobile"
}
}
Requires: "h_ZebesIsAwake" |
|
From: 1
Bottom Left Door
To: 6
G-Mode Morph Junction Direct (Bottom)
Entrance condition: {
"comeInWithGMode": {
"mode": "direct",
"morphed": true
}
}
Requires: "h_ZebesIsAwake"
{
"or": [
"h_canArtificialMorphSpringBall",
"h_canArtificialMorphBombThings",
{
"enemyDamage": {
"enemy": "Geemer (blue)",
"hits": 1,
"type": "contact"
}
}
]
}
|
|
From: 1
Bottom Left Door
To: 6
G-Mode Morph Junction Direct (Bottom)
Notable: true The eye scanners are particularly annoying while in G-mode. They scan Samus with bright flashing lights which remain for a further distance. This is notable so a player can disable having to enter these flashing lights. If disabled, Samus will only require being in g-mode in this room if Zebes is awake. Entrance condition: {
"comeInWithGMode": {
"mode": "direct",
"morphed": true
}
}
Requires: {
"or": [
"h_ZebesNotAwake",
"h_canArtificialMorphSpringBall",
"h_canArtificialMorphBombThings",
{
"enemyDamage": {
"enemy": "Geemer (blue)",
"hits": 1,
"type": "contact"
}
}
]
}
|
|
From: 2
Top Left Door
To: 2
Top Left Door
Falling down the shaft and breaking the crumble block does not require Morph. Requires: "h_ZebesIsAwake"
{
"obstaclesCleared": [
"A",
"B"
]
}
Exit condition: {
"leaveWithGModeSetup": {}
}
|
|
From: 2
Top Left Door
To: 2
Top Left Door
Falling down the shaft and breaking the crumble block does not require Morph. Requires: "h_ZebesIsAwake"
{
"or": [
"h_canDestroyBombWalls",
{
"obstaclesCleared": [
"A"
]
}
]
}
{
"or": [
"canConsecutiveWalljump",
"h_canFly"
]
}
Exit condition: {
"leaveWithGModeSetup": {}
}
|
|
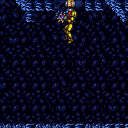
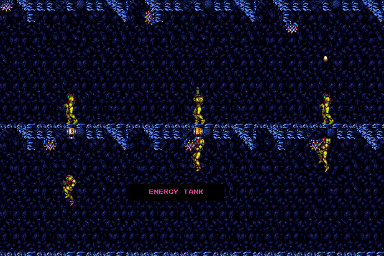
G-Mode Setup - Get Hit By Geemer - Broken Power Bomb Blocks (Extreme)
Blue Brinstar Energy Tank Room
From: 2
Top Left Door
To: 2
Top Left Door
Falling down the shaft and breaking the crumble block does not require Morph. Requires: "h_ZebesIsAwake"
{
"or": [
"h_canDestroyBombWalls",
{
"obstaclesCleared": [
"A"
]
}
]
}
"h_canUsePowerBombs"
{
"canShineCharge": {
"usedTiles": 33,
"openEnd": 2
}
}
{
"shinespark": {
"frames": 43
}
}
Exit condition: {
"leaveWithGModeSetup": {}
}
|
|
Shoot a Super at the wall, while the Geemer is moving vertically. If it is on the bottom of the shot blocks, it will not fall. Requires: {
"enemyDamage": {
"enemy": "Geemer (blue)",
"type": "contact",
"hits": 1
}
}
"h_ZebesIsAwake"
{
"ammo": {
"type": "Super",
"count": 1
}
}
|
|
From: 1
Top Left Door
To: 1
Top Left Door
Carefully shoot the shoot blocks at the right time to knock off a Geemer without killing it. Requires: "h_ZebesIsAwake" Exit condition: {
"leaveWithGModeSetup": {}
}
|
|
Shoot a Super at the wall, while the Geemer is moving vertically. If it is on the bottom of the shot blocks, it will not fall. Requires: {
"enemyDamage": {
"enemy": "Geemer (blue)",
"type": "contact",
"hits": 1
}
}
"h_ZebesIsAwake"
{
"ammo": {
"type": "Super",
"count": 1
}
}
|
|
Carefully shoot the shoot blocks at the right time to knock off a Geemer without killing it. Requires: "h_ZebesIsAwake" Exit condition: {
"leaveWithGModeSetup": {}
}
|
|
From: 3
Bottom Left Door
To: 3
Bottom Left Door
Carefully shoot the shoot blocks at the right time to knock off a Geemer without killing it. Requires: "Morph" "h_ZebesIsAwake" Exit condition: {
"leaveWithGModeSetup": {}
}
|
|
Requires: "h_ZebesIsAwake"
{
"resetRoom": {
"nodes": [
1,
2
],
"mustStayPut": false
}
}
{
"refill": [
"Energy",
"Missile"
]
}
|
|
Requires: {
"enemyDamage": {
"enemy": "Sidehopper",
"type": "contact",
"hits": 1
}
}
"h_ZebesIsAwake"
|
|
Requires: "h_ZebesIsAwake" Exit condition: {
"leaveWithGModeSetup": {}
}
|
|
From: 1
Left Door
To: 5
Left Item (locked)
Overload the PLMs by rolling through the camera scroll blocks which are 4 tiles to the right of the stair by the door. Entrance condition: {
"comeInWithGMode": {
"mode": "any",
"morphed": true
}
}
Requires: "h_ZebesNotAwake" Clears obstacles: D |
|
Requires: "h_ZebesNotAwake" Clears obstacles: C |
|
Requires: {
"or": [
"h_ZebesIsAwake",
"h_AllItemsSpawned"
]
}
|
|
Requires: "h_ZebesNotAwake" Clears obstacles: C |
