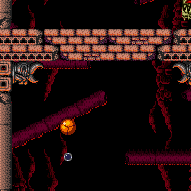
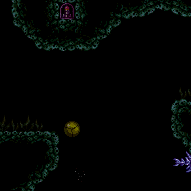
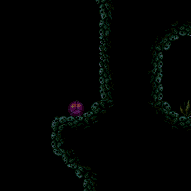
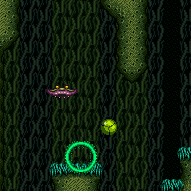
canStaggeredIBJ (Extreme)
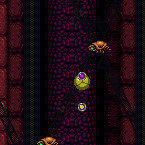
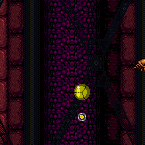
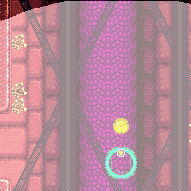
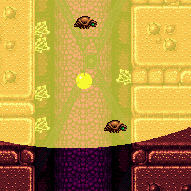
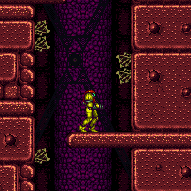
The ability to change the bomb placement timing in order control the speed with which you gain height. This is typically used to avoid an enemy moving in Samus' path above.
Dependencies: canIBJ
Strats ()
|
With a blue suit, Samus cannot stand on the platforms. Requires: {
"haveBlueSuit": {}
}
{
"or": [
"SpaceJump",
{
"and": [
"canLongIBJ",
"canStaggeredIBJ"
]
},
"canWallJump"
]
} |
From: 3
Bottom Left Door
To: 2
Middle Left Door (Behind Power Bomb Blocks)
Requires switching between single and double IBJs. While Doubles are not techincally necessary, they make the strat more bearable. Exit G-Mode before the Power Bomb explodes in order to break the wall. With an extra Power Bomb, it may be worthwhile to use it to kill some of the Rippers. Entrance condition: {
"comeInWithGMode": {
"mode": "any",
"morphed": true
}
}Requires: {
"notable": "IBJ Between the Bottom Rippers"
}
"h_artificialMorphDoubleBombJump"
"h_artificialMorphStaggeredIBJ"
"h_artificialMorphPowerBomb"
"h_artificialMorphLongIBJ"
{
"or": [
"canWallJump",
"HiJump"
]
}Clears obstacles: A Dev note: This will kill the Beetom, which could prevent using it to get up, so this needs to get all the way to 2. Anything with Morph can exit G-Mode at 6. |
From: 3
Bottom Left Door
To: 2
Middle Left Door (Behind Power Bomb Blocks)
Use two Power Bombs to kill the Rippers, or carefully pass the first two and place a single Power Bomb on the left ledge to kill them all. Exit G-Mode before the Power Bomb explodes in order to break the wall. Entrance condition: {
"comeInWithGMode": {
"mode": "any",
"morphed": true
}
}Requires: "h_artificialMorphLongIBJ"
"h_artificialMorphPowerBomb"
{
"or": [
"h_artificialMorphStaggeredIBJ",
"h_artificialMorphPowerBomb"
]
}
"h_artificialMorphPowerBomb"
{
"or": [
"canWallJump",
"HiJump"
]
}Clears obstacles: A Dev note: This will kill the Beetom, which could prevent using it to get up, so this needs to get all the way to 2. Anything with Morph can exit G-Mode at 6. |
From: 3
Bottom Left Door
To: 6
Junction (Above Bottom Rippers)
Requires switching between single and double IBJs. While Doubles are not techincally necessary, they make the strat more bearable. With a Power Bomb, it can help to kill some of the Rippers. Entrance condition: {
"comeInWithGMode": {
"mode": "any",
"morphed": true
}
}Requires: {
"notable": "IBJ Between the Bottom Rippers"
}
"h_artificialMorphDoubleBombJump"
"h_artificialMorphStaggeredIBJ"
"h_artificialMorphPowerBomb"
"h_artificialMorphLongIBJ" |
From: 3
Bottom Left Door
To: 6
Junction (Above Bottom Rippers)
Use two Power Bombs to kill the Rippers, or carefully pass the first two and place a single Power Bomb on the left ledge to kill them all. Entrance condition: {
"comeInWithGMode": {
"mode": "any",
"morphed": true
}
}Requires: "h_artificialMorphLongIBJ"
"h_artificialMorphPowerBomb"
{
"or": [
"h_artificialMorphStaggeredIBJ",
"h_artificialMorphPowerBomb"
]
} |
From: 4
Bottom Right Door
To: 2
Middle Left Door (Behind Power Bomb Blocks)
Requires switching between single and double IBJs. While Doubles are not techincally necessary, they make the strat more bearable. Exit G-Mode before the Power Bomb explodes in order to break the wall. With an extra Power Bomb, it may be worthwhile to use it to kill some of the Rippers. Entrance condition: {
"comeInWithGMode": {
"mode": "any",
"morphed": true
}
}Requires: {
"notable": "IBJ Between the Bottom Rippers"
}
"h_artificialMorphDoubleBombJump"
"h_artificialMorphStaggeredIBJ"
"h_artificialMorphPowerBomb"
"h_artificialMorphLongIBJ"
{
"or": [
"canWallJump",
"HiJump"
]
}Clears obstacles: A Dev note: This will kill the Beetom, which could prevent using it to get up, so this needs to get all the way to 2. Anything with Morph can exit G-Mode at 6. |
From: 4
Bottom Right Door
To: 2
Middle Left Door (Behind Power Bomb Blocks)
Use two Power Bombs to kill the Rippers, or carefully pass the first two and place a single Power Bomb on the left ledge to kill them all. Exit G-Mode before the Power Bomb explodes in order to break the wall. Entrance condition: {
"comeInWithGMode": {
"mode": "any",
"morphed": true
}
}Requires: "h_artificialMorphLongIBJ"
"h_artificialMorphPowerBomb"
{
"or": [
"h_artificialMorphStaggeredIBJ",
"h_artificialMorphPowerBomb"
]
}
"h_artificialMorphPowerBomb"
{
"or": [
"canWallJump",
"HiJump"
]
}Clears obstacles: A Dev note: This will kill the Beetom, which could prevent using it to get up, so this needs to get all the way to 2. Anything with Morph can exit G-Mode at 6. |
From: 4
Bottom Right Door
To: 6
Junction (Above Bottom Rippers)
Requires switching between single and double IBJs. While Doubles are not techincally necessary, they make the strat more bearable. With a Power Bomb, it can help to kill some of the Rippers. Entrance condition: {
"comeInWithGMode": {
"mode": "any",
"morphed": true
}
}Requires: {
"notable": "IBJ Between the Bottom Rippers"
}
"h_artificialMorphDoubleBombJump"
"h_artificialMorphStaggeredIBJ"
"h_artificialMorphPowerBomb"
"h_artificialMorphLongIBJ" |
From: 4
Bottom Right Door
To: 6
Junction (Above Bottom Rippers)
Use two Power Bombs to kill the Rippers, or carefully pass the first two and place a single Power Bomb on the left ledge to kill them all. Entrance condition: {
"comeInWithGMode": {
"mode": "any",
"morphed": true
}
}Requires: "h_artificialMorphLongIBJ"
"h_artificialMorphPowerBomb"
{
"or": [
"h_artificialMorphStaggeredIBJ",
"h_artificialMorphPowerBomb"
]
} |
From: 7
Junction (Bottom of Room)
To: 6
Junction (Above Bottom Rippers)
Requires switching between single and double IBJs. While Doubles are not techincally necessary, they make the strat more bearable. Requires: {
"notable": "IBJ Between the Bottom Rippers"
}
"canDoubleBombJump"
"canStaggeredIBJ"
"canLongIBJ" |
From: 9
Junction (Top Rippers)
To: 9
Junction (Top Rippers)
To kill the Rippers with a single Power Bomb without breaking the ledge, place the bomb just above the second Ripper. Requires: "h_usePowerBomb"
"canCarefulJump"
{
"or": [
"canWallJump",
"canSpringBallJumpMidAir",
"SpaceJump",
{
"and": [
"HiJump",
"canTrickyDashJump"
]
},
{
"and": [
"canJumpIntoIBJ",
{
"or": [
"canStaggeredIBJ",
"canDoubleBombJump"
]
}
]
}
]
}Clears obstacles: B |
From: 1
Top Left Door
To: 3
Right Door
Overload PLMs by bombing the gate or crumble blocks, then go through the crumble blocks below and get to the door. IBJ past the Ripper or kill it. The Kago bugs will not spawn until Samus exits G-mode, so it is fine to kill it or IBJ from on top of it. Entrance condition: {
"comeInWithGMode": {
"mode": "any",
"morphed": true
}
}Requires: {
"or": [
"h_artificialMorphLongIBJ",
"h_artificialMorphJumpIntoIBJ"
]
}
"h_artificialMorphBombHorizontally"
{
"or": [
"h_artificialMorphPowerBomb",
{
"and": [
"Morph",
{
"ammo": {
"type": "Missile",
"count": 2
}
}
]
},
{
"and": [
"Morph",
{
"ammo": {
"type": "Super",
"count": 1
}
}
]
},
{
"and": [
"h_artificialMorphDoubleBombJump",
"h_artificialMorphStaggeredIBJ"
]
}
]
}
"h_heatedGModeOpenDifferentDoor" |
From: 1
Top Left Door
To: 4
Item
Overload PLMs by bombing the gate or crumble blocks, then go through the crumble blocks below and get to the item. IBJ past the Ripper or kill it. The Kago bugs will not spawn until Samus exits G-mode, so it is fine to kill it or IBJ from on top of it. Entrance condition: {
"comeInWithGMode": {
"mode": "direct",
"morphed": true
}
}Requires: {
"or": [
"h_artificialMorphLongIBJ",
"h_artificialMorphJumpIntoIBJ"
]
}
"h_artificialMorphBombHorizontally"
{
"or": [
"h_artificialMorphPowerBomb",
{
"and": [
"Morph",
{
"ammo": {
"type": "Missile",
"count": 2
}
}
]
},
{
"and": [
"Morph",
{
"ammo": {
"type": "Super",
"count": 1
}
}
]
},
{
"and": [
"h_artificialMorphDoubleBombJump",
"h_artificialMorphStaggeredIBJ"
]
}
]
}
{
"heatFrames": 0
} |
From: 2
Bottom Left Door
To: 3
Right Door
Overload PLMs by bombing the gate or crumble blocks, then go through the crumble blocks below and get to the door. IBJ past the Ripper or kill it. The Kago bugs will not spawn until Samus exits G-mode, so it is fine to kill it or IBJ from on top of it. Entrance condition: {
"comeInWithGMode": {
"mode": "any",
"morphed": true
}
}Requires: {
"or": [
"h_artificialMorphLongIBJ",
"h_artificialMorphJumpIntoIBJ"
]
}
"h_artificialMorphBombHorizontally"
{
"or": [
"h_artificialMorphPowerBomb",
{
"and": [
"Morph",
{
"ammo": {
"type": "Missile",
"count": 2
}
}
]
},
{
"and": [
"Morph",
{
"ammo": {
"type": "Super",
"count": 1
}
}
]
},
{
"and": [
"h_artificialMorphDoubleBombJump",
"h_artificialMorphStaggeredIBJ"
]
}
]
}
"h_heatedGModeOpenDifferentDoor" |
From: 2
Bottom Left Door
To: 4
Item
Overload PLMs by bombing the gate or crumble blocks, then go through the crumble blocks below and get to the item. IBJ past the Ripper or kill it. The Kago bugs will not spawn until Samus exits G-mode, so it is fine to kill it or IBJ from on top of it. Entrance condition: {
"comeInWithGMode": {
"mode": "direct",
"morphed": true
}
}Requires: {
"or": [
"h_artificialMorphLongIBJ",
"h_artificialMorphJumpIntoIBJ"
]
}
"h_artificialMorphBombHorizontally"
{
"or": [
"h_artificialMorphPowerBomb",
{
"and": [
"Morph",
{
"ammo": {
"type": "Missile",
"count": 2
}
}
]
},
{
"and": [
"Morph",
{
"ammo": {
"type": "Super",
"count": 1
}
}
]
},
{
"and": [
"h_artificialMorphDoubleBombJump",
"h_artificialMorphStaggeredIBJ"
]
}
]
}
{
"heatFrames": 0
} |
|
Bomb horizontally on room entry to jump over the Ripper and land on the crumble blocks, or use a Power Bomb to kill the Ripper. Avoid touching all 6 crumbles, so Samus can use the item to overload PLMs and go through one of the crumbles to get to the left side of the room. If the item has already been obtained, Samus can shoot or Bomb the gate many times to overload PLMs. Entrance condition: {
"comeInWithGMode": {
"mode": "direct",
"morphed": true
}
}Requires: "canRemoteAcquire"
{
  "or": [
    "h_artificialMorphCeilingBombJump",
    {
      "and": [
        "h_artificialMorphBombHorizontally",
        "h_artificialMorphIBJ",
        "h_artificialMorphPowerBomb"
      ]
    },
    {
      "and": [
        "h_artificialMorphBombHorizontally",
        "canTrickyDodgeEnemies",
        "h_artificialMorphDoubleBombJump",
        "h_artificialMorphStaggeredIBJ"
      ]
    }
  ]
}
"h_heatedGModeOpenDifferentDoor"Collects items: 4 |
From: 3
Right Door
To: 1
Top Left Door
Bomb horizontally on room entry to jump over the Ripper and land on the crumble blocks, or use a Power Bomb to kill the Ripper. Entrance condition: {
"comeInWithGMode": {
"mode": "indirect",
"morphed": true
}
}Requires: {
"or": [
"h_artificialMorphCeilingBombJump",
{
"and": [
"h_artificialMorphBombHorizontally",
"h_artificialMorphIBJ",
"h_artificialMorphPowerBomb"
]
},
{
"and": [
"h_artificialMorphBombHorizontally",
"canTrickyDodgeEnemies",
"h_artificialMorphDoubleBombJump",
"h_artificialMorphStaggeredIBJ"
]
}
]
}
"h_heatedGModeOpenDifferentDoor" |
From: 3
Right Door
To: 2
Bottom Left Door
Bomb horizontally on room entry to jump over the Ripper and land on the crumble blocks, or use a Power Bomb to kill the Ripper. Avoid touching all 6 crumbles, so Samus can use the item to overload PLMs and go through one of the crumbles to get to the left side of the room. If the item has already been obtained, Samus can shoot or Bomb the gate many times to overload PLMs. Entrance condition: {
"comeInWithGMode": {
"mode": "direct",
"morphed": true
}
}Requires: "canRemoteAcquire"
{
  "or": [
    "h_artificialMorphCeilingBombJump",
    {
      "and": [
        "h_artificialMorphBombHorizontally",
        "h_artificialMorphIBJ",
        "h_artificialMorphPowerBomb"
      ]
    },
    {
      "and": [
        "h_artificialMorphBombHorizontally",
        "canTrickyDodgeEnemies",
        "h_artificialMorphDoubleBombJump",
        "h_artificialMorphStaggeredIBJ"
      ]
    }
  ]
}
"h_heatedGModeOpenDifferentDoor"Collects items: 4 |
From: 3
Right Door
To: 2
Bottom Left Door
Bomb horizontally on room entry to jump over the Ripper and land on the crumble blocks, or use a Power Bomb to kill the Ripper. Entrance condition: {
"comeInWithGMode": {
"mode": "indirect",
"morphed": true
}
}Requires: {
"or": [
"h_artificialMorphCeilingBombJump",
{
"and": [
"h_artificialMorphBombHorizontally",
"h_artificialMorphIBJ",
"h_artificialMorphPowerBomb"
]
},
{
"and": [
"h_artificialMorphBombHorizontally",
"canTrickyDodgeEnemies",
"h_artificialMorphDoubleBombJump",
"h_artificialMorphStaggeredIBJ"
]
}
]
}
"h_heatedGModeOpenDifferentDoor" |
From: 3
Right Door
To: 3
Right Door
Bomb horizontally on room entry to jump over the Ripper and land on the crumble blocks, or use a Power Bomb to kill the Ripper. Entrance condition: {
"comeInWithGMode": {
"mode": "direct",
"morphed": true
}
}Requires: "canRemoteAcquire"
{
"or": [
"h_artificialMorphLongCeilingBombJump",
{
"and": [
"h_artificialMorphBombHorizontally",
"h_artificialMorphIBJ",
"h_artificialMorphPowerBomb"
]
},
{
"and": [
"h_artificialMorphBombHorizontally",
"canTrickyDodgeEnemies",
"h_artificialMorphDoubleBombJump",
"h_artificialMorphStaggeredIBJ"
]
}
]
}
"h_heatedDirectGModeLeaveSameDoor"Collects items: 4 |
|
Entrance condition: {
"comeInWithGMode": {
"mode": "direct",
"morphed": false
}
}Requires: "canRemoteAcquire"
{
"or": [
"SpaceJump",
{
"and": [
"canPreciseGrapple",
"canUseEnemies"
]
},
"canSpringBallJumpMidAir",
"canInsaneWallJump",
{
"and": [
"HiJump",
"canWallJump"
]
},
{
"and": [
"HiJump",
"canSpeedyJump"
]
},
{
"and": [
"canStaggeredIBJ",
"canDoubleBombJump",
"canBombHorizontally"
]
},
{
"and": [
"h_IBJFromSpikes",
"h_IBJFromSpikes"
]
},
{
"and": [
"h_IBJFromSpikes",
"canCameraManip",
"canMoonwalk"
]
}
]
}
"h_heatedDirectGModeLeaveSameDoor"Collects items: 4 |
|
Jump onto the crumble blocks to make them solid, then use them as a platform to cross the room. With Grapple, a running jump then single Grapple swing can be used before PLMs are overloaded, alternatively jump on the crumble blocks and Grapple the Ripper. Entrance condition: {
"comeInWithGMode": {
"mode": "any",
"morphed": false
}
}Requires: {
"or": [
"SpaceJump",
{
"and": [
"canStaggeredIBJ",
"canDoubleBombJump",
"canBombHorizontally"
]
},
{
"and": [
"canDash",
{
"or": [
"canTrickySpringBallJump",
"canInsaneWallJump",
{
"and": [
"HiJump",
"canWallJump"
]
},
{
"and": [
"HiJump",
"canSpeedyJump"
]
},
"h_IBJFromSpikes"
]
}
]
},
{
"and": [
"canPreciseGrapple",
{
"or": [
"canDash",
"canUseEnemies",
"canInsaneJump"
]
}
]
}
]
}
{
"heatFrames": 0
}Dev note: FIXME: some more of these options may be possible with a blue suit, with greater difficulty. |
|
Bomb horizontally on room entry to jump over the Ripper and land on the crumble blocks, or use a Power Bomb to kill the Ripper. Entrance condition: {
"comeInWithGMode": {
"mode": "any",
"morphed": true
}
}Requires: {
"or": [
"h_artificialMorphCeilingBombJump",
{
"and": [
"h_artificialMorphBombHorizontally",
"h_artificialMorphIBJ",
"h_artificialMorphPowerBomb"
]
},
{
"and": [
"h_artificialMorphBombHorizontally",
"canTrickyDodgeEnemies",
"h_artificialMorphDoubleBombJump",
"h_artificialMorphStaggeredIBJ"
]
}
]
}
{
"heatFrames": 0
} |
|
Bomb horizontally on room entry to jump over the Ripper and land on the crumble blocks, or use a Power Bomb to kill the Ripper. In indirect G-mode, stand where the gate will spawn and exit G-mode to open the gate. In direct G-mode, overload PLMs by shooting the gate then position Samus a few pixels away from the gate to where upward diagonal shots go through it. Crouch then shoot diagonally and quickly exit G-mode (3-7 frames later) to open the gate on G-mode exit. Entrance condition: {
"comeInWithGMode": {
"mode": "any",
"morphed": true
}
}Requires: "canComplexGMode"
"h_heatedGMode"
{
"or": [
"h_artificialMorphCeilingBombJump",
{
"and": [
"h_artificialMorphBombHorizontally",
"h_artificialMorphIBJ",
"h_artificialMorphPowerBomb"
]
},
{
"and": [
"h_artificialMorphBombHorizontally",
"canTrickyDodgeEnemies",
"h_artificialMorphDoubleBombJump",
"h_artificialMorphStaggeredIBJ"
]
}
]
}
{
"heatFrames": 35
}Clears obstacles: A Dev note: Artificial morph strats can be useful, for instance, in indirect G-mode without heat protection, where Samus needs to collect the item. The canComplexGMode is only used here to describe opening the gate in direct G-mode without gate glitching. However, the indirect variant still requires canHeatedGMode or Varia - with Varia, indirect strats can instead be used to go to the top left door and return. |
|
Jump onto the crumble blocks to make them solid, then use them as a platform to cross the room. With Grapple, a running jump then single Grapple swing can be used before PLMs are overloaded, alternatively jump on the crumble blocks and Grapple the Ripper. In indirect G-mode, stand where the gate will spawn and exit G-mode to open the gate. In direct G-mode, overload PLMs by shooting the gate then position Samus a few pixels away from the gate to where upward diagonal shots go through it. Crouch then shoot diagonally and quickly exit G-mode (3-7 frames later) to open the gate on G-mode exit. Entrance condition: {
"comeInWithGMode": {
"mode": "any",
"morphed": false
}
}Requires: "canComplexGMode"
"h_heatedGMode"
{
"or": [
"SpaceJump",
{
"and": [
"canStaggeredIBJ",
"canDoubleBombJump",
"canBombHorizontally"
]
},
{
"and": [
"canDash",
{
"or": [
"canTrickySpringBallJump",
"canInsaneWallJump",
{
"and": [
"HiJump",
"canWallJump"
]
},
{
"and": [
"HiJump",
"canSpeedyJump"
]
},
"h_IBJFromSpikes"
]
}
]
},
{
"and": [
"canPreciseGrapple",
{
"or": [
"canDash",
"canUseEnemies",
"canInsaneJump"
]
}
]
}
]
}
{
"heatFrames": 35
}Clears obstacles: A Dev note: The canComplexGMode is only used here to describe opening the gate in direct G-mode without gate glitching. However, the indirect variant still requires canHeatedGMode or Varia - with Varia, indirect strats can instead be used to go to the top left door and return. FIXME: some more of these options may be possible with a blue suit, with greater difficulty. |
From: 3
Right Door
To: 6
G-Mode, Remote Acquire Junction (Bottom Right)
Bomb horizontally on room entry to jump over the Ripper and land on the crumble blocks, or use a Power Bomb to kill the Ripper. Avoid touching all 6 crumbles, so Samus can use the item to overload PLMs and go through one of the crumbles to get to the left side of the room. If the item has already been obtained, Samus can shoot or Bomb the gate many times to overload PLMs. Entrance condition: {
"comeInWithGMode": {
"mode": "direct",
"morphed": true
}
}Requires: "canRemoteAcquire"
{
  "or": [
    "h_artificialMorphCeilingBombJump",
    {
      "and": [
        "h_artificialMorphBombHorizontally",
        "h_artificialMorphIBJ",
        "h_artificialMorphPowerBomb"
      ]
    },
    {
      "and": [
        "h_artificialMorphBombHorizontally",
        "canTrickyDodgeEnemies",
        "h_artificialMorphDoubleBombJump",
        "h_artificialMorphStaggeredIBJ"
      ]
    }
  ]
}
{
  "heatFrames": 0
}Dev note: This is only useful if the item is Morph, because with Morph, another strat would have been used. |
From: 3
Right Door
To: 6
G-Mode, Remote Acquire Junction (Bottom Right)
Jump onto the crumble blocks to make them solid, then use them as a platform to get to the item. With Grapple, a running jump then single Grapple swing can be used before PLMs are overloaded, alternatively jump on the crumble blocks and Grapple the Ripper. Avoid touching all 6 crumbles, so Samus can use the item to overload PLMs and go through one of the crumbles to get to the left side of the room. If the item has already been obtained, Samus can shoot the gate many times to overload PLMs. Entrance condition: {
"comeInWithGMode": {
"mode": "direct",
"morphed": false
}
}Requires: "canRemoteAcquire"
{
"or": [
"SpaceJump",
"canCeilingBombJump",
{
"and": [
"canBombHorizontally",
"canIBJ",
"h_usePowerBomb"
]
},
{
"and": [
"canStaggeredIBJ",
"canDoubleBombJump",
"canBombHorizontally"
]
},
{
"and": [
"canPreciseGrapple",
"canUseEnemies"
]
},
{
"and": [
"canDash",
{
"or": [
"canTrickySpringBallJump",
"canInsaneWallJump",
{
"and": [
"HiJump",
"canWallJump"
]
},
{
"and": [
"HiJump",
"canSpeedyJump"
]
},
"h_IBJFromSpikes"
]
}
]
}
]
}
{
"heatFrames": 0
} |
From: 3
Right Door
To: 7
G-Mode Junction (Bottom Right)
Jump onto the crumble blocks to make them solid, then use them as a platform to cross the room. With Grapple, a running jump then single Grapple swing can be used before PLMs are overloaded, alternatively jump on the crumble blocks and Grapple the Ripper. Entrance condition: {
"comeInWithGMode": {
"mode": "indirect",
"morphed": false
}
}Requires: "Morph"
{
"or": [
"SpaceJump",
"canCeilingBombJump",
{
"and": [
"canStaggeredIBJ",
"canDoubleBombJump",
"canBombHorizontally"
]
},
{
"and": [
"canBombHorizontally",
"canIBJ",
"h_usePowerBomb"
]
},
{
"and": [
"canDash",
{
"or": [
"canTrickySpringBallJump",
"canInsaneWallJump",
{
"and": [
"HiJump",
"canWallJump"
]
},
{
"and": [
"HiJump",
"canSpeedyJump"
]
},
"h_IBJFromSpikes"
]
}
]
},
{
"and": [
"canPreciseGrapple",
{
"or": [
"canDash",
"canUseEnemies",
"canInsaneJump"
]
}
]
}
]
}
{
"heatFrames": 0
}Dev note: With Grapple, Morph isn't needed, but there's no reason to go there without Morph. |
|
Begin on top of the lower left Namihe Jump into a double IBJ with such timing that Samus passes above the fired flame and such a way that there is no horizontal speed. A forward jump with run not held will work. Begin diagonal bomb jumping once past the start of the 2nd spike group from the top. Requires: {
"notable": "Diagonal Bomb Jump"
}
"h_heatProof"
"Gravity"
{
"or": [
"h_lavaProof",
"canSuitlessLavaDive"
]
}
"canJumpIntoIBJ"
"canLongIBJ"
"canDoubleBombJump"
"canDiagonalBombJump"
"canStaggeredIBJ"
"canInsaneJump"
{
"heatFrames": 1560
}
{
"lavaFrames": 1520
}Dev note: heatProof because each attempt at this strat costs so many heat frames and its hard enough already. |
|
Kill the Sova on the bottom-right platform, then IBJ right next to the left of the platform. Samus can align with the left side of the platform by jumping into it. Changing the IBJ speed may be necessary to get past the second Sova. Requires: "canLongIBJ"
"canStaggeredIBJ"
{
"heatFrames": 4000
} |
|
IBJ against the left-most wall. Changing the IBJ speed may be necessary to get past the Sova. Requires: "canLongIBJ"
"canStaggeredIBJ"
{
"heatFrames": 4000
} |
From: 6
Bottom Platform Junction With Pirates Killed
To: 4
Junction Above Bomb Blocks
Requires: "canLongIBJ"
{
"or": [
{
"and": [
"canJumpIntoIBJ",
{
"heatFrames": 1250
}
]
},
{
"and": [
"canJumpIntoIBJ",
"canDoubleBombJump",
{
"heatFrames": 700
}
]
},
{
"and": [
"HiJump",
"canJumpIntoIBJ",
"canDoubleBombJump",
{
"heatFrames": 630
}
]
},
{
"heatFrames": 2000
}
]
}
{
"or": [
"canPowerBombMidIBJ",
{
"and": [
"canBombAboveIBJ",
"canStaggeredIBJ",
{
"heatFrames": 220
}
]
},
{
"obstaclesCleared": [
"A"
]
},
{
"haveBlueSuit": {}
}
]
}Clears obstacles: A |
|
This is a long climb, and getting around the fish under the missiles can be tricky or slow. Entrance condition: {
"comeInWithGMode": {
"mode": "any",
"morphed": true
}
}Requires: "h_artificialMorphIBJ"
"Gravity"
{
"or": [
"h_artificialMorphJumpIntoIBJ",
"h_artificialMorphDoubleBombJump",
"h_artificialMorphStaggeredIBJ",
"canBeVeryPatient"
]
} |
From: 13
G-Mode Morph Junction By Middle Right Door
To: 4
Top Right Door
Requires: "canGMode"
"h_navigateUnderwater"
{
"or": [
{
"and": [
"h_artificialMorphIBJ",
"Gravity",
{
"or": [
"h_artificialMorphDoubleBombJump",
"h_artificialMorphStaggeredIBJ",
"canBePatient",
"h_artificialMorphPowerBomb"
]
}
]
},
"h_artificialMorphDoubleSpringBallJump"
]
} |
From: 13
G-Mode Morph Junction By Middle Right Door
To: 10
Direct G-Mode Morph, On Ledge Above Speed Blocks
Requires: "h_navigateUnderwater"
{
"obstaclesCleared": [
"B"
]
}
{
"or": [
{
"and": [
"Gravity",
{
"or": [
"h_artificialMorphJumpIntoIBJ",
"h_artificialMorphDoubleBombJump",
"h_artificialMorphStaggeredIBJ",
{
"and": [
"h_artificialMorphIBJ",
"canBeVeryPatient"
]
},
{
"and": [
"h_artificialMorphIBJ",
"h_artificialMorphPowerBomb"
]
},
{
"and": [
"h_artificialMorphSpringBall",
"HiJump"
]
},
{
"and": [
"h_artificialMorphSpringBall",
"canGravityJump"
]
}
]
}
]
},
"h_artificialMorphDoubleSpringBallJump"
]
}Dev note: FIXME: Some IBJ strats may need canBeVeryPatient if they can't be done before the crab is in position |
|
Start an IBJ by either bouncing on the sand with Spring Ball, doing a stationary spinjump on the sand, or by crouch jumping in the sand while holding down. Requires: {
"noBlueSuit": {}
}
"Gravity"
"canLongIBJ"
"canJumpIntoIBJ"
{
"or": [
{
"and": [
"canTrickyJump",
"can4HighMidAirMorph",
"canPlayInSand"
]
},
"h_useSpringBall"
]
}
{
"or": [
"canDoubleBombJump",
"canStaggeredIBJ",
"canBePatient"
]
} |
|
IBJ up the climb. This is a lot easier with PBs or Spring Ball to help kill the enemies. With PBs, use one on entry to deal with the Puyos, then IBJ up the right side and use another to kill the middle Choot. Otherwise, Kill the Puyos then the bottom Choot with Bombs, falling off when necessary, then climb the left side of the room. Entrance condition: {
"comeInWithGMode": {
"mode": "any",
"morphed": true
}
}Requires: {
"or": [
"h_artificialMorphLongIBJ",
"h_artificialMorphJumpIntoIBJ"
]
}
{
"or": [
"h_artificialMorphSpringBall",
{
"and": [
"h_artificialMorphPowerBomb",
"h_artificialMorphPowerBomb"
]
},
{
"and": [
"h_artificialMorphStaggeredIBJ",
"canBeVeryPatient"
]
}
]
} |
From: 1
Bottom Left Door
To: 4
G-Mode Junction (Top by Elevator)
It is possible to kill the Rippers with a single Power Bomb by placing it at least 2 tiles above the lowest Ripper inside the narrow section of the shaft. Entrance condition: {
"comeInWithGMode": {
"mode": "any",
"morphed": false
}
}Requires: {
"or": [
{
"and": [
{
"enemyKill": {
"enemies": [
[
"Ripper",
"Ripper",
"Ripper"
]
]
}
},
{
"or": [
"canWallJump",
"SpaceJump"
]
}
]
},
{
"and": [
"canLongIBJ",
{
"ammo": {
"type": "Super",
"count": 3
}
}
]
},
{
"and": [
"canLongIBJ",
"h_usePowerBomb",
{
"or": [
"h_usePowerBomb",
"canStaggeredIBJ"
]
}
]
}
]
} |
From: 1
Bottom Left Door
To: 4
G-Mode Junction (Top by Elevator)
The Rippers can be killed with three Power Bombs, or one carefully placed Power Bomb, Gravity, and a careful dodge of the top-most Ripper. With a single Power Bomb, IBJ from the water to avoid the first Ripper, then place the Power Bomb at least two tiles above the next. This can be achieved with a Staggered IBJ. Then climb the right side of the shaft and similarly dodge the top Ripper. Entrance condition: {
"comeInWithGMode": {
"mode": "any",
"morphed": true
}
}Requires: "h_artificialMorphLongIBJ"
{
"or": [
"Gravity",
"h_artificialMorphPowerBomb",
{
"enemyDamage": {
"enemy": "Ripper",
"type": "contact",
"hits": 1
}
},
{
"and": [
"canInsaneJump",
"h_artificialMorphDoubleBombJump",
"h_artificialMorphStaggeredIBJ"
]
}
]
}
"h_artificialMorphPowerBomb"
{
"or": [
"h_artificialMorphStaggeredIBJ",
"h_artificialMorphPowerBomb",
{
"enemyDamage": {
"enemy": "Ripper",
"type": "contact",
"hits": 1
}
}
]
} |
From: 1
Bottom Left Door
To: 4
G-Mode Junction (Top by Elevator)
The Rippers can be killed with two Power Bombs, or one carefully placed Power Bomb and a careful dodge of the top-most Ripper. With a single Power Bomb, use Spring Ball to avoid the first Ripper, then place the Power Bomb at least two tiles above the next. This can be achieved with a Staggered IBJ or a Spring Ball Bomb Boost. Then climb the right side of the shaft and dodge the top Ripper. Entrance condition: {
"comeInWithGMode": {
"mode": "any",
"morphed": true
}
}Requires: "h_artificialMorphLongIBJ"
"h_artificialMorphSpringBallBombJump"
"h_artificialMorphPowerBomb"
{
"or": [
"h_artificialMorphStaggeredIBJ",
"h_artificialMorphPowerBomb",
{
"enemyDamage": {
"enemy": "Ripper",
"type": "contact",
"hits": 1
}
}
]
}Dev note: canSpringBallBombJump can be bypassed with SpringBall and other requirements, but that's being assumed with Bombs and SpringBall at this level. |
|
Align with the right wall of the shaft by pressing against it. Use precise Bomb placements to IBJ while dodging the Rippers. Requires: {
"notable": "Dodge Rippers IBJ"
}
"canTrickyDodgeEnemies"
"canStaggeredIBJ"
{
"or": [
"canBeVeryPatient",
{
"enemyDamage": {
"enemy": "Ripper",
"type": "contact",
"hits": 3
}
}
]
} |
From: 2
Right Door
To: 4
G-Mode Junction (Top by Elevator)
It is possible to kill the Rippers with a single Power Bomb by placing it at least 2 tiles above the lowest Ripper inside the narrow section of the shaft. Entrance condition: {
"comeInWithGMode": {
"mode": "any",
"morphed": false
}
}Requires: {
"or": [
{
"and": [
{
"enemyKill": {
"enemies": [
[
"Ripper",
"Ripper",
"Ripper"
]
]
}
},
{
"or": [
"canWallJump",
"SpaceJump"
]
}
]
},
{
"and": [
"canLongIBJ",
{
"ammo": {
"type": "Super",
"count": 3
}
}
]
},
{
"and": [
"canLongIBJ",
"h_usePowerBomb",
{
"or": [
"h_usePowerBomb",
"canStaggeredIBJ"
]
}
]
}
]
} |
From: 2
Right Door
To: 4
G-Mode Junction (Top by Elevator)
Positioning so that Samus will be against the right wall of the shaft, use precise Bomb placements to IBJ while dodging the Rippers. Requires: {
"notable": "Dodge Rippers IBJ"
}
"canTrickyDodgeEnemies"
"canStaggeredIBJ"
{
"or": [
"canBeVeryPatient",
{
"enemyDamage": {
"enemy": "Ripper",
"type": "contact",
"hits": 3
}
}
]
} |
From: 2
Right Door
To: 4
G-Mode Junction (Top by Elevator)
The Rippers can be killed with two Power Bombs, or one carefully placed Power Bomb and a careful dodge of the top-most Ripper. With a single Power Bomb, place it at least two tiles above the first Ripper. This can be achieved with a Staggered IBJ or a Spring Ball Bomb Boost. Then climb the right side of the shaft and dodge the top Ripper. Entrance condition: {
"comeInWithGMode": {
"mode": "any",
"morphed": true
}
}Requires: "h_artificialMorphLongIBJ"
"h_artificialMorphPowerBomb"
{
"or": [
"h_artificialMorphStaggeredIBJ",
"h_artificialMorphPowerBomb",
{
"enemyDamage": {
"enemy": "Ripper",
"type": "contact",
"hits": 1
}
}
]
} |
