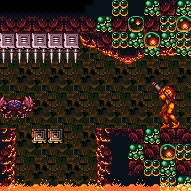
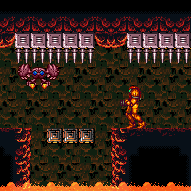
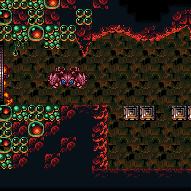
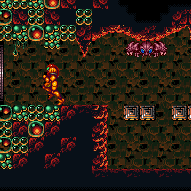
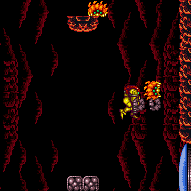
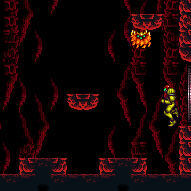
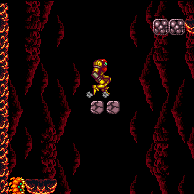
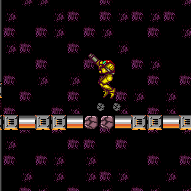
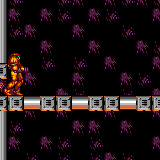
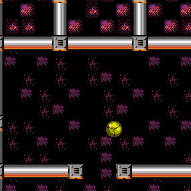
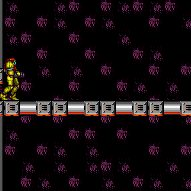
canCrumbleJump (Very Hard)
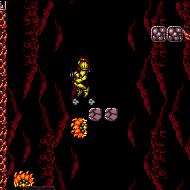
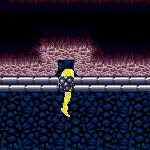
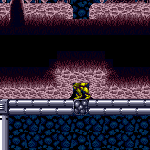
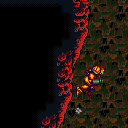
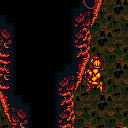
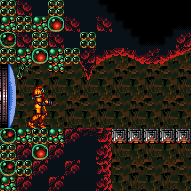
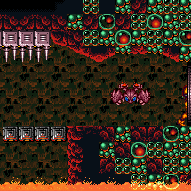
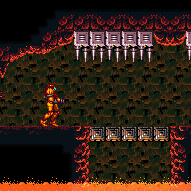
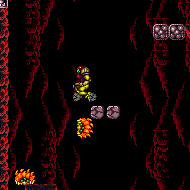
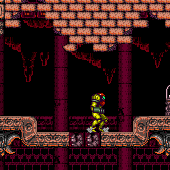
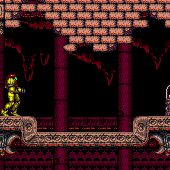
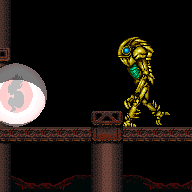
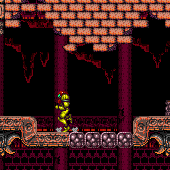
The ability to jump off of a crumble block while it crumbles. A straight jump may employ the small amount of jump buffering the game offers, but a spinjump can only use the time before the crumble block breaks.
Strats ()
|
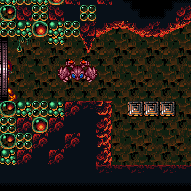
Jump and freeze the Beetom at a precise location in order to jump through the crumble blocks. The pixel window is larger and higher with Morph and an X-Ray Stand Up. Two Beetom hits are assumed, but with failed attempts it could take more, possibly requiring leaving the Beetom and going back to the right to farm. Requires: {
"notable": "Beetom Clip"
}
{
"or": [
"h_XRayMorphIceClip",
"h_preciseIceClip"
]
}
"Morph"
{
"enemyDamage": {
"enemy": "Beetom",
"type": "contact",
"hits": 2
}
}
{
"or": [
"h_preciseIceClip",
"canWalljump",
"HiJump",
"SpaceJump",
{
"enemyDamage": {
"enemy": "Beetom",
"type": "contact",
"hits": 2
}
}
]
}
{
"or": [
"canCrumbleJump",
"canWalljump",
"HiJump",
"SpaceJump"
]
}Dev note: Morph is required to lure a Beetom. Morphless tunnel crawl should not be required. FIXME: An ice clip would allow for Moondance strats at 1 and 2 using a second Beetom. |
From: 3
Item
To: 4
Top Left Junction
Gain a shinecharge by running right-to-left, either using the short runway (with unbroken Super block) or an extended runway by taking a spike hit. Then spin jump, hit the ceiling, aim down, break the Super block, and turn around to quick drop through the crumble block. During the item message box, buffer the inputs to turn around to the right and jump. Once under the crumble block (the left part of it), press up while still holding jump, to immediately activate the spark and make it up in time. Requires: {
"notable": "Mission Impossible Shinespark"
}
{
"or": [
{
"canShineCharge": {
"usedTiles": 16,
"openEnd": 0
}
},
{
"and": [
{
"canShineCharge": {
"usedTiles": 23,
"openEnd": 0
}
},
{
"spikeHits": 1
},
"canUseIFrames"
]
}
]
}
"canShinechargeMovementComplex"
"canQuickDrop"
{
"or": [
{
"shinespark": {
"frames": 19,
"excessFrames": 7
}
},
{
"and": [
{
"shinespark": {
"frames": 19,
"excessFrames": 15
}
},
"canCrumbleJump"
]
}
]
}
{
"obstaclesCleared": [
"A",
"B"
]
}Dev note: This expects that the Sidehoppers are dead. To avoid redundant requirements, they must be killed coming in. |
From: 3
Item
To: 4
Top Left Junction
Spin jump, hit the ceiling, aim down, break the Super block, and turn around to quick drop through the crumble block. During the item message box, buffer the inputs to turn around to the right and jump. Once under the crumble block (the left part of it), press up while still holding jump, to immediately activate the spark and make it up in time. Requires: {
"notable": "Mission Impossible Shinespark"
}
"canQuickDrop"
{
"useFlashSuit": {}
}
{
"or": [
{
"shinespark": {
"frames": 19,
"excessFrames": 7
}
},
{
"and": [
{
"shinespark": {
"frames": 19,
"excessFrames": 15
}
},
"canCrumbleJump"
]
}
]
}
{
"obstaclesCleared": [
"A",
"B"
]
}Dev note: This expects that the Sidehoppers are dead. To avoid redundant requirements, they must be killed coming in. |
From: 3
Item
To: 4
Top Left Junction
Perform a quick-drop through the Crumble block, and grab the item. During the item message box, buffer the inputs to turn around to the right and jump. Break spin just before you would hit the respawning crumble block, in order to clip up through it. Then perform a crumble jump to make it out. Requires: {
"notable": "Mission Impossible Walljumpless"
}
"canQuickDrop"
"HiJump"
"canCrumbleJump"
{
"obstaclesCleared": [
"A",
"B"
]
}Dev note: This expects that the Sidehoppers are dead. To avoid redundant requirements, they must be killed coming in. |
|
Requires: "HiJump"
"canInsaneJump"
"canCrumbleJump"
"canWalljump"
{
"heatFrames": 340
} |
|
Pause while crumble jumping, and quickly mid-air morph and equip Spring Ball, to obtain a boost in horizontal speed before mid-air Spring Ball jumping. Requires: "canCrumbleJump"
"canTrickySpringBallJump"
"canSpringFling"
"h_trickyToCarryFlashSuit"
{
"heatFrames": 270
} |
|
Jump into the spike pit, hitting the Ripper to avoid spike damage. Climb the left wall while avoiding falling onto the spikes or through the crumble blocks. The ledge is the same size of that in writg. Requires: {
"notable": "HiJumpless Wall Jump"
}
"h_heatProof"
"canInsaneWalljump"
"canHorizontalDamageBoost"
{
"or": [
"canUseIFrames",
"canCrumbleJump"
]
}
{
"enemyDamage": {
"enemy": "Ripper 2 (green)",
"type": "contact",
"hits": 1
}
} |
|
Pause while crumble jumping, and quickly mid-air morph and equip Spring Ball, to obtain a boost in horizontal speed before mid-air Spring Ball jumping. Requires: "canCrumbleJump"
"canTrickySpringBallJump"
"canSpringFling"
"canInsaneJump"
"h_trickyToCarryFlashSuit"
{
"heatFrames": 280
}Dev note: Compared to the other direction, this direction requires traveling one more tile horizontally, which makes it more difficult. |
|
Free the Geruta and lure it to this door. To speed it up, it helps to prevent breaking most of the crumbles (no more than two consecutive) so the Geruta doesn't get stuck. Requires: "canComplexGMode"
{
"heatFrames": 2100
}
{
"or": [
"h_heatProof",
"canCrumbleJump"
]
}Exit condition: {
"leaveWithGModeSetup": {}
} |
|
Free the Geruta and lure it to this door. To speed it up, it helps to prevent breaking most of the crumbles (no more than two consecutive) so the Geruta doesn't get stuck. Requires: "canComplexGMode"
{
"heatFrames": 2200
}
{
"or": [
"h_heatProof",
"canCrumbleJump"
]
}Exit condition: {
"leaveWithGModeSetup": {}
}Unlocks doors: {"types":["missiles","super"],"requires":[]}
{"types":["powerbomb"],"requires":["h_heatProof"]} |
|
Free the Geruta and lure it to this door. To speed it up, it helps to prevent breaking most of the crumbles (no more than two consecutive) so the Geruta doesn't get stuck. Requires: "canComplexGMode"
{
"heatFrames": 2250
}
{
"or": [
"h_heatProof",
"canCrumbleJump"
]
}Exit condition: {
"leaveWithGModeSetup": {}
}Unlocks doors: {"types":["missiles","super"],"requires":[]}
{"types":["powerbomb"],"requires":["h_heatProof"]} |
|
Free the Geruta and lure it to this door. To speed it up, it helps to prevent breaking most of the crumbles (no more than two consecutive) so the Geruta doesn't get stuck. Requires: "canComplexGMode"
{
"heatFrames": 2500
}
{
"or": [
"h_heatProof",
"canCrumbleJump"
]
}Exit condition: {
"leaveWithGModeSetup": {}
} |
|
Break each of the crumble platforms to group the Sovas at the bottom of the room. Requires: "h_heatProof"
"canDodgeWhileShooting"
{
"or": [
{
"and": [
"canConsecutiveWalljump",
{
"or": [
"canCrumbleJump",
"SpaceJump",
"canPreciseWalljump"
]
},
{
"cycleFrames": 930
}
]
},
{
"and": [
"h_useSpringBall",
{
"cycleFrames": 1200
}
]
},
{
"and": [
"SpaceJump",
{
"cycleFrames": 1320
}
]
},
{
"and": [
"canDoubleBombJump",
"canLongIBJ",
{
"cycleFrames": 2340
}
]
},
{
"and": [
"canJumpIntoIBJ",
"canLongIBJ",
"canBePatient",
{
"cycleFrames": 4640
}
]
}
]
}
{
"or": [
"canCrumbleJump",
{
"cycleFrames": 300
}
]
}
{
"resetRoom": {
"nodes": [
1,
2
]
}
}
{
"or": [
"Wave",
"Spazer",
"Plasma",
"Grapple",
{
"cycleFrames": 120
}
]
}Resets obstacles: A Farm cycle drops: 6 Sova Dev note: Climb from 2 to 1 if resetting with 2. |
|
Requires: "canCrumbleJump"
{
"heatFrames": 130
} |
|
Requires: "canCrumbleJump"
"canTrickyJump"
{
"heatFrames": 110
}Clears obstacles: A |
From: 2
Bottom Right Door
To: 1
Top Right Door
Do 9 successive crumble jumps up the platforms. If Hi-Jump is available, then it is possible to skip 4 of the crumble platforms, using only the center platforms, in which case it is recommended to down-grab the 3rd center platform, though doing a crumble spin jump onto it is also an option. Requires: "canCrumbleJump"
"canTrickyJump"
"canTrickyDodgeEnemies"
{
"or": [
{
"and": [
"HiJump",
"canInsaneJump",
{
"heatFrames": 370
}
]
},
{
"heatFrames": 630
}
]
} |
From: 2
Bottom Right Door
To: 2
Bottom Right Door
Entrance condition: {
"comeInNormally": {}
}Requires: {
"heatFrames": 370
}
{
"or": [
"HiJump",
"SpaceJump",
"canWalljump",
"h_useSpringBall",
"canCrumbleJump",
"canTrickyJump",
{
"ammo": {
"type": "Super",
"count": 1
}
},
{
"and": [
"canJumpIntoIBJ",
{
"heatFrames": 80
}
]
}
]
}Exit condition: {
"leaveWithGModeSetup": {}
}Unlocks doors: {"types":["missiles","super"],"requires":[]}
{"types":["powerbomb"],"requires":["never"]}Dev note: It is possible to jump into the room if it is dry, but these options are easy enough to ignore adding that. Opening the door with missiles will usually not add any heat frames, but will if using IBJ or a doorframe jump. |
From: 2
Bottom Right Door
To: 2
Bottom Right Door
To minimize heat frames, briefly wait for the Sova to be on the top right of the platform before knocking it off to shorten its path to the door. Requires: "h_frozenEnemyRunway"
{
"heatFrames": 360
}
{
"or": [
"canCrumbleJump",
"HiJump",
"canWalljump"
]
}Exit condition: {
"leaveWithRunway": {
"length": 2,
"openEnd": 1
}
}Dev note: There are more alternatives to the single canCrumbleJump, but it is basically assumed at this difficulty. |
|
Requires: "canCrumbleJump"
{
"heatFrames": 155
} |
From: 1
Top Left Door
To: 1
Top Left Door
Use SpringBall or a crumble jump while opening the door. Entrance condition: {
"comeInWithMockball": {
"speedBooster": "any",
"adjacentMinTiles": 0,
"remoteAndLandingMinTiles": [
[
0,
0
]
]
}
}Requires: {
"or": [
"canCrumbleJump",
{
"and": [
"canPrepareForNextRoom",
"h_useSpringBall"
]
}
]
}
{
"doorUnlockedAtNode": 1
}Unlocks doors: {"types":["super"],"requires":[]}
{"types":["missiles","powerbomb"],"requires":[{"or":["canTrickyJump","h_useSpringBall"]}]} |
From: 1
Top Left Door
To: 1
Top Left Door
Use SpringBall or a crumble jump while opening the door. Entrance condition: {
"comeInNormally": {}
}Requires: {
"or": [
"canCrumbleJump",
{
"and": [
"canPrepareForNextRoom",
"h_useSpringBall"
]
}
]
}
{
"doorUnlockedAtNode": 1
}Unlocks doors: {"types":["super","powerbomb"],"requires":[]}
{"types":["missiles"],"requires":[{"or":["canTrickyJump","h_useSpringBall"]}]} |
|
Requires: {
"notable": "Crumble Jump"
}
"h_navigateHeatRooms"
"canCrumbleJump"
{
"heatFrames": 80
} |
|
Use a Crystal Flash to refill reserve energy. If Golden Torizo is alive, perform the Crystal Flash in the left corner of the room; otherwise it can be done near the door. Then use heat damage to trigger an R-mode forced standup near the crumble blocks with upward momentum, in order to clip up through them. Several different combinations of items and techniques can make this possible: 1) Space Jump, with a mid-air morph (not required but makes it easier), 2) HiJump and a mid-air Spring Ball jump, most easily by equipping both HiJump and SpringBall during the pause, 3) A walljump into Spring Ball jump, equipping Spring Ball soon after the wall jump into order to gain horizontal speed before the mid-air jump. 4) HiJump and Speedbooster, running and jumping into a mid-air morph, In every case, precise timing is needed to be in the correct location when reserves trigger, just below the crumbles but without bonking them. Having less upward momentum can provide more lenience for timing the forced standup clip, though if Samus' momentum is not enough to make it onto the ledge then a crumble jump may also be required. Entrance condition: {
"comeInWithRMode": {}
}Requires: {
"notable": "R-Mode Forced Standup Clip"
}
"canRModeStandupClip"
{
"or": [
{
"or": [
"f_DefeatedGoldenTorizo",
{
"obstaclesCleared": [
"f_DefeatedGoldenTorizo"
]
}
]
},
{
"heatFrames": 100
}
]
}
"h_heatedCrystalFlash"
{
"or": [
{
"and": [
"SpaceJump",
"can4HighMidAirMorph"
]
},
{
"and": [
"HiJump",
"canSpringBallJumpMidAir"
]
},
{
"and": [
"HiJump",
"canSpeedyJump",
"canMidAirMorph",
"canCrumbleJump"
]
},
{
"and": [
"h_trickySpringwall",
"canCrumbleJump"
]
}
]
}
{
"resourceCapacity": [
{
"type": "RegularEnergy",
"count": 99
}
]
}
{
"autoReserveTrigger": {}
}
{
"heatFrames": 100
}Clears obstacles: door_2 Dev note: FIXME: A variant of this strat could go to the item node instead of the door, possibly with slightly different heat frames at the end. FIXME: As an alternative to doing a Crystal Flash, Golden Torizo could be used as a farm, with canRiskPermanentLossOfAccess. |
|
Requires: {
"notable": "Crumble Jump"
}
"h_navigateHeatRooms"
"canCrumbleJump"
{
"heatFrames": 100
} |
From: 2
Top Right Door
To: 4
Junction Below Bomb Blocks
Carry Temporary Blue through the top door to break the left side of the bomb blocks. There is a small frame window where Samus can soft unmorph on the crumble blocks and jump again while retaining temporary blue. Entrance condition: {
"comeInWithTemporaryBlue": {}
}Requires: {
"notable": "Temporary Blue Crumble Jump without Spring Ball"
}
{
"obstaclesNotCleared": [
"A"
]
}
"canPrepareForNextRoom"
"canChainTemporaryBlue"
"canInsaneJump"
"canCrumbleJump"
{
"heatFrames": 300
}Clears obstacles: B Dev note: You could jump into the room for the initial Temporary Blue and turn around with XRay twice, but this room is heated so that would be costly. |
From: 4
Junction Below Bomb Blocks
To: 2
Top Right Door
Jump and mid-air morph off a crumble block to begin the IBJ. Use double bomb jumps to make it up quickly before the shot block respawns. Requires: {
"obstaclesCleared": [
"A"
]
}
"canCrumbleJump"
"canInsaneJump"
"canJumpIntoIBJ"
"canDoubleBombJump"
{
"heatFrames": 360
}Dev note: This is likely to only be useful if the in-room item is Bombs, and Samus had to break the blocks with a Power Bomb to get to it. |
From: 4
Junction Below Bomb Blocks
To: 2
Top Right Door
Requires: {
"obstaclesCleared": [
"A"
]
}
"HiJump"
"canCrumbleJump"
{
"heatFrames": 180
} |
From: 4
Junction Below Bomb Blocks
To: 2
Top Right Door
Spin jump off a crumble block with exactly 1 frame of dash speed. That gives just enough height to be able to wall jump out. Requires: {
"notable": "Crumble Tricky Dash Jump"
}
{
"obstaclesCleared": [
"A"
]
}
"canCrumbleJump"
"canTrickyDashJump"
"canPreciseWalljump"
"canInsaneJump"
{
"heatFrames": 180
} |
From: 4
Junction Below Bomb Blocks
To: 2
Top Right Door
This is possible by jumping on the crumble blocks into a mid-air spring ball jump, or by avoiding them. The crumbles can be avoided by starting with either an air ball, a 3 tile high mid-air morph, or a low spring wall. These are generally safer, as bouncing on the crumble blocks with Spring Ball is trivial. Requires: {
"obstaclesCleared": [
"A"
]
}
"canTrickySpringBallJump"
{
"heatFrames": 250
}
{
"or": [
{
"and": [
"can4HighMidAirMorph",
"canSpringFling"
]
},
{
"and": [
"canLateralMidAirMorph",
"canTrickyJump"
]
},
"canCrumbleJump",
{
"and": [
"h_trickySpringwall",
"canPreciseWalljump"
]
}
]
} |
From: 9
Junction Below Crumble Blocks, Set Up to Clip
To: 2
Top Right Door
Ice Clip through the crumble blocks using a Multiviola from the bottom of the room and then Crumble Jump to clip through the bomb blocks. The ice clip can be setup by standing in a corner and firing forward when the Multiviola hits Samus, if it is moving downwards towards Samus. The Crumble Jump is done by aiming down (not immediately) after jumping, then changing Samus' hitbox once above the crumble blocks, and jumping again. Requires: {
"notable": "Multiviola Ice Clip"
}
"h_heatProof"
"h_preciseIceClip"
"canPartialFloorClip"
"canTrickyJump"
"canCrumbleJump"
{
"enemyDamage": {
"enemy": "Multiviola",
"type": "contact",
"hits": 1
}
}
{
"or": [
"h_crouchJumpDownGrab",
"canWalljump",
"canSpringBallJumpMidAir",
"HiJump",
"SpaceJump",
"canJumpIntoIBJ"
]
}Dev note: This may be possible with a high pixel ice clip. FIXME: using a flash suit should also be possible. |
From: 7
Below Morph Tunnel Junction
To: 5
Morph Tunnel Junction
Jump off of the crumble blocks consecutively while placing a bomb on the water line and convert that into an IBJ to climb to the dry morph tunnel. Requires: "canJumpIntoIBJ" "canBombJumpWaterEscape" "canCrumbleJump" "canInsaneJump" Dev note: This is only useful without other movement items, which means that falling through the crumble blocks would require Samus to restart the room from above (likely shinecharged or with a flash suit). |
